Start with the liquor retail use case
A canvas messenger bag for a liquor retailer is not automatically a general promotional bag. It may carry bottle gift sets, tasting notes, miniature spirits, branded glassware, staff tools, or event merchandise. Each use changes the inspection standard. A giveaway bag may prioritize cost and visual consistency, while a retail resale bag or premium gift-set carrier needs stronger construction, cleaner finishing, and better packing.
Before asking for prices, define the commercial job of the bag. Will it be sold, given away, used by staff, or packed with bottles? Will customers carry it home immediately, or will it sit on shelf as part of a branded display? The answer affects canvas weight, gusset depth, strap comfort, reinforcement, closure choice, and decoration method.
For liquor programs, load and presentation should be considered together. A bag that carries two bottles but collapses on display may pass a simple strength check and still disappoint the retail team. Likewise, a good-looking bag with weak strap anchors can become a claim risk once glass bottles are loaded.
Write the use case in the brief and repeat it in the RFQ, sample approval, and QC checklist. This keeps procurement, marketing, warehouse, and the supplier aligned on what the bag must do.
- Define whether the bag is for giveaway, resale, staff use, gifting, or event merchandise.
- List the expected contents by bottle size, bottle count, inserts, glassware, or accessories.
- State the desired retail appearance when the bag is empty, filled, folded, and packed.
- Set quality priorities before quoting: strength, presentation, low cost, or fast replenishment.
Turn the brief into measurable specs
A useful supplier brief converts design intent into details that can be quoted, sampled, and inspected. “Durable canvas bag with logo” is too vague. Buyers should specify finished width, height, gusset, flap depth, strap drop, pocket layout, closure type, canvas weight, lining, reinforcement, and decoration method.
For bottle-related use, the gusset and opening are especially important. A bag may have enough overall volume but still be awkward if the opening is narrow or the flap interferes with loading. If the bag must carry wine bottles, spirits bottles, sample kits, or tasting cards, provide the actual product dimensions or a packing diagram.
Stress points deserve separate attention. Strap anchors, gusset corners, flap attachment, buckle tabs, zipper ends, and pocket corners often fail before the main panels. Require reinforcement patches or bartacks in those areas and ask the supplier to show them clearly on the sample.
Finally, specify the measurement method. Width can be measured flat across the top, across the base, or along a shaped panel. Strap drop can be measured from the highest strap point to the bag top or to another reference point. If the point is not defined, inspection results can become disputed even when both sides are acting in good faith.
- Include finished dimensions and exact measurement points in the tech pack or RFQ.
- Set tolerances before production, not after goods arrive.
- Call out reinforcement at strap anchors, gussets, closure tabs, and pocket corners.
- Provide real bottle or insert dimensions when the bag must fit a specific retail pack.
Use quotes to compare risk, not only price
The lowest unit price is not always the lowest program cost. Two suppliers may quote the same canvas messenger bag while including different fabric weights, reinforcement, decoration setup, carton packing, barcode labor, or inspection support. A quote that omits those items may look cheaper until the order reaches sampling, packing, or receiving.
Ask each supplier to restate the specification in its own quotation. This simple step reveals gaps. If one quote says “12 oz canvas with lining and reinforced strap anchors” while another says only “canvas bag with logo,” the offers are not equivalent. Require separate lines for unit price, sample cost, setup, decoration, special trim, hangtag, barcode label, carton printing, and inland freight where relevant.
Supplier comparison should also include operational fit. A factory using stock canvas may move faster, but it may have limited color control. A supplier that offers custom dyeing may match brand color more closely but need longer lead time and stronger shade approval. Neither option is automatically better; the right choice depends on the launch date, brand expectations, and repeat-order plan.
Use the comparison table as a sourcing sign-off tool. Procurement can review cost, quality can review inspection evidence, and marketing can confirm presentation before awarding the order.
- Compare the full included specification, not just the quoted unit price.
- Separate required items from optional upgrades so cost tradeoffs are visible.
- Flag substitutions that reduce strength, decoration quality, or packing protection.
- Ask for quote validity and repeat-order pricing if the program may continue.
RFQ details buyers should include
A strong RFQ is short enough for suppliers to answer but specific enough to prevent guesswork. Include the intended use, target quantity, delivery location or incoterm, finished size, canvas weight, lining, reinforcement, strap details, closure, logo method, barcode or hangtag needs, and packing format. Ask suppliers to confirm what is included and what is excluded.
For decoration, provide artwork files, target size, placement, color reference, and any restrictions near folds or hardware. Print, embroidery, woven patches, leather patches, and metal labels each behave differently on canvas. The supplier should recommend a method and explain the risk if the design crosses a seam, flap fold, or heavy texture.
For liquor retailers, include retail handling details. If store staff must scan a barcode, say where it should be placed. If the bag is part of a gift set, state whether it must arrive stuffed, folded, wrapped, or packed with inserts. If the product will be displayed beside premium spirits, define the acceptable presentation standard instead of relying on a generic promo-bag finish.
Also ask for lead-time assumptions. A complete answer should break out sampling, material booking, decoration setup, bulk sewing, final inspection, packing, and shipment handoff. This makes it easier to see where delays may occur.
- Ask suppliers to restate the specification in the quote.
- Request separate pricing for sample, setup, decoration, packing, labels, and freight items.
- Require the supplier to identify stock materials, made-to-order materials, and outsourced steps.
- Attach the inspection checklist or defect list before price approval.
Material, construction, and decoration controls
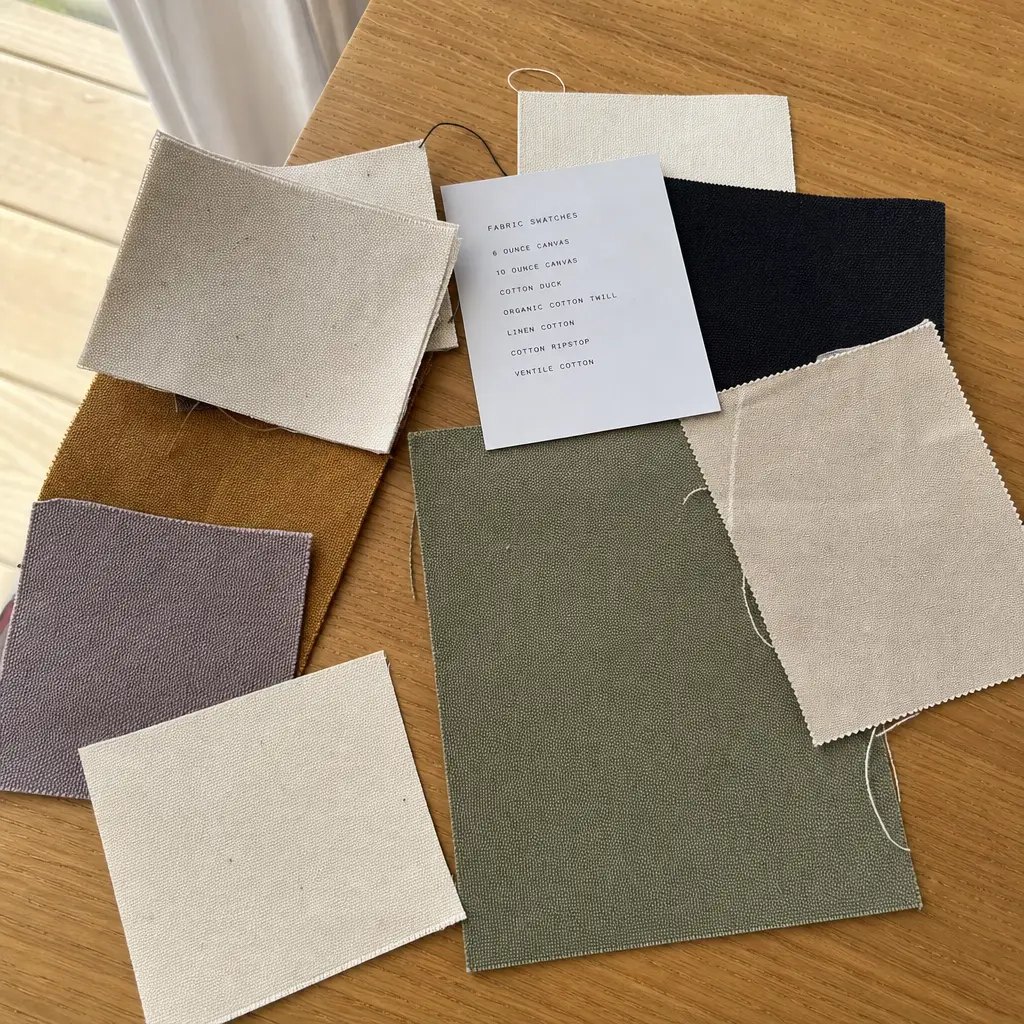
Canvas quality should be described in measurable terms. Ask for GSM or oz, weave, yarn appearance, finish, washing or coating, shrinkage expectation if relevant, and approved shade standard. If the bag needs body, specify lining or interfacing rather than hoping heavier canvas alone will hold the shape.
Construction details should match the load. A liquor retail bag carrying bottles may need wider webbing, reinforced strap anchors, stronger thread, larger bartacks, or hardware with smoother edges. Ask for strap width, buckle or D-ring material, seam allowance, bartack length or stitch count, reinforcement patch dimensions, and zipper grade if a zipper is used.
Decoration must be inspected as part of the product, not treated as a final cosmetic step. Embroidery can pucker if the canvas is too light or the stabilizer is weak. Screen print can lose sharpness on rough weave or crack if placed across a fold. Patches can lift if edge stitching is poor. Metal labels can scratch fabric or distort the flap if they are too heavy.
A pre-production sample should prove the chosen combination: fabric, construction, logo method, and packing. Do not approve material and decoration separately if they will interact in production. The sample should show the final effect on the actual bag construction.
- Confirm canvas weight with a measured swatch and approved sample.
- Specify reinforcement and hardware rather than accepting generic “strong strap” wording.
- Keep logos away from fold lines, bulky seams, and high-friction hardware when possible.
- Ask the supplier to identify likely failure modes for the selected decoration method.
Inspection standards and numeric checkpoints
Vague quality language creates disputes. The purchase order or inspection sheet should define critical, major, and minor defects, plus the action required for each. Critical issues usually include unsafe sharp edges, mold, strong odor, wrong material, broken load-bearing hardware, or missing reinforcement on a load-bearing design. Major defects include open seams, wrong logo, severe stains, incorrect dimensions, missing bartacks, and damaged retail packing. Minor defects may include trimable loose threads, small hidden marks, or slight stitch waviness that does not affect use or appearance.
Use numeric checkpoints wherever possible. For many canvas messenger bags, a practical starting point is ±8 mm on main body width or height, ±5 mm on small pockets, ±10 mm on strap drop, and ±3–5 mm on logo placement depending on artwork size. These are examples, not universal rules; the approved sample and design complexity should set the final tolerance.
Stitching should also be measurable. Buyers often request about 7–9 stitches per inch for canvas seams, but the important point is consistency with the approved sample. Inspect skipped stitches, loose tension, needle damage, seam allowance, bartack placement, and thread color. At strap anchors, compare both sides of the bag to ensure the reinforcement is symmetrical and not only decorative.
For strength, ask for a simple load test on sample units from the lot. For example, if the intended load is 6 kg, the supplier can test at 9–12 kg for a defined period such as 30 minutes, then inspect strap anchors, seams, hardware, and deformation. The exact target should reflect the product design and buyer risk tolerance.
For sampling, many buyers use AQL General Inspection Level II with separate limits for critical, major, and minor defects. Premium launches, resale merchandise, or bottle-carry programs may justify tighter major-defect limits or extra checks on load-bearing and decoration. Whatever plan is chosen, agree on it before production.
- Use defect classes with written rework, reject, and shipment-hold rules.
- Set numeric tolerances for dimensions, logo placement, and carton counts.
- Test load-bearing areas against the intended retail use, not an abstract claim.
- Record the inspection level, sample size, and acceptance limits before bulk production.
Sample approval and production evidence
A sample only protects the buyer if it is controlled. Keep one physical approved pre-production sample with the purchase file, and record the version, date, approver, and any allowed deviations. If the supplier revises fabric, logo method, lining, hardware, or packing, create a new approval record.
Request complete sample photos before approving shipment of the sample: front, back, side, bottom, inside, strap anchors, hardware, logo close-up, pocket corners, lining, labels, hangtags, folded unit, and packed unit. Photos do not replace the physical sample for new or high-risk programs, but they help the team screen obvious problems early.
First-piece evidence is valuable once production starts. Ask the supplier to send measured photos from the first sewn units, plus logo placement, bartacks, lining, and packing photos. The goal is not to inspect the entire order by email; it is to catch drift before hundreds or thousands of units are completed.
Document deviations clearly. If the buyer accepts a small shade difference, a revised label size, or an alternate buckle finish, write it down and require supplier confirmation. Silent acceptance creates room for disputes at final inspection.
- Keep one approved physical sample for each new style or supplier.
- Require multi-angle sample photos, not a single front-view image.
- Use first-piece checks to catch material, logo, and construction drift early.
- Log every accepted deviation with date, approver, and supplier confirmation.
Supplier vetting that proves control
The key supplier-vetting question is not whether the company calls itself a factory. The practical question is who controls cutting, sewing, decoration, packing, inspection, and shipment release. A trading company can be workable if it is transparent and competent, but procurement should know where accountability sits.
Ask for operational proof tied to the product type. Useful evidence includes a business registration or factory profile, a short live video call from the production floor, photos of cutting tables, sewing lines, decoration equipment, QC area, packing area, and recent messenger-bag work using similar canvas or hardware. Ask which steps are in-house and which are outsourced.
Make the evidence specific. During the video call, ask the contact to show strap webbing inventory, hardware bins, bartack machines, inspection tables, carton packing, and a current production schedule or work order with sensitive customer information covered. This is more useful than a polished brochure because it shows process control.
Also identify decision makers. Ask who approves first piece, who handles in-line QC, who authorizes rework, and who signs shipment release. If the supplier cannot name those roles, response time may be weak when a defect appears late in production.
Vetting should be proportional to order risk. A small one-time giveaway may need basic checks. A premium retail launch, repeat program, or bottle-carry design deserves stronger verification before deposit.
- Verify process control across cutting, sewing, decoration, packing, QC, and release.
- Ask for live or recent evidence connected to canvas bag production, not generic factory images.
- Confirm outsourced steps and the person responsible for each one.
- Match vetting depth to order value, brand exposure, and load-bearing risk.
Packing, logistics, and retail readiness
Packing affects quality because it controls how the bag looks when it reaches the store. Canvas can crease, absorb odor, pick up carton dust, or show hardware marks if packed poorly. For liquor retailers, poor packing can also slow receiving if barcodes, carton marks, or assortments are unclear.
Define the unit pack. Options include no polybag, recyclable polybag, tissue wrap, strap tie, shape stuffing, hardware cover, hangtag, barcode sticker, or retail belly band. If the bag will be sold, the packed unit should look deliberate. If it is only a promotion insert, protection and count accuracy may matter more than presentation.
Carton rules should include units per carton, carton dimensions, gross weight limit, carton marks, color or style breakdown, moisture protection, and palletization if needed. Heavy cartons can deform bags or create warehouse handling issues. Mixed cartons may help store allocation but increase mispick risk, so require a packing chart when assortments are allowed.
Before release, inspect cartons as well as bags. Confirm carton count, unit count, barcode readability, shipping marks, moisture condition, carton strength, and whether straps or hardware are protected from rubbing. A clean final inspection can still fail commercially if the goods arrive crushed, mislabeled, or hard to receive.
- Specify unit wrapping, folding, strap control, hardware protection, and hangtag placement.
- Set carton count, gross weight, dimensions, marks, and mixed-carton rules.
- Check barcode readability and retail presentation before shipment.
- Use packed-unit photos and carton photos as part of release evidence.
Release decision and claims prevention
A shipment release decision should be based on agreed evidence, not pressure from the calendar. Before final approval, the buyer should review inspection results, measured samples, defect counts, photos of critical areas, carton count, and any deviation log. If the order is tied to a promotion date, this review should be scheduled into the production plan rather than treated as an afterthought.
Separate defects into three outcomes: accept, rework, or hold. Loose threads may be trimmed. Minor packing scuffs may be corrected by repacking. Open seams, wrong artwork, missing reinforcement, mold, heavy odor, broken buckles, or widespread size failure should trigger shipment hold until the supplier proposes a corrective action.
Claims prevention begins before bulk production. The approved sample, written tolerances, defect list, AQL plan, packing requirements, and supplier evidence should all be attached to the purchase file. When expectations are documented, the supplier has less room to argue that a defect is normal variation.
After receiving, keep a simple record of issues found at the warehouse or stores. If cartons arrive crushed, barcodes are hard to scan, straps are creased, or logos vary by lot, those notes improve the next RFQ and help negotiate corrective action. The best checklist becomes stronger after each order.
- Review measurement data, defect counts, photos, and deviation approvals before shipment release.
- Define which defects can be accepted, reworked, replaced, or held.
- Keep all approvals and QC evidence in the purchase file.
- Feed receiving issues back into the next specification and supplier scorecard.
Specification comparison for buyers
| Decision area | Buyer specification | Supplier A | Supplier B | Pass/fail evidence |
|---|---|---|---|---|
| Fabric and structure | Canvas weight, weave, finish, lining, interfacing, seam allowance, and approved color standard | Quote exact GSM/oz and construction, not only “heavy canvas” | State any substitution or lighter alternative separately | Fabric spec sheet, measured swatch, shade approval, and physical sample match |
| Load-bearing points | Strap width, webbing grade, bartack count, reinforcement patch size, D-ring or buckle material, and safe load target | Confirm reinforcement at strap anchors and gusset corners | Identify whether reinforcement is omitted or reduced | Close-up photos plus pull-test result on sample units |
| Dimensions and fit | Finished width, height, gusset, flap depth, strap drop, pocket size, and tolerance | Confirm measurement points and tolerance | Flag any pattern change needed to hit target size | Inspection sheet showing measured units within tolerance |
| Decoration | Print, embroidery, woven patch, leather patch, or metal label; placement; color reference; fold-line risk | Confirm artwork method, setup, placement, and color control | Quote different decoration methods as separate options | First-piece photo, color match, placement drawing, and adhesion or puckering check |
| Retail presentation | Hangtag, barcode location, folding method, strap packing, tissue or polybag rules, and shelf-ready appearance | Include retail packing labor and materials | List presentation items excluded from unit price | Packed-unit photo, carton photo, barcode scan check, and approved pack-out sample |
| Commercial terms | MOQ, sample fee, setup fee, unit price, incoterm, carton count, spare trim policy, and repeat-order pricing | Break out each cost line | Hide no cost in “miscellaneous” or freight-only notes | Written quote with inclusions, exclusions, and validity date |
| Inspection standard | AQL level, sample size, defect classes, measurement points, and rejection rules | Accept buyer defect list before production | State factory default if different from buyer requirement | Signed QC checklist with critical, major, and minor defect definitions |
| Lead-time risk | Sample days, material booking, decoration setup, bulk sewing, final inspection, packing, and ship date | Map lead time by component | Identify stock versus made-to-order inputs | Production schedule with hold points and change-approval rule |
| Supplier control | Who cuts, sews, decorates, packs, inspects, and releases shipment | Show in-house and outsourced steps clearly | Disclose trading role or subcontracted processes | Factory license or profile, process photos, video call, and named QC contact |
Buyer checklist before sampling
- Define the commercial use: bottle gift set, tasting kit, staff carry bag, event merchandise, loyalty reward, or retail resale item.
- State the expected load in kilograms and the actual contents: bottle count, bottle size, glassware, inserts, catalogs, or accessories.
- Lock finished dimensions, gusset depth, flap coverage, strap drop, pocket layout, closure style, and usable opening before quoting.
- Specify canvas GSM or oz, lining, interfacing, reinforcement patches, thread, hardware finish, zipper grade if used, and allowable shade range.
- Approve artwork size, placement, color reference, decoration method, and distance from seams, buckles, folds, or flap edges.
- Request a physical pre-production sample for any new supplier, new fabric, new logo method, or premium retail program.
- Set numeric tolerances for dimensions, logo placement, stitch density, carton quantity, and packing condition before bulk sewing starts.
- Agree on critical, major, and minor defects, including which issues require rework, sorting, replacement, or shipment hold.
- Confirm carton marks, barcode or hangtag placement, polybag or tissue rules, moisture protection, and mixed-carton policy.
- Compare landed cost by including sample charges, setup, label application, special packing, inland freight, duties, inspections, and rework risk.
Factory quote questions to send
- What exact canvas weight, weave, finish, lining, reinforcement, thread, strap webbing, and hardware are included in this price?
- Can you separate unit price, sample fee, artwork or mold setup, decoration charge, packing material, carton printing, inland freight, and rush charges?
- Which parts are stock, which are made to order, and which items could delay production if the sample is revised?
- What finished-size tolerance do you recommend for this construction, and where exactly will your team measure width, height, gusset, and strap drop?
- What stitch density, bartack length or stitch count, seam allowance, and pull-test target will you use at strap anchors and closure points?
- What AQL level and defect classifications will you accept for final inspection, and can we attach our own checklist to the purchase order?
- Who will cut, sew, decorate, pack, inspect, and release this order, and which steps are performed in-house versus outsourced?
- Can you provide a short production-floor video during sampling that shows canvas cutting, sewing lines, decoration equipment, and packing area for this order type?
- What first-piece evidence will you send before full production continues: measurements, logo placement, seam close-ups, hardware close-ups, and packed-unit photos?
- What is your process if bulk goods fail inspection: sorting, rework, replacement timing, cost responsibility, and shipment hold approval?
Quality-control points to confirm
- Measure finished width, height, gusset, flap depth, strap drop, pocket opening, and logo position against the approved sample and agreed measurement points.
- Use practical dimension tolerances such as ±5 mm for small pockets, ±8 mm for main body width or height, and ±10 mm for strap drop unless the design requires tighter limits.
- Check fabric GSM or oz against the approved swatch, then inspect shade bands, stains, oil marks, excessive slubs, odor, coating inconsistency, and cutting direction.
- Inspect stitch density at visible seams and load points; many canvas bags use about 7–9 stitches per inch, but the approved sample should set the production standard.
- Confirm seam allowance, thread tension, skipped stitches, needle holes, seam slippage, loose threads, bartack placement, and reinforcement patch coverage at strap anchors.
- Test load-bearing areas on sample units from the lot; for bottle-related programs, buyers commonly request a static hang test at 1.5–2 times the intended load for a defined time such as 30 minutes.
- Check buckles, D-rings, sliders, snaps, zippers, magnetic closures, and flap closures for smooth operation, sharp edges, plating defects, and secure attachment.
- Verify decoration placement within the agreed tolerance, such as ±3 mm for small logos or ±5 mm for larger front-panel artwork, unless the artwork requires stricter control.
- Inspect print adhesion, embroidery puckering, patch edge lifting, metal label alignment, color match, and distortion near flap folds or hardware.
- Review inner seams, lining attachment, pocket corners, binding, raw edges, loose threads, and hidden stains that may not show in front-view photos.