Why print proofing matters more on canvas messenger bags
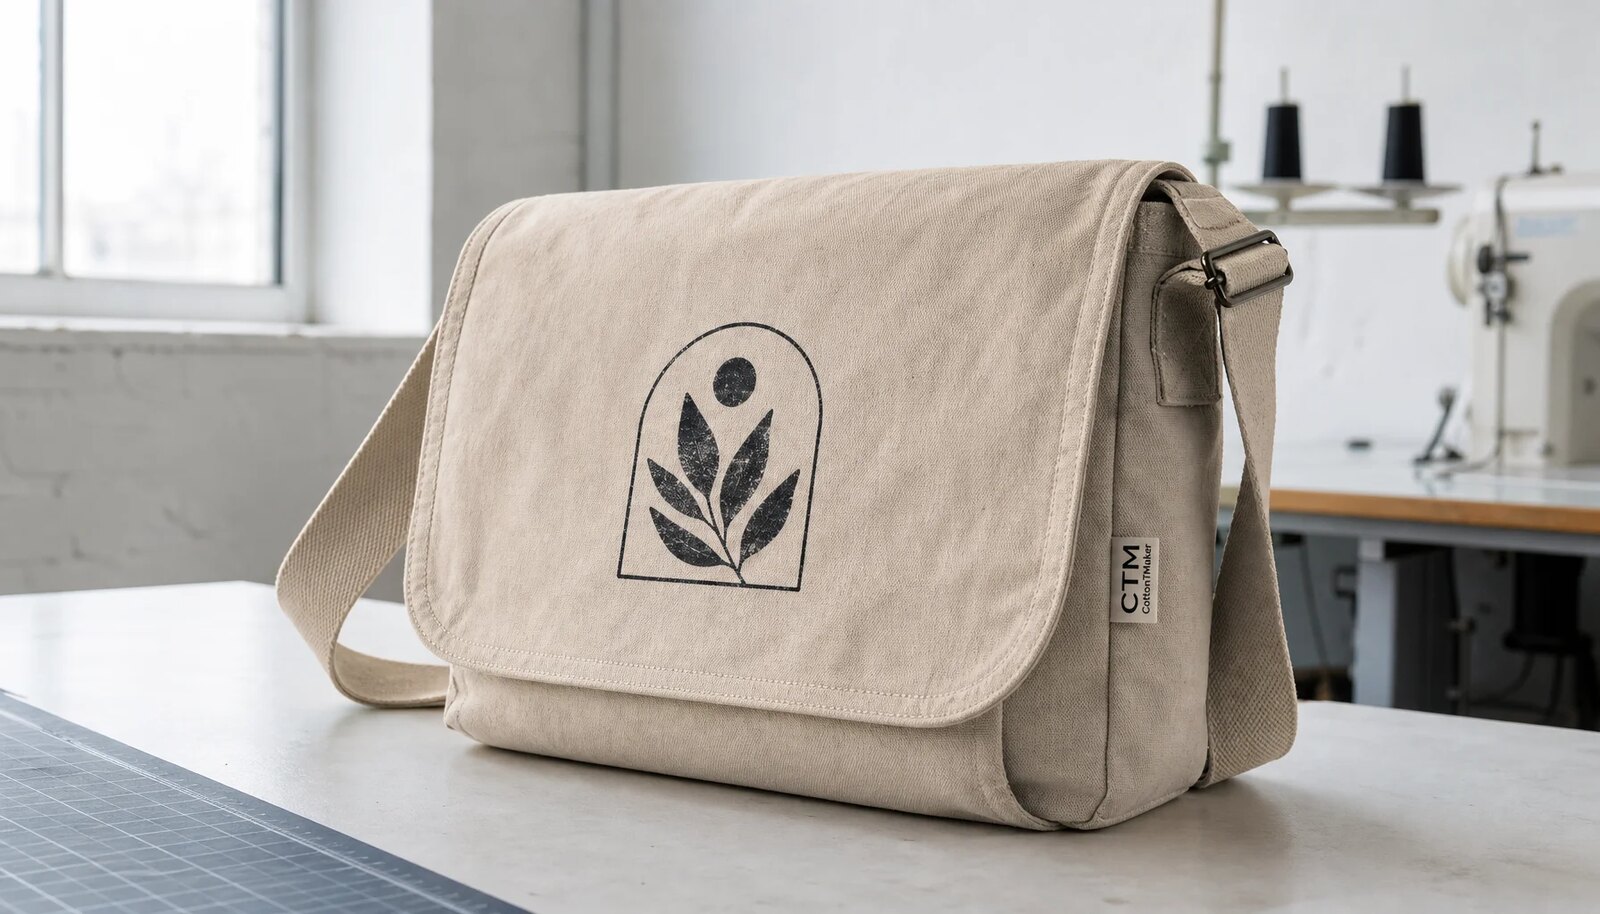
Custom canvas messenger bags look straightforward, but they expose every weakness in artwork prep, material selection, and factory communication. The front panel is usually large enough for a logo, campaign line, or retail graphic, yet the fabric structure can distort a print if the canvas is too light, the bag is overfolded, or the artwork sits too close to a seam. For eco apparel brands, that matters because the bag is often used as a retail accessory, an event handout, or a reusable carry item that sits beside the garments you are already trying to position as premium and responsible.
The common mistake is treating proof approval like a design task instead of a production gate. A clean PDF or mockup does not show stitch pull, seam interference, ink density, fold memory, or how a logo behaves on washed canvas. The custom canvas messenger bags print proofing checklist for eco apparel brands should therefore be built around how the bag will actually be cut, sewn, folded, packed, and shipped, not just how it looks in a render.
If the supplier cannot explain how they will preserve print clarity through sewing and packing, that is a warning sign. Buyers need a process that catches small errors before they become large claims: off-center prints, soft edges, inconsistent shade, or a logo that looks acceptable on a screen but weak on finished canvas. Proofing is the cheapest place to correct those issues.
- Canvas texture changes how fine lines, small text, and flat fills reproduce.
- Strap and seam placement can cut into the print zone if the pattern is not planned correctly.
- Eco-focused buyers often want a natural or low-bleed finish, which is harder to hold on softwashed canvas.
- A production proof should reflect cutting, sewing, curing, folding, and packing, not only the artwork file.
Start with the bag spec before talking about print
A print proof only works if the base bag spec is stable. For most retail or branded programs, 12oz to 14oz cotton canvas is the safest starting range because it balances structure, print readability, and perceived value. Ten-ounce canvas can work for lighter promotional use, but it wrinkles more, shows handling marks faster, and gives the print less support. If the bag is supposed to sell at retail or sit inside a lifestyle assortment, a heavier body usually reduces complaint risk.
Write the spec in production terms, not marketing terms. Give the supplier the fabric weight in oz or GSM, the weave if known, dimensions, handle length, handle width, closure type, pocket layout, lining requirement, and whether the bag must be washed or pre-shrunk before cutting. If you want a clean front print, tell the factory whether the art must avoid seams entirely or whether you accept a print area that crosses a seam. That one decision changes cutting yield, setup time, and reject risk.
Eco apparel brands also need to be explicit about what sustainability language they expect on the bag itself. If recycled content, organic cotton, or low-impact dye claims will appear on the product page or hangtag, the supplier should be able to support that claim with documentation. Do not rely on verbal assurance alone when the bag is part of a branded assortment.
- Typical buyer-friendly starting point: 12oz-14oz cotton canvas, unlined, reinforced handles, single front print.
- For heavier retail use, request bar-tack reinforcement or boxed stress points at handle attachments.
- If the bag is garment-washed or naturally dyed, expect more shade variation and define the acceptable range in advance.
- If the bag includes an interior pocket or zipper, confirm that those components do not interfere with front-panel print placement.
Match the print method to the artwork and use case
Screen print is usually the default for custom canvas messenger bags because it handles bold logos, solid fills, and repeatable retail orders well. It is also the easiest method for a factory to control if the artwork is limited to one to four colors. If the brand mark is crisp and simple, screen print usually gives the best balance of cost, durability, and clarity on canvas.
Heat transfer can solve short-run or variable-data needs, but it is not the first choice for a bag that will be washed, folded, or sold as a durable retail item. Embroidery can work if the logo is small and premium, but it adds thread bulk and can distort soft canvas if the backing is not handled correctly. For gradients, halftones, or very fine text, many suppliers will promise more than their process can hold. The proof should show the smallest readable line, the exact ink color target, and the actual finish on the chosen base cloth.
Buyers should also think about how the bag will be used after sale. A conference giveaway that lives inside a tote stack has different durability needs than a messenger bag intended for daily commutes. If the logo will be handled frequently or rubbed against clothing, you need a print method that tolerates friction, not just one that looks clean on day one.
- Use screen print when you want stable repeat production and clean block artwork.
- Avoid tiny reversed text unless the supplier shows a proof on real canvas.
- If the design uses multiple colors, confirm whether each color requires a separate screen and setup fee.
- Ask how the factory handles registration on a textured surface, especially when the logo includes thin outlines or small type.
Build the proofing workflow around production, not presentation
The proofing workflow should start with artwork intake and end with a signed sample approval that the factory can actually build against. First, confirm vector art quality, font conversion, and line thickness. Then confirm the bag dimensions, print location, and whether the artwork needs to be adjusted to avoid seams, top stitching, or strap placement. Finally, ask for a physical pre-production sample made from final fabric and final trims so you can judge the result under real handling conditions.
Paper proofs and digital renders are useful for internal alignment, but they are not enough for a canvas bag. The fabric structure changes the visual result, and the sewing sequence affects where the print lands after finishing. A good workflow requires the supplier to tell you what can still move after cutting, what can change after heat setting, and what is fixed by the sewing pattern. That is the difference between a design review and an actual production approval.
You should also create a single written approval document that captures artwork version, panel size, print placement, fabric spec, trim spec, packing spec, and sign-off date. When issues appear later, that document becomes the reference point. Without it, buyers usually end up debating memory instead of evidence.
- Approve actual print color against a physical reference, not only a screen file.
- Measure the logo placement from at least two fixed points on the bag.
- Confirm the sample includes the final label, hangtag attachment point, and any woven side label.
- Keep the approval record tied to a versioned artwork file so the factory cannot swap in an older layout.
What to inspect on the pre-production sample
The pre-production sample should be treated as the last chance to discover problems before bulk runs begin. Inspect it with a buyer's eye, not just a design eye. Open and close the bag several times. Fold it the way your warehouse, retail team, or distributor will fold it. Check whether the print cracks at the fold, whether the surface feels too stiff after curing, and whether internal stitching distorts the outside panel. If there is a flap, pocket, snap, or zipper, confirm that the hardware functions without pulling the panel out of shape.
The sample should also be assessed for measurement integrity. Check body width, depth, and strap drop against the purchase order. A one-centimeter shift may not sound serious on paper, but on a messenger bag it can change how the product hangs on the shoulder or how it stacks in carton. If the bag includes an adjustable strap, confirm the buckle type, the tail length after adjustment, and whether the finished strap length is suitable for your intended user.
Finally, do not ignore the visual finish. Canvas can hide small defects in dim light, so inspect under bright and neutral conditions. Look for loose threads, skipped stitches, dirty marks, shade jumps between panels, and print edges that are soft on one side of the logo but not the other. The sample should represent the standard you want the bulk lot to meet, not the best piece the factory could find.
- Reject any sample with shifted logo placement, obvious stitch distortion, or poor color match.
- Check whether the print holds after a normal fold and a few handling cycles.
- Verify that hardware, label placement, and seam reinforcement match the approved construction.
- Measure the bag in the same condition it will be packed and shipped.
Compare supplier routes before you compare unit price
A direct factory, trading company, or local decorator can all quote custom canvas messenger bags, but the quote structure will not mean the same thing. A direct factory usually gives the best control over fabric, sewing, and print sequence, which matters when you need a specific proof standard. A trading company may help if you need mixed SKUs, lower paperwork burden, or a broader sourcing lane across bag types. A local decorator can be faster for urgent replenishment, but you may lose control of fabric origin, cutting consistency, and the full sewing spec.
The mistake buyers make is choosing the lowest unit price from a quote that hides setup charges, label changes, or packaging differences. A bag that looks cheap ex-works can become expensive once you add screen fees, sample fees, carton changes, compliance labeling, and local freight. Compare like for like. If one supplier includes a woven label and another does not, add that cost back in before deciding.
For procurement teams, the right question is not only who is cheapest, but who can hold the same spec repeatedly. If the bag becomes a recurring item in your assortment, supplier consistency matters more than a small difference in first-order price. Rework, chargebacks, and delayed launches usually cost more than the initial savings.
- Ask whether the factory owns the sewing line and print process or outsources part of it.
- Check if the supplier quotes the same canvas weight across all colors or quietly substitutes lighter stock.
- Demand a quote that separates bag body, print, label, packaging, and freight term.
- Ask for the same quote format from each supplier so you can compare landed cost instead of headline price.
Read MOQ, setup, and artwork changes as a single cost system
MOQ on custom canvas messenger bags is not one number. There is fabric MOQ, print setup MOQ, colorway MOQ, and sometimes label MOQ. A supplier may quote a friendly low unit price but then require a large screen setup charge or a minimum fabric purchase that pushes your real landed cost higher than expected. This matters especially for eco apparel brands that want seasonal graphics, campaign-specific messages, or multiple colorways tied to a capsule launch.
The cleanest way to reduce MOQ pressure is to standardize the bag body and vary only one element at a time. Keep the same canvas weight, same dimensions, and same trim package, then change only the print or the side label. If you spread the order across several body colors, pocket options, and artwork variants, the factory will usually treat each combination as a separate production run. That increases setup time and raises the risk of inconsistent output.
You should also define how artwork revisions are handled. If the supplier changes the placement or adjusts the print scale to fit the panel, that needs buyer approval before the screens are cut. Artwork drift is one of the easiest ways to lose control of a supposedly simple reorder. Keep a revision log that names the file version, the change made, and the reason for approval.
- Consolidate artwork variants when possible to spread setup cost.
- Use one base bag body across multiple campaigns to reduce cutting and sewing changes.
- If you need a small run, compare total cost per delivered unit, not just ex-factory price.
- Lock a revision process so no one changes artwork scale or placement without written approval.
Packing and carton details that protect the print
Packing is not a minor detail on printed canvas bags. A fresh print can scuff if the fold line rubs against itself or against another bag inside the carton. If the supplier folds the bag randomly, the print may crease in the same place on every unit. That creates visible handling marks before the bag even reaches a retail shelf or warehouse shelf.
Put packing instructions in the PO in plain language. State whether each bag must be polybagged, how it should be folded, how many units go into an inner pack or master carton, and whether the print face must be protected with tissue or a sleeve. Also define the carton size target if you care about freight efficiency. A slightly smaller carton can save space, but overcompressed bags often arrive with sharper fold marks and more wrinkles.
If you sell through wholesale or distribution channels, label the cartons in a way that supports receiving speed. Carton marks should match the packing list, carton count, and SKU breakdown. If the supplier cannot tell you the gross weight or carton dimensions before production, your freight quote will be guesswork. That creates unnecessary cost and, in some cases, warehouse receiving delays.
- Specify fold direction so the print does not sit on a hard crease.
- Confirm carton pack count matches your distribution center handling plan.
- If using polybags, define thickness and whether recycled content is required.
- Ask for outer carton dimensions and gross weight before approval so logistics can estimate landed cost accurately.
Lead time planning: sample approval is the real start date
Many buyers focus on production lead time but ignore sample approval time. For custom canvas messenger bags, the bulk schedule usually starts only after the factory receives written sample approval. If artwork changes after approval, the clock resets. That delay is easy to miss when brand, procurement, and retail teams are all reviewing the same proof at different speeds.
A realistic planning model separates sampling, bulk production, inspection, and shipping. For a normal run, bulk production may take roughly 35 to 55 days after approval, but that depends on fabric availability, print complexity, and seasonality. If the order lands in peak season, fabric mills, carton suppliers, and freight booking can become the bottleneck, not the sewing line. A good buyer asks which inputs are already in stock and which need to be ordered fresh.
The safest approach is to set a launch calendar backward from the delivery date. Include time for the first sample, one correction round if needed, final approval, bulk production, inline inspection, and transit. If the project is tied to a marketing launch, the schedule should also account for internal sign-off delays. Late approvals are usually a process problem, not a factory problem.
- Build in time for a corrected sample if the first proof misses placement or color.
- Do not promise launch dates to sales teams until the sample is signed off in writing.
- Ask whether fabric is greige stock, dyed stock, or mill-ordered material; each affects timing.
- Confirm whether freight booking is booked before or after production finishes so shipping does not become the last bottleneck.
Landed-cost comparison: what to include in the supplier quote
A useful quote for custom canvas messenger bags should let you compare landed cost, not just factory unit price. The base bag price is only part of the picture. Screen setup, label application, sample charges, packing, carton markings, and shipping terms can move the total enough to change supplier selection. This is especially true when comparing direct factory bids against distributor quotes or local converters.
For a clean comparison, require every supplier to quote on the same basis. If one supplier quotes FOB and another quotes EXW, normalize them before reviewing. If one includes a woven label and another does not, add that cost back in. If the bags are packed 20 per carton from one source and 30 per carton from another, freight and warehouse handling may differ enough to affect your actual cost per sellable unit.
Procurement should also ask for any hidden cost triggers. Common ones include chargeable color changes, revised artwork, re-sampled prints, carton style changes, or compliance labeling requested after production starts. A clean quote is not the cheapest quote. It is the quote that shows the real path from specification to delivered inventory.
- Compare unit price plus setup, sample, packing, and freight terms.
- Identify whether price changes at different quantity breaks are driven by fabric, printing, or labor.
- Request carton dimensions and gross weight so logistics can estimate landed cost accurately.
- Ask which charges are one-time and which recur on every reorder.
Specification comparison for buyers
| Spec decision | Recommended option | When it fits | Buyer risk to check |
|---|---|---|---|
| Fabric weight | 12oz-14oz cotton canvas for retail use; 10oz only for light promotional programs | Retail merch, daily carry, and bags that need a firmer structure and better print clarity | Too-light fabric can wrinkle under print, telegraph seam distortion, and feel cheap at shelf |
| Print method | Screen print for bold artwork; heat transfer only for short runs or variable names; embroidery for logo-led premium programs | Simple logos, 1-4 spot colors, or limited decorations with stable repeat orders | Fine lines, gradients, or small reverse text can break up if the method does not match artwork |
| Supplier route | Direct factory for full control; trading company for smaller mixed-SKU orders; local decorator for urgent replenishment | Brands balancing MOQ, speed, and internal approval layers | Extra handoffs can hide real fabric weight, trim cost, or print setup charges |
| Sample stage | Pre-production sample with real fabric, real print method, and final placement | Any order where color, logo placement, or handle construction affects brand presentation | Flat artwork proofs alone miss shrinkage, print shift, and stitching conflicts |
| MOQ logic | Separate fabric MOQ, print setup MOQ, and colorway MOQ; negotiate by consolidating artwork or lining colors | Multi-SKU drops or brands testing several message variants | A low unit MOQ may still carry high setup costs if each artwork variant is treated as a new job |
| Packing method | Bulk polybag + carton, with fold standard and carton pack count defined in the PO | Wholesale and distributor shipments where transit scuffing must be controlled | Loose folding can crease the print; overpacking raises carton weight and freight cost |
| Lead time | Count sample approval date separately from bulk production date; plan 35-55 days after approval for normal runs | Seasonal launches and replenishment orders with fixed retailer windows | One delayed proof approval can push the whole order past the selling window |
| Quote format | Line-item quote for bag body, print setup, label, packaging, and freight terms | Comparing suppliers across regions or comparing direct factory vs distributor bids | All-in pricing can hide setup fees, upgraded paper cards, or carton changes that affect landed cost |
Buyer checklist before sampling
- Confirm the canvas weight in oz or GSM, plus whether the fabric is pre-shrunk, washed, or mill-finished before cutting.
- Lock artwork dimensions, print placement from seam and top edge, and exact PMS or Pantone targets if color match matters.
- Demand a physical pre-production sample made from final fabric, final print method, final trim set, and final fold condition.
- Specify handle length, webbing width, shoulder drop, interior pocket needs, closure type, and any reinforcement points.
- Write packing instructions into the PO: fold direction, polybag thickness if used, carton count, and carton marks.
- Compare quotes on the same basis: unit price, setup fee, sample fee, label fee, packing fee, and freight term.
- Approve tolerance limits for print misregistration, shade variation, stitch density, seam puckering, and fabric bow before bulk starts.
- Set a written delivery schedule with sample approval cutoff, bulk start date, inspection window, and ship-ready date.
- Confirm whether the print is one location or multiple locations, and whether each location requires a separate screen or setup.
- Ask for carton dimensions and gross weight before approval so freight and warehouse handling are based on real numbers.
Factory quote questions to send
- What canvas weight, weave, and finishing are included in your quote, and can you send a swatch or cut piece?
- Is the print price based on one color, one location, or one artwork, and what is the added cost per extra color or position?
- Does your MOQ change if we use one logo across multiple body colors, or if we keep one body color and change the print?
- Will the sample be made with the exact final fabric, ink, lining, webbing, zipper, closure, and label construction?
- What are the tooling or screen setup charges, and are they refundable against bulk if the order is placed?
- How do you pack the bags for shipment, and can you quote the carton size, carton count, and gross weight before production?
- What lead time do you need after sample approval, and which steps are fixed versus negotiable?
- What inspection standard do you use for print alignment, seam quality, stains, thread breaks, and shade variation?
- Are there separate charges for hangtags, woven labels, care labels, recycled polybags, or custom carton marks?
- If the first sample misses placement or color, how many revision rounds are included before bulk production starts?
Quality-control points to confirm
- Fabric weight matches the approved spec within tolerance and feels consistent across the roll or cutting lot.
- Print position stays within the agreed placement window from top edge, side seam, centerline, and strap attachment points.
- Artwork edges are sharp with no smudging, ghosting, ink pinholes, washed-out thin strokes, or unintentional haloing.
- Stitching is even, handle attachments are reinforced, and load-bearing seams do not pucker after pressing or folding.
- Bag dimensions remain within tolerance after sewing and finishing, especially body width, depth, and strap drop.
- Color consistency is acceptable across cartons, and no visible shade jump appears between panels or dye lots.
- Packing protects the print surface from scuffing, transfer, or moisture during transit and storage.
- Carton labels, inner packs, and master carton counts match the shipping documents and purchase order.
- Print cure is complete, with no tackiness, offset, or rub-off after a standard handling test.
- No obvious contamination is present, including oil marks, loose threads, broken needles, or fabric slubs outside the approved tolerance.