Start with event use, not a catalog picture
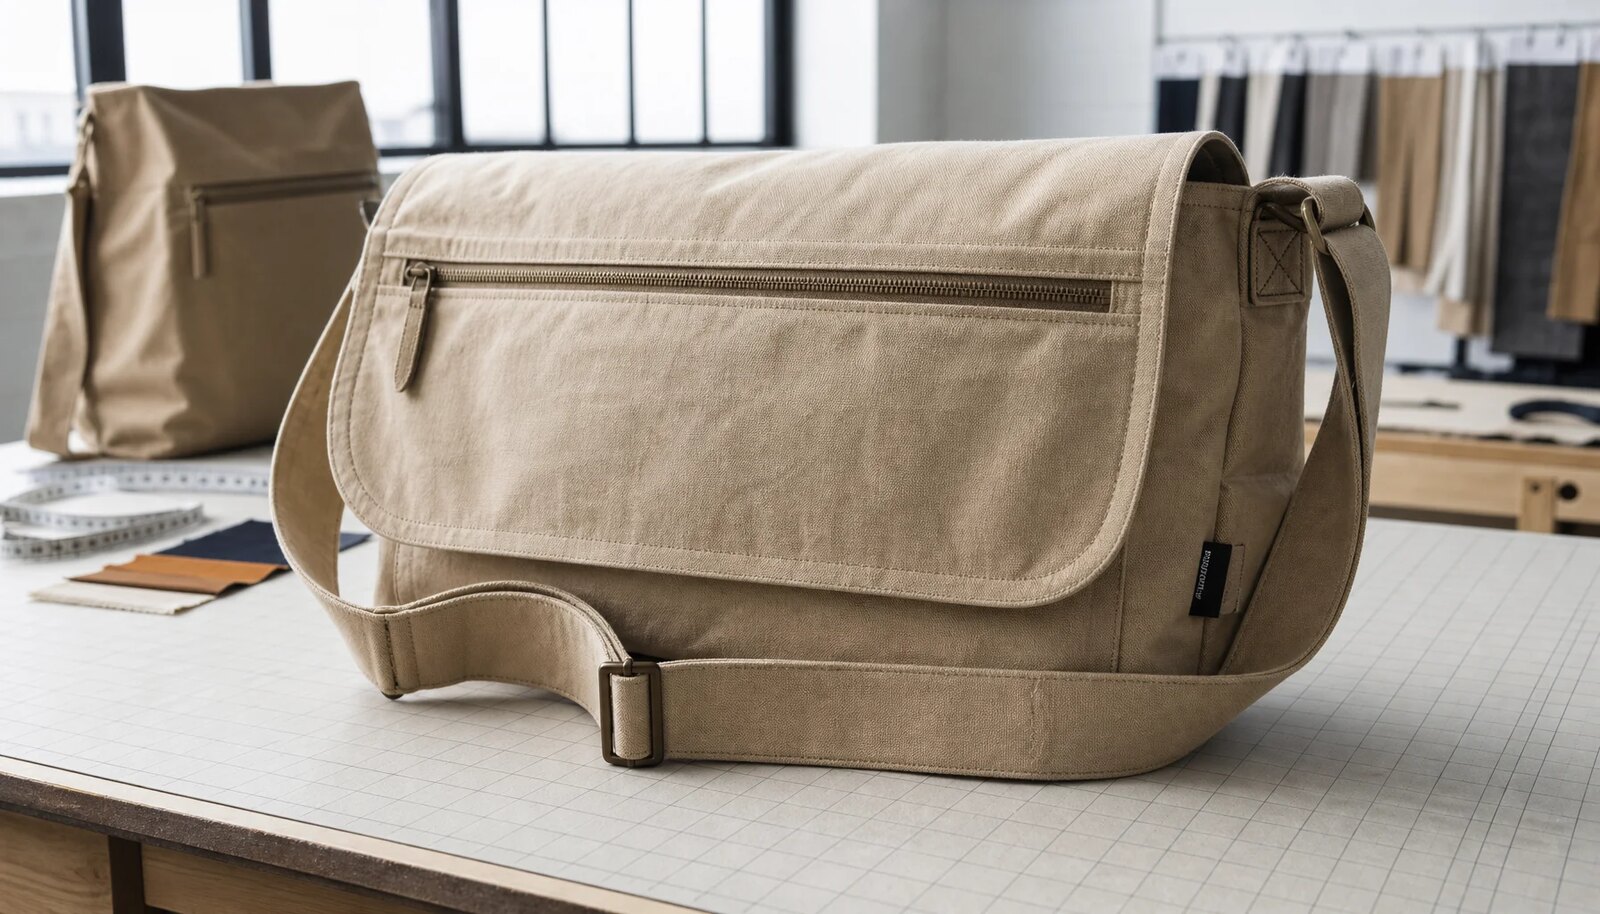
Custom canvas messenger bags are often quoted from a size, logo, and quantity. That is not enough for event procurement. A messenger bag is worn, loaded, stacked, shipped, unpacked, photographed, and handled by attendees or staff who will not treat it like a delicate promo item. The useful buying question is not simply whether the bag looks good. It is whether it survives the actual event load and still represents the brand well when it reaches the venue.
Common failures are predictable. Strap anchors pull away after a full day of crossbody wear. Corners rub through when bags are placed on concrete, counters, shuttle floors, and staging areas. Zippers work on an empty sample but snag once the bag is packed with catalogs or gifts. A printed logo cracks because it sits on a fold line inside the carton. A soft base collapses and makes a sponsor kit look cheaper than planned.
A custom canvas messenger bags durability testing checklist for event planners turns those risks into specifications. It helps buyers compare suppliers on fabric, reinforcement, decoration, packing, and inspection instead of only unit price. It also gives the factory a clearer target, which reduces guesswork and late substitutions.
- Treat the bag as a working carry product, not only a branded surface.
- Compare quotes against the same written spec and sealed PP sample.
- Put load, closure function, strap reinforcement, decoration wear, and packing condition into approval criteria.
- Use the checklist at RFQ, sample approval, pre-shipment inspection, and event-site receiving.
Define the real load profile
Durability testing starts with the contents. A light registration kit with a badge insert, notebook, pen, and brochure pack creates a different stress pattern from a sponsor kit with a tumbler, boxed sample, power bank, catalog, and charger. A staff operations bag used across several show days needs more strap comfort, faster access, and better reinforcement than a giveaway bag used for one afternoon.
Send the load profile with the RFQ. Include expected maximum loaded weight, the heaviest single item, sharp or hard-edged items, and whether the contents are flat, bulky, dense, or uneven. Shape matters as much as weight. A stack of catalogs presses against corners and seams. A bottle or boxed gift distorts the gusset. Electronics change pocket and padding expectations, and the buyer should not assume a simple canvas messenger bag provides impact protection unless that has been specified.
Also describe movement. Will attendees wear the bag through crowded halls? Will staff carry radios, chargers, notebooks, and badges for multiple days? Will bags be pre-packed and stacked before registration opens? Will cartons be split across hotels, booths, or sponsor rooms? These details tell the supplier where reinforcement and packing control are worth paying for.
- Light attendee kit: prioritize clean decoration, accurate counts, smooth closure, and simple packing.
- Mixed sponsor kit: prioritize base shape, corner strength, gusset stability, and carton protection.
- Staff utility bag: prioritize strap comfort, zipper quality, pocket layout, and reinforced load points.
- VIP or speaker kit: prioritize shade consistency, lining quality, logo placement, and presentation after unpacking.
Make the canvas specification measurable
Canvas weight is useful, but only when the measurement basis is clear. As a buyer-side rule of thumb, 12 oz canvas can work for light brochure kits, 14 oz is often a practical middle point for mixed event bags, and 16 oz may be better for heavier staff or sample kits. These are not universal durability guarantees. Final performance depends on weave, finish, construction, lining, strap anchoring, and the actual test results.
Ask whether the quoted canvas weight is measured before washing, after washing, or before finishing. Washing, enzyme treatment, softening, pigment dyeing, and pre-shrinking can change hand feel, shade, shrinkage, and finished size. A small shrinkage difference can shift logo placement, distort a flap, or make a zipper harder to close.
Request a spec sheet, not just a verbal fabric description. The spec sheet should show fabric weight basis, weave if available, finish, color process, shrinkage target, finished dimensions, dimension tolerance, body construction, seam finish, lining decision, reinforcement points, and packing method. If the supplier cannot document the spec, comparing quotes becomes guesswork.
- Confirm whether canvas weight is pre-wash, post-wash, or greige fabric basis.
- Set finished dimension tolerance before approving artwork and pocket placement.
- Ask whether the body is unlined, lined, bound, reinforced, or supported with a base board.
- Require the approved canvas and trim details to appear in the PP sample record.
Specify stress points before sampling
Straps are the highest-risk area on most canvas messenger bags. They carry the full load, move against the user, and absorb sudden pulls when the bag is lifted from the floor, a chair, a registration counter, or a shuttle seat. A narrow strap may look acceptable in photos but become uncomfortable after hours of wear. A strap attached only with light topstitching may fail even when the fabric body is strong.
A good RFQ defines strap width, webbing type, adjustability, anchor location, stitch pattern, and hardware. For event use, sewn-through webbing with bar-tacks or reinforced box stitching is usually safer than decorative attachment. If buckles, sliders, D-rings, or swivel hooks are used, request the material and finish on the trim card and inspect for deformation after load testing.
Pockets, flaps, zipper ends, and base corners also need written standards. Pocket corners should be reinforced if users will pull agendas or sponsor cards out repeatedly. Zipper ends should be secured so the slider does not stress the top seam. A base board can help a bag stand upright, but it can also reduce usable depth or create hard edges that abrade the canvas if poorly fitted.
- For straps: specify width, webbing, adjuster, anchor method, stitch pattern, and load test.
- For pockets: define content use, opening size, corner reinforcement, and logo clearance.
- For base construction: choose boxed corners, extra fabric reinforcement, or base board based on load and display need.
- For hardware: request material, finish, substitution rules, and performance under load.
Choose decoration for wear and packing
Decoration durability is part of product durability. Logos and event graphics are folded, rubbed, compressed, stacked, and handled before they ever reach an attendee. Screen printing is often practical for simple logos and larger artwork on canvas, but it depends on ink selection, fabric surface, coverage, and cure. Embroidery can feel premium for smaller marks, but dense stitching may distort thinner canvas or leave backing that affects the interior. Woven labels are useful for subtle long-wear branding. Heat transfers should be used only after adhesion and rub checks on the actual canvas finish.
Placement is as important as method. Avoid main fold lines, flap edges, lower corners, zipper rub areas, and strap contact zones. If the bag will be pre-packed with event contents, test decoration after packing simulation, not only at the printing table. Hardware impressions, print transfer, and creasing can all appear after cartons are closed.
Make acceptance measurable. Set logo position tolerance, color tolerance if required, edge sharpness, thread cleanup, label alignment, and rub-test results. Ask the factory to document the cure or fixation process. Durable print is not a specification by itself; rub, fold, adhesion, and visual pass/fail criteria are specifications.
- Screen print: useful for simple event graphics and controlled color counts.
- Embroidery: best for smaller premium marks where panel distortion is controlled.
- Woven label: useful for side branding, flap branding, and repeat-use identity.
- Heat transfer: require adhesion, fold, and rub testing on the actual canvas finish.
- Packing check: inspect decoration after folding, stacking, and carton compression simulation.
Use sample tests with pass/fail values
Sample testing should be practical, repeatable, and tied to the event load. Start with the real kit whenever possible. If the final contents are not available, build a substitute load with similar weight, shape, and stiffness. Soft filler does not stress a bag the same way as catalogs, bottles, boxes, or electronics.
For static load testing, set an intended working load and test at 1.5x that load for 4 hours. For example, if the event kit is expected to weigh 4 kg, test the sample at 6 kg. Suspend the bag by the strap, then inspect strap anchors, top seams, side seams, pocket corners, hardware, and base shape. Pass only if there is no tearing, open seam, stitch pullout, permanent hardware deformation, or major distortion.
Run a handling cycle after the static test. Load the bag to intended weight, lift it by the strap, set it down, open it, close it, remove contents, reload it, and repeat 20 times. For zipper bags, run 100 open-close cycles with the bag loaded to about 75% capacity. For snaps, magnets, buckles, and adjusters, run 50 open-close or adjustment cycles. Add dry rub of 20 strokes, wet rub of 10 strokes, and 10 fold cycles over the decoration area. These values are practical buyer-side checkpoints, not a replacement for lab standards when a regulated test is required.
- Static load: 1.5x intended load for 4 hours, no seam opening or anchor damage.
- Handling: 20 loaded lift-and-set-down cycles, no strap twist, tearing, or shape failure.
- Zipper: 100 cycles loaded to about 75% capacity, no catching or tooth separation.
- Closures and adjusters: 50 cycles, no misalignment, tearing, or slippage.
- Decoration: 20 dry rub strokes, 10 wet rub strokes, 10 fold cycles, no obvious transfer or cracking.
Control approval documents
Sample approval should happen in two stages. The development sample confirms shape, size, construction logic, strap comfort, pocket layout, and early decoration placement. The pre-production sample confirms the exact bulk fabric, color, trims, decoration method, stitch details, label placement, packing method, and finished dimensions. Do not treat photos as a substitute for a sealed PP sample when the bag has custom fabric, lining, closure hardware, or decoration.
Keep a sealed approved reference sample. Label it with supplier name, project or PO number, date, canvas weight, finish, decoration method, approved load target, and any accepted deviations. The factory and inspector should compare bulk goods against this reference, not against a rendering or catalog image.
Request the supporting documents before bulk release. At minimum, collect the spec sheet, trim card, artwork proof, decoration method note, sample test record, packing mockup, sealed PP sample, and production inspection plan. For larger orders, ask for an in-line inspection record and final inspection report. These documents make substitutions visible and clarify who is responsible if rework is required.
- Development sample: approve structure, size, carry feel, pocket logic, and decoration direction.
- PP sample: approve exact materials, trims, construction, artwork, packing, and tolerances.
- Trim card: confirm zipper, slider, puller, snaps, magnets, buckles, webbing, labels, thread, lining, and packaging.
- Packing mockup: confirm fold, inner pack, carton dimensions, gross weight, labels, and moisture protection.
- Inspection report: record defect counts, AQL result, sample size, photos, and corrective actions.
Set QC rules and acceptance thresholds
Final inspection works best when defect classes are agreed before production. Critical defects make the bag unsafe or unusable, such as torn strap anchors, open load-bearing seams, broken zippers, sharp hardware, mold, severe odor, or moisture contamination. Major defects affect function, durability, or brand presentation, such as wrong dimensions, wrong material, weak reinforcement, zipper catching, visible print cracking, severe logo misplacement, or incorrect packing. Minor defects are small cosmetic issues within the approved sample standard, such as a tiny trimmed thread or slight surface mark.
AQL thresholds give procurement a clear acceptance language. A common default for promotional and event bags is critical defects 0 accepted, major defects AQL 2.5, and minor defects AQL 4.0. Buyers can tighten this for VIP, retail, sponsor, or multi-venue programs. The exact plan should be written into the purchase documents so the factory knows how the order will be judged.
Inspection should include measurement, fabric shade, seam quality, reinforcement, closure function, decoration, cleanliness, odor, count, packing, carton labels, and carton condition. Pull samples from sealed cartons, not only from the top of the production line. Let compressed samples recover briefly, then check shape, print condition, hardware marks, odor, and moisture.
- Critical: torn load points, broken closure, unsafe hardware, mold, severe odor, or unusable construction.
- Major: wrong spec, wrong size, weak seams, print failure, zipper catching, severe shade mismatch, or wrong packing.
- Minor: small cosmetic variation that does not affect function and matches the approved tolerance.
- Default acceptance: critical 0, major AQL 2.5, minor AQL 4.0 unless buyer sets another standard.
- Inspection scope: dimensions, seams, trims, decoration, load points, cleanliness, packing, labels, and carton condition.
Plan packing and site receiving
Packing can damage a good bag. Canvas can crease, absorb moisture, hold odor, or pick up scuffs when compressed too tightly. Printed panels can transfer ink if stacked too soon or without protection. Hardware can press into the front panel and leave marks. These problems often appear at the venue, when there is no time to rework the order.
Choose packing based on distribution. Individual polybags protect surfaces and make counting easier, but they add cost and waste. Paper interleaving, tissue, or careful bulk packing may be enough for simpler programs. If bags are pre-kitted, test the bag after filling and stacking. If cartons ship to several venues, inner packs and clear carton labels reduce receiving errors.
Review carton dimensions and gross weight before shipment. Buyers sometimes ask for fewer cartons, but overpacked cartons can crush shape and increase damage. Very heavy cartons are harder for event staff to move. Carton labels should show item, color, quantity, PO or event reference, destination, and carton count sequence.
- Request a packing mockup before bulk packing begins.
- Confirm pieces per inner pack, pieces per master carton, carton dimensions, and gross weight.
- Ask how the supplier prevents print transfer, zipper impressions, moisture, odor, and compression marks.
- Use carton labels that support fast receiving, venue sorting, and count verification.
- Inspect cartons for moisture, crushed corners, mixed SKUs, count errors, and damaged inner packs.
Compare MOQ, lead time, and landed cost
MOQ is tied to more than sewing capacity. It may depend on canvas dye lots, fabric roll purchasing, strap color, lining color, zipper stock, print setup, embroidery thread, labels, and carton planning. Ask the supplier to define MOQ by variable. One body color may be available at a lower quantity, while custom-dyed canvas, multiple sponsor logos, special hardware, or several strap colors may require separate batches.
Lead time should be broken into development sample, PP sample, material booking, decoration setup, cutting, sewing, finishing, packing, inspection, and dispatch. A single total lead time hides the critical path. Build the inspection window into the event calendar. If an order fails inspection five days before the show, the low unit price no longer matters.
Compare landed cost, not only ex-factory price. Include sample fees, screens or setup charges, packaging, inspection, inland freight, international freight, duties, local delivery, storage, repacking, and rush-shipping exposure. The best quote is the one that can produce the approved construction, pass the durability checklist, arrive countable and clean, and meet the event date.
- Ask for MOQ by color, size, lining, strap color, decoration setup, and custom trim.
- Separate sample lead time, PP approval, production, inspection, dispatch, and transit.
- Request quote validity and identify which material or freight changes can affect pricing.
- Compare landed cost after packing, inspection, freight, duty, local handling, and rush-risk are included.
Specification comparison for buyers
| Buyer decision | Rule of thumb for event orders | Suggested test or document | Procurement risk to control |
|---|---|---|---|
| Canvas weight | 12 oz for light brochure kits, 14 oz for mixed attendee packs, 16 oz for heavier staff or sample kits | Spec sheet showing weight basis, weave, finish, shrinkage target, and finished bag dimensions | A quoted 14 oz fabric may be measured before washing or finishing; confirm the basis before comparing prices |
| Carry load | Set a working load and a test load before sampling | Static hang test at 1.5x intended load for 4 hours; pass if no seam opening, anchor tearing, or hardware deformation | A bag that looks fine empty may fail after catalogs, bottles, power banks, or staff gear are added |
| Strap anchoring | Use sewn-through webbing with bar-tacks or reinforced box stitching at every load point | Inspect stitch pattern and run 20 lift-and-drop handling cycles at intended load | Surface stitching alone can pull out of canvas when the bag is worn crossbody all day |
| Closure | Use top zipper for public venues and travel; use flap closure when quick access matters more than containment | Zipper cycle test: 100 open-close cycles loaded to 75% capacity; pass if no catching, tooth separation, or slider failure | Cheap zippers pass visual review but snag once the top panel is under load |
| Decoration | Place artwork away from fold lines, lower corners, strap rub zones, and zipper contact | Dry rub 20 strokes, wet rub 10 strokes, fold 10 times, then inspect for transfer, cracking, peeling, or thread pull | A logo can fail because of placement or poor cure, even when the bag construction is acceptable |
| Base and corners | Use boxed corners and reinforced base seams for dense kits; add base board only when upright presentation is required | Abrasion rub on base/corners for 500 cycles or a practical bench rub test agreed with the supplier | Hard-edged contents and venue surfaces create corner wear faster than general fabric handling |
| Interior finish | Use bound seams or lining when contents include pens, electronics, retail gifts, or sharp packaging | Review trim card and PP sample; inspect loose threads, pocket bags, lining attachment, and seam binding | Raw seams and loose threads can snag event materials and make a good exterior feel cheap |
| Packing | Choose carton packing based on destination handling, pre-kitting, and display condition | Packing mockup with carton size, pieces per carton, gross weight, inner pack method, and label sample | Overpacked cartons can crush shape, mark printed panels, and make on-site counting difficult |
| Inspection level | Use AQL-style inspection for bulk orders with clear defect classes | Common benchmark: critical 0, major AQL 2.5, minor AQL 4.0 unless buyer sets tighter rules | Without reject thresholds, suppliers may treat functional problems as cosmetic variation |
Buyer checklist before sampling
- Define the actual event contents, expected maximum loaded weight, heaviest single item, sharp or hard-edged items, and whether the bag is for attendees, staff, VIPs, or sponsors.
- Set a working load and test load in the RFQ, such as 4 kg intended use and 6 kg static test load, adjusted to the real event kit.
- Lock finished dimensions, gusset depth, pocket layout, closure type, strap length, target canvas weight, lining decision, and base structure before requesting final pricing.
- Request a spec sheet showing canvas weight basis, weave, finish, shrinkage target, body construction, seam finish, and finished dimension tolerance.
- Specify strap width, webbing type, anchor method, bar-tack or box-stitch pattern, hardware material, and the load test the supplier must pass on samples.
- Choose decoration based on abrasion exposure, fold lines, logo size, color count, ink cure, embroidery density, transfer adhesion, and carton compression risk.
- Request a trim card for zipper, slider, puller, snap, magnet, buckle, adjuster, lining, webbing, labels, thread, and packaging materials.
- Approve a development sample first, then approve a sealed pre-production sample that represents exact bulk fabric, trims, decoration, construction, and packing.
- Require written pass/fail criteria for load, zipper cycles, rub tests, seam slippage, dimension tolerance, odor, cleanliness, and carton condition.
- Request an itemized quote separating fabric, cutting, sewing, decoration, trims, lining, labels, packing, sample charges, setup charges, inspection, and freight assumptions.
Factory quote questions to send
- What exact canvas weight, weave, finish, color process, and shrinkage target are you quoting, and is the weight measured before washing, after washing, or before finishing?
- Can you provide a written spec sheet with finished dimensions, dimension tolerance, seam construction, reinforcement points, lining details, and target carry load?
- How are the strap ends anchored, what stitch pattern is used, how many bar-tacks are applied, and what static load and handling tests can you run on the PP sample?
- Which zipper, slider, puller, snap, magnet, buckle, adjuster, webbing, label, thread, and lining materials are included, and can you send a trim card before bulk production?
- Which decoration method will you use, where will the logo sit, what ink, thread, label, or transfer process is included, and how do you verify cure, adhesion, rub resistance, or stitch stability?
- Can you quote fabric, cutting, sewing, decoration, trims, lining, labels, packing, sample cost, screens, molds, inspection, and freight assumptions as separate line items?
- What are the development sample lead time, PP sample lead time, material booking time, bulk production time after approval, inspection window, dispatch date, and quote validity period?
- What is the MOQ by body color, size, lining, strap color, print setup, embroidery program, and trim option, and which changes trigger a separate production batch?
- Can you provide a packing mockup showing folding method, inner pack quantity, master carton dimensions, gross weight, moisture protection, carton label, and carton count sequence?
- Which defects count as critical, major, or minor in final inspection, what AQL level do you accept, and who is responsible for rework, replacement, shortage, or late-discovered defects?
Quality-control points to confirm
- Finished bag dimensions should match the sealed PP sample within agreed tolerance, commonly +/- 1 cm for body width and height and +/- 0.5 cm for pocket or logo placement unless tighter tolerances are specified.
- Canvas shade, hand feel, surface texture, and shrinkage should match the approved sample closely enough that mixed cartons do not show obvious batch variation under normal daylight.
- Strap anchors, side seams, flap seams, zipper seams, pocket seams, and base seams should show no skipped stitches over 2 consecutive stitches, broken threads, open seams, loose bar-tacks, severe waviness, or stitch pullout.
- Static load test should use at least 1.5x intended carry load for 4 hours; pass only if there is no tearing, seam opening, anchor distortion, hardware deformation, or permanent strap slippage.
- Handling test should include 20 loaded lift-and-set-down cycles at intended load; pass only if strap alignment, anchor stitching, closure function, and base shape remain acceptable.
- Zipper should open and close smoothly for 100 cycles with the bag loaded to about 75% capacity, with no catching, tooth separation, slider failure, weak stops, or panel distortion.
- Snaps, magnets, buckles, adjusters, and hook-and-loop closures should remain aligned and functional after 50 open-close cycles, with no tearing at attachment points.
- Decoration should pass dry rub of 20 strokes and wet rub of 10 strokes with no obvious color transfer, cracking, peeling, thread pull, edge lift, or loss of legibility.
- Base corners, gussets, pocket openings, and flap edges should show no early abrasion, puckering, uneven bulk, collapse, or exposed raw edge that affects appearance or function.
- Interior seams, lining, binding, pocket bags, and loose thread cleanup should be consistent enough that event contents do not snag during normal loading and unloading.