Why startup tote orders go wrong
A canvas grocery tote looks simple until you have to buy several hundred or several thousand on a deadline. For a tech startup, the bag may be used in a launch kit, employee welcome pack, event giveaway, or retail drop. In each case, it carries brand risk as much as it carries groceries.
The common mistake is treating the tote like a standard promo item. Buyers compare a mockup, a logo size, and a unit price, then assume the rest is fixed. It is not. Fabric weight, weave tightness, handle attachment, stitch density, print method, packing count, and inspection timing can all change the result. Two suppliers can quote the same “canvas tote” and deliver very different bags.
Startups have less room for recovery than mature merch programs. If a tote arrives with weak handles or off-center print two days before a conference, the low price no longer matters. Rework may be impossible, air freight may be expensive, and the team may be forced to distribute bags that feel below brand standard.
The fix is to make the spec measurable early. A clear custom canvas grocery totes quality inspection checklist for tech startups turns a vague merchandise order into a controlled procurement exercise. The goal is not perfect technical complexity; it is a quote and inspection process that leaves fewer gaps for suppliers to fill in on their own.
- Do not compare tote quotes by price and mockup alone.
- A sample photo cannot prove fabric weight, stitch strength, or packing accuracy.
- Launch-critical orders need inspection milestones before shipment.
- Repeatability matters more than a one-off attractive prototype.
- The RFQ should make major quality decisions visible before deposit.
Lock the use case before the fabric spec
Before asking for prices, define what the tote must do. A lightweight conference giveaway has different requirements from a grocery bag expected to carry bottles, pantry goods, books, or a laptop. If the intended load is heavier, the fabric, handle build, bottom structure, and reinforcement need to support that use. Otherwise the tote may look good in a photo but fail in the hand.
For most reusable grocery programs, 12 oz to 14 oz cotton canvas is a practical working range. It gives more body than very light promotional cotton and usually prints cleanly. A 12 oz build may be enough for brand merch and lighter daily use. A 14 oz build is often safer when the tote needs a more structured feel or a higher perceived value.
Do not stop at the weight number. Ask whether the quoted fabric weight is greige weight, washed weight, or finished weight. Those values are not interchangeable. A tote made from fabric that changes materially after finishing may end up smaller than expected, with a handle drop or logo location that no longer matches approval.
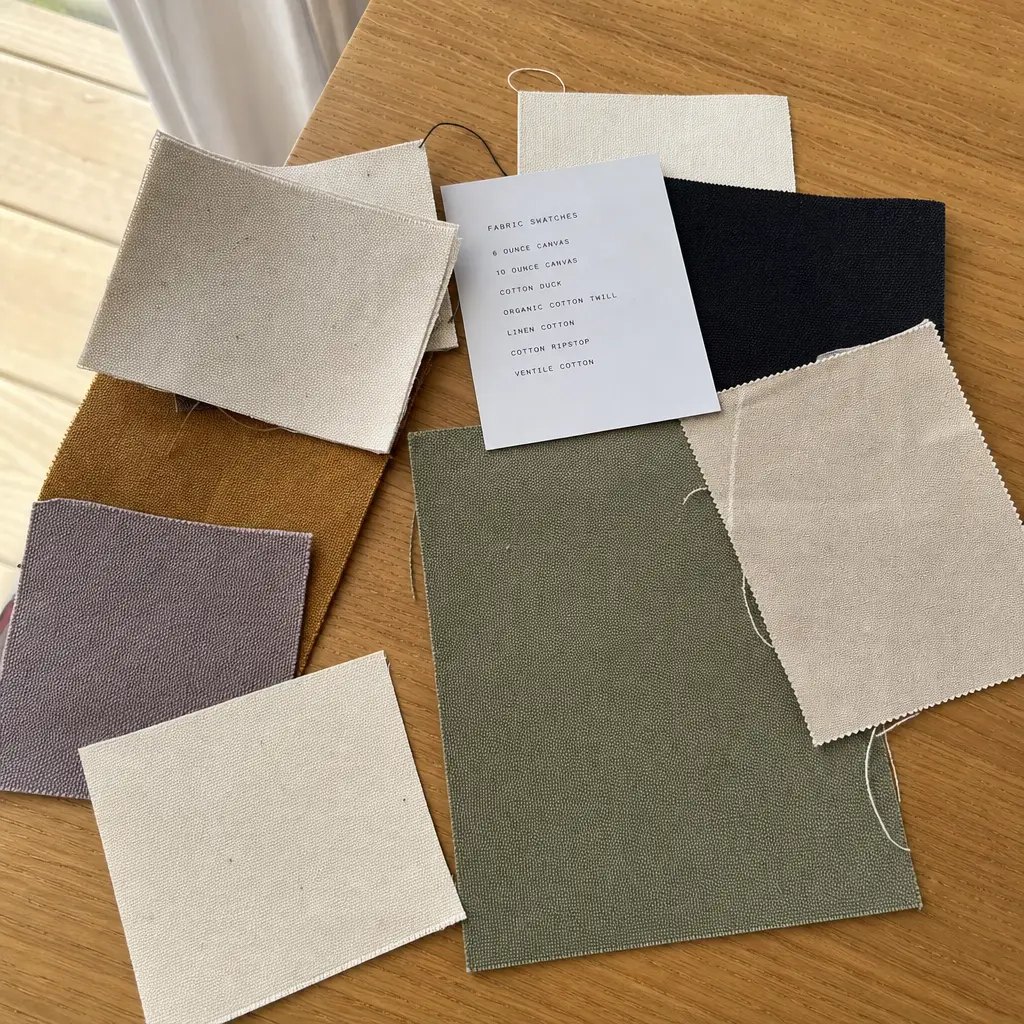
Weave quality affects both appearance and print consistency. A tighter, more even weave usually gives a cleaner surface for branding. A looser weave can show more slubs, more ink variation, and more visible distortion. If the supplier cannot provide a swatch, ask for close-up fabric photos and a physical sample before committing to bulk production.
- Use 12 oz to 14 oz cotton canvas as the practical range for reusable grocery totes.
- Require the supplier to identify greige, washed, or finished fabric weight.
- Ask for shrinkage data if size, logo placement, or handle drop is important.
- Review fabric weave up close, not only in a full-bag photo.
- Match fabric weight to the actual carry load, not only to budget.
Build the RFQ so suppliers quote the same product
A strong RFQ removes interpretation. Instead of asking for “a natural canvas grocery tote with logo,” state the finished dimensions, gusset depth, handle drop, fabric weight, decoration method, print size, packing count, carton marks, sample requirements, and inspection expectations. The fewer gaps in the brief, the fewer substitutions appear later.
This matters because suppliers fill blanks differently. One may quote lighter canvas to win the price comparison. Another may assume basic handle stitching instead of reinforcement. A third may exclude carton labeling or inner packing. On paper, the prices may look comparable. In practice, they are not quoting the same tote.
For startup teams, the RFQ also reduces internal churn. Marketing can approve the logo size and color standard. Operations can confirm carton counts and receiving labels. Finance can compare landed cost rather than chase unclear per-piece numbers. Procurement can push suppliers to clarify what is included before a purchase order is issued.
A good rule is simple: if the feature affects cost, durability, appearance, or warehouse handling, write it into the RFQ. If you cannot define it yet, ask the supplier to show options and price differences. Do not leave it as an assumption.
- List dimensions, material, handles, decoration, packing, and QC in one RFQ.
- Ask every supplier to quote against the same written specification.
- Identify exclusions such as hangtags, barcodes, cartons, or sample fees.
- Make tolerances visible before production, not after defects appear.
- Save the RFQ as the control document for sampling and inspection.
Use a quote comparison table that exposes hidden differences
A structured comparison table is one of the simplest sourcing controls. It forces each supplier to describe the tote behind the price. If one supplier includes 14 oz canvas, reinforced handles, screen print, and marked cartons, while another includes lighter fabric and bulk unmarked packing, the lower quote may not be lower once corrected to the same standard.
The table should not sit in the blog as decoration. Use it as a buyer worksheet. Copy the key fields into the RFQ, then require the supplier to complete every line. Where the supplier writes “standard,” ask what that means in measurable terms. Standard to one factory may mean a narrow seam allowance; standard to another may mean stronger reinforcement or better carton control.
For startup buyers, this approach is useful because tote orders often have several stakeholders. Brand teams care about hand feel and print appearance. Operations cares about carton count and delivery timing. Finance cares about unit cost and inventory cash. A single quote table gives everyone the same facts instead of separate email threads.
When a supplier avoids a detail, treat that as risk. Missing information is often where cost has been removed. Ask again, and if the answer remains vague, mark that supplier as higher risk even if the price looks attractive.
- Compare fabric weight, print method, handle build, packing, and QC side by side.
- Treat “standard” or “similar” as incomplete until the supplier defines it.
- Ask for size tolerance and carton count in the quote, not after award.
- Record deviations so decision-makers see the true product difference.
- Award the order on controlled value, not only the lowest visible unit price.
Choose decoration for repeat use, not only for appearance
For many startup logos, screen print is the best default. It works well on cotton canvas, handles solid colors cleanly, and is usually cost-effective at medium and higher volumes. If the artwork is one or two colors with clear edges, screen print often gives the best mix of clarity and repeatability.
Heat transfer has a place. It can be useful for short runs, detailed artwork, gradients, or designs that are difficult to screen print economically. But buyers should understand the tradeoff. Transfers can feel more synthetic on canvas, and some can crack, lift, or show edge wear after repeated folding and flexing. If you choose transfer, build rub, flex, or wash expectations into sample approval.
Embroidery can look premium, but it is not automatically the right answer. Dense embroidery can pucker lighter canvas, add weight, and limit logo size. It may work well for a small badge-style mark or a higher-end employee gift, but it should be sampled on the actual tote panel. Ask for stitch count, backing method, and any risk of fabric distortion.
Color control deserves more attention than it usually gets. Do not approve “blue,” “red,” or “near black” by email description. Use Pantone references where possible, approve a physical strike-off or decorated pre-production sample, and record acceptable variation. If you plan to reorder, ask how the supplier manages ink, thread, or transfer-film variation between production lots.
- Use screen print for most simple, durable canvas tote logos.
- Use heat transfer when artwork complexity or short-run economics justify the tradeoff.
- Sample embroidery on the final canvas to check puckering and scale.
- Approve print placement on a sewn tote, not only on a flat digital proof.
- Define color standards with Pantone references or physical approved samples.
Inspect the pre-production sample like a real product
A pre-production sample should prove the full build. It should use the final canvas, final handle material, final stitch method, final decoration, final dimensions, and intended packing approach. A showroom sample or photo mockup can help with early discussion, but it cannot approve bulk production.
When the sample arrives, measure it. Record body width, body height, gusset depth, handle length, handle drop, top hem width, and any pocket dimensions. Compare the numbers to the RFQ and decide whether they are within tolerance. If the bag is off-spec but still acceptable, update the approved spec. If not, request correction before bulk cutting.
Then handle it roughly enough to learn something. Load it with realistic grocery weight, pull the handles, open the gusset, flex the printed area, and check whether the top edge distorts. You are not running a laboratory test; you are trying to reveal obvious weaknesses before hundreds or thousands of units are produced.
Finish with an approval record. Save photos of the front, back, inside seams, handles, gusset, print close-up, carton packing if available, and measurement sheet. This record becomes the reference for inline and final inspection. Without it, disputes become subjective.
- Approve a true pre-production sample, not just a logo proof.
- Measure every critical dimension and keep the numbers on file.
- Load-test the sample in a practical way before approving production.
- Photograph seams, handle attachments, print, fabric, and packing details.
- Freeze the approved sample record before bulk production starts.
Check stitching, seams, and handles before they become claims
Most tote failures start at stress points. Inspect the handle attachments, top hem, side seams, bottom seam, and gusset corners first. These areas carry load, absorb movement, and reveal poor sewing faster than flat panels. A bag can look clean from the front and still have weak seam allowance or skipped stitches inside.
Handle reinforcement is non-negotiable for a grocery tote. Bar-tacks or equivalent reinforcement should sit securely at each handle end. The stitching should be balanced, with no skipped stitches, broken thread, loose loops, or messy backtracking. Both handles should be symmetrical, and the handle drop should match the approved sample within tolerance.
Thread tension matters too. If tension is too tight, seams can pucker and weaken the fabric. If tension is too loose, stitches can snag or open under load. Inspectors should check not only whether a stitch exists, but whether it locks the layers cleanly.
Cosmetic workmanship should be defined as well. Loose threads, oil marks, needle holes, uneven top stitching, visible repairs, and dirty panels may not always affect strength, but they affect brand perception. Decide in advance which issues can be trimmed, which are minor defects, and which are rejects.
- Inspect handle anchors, top hem, side seams, bottom seam, and gusset corners first.
- Require bar-tacks or equivalent reinforcement at handle stress points.
- Check stitch balance, thread tension, skipped stitches, and seam allowance.
- Confirm handle length and handle drop against the approved sample.
- Define workmanship defects before the factory begins bulk sewing.
Control MOQ, variants, and reorder risk
MOQ is not just a supplier rule. It is a cost structure. Canvas cutting, print screen setup, line changeover, and packing labor all become more efficient when the same tote is produced in a larger run. That is why a higher MOQ often lowers unit cost. It is also why too many variations can make a small order expensive.
For startups, the safest route is usually one stable construction spec with limited artwork or color variation. Changing the printed message may be manageable. Changing handle length, gusset depth, fabric color, pocket construction, or packing method can create new setup work and new inspection risk. If you need variants, ask the supplier to price the changes line by line.
Low MOQ can be useful for a launch test, but it should not quietly change the product. Ask whether a lower quantity affects fabric availability, print method, packing efficiency, or production route. If the supplier reduces quality to make the quantity work, the low MOQ is not a win.
Think about the reorder before placing the first order. If the tote becomes a recurring brand item, you will want the same fabric hand feel, same size, same logo position, and same carton format next time. Keep approved samples, spec sheets, artwork files, and carton information organized so the second order does not restart from zero.
- Keep one construction spec when testing demand.
- Limit variants to artwork or color where possible.
- Ask what changes internally when MOQ goes down.
- Separate launch quantity, reorder threshold, and inventory buffer planning.
- Store approved specs and samples for repeat production.
Treat packing and carton marks as part of quality
Packing feels secondary until cartons arrive with mixed artwork, wrong counts, dust exposure, crushed folds, or labels that do not match the purchase order. For canvas grocery totes, bulk packing by agreed count is often efficient, but it still needs a written method. Define fold direction, inner pack count if any, carton quantity, carton dimensions, gross weight, and outer marks.
If the tote will move through retail or a 3PL, packing may need more structure. Individual polybags, hangtags, barcode stickers, insert cards, or fold bands can improve presentation and receiving accuracy. They also add cost and labor. Choose them because the channel requires them, not because they sound premium.
Carton marks should match the buyer’s workflow. At minimum, they may need product name, color, artwork version, quantity, carton number, PO number, and destination information. If scan-based receiving is used, barcode format and label placement should be confirmed before production packing starts.
Packing inspection should happen before shipment. Count cartons, verify quantity per carton, check label accuracy, and look for mixed SKUs. Also consider transit protection. Long freight routes, multiple handling points, or humid storage conditions may require stronger cartons or moisture-control decisions.
- Define fold method, carton count, carton marks, and label content in writing.
- Match packing to the sales channel, warehouse, or event distribution plan.
- Verify barcode, hangtag, and carton label requirements before production.
- Inspect carton counts and SKU separation before shipment release.
- Do not let packing be decided informally at the end of production.
Use a three-stage QC plan and clear defect thresholds
A good inspection plan has stages. Incoming material checks confirm fabric weight, color, weave, and cleanliness. Inline checks catch sewing or print problems while correction is still possible. Final inspection verifies dimensions, workmanship, decoration, quantity, packing, and carton marks before shipment. If the order is launch-critical, skipping one stage increases risk.
For final inspection, many buyers use an AQL-style approach, but the exact standard should be agreed in advance. Define critical, major, and minor defects. A broken handle, wrong artwork, severe stain, or incorrect carton label may be major or critical depending on the program. A trim-able loose thread may be minor. The supplier and inspector should not be deciding this for the first time on inspection day.
Lead time should be broken into milestones: artwork confirmation, sample development, sample approval, material preparation, cutting, printing, sewing, packing, inspection, and freight. Ask when the production clock starts. Some suppliers count from deposit. Others count from sample approval or fabric arrival. That difference matters when a launch date is fixed.
Finally, compare landed cost, not only ex-factory price. Packing, cartons, export documents, freight, duty, customs clearance, damage risk, and receiving labor all affect the real cost of the tote. A slightly higher factory quote may be the better buy if it delivers stable quality, cleaner packing, and fewer surprises. For a startup, reliability is often the cheapest option once deadlines are real.
- Use incoming material, inline, and final inspection for controlled orders.
- Define critical, major, and minor defects before inspection.
- Confirm whether lead time starts from deposit, artwork approval, or sample approval.
- Compare landed cost, including packing, freight, duty, and receiving impact.
- Choose the supplier that can repeat the approved tote, not only the one with the lowest quote.
Specification comparison for buyers
| Spec decision | Recommended option | When it fits | Buyer risk to check |
|---|---|---|---|
| Fabric weight | 12 oz to 14 oz finished cotton canvas, with the supplier stating whether the number is greige, washed, or finished weight | Reusable grocery bags, retail merch, onboarding kits, and event totes that need a structured feel | Light fabric can collapse under bottles, shrink after finishing, or make the logo look distorted on the panel |
| MOQ tier | One stable construction spec at the lowest workable MOQ; reserve variants for artwork, not structure | Startup launch tests, pilot drops, and first-order inventory control | Low MOQ may hide fabric substitutions, reduced reinforcement, or less efficient packing |
| Sample type | One physical pre-production sample made from final material, final sewing, final decoration, and final packing method | Any order where repeatability matters or launch timing is fixed | A showroom sample or flat artwork proof does not prove the bulk run |
| Decoration method | Screen print for simple logos; transfer only when artwork complexity or short-run economics justify it | Solid startup branding, clean type, and medium-to-higher volume orders | Transfers can feel plasticky, crack at edges, or vary more after flexing |
| Handle build | Self-fabric or webbing handles with bar-tack or equivalent reinforcement at both ends | Reusable grocery use, bottles, books, and heavier daily carry | Weak stitch density, short reinforcement, or uneven handle anchoring can lead to pull-out |
| Bottom structure | Side gusset plus boxed bottom when volume and shelf presentation matter | Retail resale, grocery programs, and bags that should stand or fold neatly | Flat bags carry less and can twist or stretch under load |
| Packing example | Bulk packed by agreed count, then carton packed with clear outer marks, PO references, and SKU identity | Wholesale, 3PL delivery, and cross-border shipping | Loose packing can create count errors, dust exposure, mixed colors, and receiving delays |
| QC route | Incoming material check, inline sewing/print check, and final AQL-style inspection | Launch-critical orders and repeatable programs | Skipping one stage often pushes defects into shipment |
| Defect threshold | Written pass/fail criteria for loose threads, stains, broken stitches, print drift, and carton errors | Any buyer who needs consistent reorders | If thresholds are not written, acceptance becomes subjective at receiving |
Buyer checklist before sampling
- Confirm finished bag width, height, gusset depth, handle length, handle drop, top hem width, and seam allowance before quoting.
- State the target load in practical terms, such as bottles, books, groceries, or kit contents, so the supplier can size reinforcement correctly.
- Specify canvas type, finished fabric weight, weave density if available, color tolerance, and acceptable shrinkage after washing or steam finishing.
- Ask the supplier to declare whether the quoted fabric weight is greige weight, washed weight, or finished weight.
- Send vector artwork and define logo size, print position, print colors, Pantone references, and maximum print-position movement.
- Request one physical pre-production sample using final fabric, final stitching, final decoration, and intended packing method.
- Agree carton packing, fold method, barcode or hangtag requirements, carton marks, PO references, and shipment labels before production starts.
- Record inspection checkpoints for stitching, handle reinforcement, print adhesion, stains, odor, dimension tolerance, quantity count, and carton labeling.
- Define pass/fail criteria for loose threads, misprints, stains, broken stitches, skipped stitches, odor, visible repairs, and fabric contamination before cutting begins.
- Ask how many reinforcement points are used at each handle attachment and where they sit relative to the top hem.
Factory quote questions to send
- What exact fabric weight and canvas construction are you quoting, and is that greige weight, washed weight, or finished weight?
- What weave specification, yarn count, or fabric density information can you provide, and can you share a swatch or close-up fabric photo?
- Is the quote based on in-house sewing and printing, or is any step outsourced to a subcontractor?
- What is the sample lead time, and will the pre-production sample include final fabric, final print, final stitching, and final packing?
- What carton pack count, carton size, gross weight, net weight, fold method, and packing material are included in the quote?
- What QC standard do you use for stitching, print registration, color matching, seam allowance, dimension tolerance, stains, and quantity count?
- Can you state the finished size tolerance for width, height, gusset depth, handle length, and handle drop in the quotation?
- What shrinkage percentage is acceptable after washing or steam testing if the tote will be laundered, pressed, or compressed in transit?
- What cost changes if we adjust handle length, add a gusset, change bag color, add an inside pocket, change packing, or move from one-color to two-color print?
- Can you separate material cost, decoration cost, sewing labor, packing cost, and carton cost so we can compare options cleanly?
Quality-control points to confirm
- Fabric weight matches the agreed tolerance and the measurement basis is recorded on the inspection form.
- Canvas hand feel, weave consistency, color, and surface cleanliness match the approved reference sample and fabric swatch.
- Finished size stays within buyer tolerance for body width, height, gusset depth, top hem, seam allowance, handle length, and handle drop.
- Handles are stitched with reinforced bar-tacks or equivalent reinforcement, even thread tension, clean trimming, and no skipped or broken stitches.
- Side seams, bottom seams, and gusset corners are straight, secure, and free from puckering or seam slippage at stress points.
- Print placement stays centered within the approved art window and matches the approved color standard or Pantone reference within agreed tolerance.
- Print adhesion is checked with rub, flex, or tape testing appropriate to the decoration method used.
- No visible oil stains, dirt marks, needle damage, broken threads, fabric slubs beyond standard, odor, or contamination appear on front-facing panels.
- Cartons match the agreed count, fold method, inner packing, carton strength, and shipping marks without mix-ups across colors, SKUs, or artwork versions.
- Labels, barcode stickers, hangtags, carton marks, purchase order numbers, and packing list details match the buyer’s order documents exactly.