Why Trade Show Tote Proofing Deserves Procurement Attention
A custom canvas grocery tote can look like an easy promotional buy. Then the event date gets close, sponsor artwork changes, freight has to be booked, and the booth team expects cartons that are counted, clean, and ready to distribute. At that point the tote is no longer a simple giveaway. It is event packaging, a walking brand surface, and a procurement deadline all at once.
The mistakes usually start early. One supplier may quote a natural canvas tote using lighter fabric and flat construction. Another may quote 12 oz canvas, a bottom gusset, shoulder-length handles, reinforced stitching, and a physical strike-off. Both quotes may sound similar in an email, but they are not buying the same bag. Unless the RFQ controls fabric, size, gusset, handle, print method, proofing, packing, inspection, and delivery basis, the lowest price is hard to trust.
A strong custom canvas grocery totes print proofing checklist for trade show exhibitors turns a marketing request into production instructions. The proof should show the finished bag, not just a logo on a rectangle. The quote should say what the factory will actually make. The QC plan should compare bulk goods against approved samples and written tolerances, not against a general feeling that the bags look acceptable.
Trade show orders leave little room for rescue. If the logo color is wrong after bulk printing, the order may not be remade in time. If handles are too short, attendees may stop using the bag. If cartons arrive mixed by artwork version or destination, the cost appears as booth labor, stress, and missed setup time. The cheapest place to remove those risks is proofing, before the factory cuts fabric or exposes screens.
- Use one complete specification sheet for every supplier so quotations are comparable.
- Treat the proof as a production control document, not just an artwork preview.
- Count lead time from final written proof approval, not from purchase order issue.
- Keep a buyer-approved sample and require the factory to retain a duplicate reference sample.
- Record sample version, artwork file name, fabric reference, approval date, and accepted tolerances.
Define the Tote Function Before You Place the Logo
Start with the load. A tote for a few brochures is different from a grocery-positioned bag that must carry boxed samples, drink bottles, packaged snacks, catalogs, giveaways, and personal items through a long exhibition day. Procurement should ask the event team what will go inside, how heavy the expected contents are, what the largest item measures, and whether attendees need hand carry or shoulder carry.
Those answers shape the specification. A bottom gusset or box-bottom style gives more usable volume and helps the tote stand more neatly on a registration counter. A side gusset adds capacity, but it also changes the safe print area because graphics can distort at the fold. Shoulder-length handles improve comfort, yet they can cover or compete with a logo placed too high. Heavier canvas adds structure and perceived value, but it also increases carton weight and freight cost.
For planning, many exhibitor grocery totes fall around 35-40 cm wide, 35-42 cm high, and 8-12 cm deep. Treat that as a starting range, not a rule. If the bag must hold A4 or letter catalogs upright, test the catalog in a finished-size sample. If it must hold product boxes, check the box footprint and height. If the tote will be inserted into registration kits, confirm folded thickness and carton count before finalizing the dimensions.
Logo visibility needs a real-use check. A front print placed too low may disappear once the bag is filled. A design crossing a gusset fold may look fine flat and distorted when the tote opens. A QR code near a crease may scan on the digital proof but fail after folding, packing, and handling. For high-visibility orders, approve a finished pre-production sample and look at it filled, standing, and carried.
- List the intended contents and estimated load before selecting fabric weight.
- Specify finished width x height x gusset; do not rely on flat artwork dimensions.
- Use bottom-gusset or box-bottom construction when grocery capacity and counter presence matter.
- Confirm handle drop for hand carry or shoulder carry before print placement is approved.
- Check the logo on a filled sample, not only on an empty flat bag.
- Make QR codes, URLs, and sponsor marks large enough to remain legible on textured canvas.
Lock Canvas Material, Weight, and Shade in Writing
Canvas terminology can be slippery. Suppliers may describe fabric by ounce weight, GSM, fiber content, weave, finish, or local trade name. If you ask for a 10 oz cotton canvas tote, also ask for approximate GSM and a fabric reference. Conversions vary with weave and finishing. In many sourcing discussions, 10 oz canvas may sit around 300-340 GSM and 12 oz around 360-400 GSM, but the approved swatch is more reliable than a conversion chart.
Natural cotton canvas is a common choice for grocery totes because it looks practical, reusable, and familiar. It also has seed flecks, yarn texture, and absorbency. Those characteristics can soften print edges and make ink look less sharp than it does on paper. Bleached canvas gives a cleaner ground and can brighten the print, but it may show dirt and handling marks more quickly. Dyed canvas can support an event color palette, although light inks often need a white underbase and shade variation needs a written acceptance range.
Recycled cotton blends, organic cotton, and cotton-poly blends should not be treated as substitutes without review. Recycled cotton can show more fiber inclusions or shade movement. Organic cotton claims may require documentation if the buyer is reporting sustainability data or making external claims. Cotton-poly blends may change cost, shrinkage, print behavior, and hand feel. If marketing language depends on material claims, confirm the documentation before those claims appear in event materials.
Finishing matters too. Washed or softened canvas may feel better in the hand, but it can shrink, relax, or absorb ink differently. Coated or heavily finished fabric may create adhesion questions. For natural canvas, ask whether the shade is standard mill stock or a specific lot. For dyed canvas, confirm whether MOQ includes the dye lot minimum and whether the proof uses bulk fabric, a lab dip, or substitute material.
- Request fabric type, fiber content, nominal ounce weight, approximate GSM, weave description, and finishing status.
- Use the approved fabric swatch as the production reference, especially when conversions between ounces and GSM are unclear.
- For natural canvas, accept normal fiber specks only within an agreed visual standard.
- For dyed canvas, approve both fabric shade and print opacity on the actual shade.
- For recycled or organic materials, confirm documentation before making external claims.
- Keep a retained swatch from the proof stage for incoming or pre-shipment inspection.
Match the Print Method to the Artwork and Fabric
For most trade show grocery totes, spot color screen printing is the practical default. It works well for solid logos, sponsor panels, simple icons, event dates, booth slogans, and one- to four-color artwork. On canvas, good results depend on the ink system, screen setup, curing, print pressure, and whether an underbase is needed. The quote should state the print method, number of colors, print size, print side, ink type, and whether underbase is included.
Digital pigment printing can be useful when artwork has gradients, many colors, or details that would be expensive to separate into screens. It may not give the same opacity or vibrancy on natural or dark canvas as screen printing, so review a physical strike-off before approving bulk. Heat transfer can reproduce complex graphics, but large transfers may feel stiffer and crease differently from direct ink. Embroidery is usually better for small premium marks than for large grocery tote graphics, since dense stitching can distort lighter canvas.
The print method should be locked before final artwork approval. A PDF mockup can make any method look clean. Bulk production behaves differently. Natural canvas absorbs ink. Textured yarns break up fine lines. Dyed fabric can reduce opacity. Seams and handles limit safe print placement. Also ask whether printing happens before sewing or after sewing. Printing before sewing gives a flatter panel but requires the sewing team to control final placement. Printing after sewing may align better to the finished bag, but the print area near seams, handles, and gussets is more limited.
Supply vector artwork whenever possible. Outline fonts, include Pantone or brand references, and name the final approved file clearly. Fine lines, small type, legal copy, URLs, and QR codes need special attention. On textured canvas, tiny reversed type can fill in and thin lines can disappear. The supplier should flag artwork that is too detailed for the selected fabric, print method, and print size before screens or transfers are made.
- Use spot color screen printing for solid logos, slogans, sponsor blocks, and limited color artwork.
- Ask for a white underbase on dark or saturated dyed canvas when light colors must remain visible.
- Use digital pigment or transfer only after reviewing hand feel, opacity, and durability on the chosen canvas.
- Confirm whether printing is before sewing or after sewing because each route changes placement control.
- Require vector artwork, outlined fonts, final print size, color references, and approved file name.
- Test QR codes and fine type from the physical proof, not only from the digital proof.
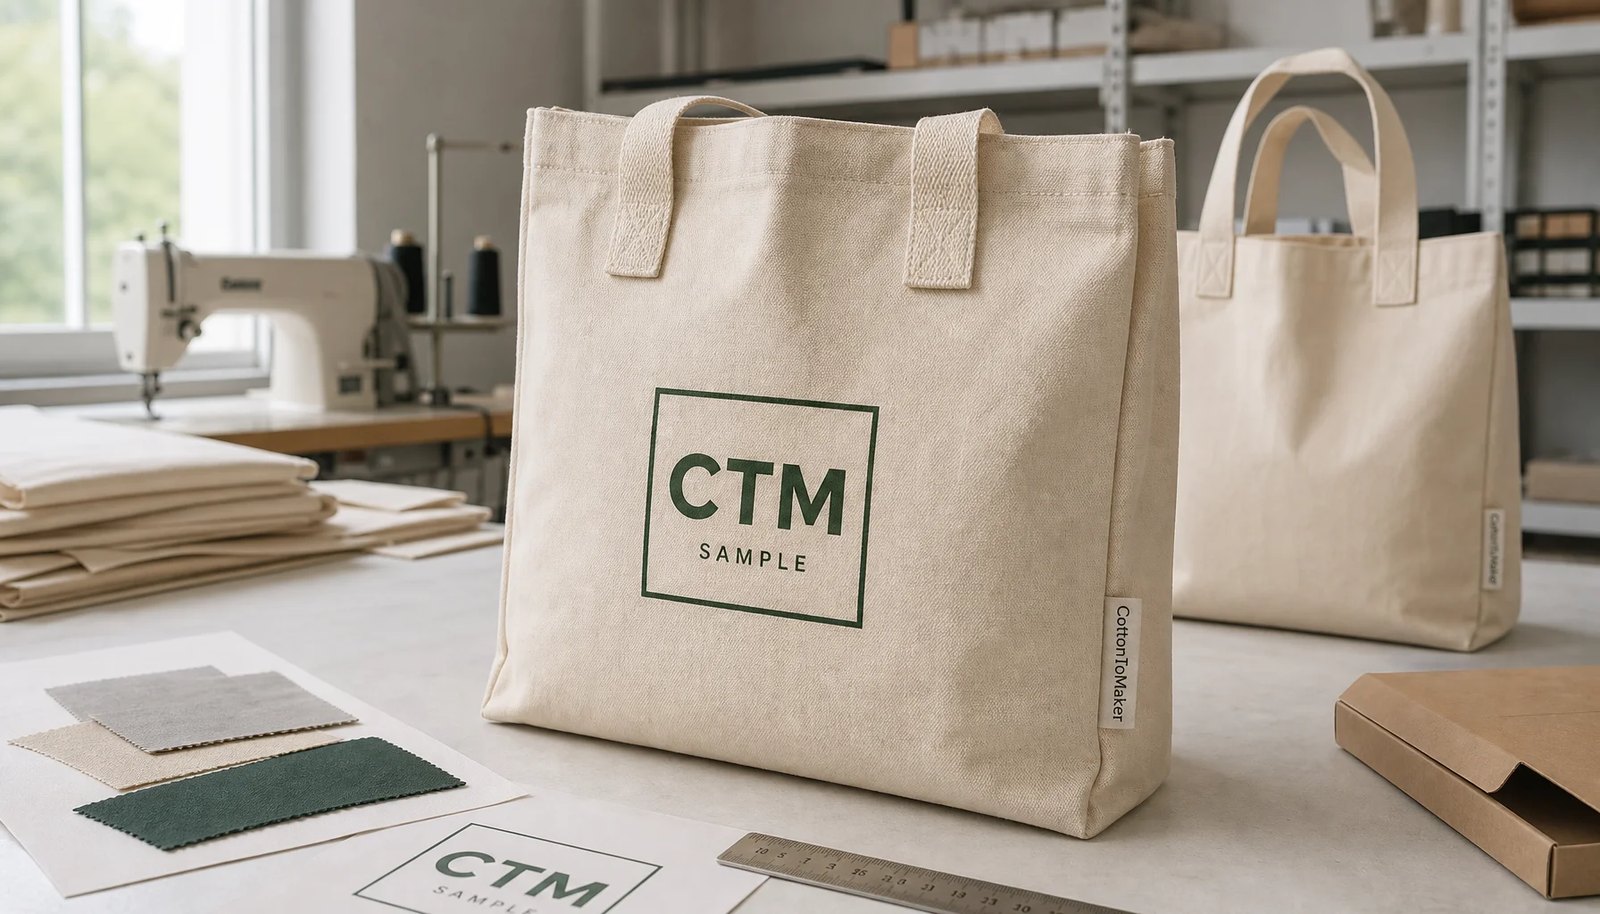
Build a Proof Package That Represents the Real Bag
A useful proof package has three layers. The digital proof checks layout, spelling, logo scale, color references, and placement against handles, seams, gusset lines, and the top hem. The physical strike-off checks ink color, opacity, edge quality, curing, and hand feel on canvas. The pre-production sample shows how the printed panel, final sewing, handle attachment, gusset, and folding style work together.
The digital layout should show the finished tote shape, not just a blank rectangle. Include the finished top edge, side seams, bottom seam or fold, gusset lines, handle position, and maximum print area. Placement should be dimensioned from stable references. For example: front logo 220 mm wide, centered horizontally, top of print 90 mm below finished top edge, minimum 35 mm from side seam, one-color Pantone 3435 C target, printed before sewing.
The strike-off should use the same canvas color and similar weight as bulk production. If exact bulk fabric is not available at that stage, write that limitation into the approval notes. When reviewing the strike-off, look at color, opacity, edge definition, texture, ink thickness, and whether the hand feel suits the program. This is often where a brand green that looked strong on a monitor appears muted on natural canvas, or a light print looks too transparent on dyed fabric.
A pre-production sample is worth the time for new specifications, larger orders, sponsor-sensitive artwork, dyed fabric, multiple artwork versions, complex packing, or tight event dates. It should confirm finished dimensions, handle drop, reinforcement stitching, print position after sewing, inside seams, folded appearance, and, when possible, carton packing. Once approved, it becomes the production reference for the factory and the inspection reference for the buyer.
- Digital proof: approve layout, spelling, logo size, print position, color references, and seam relationship.
- Physical strike-off: approve ink color, opacity, edge definition, hand feel, and curing on canvas.
- Pre-production sample: approve finished size, gusset shape, handle drop, sewing, and final logo position.
- Approval record: include approver name, date, sample version, artwork file name, and frozen change list.
- Retained sample: keep one with the buyer and one at the factory for production comparison.
- Do not allow bulk cutting, printing, or sewing to begin until proof status is written and unambiguous.
Set Tolerances Before the Factory Starts Bulk Production
Canvas tote production needs measurable tolerances because fabric and sewing are not rigid processes. Cotton canvas can relax, stretch, shrink, or shift through cutting, printing, sewing, pressing, and packing. The point is not to demand impossible precision. The point is to decide what variation is acceptable before bulk production, so the buyer, factory, and inspector use the same standard.
For many custom canvas grocery totes, finished width and height tolerances around +/-5-10 mm are practical, depending on the bag size, fabric weight, and construction. Gusset tolerance may need its own line because folds can change after pressing and packing. Print placement is often held tighter, commonly around +/-5 mm from approved reference points when the artwork is not too close to seams. Handle drop also needs control because it affects comfort and can change how the logo is seen when carried.
Color tolerance should not be treated like paper printing. Pantone is a target, but the approved strike-off is the practical production reference. Canvas base shade, texture, and absorbency all affect the final appearance. If brand color is critical, agree on the lighting or review condition. Avoid approving color from random phone photos, especially when factory lighting and screen settings are unknown.
Write defect definitions in plain language. Major issues may include wrong artwork, wrong material, missing underbase, unreadable QR code, weak handle stitching, open seams, sticky ink, severe stains, wrong carton quantity, or mixed destination labels. Minor issues may include small thread ends, slight natural fiber specks, or minor shade variation within the approved range. Clear definitions make it easier to decide whether the solution is rework, sorting, replacement, concession, or shipment hold.
- Finished size: set separate tolerances for width, height, gusset depth, handle length, and handle drop.
- Print placement: measure from finished top edge, side seam, centerline, or approved reference marks.
- Color: use Pantone as the target and the approved strike-off as the practical reference.
- Print quality: define limits for smudges, pinholes, misregistration, poor opacity, cracking, and sticky ink.
- Sewing: reject open seams, skipped stitches, weak bar tacks, twisted handles, and obvious stains.
- Carton quantity: define acceptable shortage, overage, spare quantity, and sorting requirements in advance.
Compare Supplier Quotes Line by Line, Not by Unit Price Alone
A low unit price only helps if it covers the same product. Custom canvas grocery tote cost is shaped by fabric weight, finished size, gusset construction, handle material, handle drop, print method, print area, color count, one-side or two-side printing, proofing, packing, inspection support, and logistics data. If a quote leaves out any of those items, it is not ready for fair comparison.
MOQ also belongs to the exact specification. A standard natural canvas tote with one-color screen print may carry a different MOQ from dyed canvas, custom webbing handles, four-color artwork, individual packing, or destination sorting. Dye lots, screens, cutting markers, sewing setup, carton labels, and inspection preparation all create minimum efficient quantities. Ask for the MOQ tied to the actual order, not a generic canvas tote MOQ.
Separate unit cost from setup and operating costs. Screen charges, sample fees, courier costs, artwork separation, underbase charges, carton marks, inner bundles, barcodes, palletization, third-party inspection support, and spare quantity can change the real landed cost. A quote that includes proofing and carton data may look higher at first and still be the cleaner procurement option.
Cost reduction should not start by weakening the bag. If attendees will carry heavy samples, cutting fabric weight or handle reinforcement is risky. Better options may include reducing print size slightly, printing one side instead of two, standardizing handle color, choosing natural canvas instead of custom dyeing, using fixed-count inner bundles instead of individual polybags, or consolidating destinations before packing.
- Ask each supplier to quote the same finished size, fabric, handle, gusset, print method, color count, and packing plan.
- Request setup charges and sample charges separately from unit price.
- Confirm whether underbase, screen fees, proofing, and carton labels are included.
- Compare carton size, gross weight, net weight, units per carton, CBM, and trade term for landed cost.
- Ask what specification changes reduce cost without weakening the bag for its intended event load.
- Do not compare a generic flat tote quote against a reinforced grocery tote quote.
Protect the Event Date With a Real Proofing Timeline
Trade show delivery dates are unforgiving. The tote does not only need to be produced. It has to arrive before kit assembly, booth setup, or an advance warehouse cutoff. Build the schedule backward from the required delivery date and include artwork approval, sample production, sample transit, buyer review, material preparation, cutting, sewing, printing, curing, packing, inspection, freight booking, customs clearance, and final delivery.
Bulk lead time should begin after final written proof approval, not after the purchase order is issued. A PO with incomplete artwork does not let the factory make screens, cut panels confidently, or order dyed fabric safely. If sponsor approval is required, that review time belongs on the timeline. A one-day delay in artwork approval can push the sample, production slot, inspection booking, and shipping method.
For repeat orders, previous artwork and retained samples can shorten the process, but fabric and ink should still be checked if the lot has changed. For first-time exhibitor orders, skipping physical proofing can be a false economy. Decide which steps are mandatory and which can be compressed. A couriered strike-off may be worth the time for sponsor colors. A video review may be acceptable for a repeat one-color natural canvas tote when the retained sample is still valid and the risk is low.
Name the last safe change date. After screens are made, changes cost money. After fabric is cut, size and placement changes may be impossible. After printing starts, artwork changes can mean scrap or rework. After cartons are labeled and sorted, destination changes can create warehouse errors. Written cutoff dates keep marketing, procurement, and suppliers working from the same clock.
- Work backward from booth move-in, kit assembly, or advance warehouse deadline.
- Count production days from proof approval, not from PO date.
- Separate sample-making time, courier time, buyer review time, and revision time.
- Freeze artwork before screen making and confirm the latest safe change date.
- Reserve time for curing, inspection, rework if needed, carton relabeling, and freight booking.
- Use written approvals for every revision so outdated artwork is not printed by mistake.
Control Packing So Booth Teams Can Use the Totes Immediately
Packing looks like a small detail until cartons reach the venue. If bags arrive crushed, dusty, damp, randomly folded, or mixed by artwork version, the booth team has to fix the problem under time pressure. A good packing plan makes the order easy to count, easy to distribute, and clean enough to hand out without extra handling.
Fixed-count bulk packing is often efficient for exhibitor grocery totes. Cartons of 50 or 100 pieces are common planning references, but the right count depends on fabric weight, bag size, gusset, folding thickness, carton strength, and safe worker handling. Heavy 12 oz gusseted totes may need lower carton counts to avoid overcompression and excessive carton weight. Individual polybags can improve cleanliness, but they add cost, plastic waste, and unpacking labor. Inner bundles, paper bands, or tissue separation may be a better balance.
Approve the folding method before bulk packing. A fold through a heavy ink area can leave a visible crease or stress the print. Print-to-print contact can cause abrasion or transfer if ink is not fully cured. For large front logos, ask the supplier to show the folded bag and stack direction. Moisture protection is also worth specifying for sea freight, humid routes, long storage, or warehouses without climate control.
Carton marks should match the event operation. A single booth delivery may need item code, quantity, artwork version, carton number, gross weight, and destination. A multi-city program may need sorting by region, language, event date, booth number, SKU, or salesperson allocation. If goods ship to an advance warehouse, confirm label size, barcode rules, pallet height, appointment requirements, and whether cartons must show exhibitor name and booth number.
- Approve fold direction before production packing begins.
- Use fixed-count cartons that workers can lift and count without opening every carton.
- Avoid overpacked cartons that crush gussets, bend handles, or crease heavy print areas.
- Specify carton marks, artwork version, destination reference, carton sequence, and quantity.
- Request carton dimensions, gross weight, net weight, units per carton, CBM, and pallet plan before freight booking.
- Use moisture protection when cartons may face sea freight, humid warehouses, or long storage.
- Separate VIP quantities, spare bags, inspection pulls, and retained samples if they need special handling.
Inspect Bulk Goods Against the Approved Proof, Not Memory
A good QC plan starts with the proof package. Inspectors should compare bulk production with the approved fabric swatch, strike-off, pre-production sample, measurement chart, artwork file, packing instruction, and tolerance list. Without those references, inspection becomes a broad visual opinion and can miss the details that matter most for a trade show order.
Inspection should cover measurement, visual review, print checks, sewing checks, functional handling, and packing verification. Measure width, height, gusset, handle drop, and print position on sampled units after sewing and pressing. Check fabric shade across panels, handles, and gussets. Compare print color, opacity, edge sharpness, registration, and texture with the approved strike-off. Scan QR codes and read fine text at actual production size. Review handle stitching, top hem, side seams, bottom seam, and inside finishing.
Functional checks are especially important for grocery totes. Load sampled bags with an agreed test weight or realistic event contents to check handle joins and seam stability. After curing, ink should pass basic dry rub, light scratch, folding through the printed area, and surface tack checks. The bags should not have strong odor, sticky ink, oily marks, sharp thread ends, trapped waste, or loose fabric dust. If the tote will carry packaged food samples, internal cleanliness deserves closer review than it would for a simple document bag.
Packing inspection should verify carton quantity, inner bundle count, carton marks, artwork version, destination sorting, spare quantity, and carton condition. Photos should document measured dimensions, logo placement, QR scanning, handle reinforcement, folded packing, carton labels, and final carton stack. If defects appear, classify them quickly and agree on rework, replacement, sorting, concession, or shipment hold before the goods leave the factory.
- Use the approved proof sample as the inspection reference, not only the purchase order description.
- Measure finished dimensions and logo placement from stable finished seams or edges.
- Check ink curing, rub resistance, folding behavior, opacity, and QR legibility.
- Inspect handle reinforcement and perform a realistic load check on sampled bags.
- Verify carton count, destination sorting, carton marks, and packing protection before shipment.
- Keep inspection photos and retained samples until the event order is delivered and accepted.
Specification comparison for buyers
| Procurement decision | Typical B2B specification | Best-fit use case | Quote or QC risk to control |
|---|---|---|---|
| Canvas weight | 10 oz to 12 oz cotton canvas, often about 300-400 GSM depending on weave, finish, and supplier conversion | Reusable trade show grocery totes carrying catalogs, boxed samples, drink bottles, or event kits | A quote may substitute 8 oz fabric, loose weave canvas, cotton-poly blend, or lower GSM material unless the fabric reference is locked |
| Bag construction | Bottom-gusset, side-gusset, or box-bottom tote with reinforced handle attachment | Exhibitors that want better shelf presence, grocery volume, and a bag that can stand more neatly on counters | Flat totes reduce cost but also reduce usable volume and can make the item feel more like a document bag than a grocery tote |
| Finished size | Specify width x height x gusset in finished dimensions; common exhibitor planning range is about 35-40 cm wide x 35-42 cm high x 8-12 cm gusset | Programs carrying A4 or letter catalogs, sample packs, packaged snacks, or mixed booth materials | Cutting size, flat size, and finished size are not interchangeable; unclear dimensions cause quote mismatch and inspection disputes |
| Handle specification | Cotton webbing or self-fabric handles, commonly 30-35 cm handle drop for shoulder carry; width often 2.5-3.8 cm | Attendees carrying the tote for several hours across a venue | Short handles become hand-carry only; unapproved handle color, width, or drop can change user comfort and logo visibility |
| Print method | Spot color screen print for solid logos; digital pigment or transfer only when artwork complexity requires it | Most exhibitor logos, sponsor panels, QR codes, booth slogans, and event branding in 1-4 solid colors | Digital proofs can hide opacity, hand feel, ink spread, underbase need, curing issues, and edge sharpness on textured canvas |
| Proofing package | Digital layout, physical strike-off on actual fabric, and pre-production sample for new or high-visibility orders | Orders tied to sponsor approvals, strict brand colors, fixed event dates, or multiple destination splits | A digital mockup alone does not prove fabric shade, ink absorption, logo height after sewing, or handle interference |
| Tolerance targets | Finished size often +/-5-10 mm; print placement commonly +/-5 mm when artwork is not close to seams; color judged against approved strike-off | B2B orders that need objective acceptance criteria before shipment | Unwritten tolerances create subjective disputes when fabric stretches, sewing allowance varies, or print position shifts |
| Packing plan | Fixed-count export cartons, protected folding direction, clear carton marks, optional inner bundles, moisture protection, and sorted destination labels | Booth distribution, registration kit assembly, regional event programs, and advance warehouse delivery | Overpacked cartons, print-to-print abrasion, mixed artwork versions, or missing carton sequence can disrupt event setup |
| Lead time basis | Count bulk production lead time from written proof approval, not from PO date | Trade show orders with immovable move-in dates or advance warehouse cutoffs | Artwork revisions, sample transit, curing, inspection, freight booking, and customs clearance must be scheduled separately |
Buyer checklist before sampling
- Define the tote as finished width x finished height x gusset depth, and state whether the measurement excludes handle height.
- List the intended contents: brochures, boxed samples, drink bottles, packaged food, retail items, registration kits, or mixed event materials.
- Choose canvas weight by load and positioning: 10 oz for standard reusable exhibitor totes, 12 oz for heavier grocery or retail positioning, and lighter weights only when low freight cost is the main priority.
- Confirm the material exactly: natural cotton canvas, bleached cotton canvas, dyed canvas, recycled cotton blend, organic cotton, or cotton-poly blend.
- Ask for fabric weight in ounces and approximate GSM, plus the supplier's measurement basis if fabric is quoted before washing, after finishing, or by local convention.
- Provide vector artwork with Pantone or brand color references, final print dimensions, side of print, distance from top edge, distance from side seam or centerline, and safe distance from gusset folds.
- Require a physical strike-off on the same fabric color and similar fabric weight when logo color, sponsor approval, QR legibility, or premium appearance matters.
- Approve handle material, handle width, handle drop, handle color, stitch pattern, reinforcement method, and whether handles are sewn before or after printing.
- Set written tolerances for finished size, handle drop, print placement, print color match, fabric shade, carton quantity, and acceptable defect limits.
- Confirm whether printing is done before sewing or after sewing because this changes placement control, maximum print area, and risk near seams.
Factory quote questions to send
- What exact fabric is included in the quote: fiber content, canvas type, color, weight in ounces, approximate GSM, weave description, and finishing status?
- Is the fabric weight measured before dyeing, after finishing, after washing, or as a supplier nominal weight, and how close will bulk production match the approved proof fabric?
- What finished tote size, gusset style, seam allowance, handle drop, handle width, handle material, and reinforcement stitch pattern are included?
- Which print method is priced, how many colors are included, what ink system is used, and is a white underbase included for dyed or dark canvas?
- Does the quote include a digital proof, physical strike-off, full pre-production sample, retained factory sample, and sample courier cost?
- What are the screen charges, artwork separation charges, sample charges, revision charges, courier charges, inspection support costs, and carton labeling charges?
- What MOQ applies to this exact fabric, size, handle, print method, color count, packing style, and destination sorting plan?
- What tolerances can the factory hold for finished width, height, gusset, handle drop, print placement, print color, fabric shade, and carton quantity?
- How many calendar days are needed for artwork checking, proofing, sample approval, material preparation, cutting, sewing, printing, curing, packing, inspection, and export handover after written approval?
- Will printing occur before sewing or after sewing, and how will the factory control logo position relative to top edge, side seams, handles, and gusset folds?
Quality-control points to confirm
- Measure finished tote width, height, gusset, handle length, and handle drop after sewing, pressing, and normal conditioning, not from cut panels.
- Verify fabric type, fabric shade, approximate weight, weave density, texture, odor, stains, and fiber inclusions against the approved sample or swatch.
- Check whether natural, recycled, or dyed canvas shade variation remains within the buyer-approved range across panels, gussets, and handles.
- Measure print placement from fixed references such as finished top edge, side seam, centerline, bottom seam, or approved jig marks.
- Compare logo color to the approved strike-off under consistent lighting, while allowing for normal canvas texture that can break up ink edges.
- Check opacity, edge definition, registration, pinholes, ink spread, heavy ink buildup, and color consistency across different cartons.
- Perform basic ink checks after curing: dry rub, light scratch, folding through printed area, and surface tack check before packing.
- Scan QR codes and read fine text, URLs, sponsor names, legal lines, and event dates at the actual production size.
- Inspect handle attachment for bar tacks, box-X stitching, skipped stitches, twisted handles, uneven drops, loose threads, and weak corners.
- Check load performance using a realistic event load or agreed test weight, focusing on handle joins, top hem, side seams, and bottom gusset.