Why coffee roaster pouch proofing fails when it is treated like label proofing
A cotton drawstring pouch looks simple until the logo is printed on woven fabric, sewn into a gathered top, filled with a coffee bag, and packed into cartons. Many problems are not sewing problems. They are proofing problems: the artwork is too fine, the logo sits too close to the channel, the ink behaves differently on natural cotton than it did on a digital mockup, or the pouch size was described without saying how it should be measured.
Coffee brands often use these pouches for gift sets, sample subscriptions, cupping kits, grinder accessories, retail bundles, event giveaways, and wholesale partner packs. In those contexts the pouch is a brand surface, not just a dust bag. If the mark is soft, crooked, hidden by the gathered top, or unreadable when filled, the product feels less controlled before the customer sees the coffee.
The key is to turn proofing into a measurable production standard. A useful approval trail covers fabric, print method, artwork limits, placement, cord construction, sample sequence, packing, and inspection references. A PDF proof confirms scale and layout; it does not confirm ink spread, opacity, rub resistance, fabric shade, or seam-related distortion.
- High-risk assumption: approving print from a digital mockup only.
- Common preventable issue: artwork positioned visually instead of measured from finished seams and the channel seam.
- Best control: keep a signed physical strike-off and sealed pre-production sample for inspection and repeat orders.
- Commercial impact: unclear proofing can create reprint cost, launch delay, extra sorting labor, or downgraded stock.
Start with the contents and filled pouch behavior
Before discussing logo size, define what goes inside the pouch. A 250 g retail coffee bag, 340 g bag, sample sachet set, brew card, grinder brush, cupping spoon, gift card, or accessory bundle each creates a different fit requirement. The pouch may need to stand neatly, fold flat inside an outer carton, close tightly, or simply group components for fulfillment.
Finished size should be stated in millimeters and measured flat after sewing. A supplier’s nominal 150 x 200 mm pouch may differ from another supplier’s because seam allowance, bottom fold, fabric shrinkage, and channel depth vary. For many small and medium pouches, ±5 mm finished size tolerance is a realistic starting point if agreed in writing. Larger or heavier pouches may need ±8 to ±10 mm.
Do not approve the pouch empty only. Fill it with the actual product and check how the logo sits after the drawstring is pulled. Artwork that looks centered on a flat pouch can appear too high once the top gathers.
- RFQ example: finished size 150 x 200 mm, measured flat after sewing, tolerance ±5 mm.
- Fit check: approve with the real coffee bag or accessory, not a similar substitute if fit is critical.
- Gift-set priority: filled appearance, smooth closure, logo visibility, and clean folding.
- Operational priority: consistent closure, easy counting, SKU separation, and packing speed.
Specify fabric in a way that supports the print
Fabric weight is only one part of print performance. A tight plain weave or light canvas usually gives better logo edges than open, slubby, or heavily flecked cotton. Slub can look natural and brand-appropriate for coffee, but it can interrupt thin lines, create pinholes, and make ink coverage uneven.
For many roaster pouches, 6oz to 8oz cotton, roughly 200 to 270 GSM, is a practical range. It feels more substantial than very light muslin and usually gives the front panel enough stability for screen printing. Around 5oz can work for low-cost promotional inserts. Heavier 8oz to 10oz fabric may suit premium gift sets, but it increases material cost, carton volume, and closure stiffness.
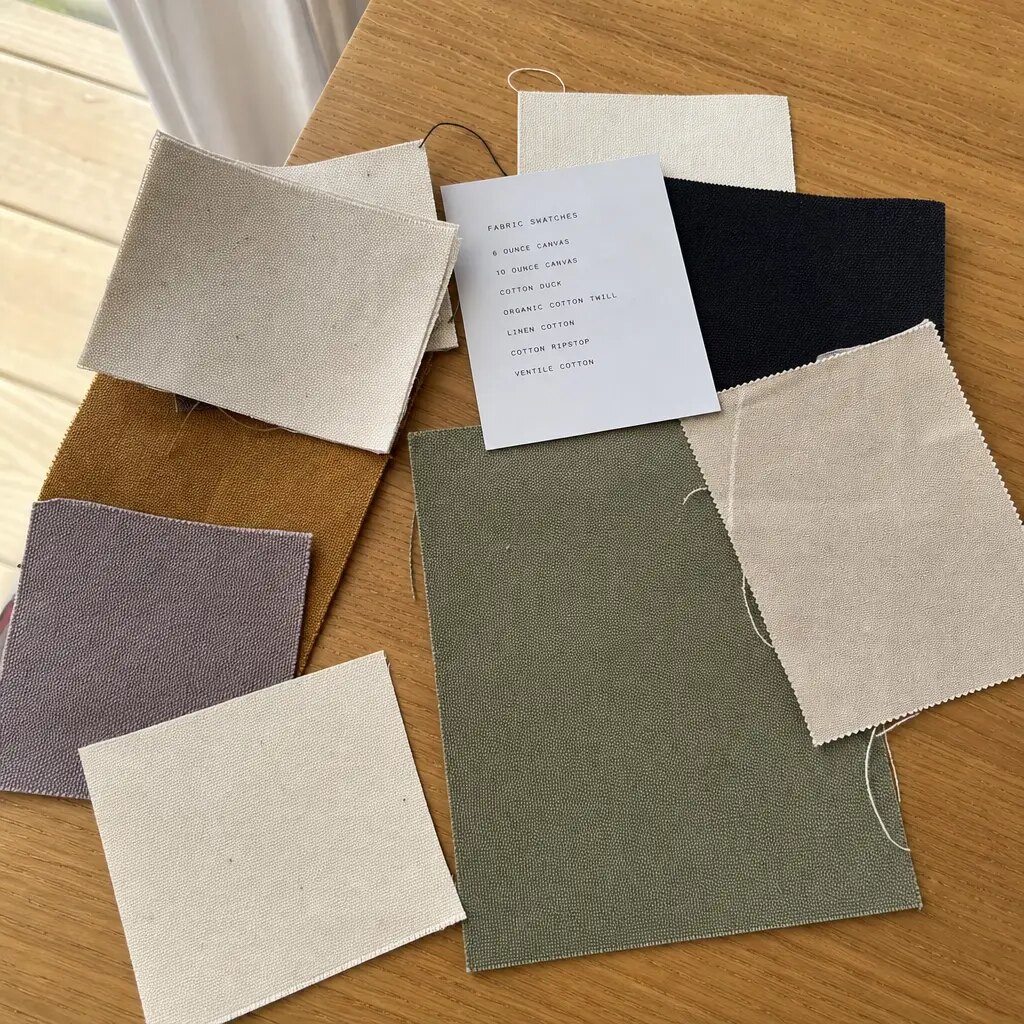
Natural cotton shade varies by lot. Bleached cotton gives a cleaner base; unbleached cotton may range from cream to beige. A Pantone reference can help communication, but physical swatches matter more. If the pouch carries organic or recycled claims, ask what the documentation covers before putting those claims into artwork or product copy.
- State composition: 100% cotton, recycled cotton blend with percentage, or certified organic cotton if required.
- State weight: for example, 8oz cotton canvas, approximately 270 GSM, with GSM tolerance such as ±5% where verifiable.
- State surface: tight enough front panel for one-color screen print and small brand details.
- For black cotton: require dye fixation review and dry/wet rub checks.
- For recycled cotton: approve texture because neps and flecks can reduce logo sharpness.
Match print method to artwork risk, not preference
Screen printing is usually the practical choice for cotton drawstring pouches with coffee roaster branding. It works well for one to three spot colors, solid logos, bold type, simple origin marks, subscription badges, and event graphics. Setup cost is spread across the order, and opacity on natural cotton can be strong when ink and curing are controlled.
Screen print has limits. Fine serif type, tight reversed lettering, halftones, gradients, narrow map lines, and small circular badge copy may not hold cleanly on woven cotton. Ink can spread into the weave, and multi-color screen print adds registration risk. Ask the supplier what they can hold on the selected fabric, not only whether they can print the file.
Heat transfer can be useful for many-color artwork or gradients, but the handfeel and edge appearance may be less natural. Digital printing may work for short runs, but confirm whether bulk production uses the same process as the sample. A sample produced with one method and bulk printed with another is not a reliable proof.
- Screen print: best for solid logos, simple line art, and 1-3 spot colors.
- Heat transfer: consider for gradients or complex color, after approving handfeel and edge behavior.
- White on black: request opacity, rub resistance, and curing checks; ask if an underbase or second pass is used.
- Metallic or foil effects: require a real strike-off because mockups are unreliable on cotton.
- Multi-color print: define acceptable registration shift at the tightest color-to-color areas.
Turn artwork into measurable acceptance criteria
Artwork files need more than a logo and a visual mockup. They should state final print width and height, number of print sides, ink colors, placement, minimum line thickness, minimum reversed gap, and smallest acceptable text. This prevents disputes when a design technically prints but important details become unreadable.
As a starting point for woven cotton, use approximately 0.3 mm minimum positive line and 0.4 mm minimum reversed gap, subject to supplier testing. Text below about 6 pt equivalent is risky on textured cotton unless the strike-off proves legibility. Reversed text is generally harder to hold than positive text because open spaces can close as ink spreads.
Placement should be measured from stable finished reference points. For many pouch sizes, keep artwork at least 20 mm from side seams and at least 35 mm below the drawstring channel seam unless a physical sample proves a closer position works. Review the print both flat and filled.
- File format: vector AI, EPS, or editable PDF with fonts outlined.
- Line rule: 0.3 mm positive line and 0.4 mm reversed gap unless testing proves otherwise.
- Placement rule: measure from finished side seams and channel seam, with tolerance such as ±5 mm.
- Color rule: judge bulk against approved strike-off, not only a screen display or Pantone book.
- Change control: do not allow supplier resizing or artwork recreation without written approval.
Build a quote pack that exposes price drivers
If the RFQ says only 'cotton drawstring pouch with logo,' each supplier may quote a different product. One price may assume 5oz muslin, another 8oz canvas. One may include a cotton cord, another polyester. One may include screen charges, another may list them later. A clear quote pack makes offers comparable.
Include finished size, fabric composition, GSM or oz weight, fabric color, cord specification, artwork file, final print size, print method, number of colors, print sides, placement sketch, quantity per SKU, packing count, carton label needs, Incoterm, and delivery deadline. If there are several origin or seasonal designs, list each artwork quantity separately.
Main price drivers are pouch size, fabric weight, fabric type, dyed or natural base, number of print colors, print area, number of artwork versions, cord material, packing requirements, sample rounds, testing, and shipping volume. Ask suppliers to separate unit price from one-time costs such as screens, sampling, artwork handling, courier, and special packing.
- Ask for unit price by quantity break, for example 500, 1,000, 3,000, and 5,000 pieces per artwork.
- Request MOQ by size, fabric color, and artwork version, not only total order MOQ.
- Separate setup charges from unit cost so repeat-order pricing is clear.
- Ask whether several artworks can share the same pouch body MOQ.
- Confirm whether carton labels, inner bags, or special folding are included.
Use MOQ logic to control SKU complexity
Coffee roasters often want unique pouches for seasonal blends, origin collections, subscription tiers, wholesale partners, and holidays. The marketing logic may be strong, but every new size, fabric color, cord color, and artwork version can affect MOQ and cost.
A practical strategy is to standardize the pouch body and vary the print. For example, use the same 150 x 200 mm natural 8oz pouch, same cord, same carton label format, and same packing across several designs. The supplier changes screens or print files without changing fabric purchasing, cutting, sewing, or cord setup.
For small seasonal runs, blank pouches with local printing may be worth comparing. This can reduce import complexity when artwork changes late, but the local printer must handle sewn pouches with cords, seams, and uneven panels. Local printing still needs a physical proof.
- Efficient factory route often starts around 500-1,000 pieces per size and artwork, depending on specification and supplier.
- Custom-dyed or certified fabrics may require higher practical MOQ than stock natural cotton.
- Multiple artworks usually mean multiple setup charges unless the quote states otherwise.
- Compare landed cost by usable pieces per SKU after MOQ rounding.
- Standardize size, GSM, cord, and packing wherever possible.
Approve samples in the right sequence
A fabric swatch, digital layout, strike-off, and pre-production sample answer different questions. Skipping steps saves little if the bulk order later fails. A useful sequence is fabric swatch, digital layout, physical print strike-off, then sealed pre-production sample.
The fabric swatch confirms handfeel, color, weave, and weight. The digital layout confirms scale and measured placement. The strike-off shows ink behavior, edge sharpness, opacity, line closure, color appearance, and curing on cotton. The sealed pre-production sample confirms final fabric, size, print, cord, seams, channel, folding, and packing together.
When reviewing the pre-production sample, lay it flat, hang it by the cord, fill it with the intended product, and pull the drawstring several times. Photograph the approved sample with a ruler and sample tag, then retain the physical sample as the inspection reference.
- Approval sequence: swatch, layout, strike-off, sealed pre-production sample.
- Strike-off: use intended production fabric where possible, not paper or unrelated cotton.
- Pre-production sample: final fabric, size, cord, print, seam construction, and representative packing.
- Decision control: assign one approval owner for artwork, color, pouch feel, and packing.
- Production release: freeze artwork, fabric, cord, size, and packing in writing.
Define QC thresholds before inspection
Final inspection is useful only if defect categories are clear before production. For branded coffee pouches, major defects usually include wrong artwork, wrong size, wrong fabric color, severe print shift, unreadable text, missing print, major smudging, incorrect cord, broken drawstring function, and open seams. Minor natural cotton texture variation may be acceptable if the logo remains complete and legible.
Placement tolerance deserves special attention. For common pouch sizes, ±5 mm print placement tolerance is a practical starting point if the supplier agrees. Measure from finished side seams and the drawstring channel seam, not from raw fabric edges. Record systematic drift, not only isolated outliers.
QC should also test function. A clean logo does not help if the cord snags, the channel is too tight, or the side seam opens during packing. Coffee teams assembling gift sets may handle hundreds of pouches quickly, so slow closure becomes a labor cost.
- Major print rejects: wrong artwork, missing print, unreadable text, severe bleed, smudge, ghosting, broken elements, or wrong ink color.
- Size check: measure samples from several cartons and record minimum and maximum width and height.
- Function check: open and close drawstrings repeatedly; check equal cord length and smooth channel movement.
- Seam check: inspect skipped stitches, loose threads, holes, weak backtacks, and fraying at cord exits.
- Reference standard: compare to signed pre-production sample, approved strike-off, and purchase order specification.
Control packing, labeling, and lead time in the proofing plan
Packing affects appearance and receiving accuracy. Over-compressed cartons can create hard fold lines through a logo, especially when ink coverage is heavy or goods are packed before print is fully stable. Mixed loose packing creates count errors and extra sorting at the roastery or 3PL.
A common export approach is to pack exact SKUs in inner bags, then master cartons. Inner packs of 25, 50, or 100 pieces may work depending on pouch size and warehouse preference. Carton quantity should prevent crushing and keep gross weight manageable. For premium programs, define fold direction and avoid hard creases through large artwork where practical.
Lead time should be planned around approvals, not only sewing days. For standard screen-printed cotton pouches using available fabric and ordinary cords, buyers often plan about 7-10 days for sample development after complete specs and artwork, then roughly 25-35 days for bulk production after sealed sample approval. Timing varies by quantity, factory load, fabric availability, dyeing, print colors, testing, and holidays.
- Packing spec: SKU separation, inner pack quantity, master carton quantity, maximum gross weight, and carton label content.
- Carton label: PO number, SKU, artwork version, pouch size, color, quantity, carton number, and destination if needed.
- Print protection: avoid damp storage, dirty cartons, over-compression, and folds through high-coverage logos.
- Lead time trigger: clarify whether production starts after deposit, artwork approval, strike-off approval, or sealed sample approval.
- Launch-critical orders: ask if approved SKUs can ship partially when one design is delayed.
Specification comparison for buyers
| Sourcing or print option | Best fit for coffee roasters | Typical price/MOQ drivers | Proofing risk to control |
|---|---|---|---|
| Stock natural cotton pouch + one-color screen print | Fast branded pouches for sample packs, retail gift sleeves, subscription inserts, events, and wholesale partner kits | Lower fabric risk; price driven by pouch size, GSM, print area, screen charge, quantity per artwork, and packing count | Natural cotton shade varies by lot. Approve a fabric swatch and strike-off, not only a PDF mockup. |
| Custom sewn natural cotton pouch + screen print | Programs needing exact finished size, upgraded 6oz-8oz fabric, controlled cord, or repeatable retail presentation | MOQ often affected by fabric roll usage, cutting/sewing setup, print setup, and number of artwork versions | Measure finished size after sewing. Confirm seam allowance, channel depth, and logo position on a sealed pre-production sample. |
| Dyed black or dark cotton + light ink print | Premium coffee gift sets, equipment accessory pouches, holiday drops, and higher-contrast branding | Higher cost from dyeing or dyed stock, heavier ink laydown, possible underbase/second pass, and added rub checks | White or cream ink may look gray, crack, or transfer if not cured well. Require opacity and dry/wet rub approval. |
| Heat transfer print | Artwork with gradients, many colors, detailed illustrations, or limited artwork that cannot be simplified | Cost depends on transfer type, size, press time, film/edge quality, and order quantity per design | Transfers can show a film edge or different handfeel. Test folding, rubbing, and cracking on the finished pouch. |
| Local printing on blank imported pouches | Very small seasonal runs, urgent campaigns, late artwork changes, or market tests | Blank pouch cost plus local print setup; may avoid high import MOQ per design but increase handling cost | Printer must handle sewn pouches with seams, cords, and uneven panels. Approve real pouch print, not flat fabric only. |
| Woven label or side tag instead of direct print | Minimalist branding, repeat pouch bodies across many blends, or cases where fine logo detail is hard to print | Label MOQ, sewing labor, label color count, and placement complexity drive cost | Label placement can twist or hide in seams. Approve label size, fold, stitching, and exact side seam location. |
Buyer checklist before sampling
- Define finished pouch width and height in millimeters, measured flat after sewing, not from cut panels.
- List intended contents: 250 g or 340 g coffee bag, sample sachets, brew cards, cupping spoons, grinder brush, gift card, retail insert, or accessory kit.
- Specify fabric composition, GSM or oz weight, weave, finish, and whether organic cotton, recycled cotton, or blends are allowed.
- Set tolerances for finished size, channel depth, cord length, and print placement before sample development.
- Approve fabric color by physical swatch; for natural cotton, define an acceptable shade range against the approved swatch.
- For black or dark dyed cotton, request dry and wet rub checks before approving light ink or light-colored cords.
- Define cord material, diameter, color, length, knot style, and end treatment such as knotted, heat-cut, taped, capped, or plain.
- Provide vector artwork in AI, EPS, or editable PDF; outline fonts and state final print width, height, side count, and ink references.
- Specify artwork placement from finished side seams, bottom edge, top edge, and drawstring channel seam rather than relying on a visual mockup.
- Confirm the exact print method used for samples and bulk production; do not approve a sample printed by a different process unless clearly documented.
Factory quote questions to send
- What finished pouch size in millimeters is included, and how are width and height measured after sewing?
- What tolerances do you propose for width, height, channel depth, cord length, and print placement? Please give figures, not only 'normal tolerance'.
- What fabric composition, weave, finish, and actual GSM are included, and what GSM tolerance is allowed per lot?
- Is the quoted fabric stock unbleached cotton, bleached cotton, dyed cotton, custom-dyed cotton, organic cotton, or recycled cotton blend?
- If organic or recycled material is quoted, what documentation is available, and does it cover fabric only or the finished pouch?
- Can you provide fabric swatches from the same lot or a representative production lot before sample approval?
- What cord material, diameter, color, length, and end treatment are included in the price?
- Which print method is quoted, how many colors are included, and what screen, plate, transfer, artwork, or setup charges apply?
- What is the maximum practical print area on this pouch size without entering seam, bottom fold, or drawstring channel risk zones?
- What minimum positive line, reversed gap, and smallest text height can you hold consistently on the selected fabric?
Quality-control points to confirm
- Measure finished width and height on samples from multiple cartons; record actual ranges against purchase order tolerance.
- Check drawstring channel depth, channel seam straightness, and cord exit position because channel variation can shift perceived print location.
- Verify fabric GSM, composition, weave, shade, and handfeel against the approved swatch before cutting or at incoming material inspection.
- For black or dark fabric, conduct dry and wet rub checks on fabric and printed areas to detect dye crocking or ink transfer.
- Inspect print placement from finished side seams, drawstring channel seam, top edge, and bottom edge; reject systematic drift beyond agreed tolerance.
- Check logo edges for ink bleed, broken lines, filled counters, ghosting, registration shift, pinholes, uneven opacity, smudging, and double images.
- Confirm small text, roast marks, origin icons, curved badge wording, and reversed gaps remain readable at normal handling distance.
- For multi-color artwork, check registration at the tightest color-to-color areas and compare against the approved strike-off.
- Rub printed areas after full curing for crocking, flaking, powdering, tackiness, cracking, or ink transfer, especially on heavy white ink.
- Open and close the drawstring repeatedly to detect channel blockage, uneven cord length, rough cord movement, or seam snagging.