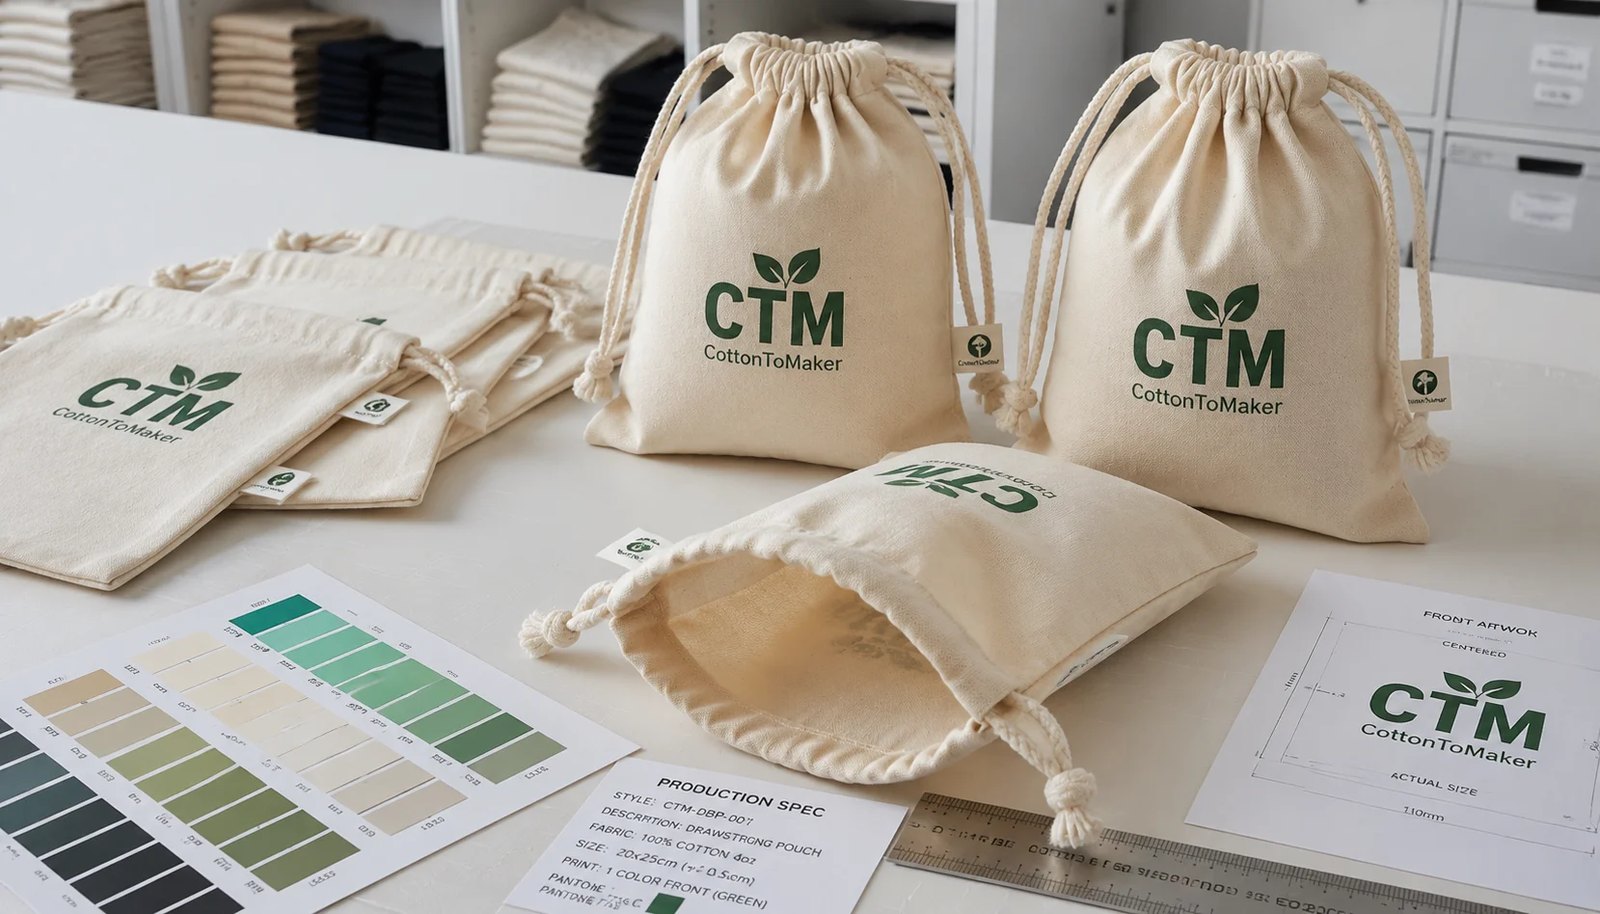
Why print proofing matters for natural grocer pouches
Cotton drawstring pouches look simple, but they are easy to mis-specify. A logo that looks clean on a PDF may print softer on unbleached cotton. A centered mark on a flat artwork file can look low once the drawstring channel is sewn. A natural fabric shade that supports an earthy grocery brand can also reduce contrast for green, tan, cream, or pale ink.
Natural grocer programs usually need quiet branding, reliable shelf presentation, and repeatable receiving. The pouch may hold tea accessories, refill tools, soap bars, herbs, produce tags, or seasonal kit items. Store teams see these products at close range, so print drift, uneven seams, blocked cords, and count errors become operational issues, not just cosmetic details.
The practical goal is to approve the real production result before bulk starts. That means the buyer should separate digital artwork approval from fabric print approval and from full pouch approval. A usable checklist keeps procurement, brand, supplier, and QC teams aligned around measurable checkpoints instead of subjective comments.
- Approve artwork content first, then approve ink on actual fabric
- Treat natural cotton shade as part of the print result
- Reference placement from sewn landmarks, not only artwork files
- Archive the approved strike-off and pre-production sample for reorders
Build the commercial spec before requesting price
Many RFQs start with a logo file and a target quantity, then ask factories for their best price. That produces non-comparable quotes. One supplier may assume 140 GSM plain cotton, another may quote 220 GSM canvas. One may include double cords and retail-count inners, while another assumes single cord and loose bulk packing.
A quote-ready spec should define the physical product before print cost is negotiated. At minimum, include finished size, target fabric weight, fabric appearance, cord construction, print method preference if known, printable area, packing plan, destination, target ship window, and inspection expectation. If the use case is known, state it. A pouch for a light sampling kit does not need the same body as a pouch carrying dense refill items.
Use size and weight ranges as planning tools, not universal rules. Small pouches around 4 x 6 in to 5 x 7 in are often quoted around 140 to 170 GSM for light-use programs. Medium pouches around 6 x 8 in to 8 x 10 in often sit around 170 to 220 GSM. Larger produce or refill pouches may need 200 to 270 GSM when shape, durability, or print stability matters more than lowest unit cost.
- State finished dimensions as width x height, measured flat
- Quote all suppliers against the same GSM and weave assumption
- Separate pouch unit cost from setup, sampling, and packing charges
- Flag any supplier quote that does not state fabric weight or packing basis
Use a staged print proofing checklist
A good proofing process answers one risk at a time. The digital proof confirms content, scale, orientation, and version control. The strike-off confirms ink behavior on the intended fabric. The pre-production sample confirms the complete pouch: fabric, sewing, cord movement, logo placement, and packing presentation.
For new artwork, changed fabric, new factory, or sensitive brand colors, do not move directly from digital proof to bulk. Natural cotton can change perceived color and opacity enough to create a real brand mismatch. White ink, pale green, fine text, thin lines, and small registration details are especially worth checking on fabric.
Repeat orders can use a lighter process only when the variables are stable. If the factory, fabric source, ink system, pouch size, print area, or packing format changes, return to the full approval sequence. The cost of one extra proofing step is usually lower than sorting rejected cartons after arrival.
- Stage 1: digital artwork proof for content, scale, orientation, and SKU name
- Stage 2: strike-off on production fabric using the proposed ink system
- Stage 3: pre-production sample for full build, placement, cord function, and packing
- Stage 4: bulk release after tolerances, AQL plan, and carton specs are signed off
Select the print method by artwork and order profile
Screen printing is usually the practical default for simple logos, one to three spot colors, and medium to larger repeat orders. It can deliver a clean hand feel and efficient unit cost once screens are amortized across enough pieces. It also supports a stable approval archive when the same artwork repeats.
Transfer methods, including DTF or related digital routes, can make sense for low quantities, many SKU versions, gradients, or artwork that is inefficient to separate into screens. Buyers should still test them on the exact fabric. Edge film visibility, heavier hand feel, cracking risk, or different rub performance may be more noticeable on a small pouch than on a large tote.
Embroidery is less common for budget pouch programs but may fit premium gift or kit packaging where texture matters more than fine detail. It needs its own proofing discipline: stitch density, backing, puckering, logo simplification, and placement should be reviewed on the actual pouch panel.
- Use screen print for stable spot-color logos and repeat programs
- Use transfer methods cautiously for short runs, detailed graphics, or many SKU versions
- Review white and pale inks after curing, not only when wet or freshly printed
- Ask for method-specific lead time and setup charges instead of one blended estimate
Set measurable tolerances and visual standards
Subjective approval language causes avoidable disputes. Terms such as centered, good quality, and close color do not guide an operator or inspector. Replace them with measurements, reference points, and approved physical standards.
Finished size should be measured flat after sewing. Print placement should be measured from stable sewn landmarks, such as the left side seam and the stitch line below the drawstring channel. If the print is visually centered in the usable front panel, define that panel. Do not reference only the unsewn fabric cut size, because sewing and channel construction change the final viewable area.
Fabric variation also needs boundaries. Natural unbleached cotton may include seed specks, slubs, and shade movement. That can be acceptable for natural grocer positioning, but it should be approved deliberately. If specks on the logo area are not acceptable, say so before production starts.
- Illustrative finished size tolerance: ±5 mm small, ±7 mm medium, ±10 mm large
- Illustrative print placement tolerance: ±3 mm to ±5 mm small, ±5 mm to ±8 mm large
- Define whether seed specks, slubs, and shade variation are acceptable on the print field
- Use the approved strike-off as the color master, not the screen PDF
Compare suppliers side by side, not just product options
A product option matrix helps buyers choose fabric weight, cord style, or print method. Supplier selection needs an additional view. Two quotes may appear close, but one supplier may include strike-off, PPS, defined tolerances, carton marks, and inspection support while another prices only a basic pouch.
Build a supplier matrix with columns for fabric basis, GSM, print method, MOQ, setup charges, sampling path, lead-time range, packing assumption, inspection support, and payment terms. Add a notes column for unclear assumptions. This makes the real commercial comparison visible and helps internal teams understand why the lowest ex works price is not always the lowest landed or lowest-risk choice.
The most useful supplier answers are specific. A factory that states normal placement tolerance, GSM tolerance, curing check, carton count method, and rework process is easier to manage than one that only says quality will be good. Specific answers also make repeat orders cleaner because the approved standard is already documented.
- Normalize quotes before comparing unit price
- Separate first-order setup costs from repeat-order costs
- Ask whether the same fabric lot or shade range can be maintained for reorders
- Record what each supplier includes in sample, packing, and inspection support
Plan lead time and MOQ with clear thresholds
Lead time should be broken into approval time and production time. A simple one-color screen print on stock natural cotton may need about 3 to 7 business days for a strike-off after artwork is ready, about 5 to 10 business days for a pre-production sample after strike-off approval, and about 2 to 5 weeks for bulk depending on quantity, season, and factory load. These are illustrative planning ranges, not guarantees.
Transfer-based orders may move faster at very low quantities, but multi-SKU review can add time if each version needs proofing and sorting. Made-to-order fabric, dyed fabric, organic documentation, custom cords, or retail-count packing can also extend the schedule. Buyers should ask suppliers for two timelines: best case with no revisions and practical case with one revision cycle.
MOQ also needs detail. A supplier may accept a low total order quantity but require minimums by artwork, pouch size, fabric color, or print method. As a practical threshold, low runs may favor transfer printing if screen setup cost is disproportionate, while repeat orders or higher quantities often justify screen printing. The right decision depends on total cost, not only MOQ.
- Ask for lead time after artwork approval, strike-off approval, and PPS approval separately
- Confirm MOQ by size, artwork, fabric color, and packing format
- Build one revision cycle into launches where color accuracy matters
- Do not treat a fast sample as proof of bulk capacity
Write AQL and defect rules before production
Final inspection is only useful when the factory and inspector know the acceptance standard before goods are packed. For many pouch orders, buyers use a general consumer-goods sampling approach such as ANSI/ASQ Z1.4 or ISO 2859-1. A common starting point is General Inspection Level II with AQL 0 for critical defects, 2.5 for major defects, and 4.0 for minor defects, adjusted to the buyer's policy and order risk.
Critical defects are usually safety, contamination, or compliance issues. Major defects are commercial failures: wrong fabric, wrong size beyond tolerance, severe stains, missing cords, open seams, unreadable print, wrong artwork, print color outside the approved standard, or placement beyond tolerance. Minor defects are small issues that do not materially affect use or brand presentation, such as trimmed thread tails needed, mild natural specking within the approved range, or slight print softness matching the strike-off.
Inspection stages should also be assigned. Incoming fabric checks catch shade and GSM problems. Print setup checks catch color and placement before full output. Inline sewing checks catch channel, seam, and cord issues. Final inspection confirms packed goods against the approved spec.
- Name the inspection level and AQL limits in the PO or QC document
- Use retained samples or photos to show borderline defects
- Classify print, sewing, fabric, and packing defects separately
- Define who has release authority if inspection results are borderline
Control packing, receiving, and carton risk
Packing is often treated as an afterthought, but it affects cost, freight, receiving accuracy, and product condition. Loose bulk packing may be suitable for internal use or simple distribution. Retail-count inners, SKU labels, and controlled carton counts are better when stores or distributors need fast receiving and clean allocation.
Print rub risk should be considered before packing is approved. Tight bundles, insufficient curing time, or rough carton movement can transfer ink or create pressure marks. If the pouch has a high-opacity print or transfer film, ask how the factory prevents sticking, abrasion, or impression marks during packing and shipment.
Carton specs should be measurable. State pieces per inner, inners per carton, max gross weight, carton dimensions if there is a warehouse limit, mixed-SKU rules, carton marks, and barcode or label requirements. Receiving teams should not have to open cartons to identify artwork version or count unless that was the agreed process.
- Set pieces per inner and inners per carton before bulk packing
- Limit carton weight where store or warehouse handling matters
- Keep mixed SKUs out of the same carton unless labels and counts are controlled
- Check print rub risk after packing, not only on loose samples
Keep the repeat-order record clean
The best sourcing workflow is simple: one RFQ sheet, one approval chain, and one retained record set. The record should include the approved artwork, strike-off, pre-production sample photos, measurement sheet, fabric details, print method, tolerance table, packing spec, carton marks, and final inspection result.
Repeat orders become faster when the supplier can work from the same controlled file instead of reconstructing decisions from old emails. Procurement should also record any approved deviation, such as a slightly warmer fabric shade or an accepted print softness on natural cotton. Without that note, receiving teams may reject goods that match what the brand already approved.
For natural grocer programs with seasonal resets or recurring kits, review the archive before every reorder. Confirm that fabric source, artwork version, ink system, pouch size, cord, and packing plan remain unchanged. If any variable changes, require a new proof for that variable rather than reopening the full project unnecessarily.
- Archive approved physical samples and digital spec files together
- Record approved deviations and do not rely on memory
- Confirm unchanged fabric, ink, size, cord, and packing before repeat release
- Use the prior inspection report to tighten the next order's checklist
Specification comparison for buyers
| Supplier-side comparison field | Supplier A response | Supplier B response | Commercial impact | Buyer check before approval |
|---|---|---|---|---|
| Fabric basis | Stock natural cotton, declared GSM and weave | Made-to-order cotton or unclear fabric source | Stock fabric can shorten lead time; made-to-order fabric may improve control but adds schedule risk | Confirm GSM tolerance, shade range, and whether the same fabric is reserved for bulk |
| Print method and setup | Screen print with itemized screen charges | Transfer or DTF with setup bundled into unit price | Bundled pricing can hide repeat-order cost; different methods affect hand feel and durability | Compare strike-offs on the same fabric and ask for repeat-order setup terms |
| MOQ and mixed SKU handling | MOQ by artwork, size, and fabric color stated clearly | One blended MOQ across all versions | Blended MOQ may fail once SKUs split by print color or size | Ask whether mixed sizes can share fabric and whether each artwork has its own minimum |
| Sampling route | Digital proof, strike-off, PPS, retained reference sample | Digital proof only or photo sample only | Skipping fabric proofing increases dispute risk on color, opacity, and placement | Require physical strike-off for new artwork or changed fabric |
| Tolerance control | Written size, placement, seam, and shade tolerances | General language such as commercial standard | Clear tolerances reduce inspection disputes and rework delays | Put tolerances into the PO or approved spec sheet, not only email comments |
| Packing assumption | Pieces per inner, carton count, carton weight, marks stated | Loose bulk packing assumed | Packing affects labor, freight, receiving accuracy, and print-rub risk | Confirm carton count control, SKU separation, and max gross weight |
| Inspection support | Inline check plus final inspection support against AQL | Factory self-check only | Factory-only checks may be enough for repeats but add risk on new programs | Define who releases bulk and who pays for reinspection if defects exceed limits |
Buyer checklist before sampling
- State finished pouch size as width x height, measured flat before filling, and define whether tolerance applies after sewing and pressing.
- Specify cotton fabric type and target weight in GSM or oz, such as 150 GSM plain weave or 220 GSM cotton canvas.
- Define fabric appearance: natural unbleached, bleached, dyed, organic-claimed, recycled blend, and whether seed specks are acceptable on the print field.
- List drawstring construction: single or double cord, cord material, approximate diameter, cord color, knot requirement, and reinforcement at exit points.
- Provide printable area size and artwork placement from fixed sewn reference points such as the top stitch line and left side seam.
- Reference artwork colors by Pantone, approved strike-off, or approved lab dip equivalent, and note expected visual shift on natural cotton.
- Request a print strike-off on actual production fabric before approving a pre-production sample for new artwork.
- Set measurable tolerances for size, print placement, seam allowance, shade range, and carton count in the PO or approved spec sheet.
- Define the QC plan: incoming material check, inline print check, sewing inspection, final inspection level, defect classes, and release authority.
- Specify packing details including pieces per inner, inners per carton, carton size limit, max gross weight, SKU separation, and carton marks.
Factory quote questions to send
- What fabric weight are you quoting in GSM, what weave is it, and what tolerance do you accept on actual fabric weight?
- Is the quote based on stock natural cotton, made-to-order fabric, or a blend that may affect print clarity, shade, and lead time?
- Which print method are you quoting for this artwork, and why does it fit the MOQ, detail level, hand feel, and reorder plan?
- How many print colors, screen charges, sampling charges, repeat-order setup charges, and artwork revision charges apply?
- Can you provide a strike-off on the exact production fabric and ink system before pre-production sample approval?
- What print placement tolerance, finished size tolerance, shade tolerance, and carton count tolerance do you normally control?
- What is your MOQ by size and artwork, and can mixed sizes or mixed prints share one fabric order?
- What are your illustrative lead-time ranges for strike-off, pre-production sample, and bulk production after approval?
- What reinforcement is included at drawcord exit points, and how do you prevent knot pull-through, fraying, or blocked channels?
- Does the quote include inline QC, final inspection support, rework handling, and reinspection terms if defects exceed the agreed standard?
Quality-control points to confirm
- Verify fabric weight against the approved spec, with mill data or in-house test record if available; do not inspect only by hand feel.
- Check base fabric shade against the approved natural tone range and segregate excessive yellow cast, heavy specking, or mixed-shade lots if not approved.
- Measure finished size flat using the approved method. Illustrative tolerances may be ±5 mm for small pouches, ±7 mm for medium, and ±10 mm for larger formats, but the PO must control the final standard.
- Compare print color to the approved strike-off on the same fabric base. Digital artwork is not the color master for natural cotton production.
- Check print placement from fixed seams or stitch lines. Illustrative tolerances may be ±3 mm to ±5 mm on small pouches and ±5 mm to ±8 mm on larger ones if agreed in advance.
- Confirm print clarity: no unreadable fine lines, severe blur, cropped artwork, major pinholes, heavy ghosting, heavy ink buildup, or obvious skew.
- Run rub, tape, or adhesion checks appropriate to the print method after curing, especially for white or high-opacity prints on natural cloth.
- Inspect drawcord channel smoothness and cord movement. The pouch should open and close without snagging, blocked channels, or severe bunching.
- Check seam integrity, reinforcement at cord exits, consistent knots, trimmed threads, and no open seams or seam grin affecting retail appearance.
- Use an agreed AQL plan for final inspection, such as General Inspection Level II with AQL 0 for critical, 2.5 for major, and 4.0 for minor defects when appropriate to the buyer's policy.