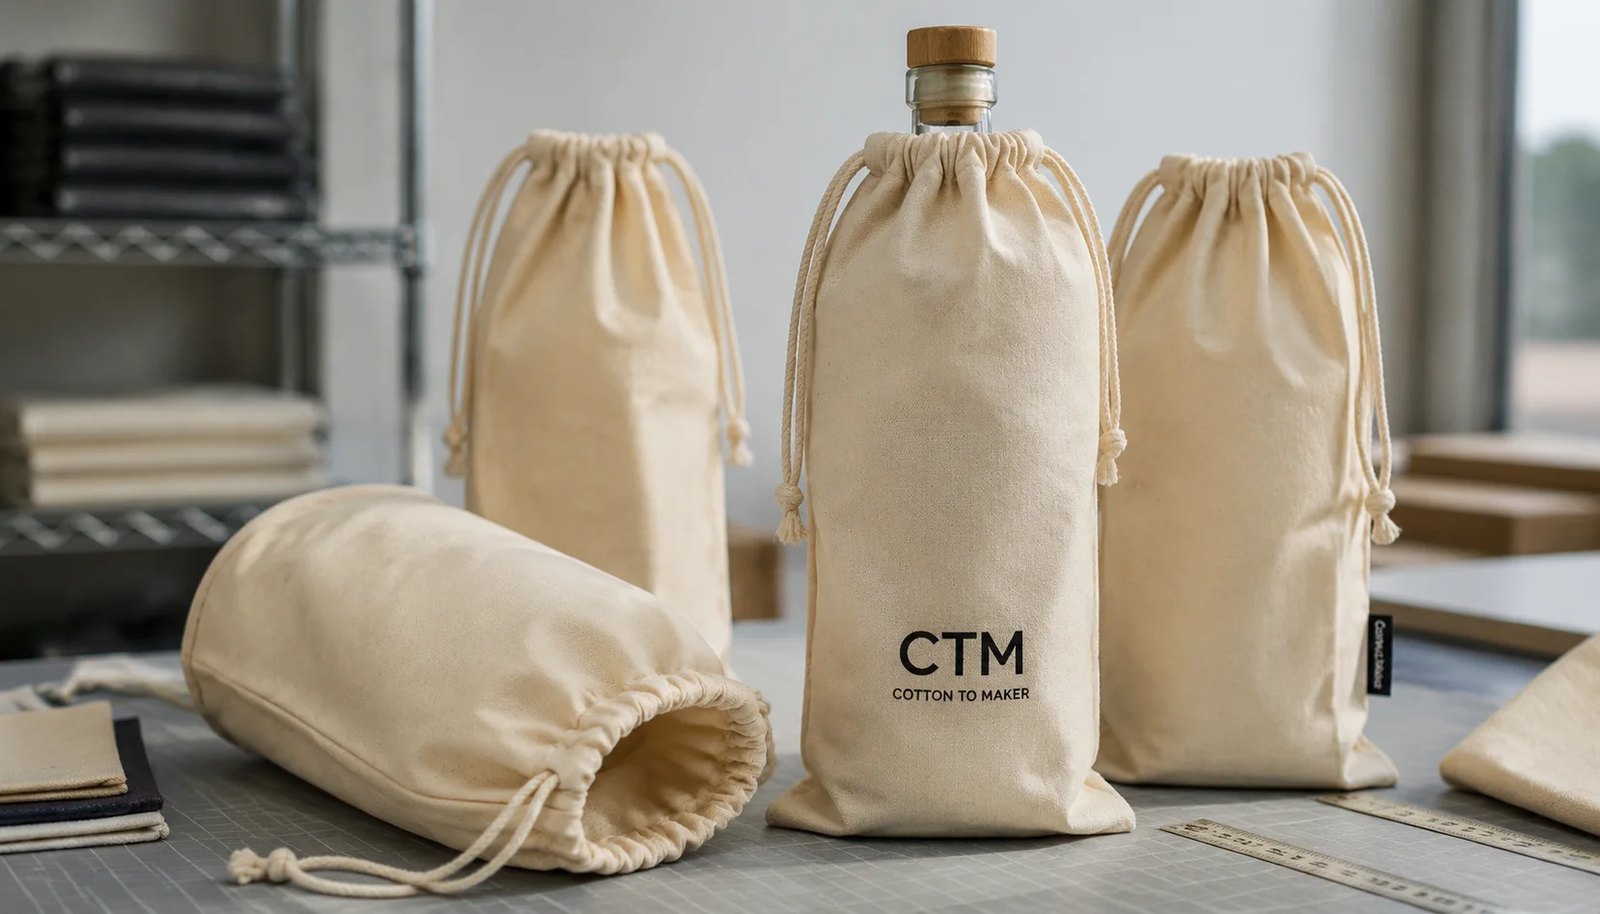
Plan backward from the usable date
For liquor retail packaging, the deadline that matters is rarely the day the pouch leaves the factory. The useful date is when the pouches are ready for the next operation: retailer distribution center, gift-set co-packer, distributor allocation point, event site, or launch staging area. A factory can ship on time and the program can still be late if freight booking, customs, receiving, or store allocation was not planned.
Cotton drawstring pouches are often one component in a larger bottle program. The bottle, neck tag, rigid box, insert, shipper, and pouch may come from different suppliers. If the pouch misses the co-packer window, the full retail set can be delayed even when the pouch itself is a low-cost item.
Start with the destination-ready date and work backward. Separate RFQ alignment, artwork review, sample making, sample transit, buyer approval, PO release, material readiness, production, final inspection, dispatch, freight, customs if applicable, receiving appointment, and internal redistribution. This keeps the calendar honest and makes approval delays visible.
Also ask what starts the supplier's lead time clock. Many factories quote bulk production days from PPS approval and material arrival, not from first inquiry, deposit, or PO issue. If that trigger is not written down, a quoted 20-day lead time may hide several weeks of pre-production work.
- Define a warehouse-ready, co-packer-ready, or launch-staging-ready date first.
- Separate development time from bulk production time.
- Confirm the exact trigger for the supplier's lead time clock.
- Include freight booking, receiving, and internal allocation in the calendar.
- Assign one buyer-side owner for every approval gate.
Size the pouch from bottle geometry
A 750 ml volume description is not enough to size cotton drawstring pouches for liquor retailers. Two bottles with the same fill volume can have different heights, shoulder widths, base diameters, closure styles, and neck lengths. Those differences change how quickly the bottle loads, how the pouch hangs, and whether the logo appears in the intended position.
Give the supplier the bottle's total height, base diameter, widest shoulder, closure type, and target neck exposure. If the pouch should look like a fitted gift sleeve, say so. If store teams need fast manual insertion before a promotion, the pouch may need more ease at the mouth and shoulder.
If one pouch must cover several SKUs, identify the largest and most difficult bottle first. Universal sizing can reduce SKU count and replenishment complexity, but it may look loose on slimmer bottles. That tradeoff can be acceptable for high-volume gift-with-purchase programs and less acceptable for premium display sets.
For squat, wide, or heavy bottles, ask whether a gusseted bottom or wider construction is needed. A flat pouch is simple and cost-effective, but it may not give the best presentation for every bottle shape. A physical fit sample is the cleanest way to avoid approving a size that only works on a flat drawing.
- Send height, base diameter, widest shoulder, closure type, and target neck exposure.
- State whether the priority is premium appearance, fast loading, or broad SKU coverage.
- Test the largest bottle first when one pouch covers multiple bottles.
- Discuss flat versus gusseted construction before sampling.
- Approve filled fit, not only flat dimensions.
Choose fabric with schedule in mind
For many liquor bottle pouch programs, 180-240 GSM cotton sheeting or light canvas is a practical range. It usually gives enough body for gifting without creating excessive seam bulk, stiff closure, or unnecessary carton weight. Lighter cotton can suit event giveaways, while heavier cotton may suit premium sets, but either choice should be deliberate.
Fabric route affects lead time. Natural cotton is often the simplest path because it may be available from stock or regular mill supply. Bleached cotton can create a cleaner print ground but still needs confirmation of availability. Dyed cotton is more schedule-sensitive because lab dips, shade approval, dyeing, drying, finishing, and lot control may be required.
Do not accept loose quote language such as premium cotton, thick cotton, or eco cotton without measurable detail. Procurement needs GSM or oz, construction, color route, and availability status. A low quote based on vague fabric can become expensive if the final sample feels too light, prints poorly, or forces a late material change.
For time-sensitive programs, ask the supplier to quote both the preferred fabric and a schedule-safe alternative. For example, a custom dyed brand color may be ideal for shelf impact, while natural cotton with a strong one-color print may protect the launch date. Procurement can then decide with cost, branding, and schedule visible together.
- Use GSM or oz and construction, not marketing fabric terms.
- Treat natural cotton, bleached cotton, and dyed cotton as different lead time routes.
- Ask whether material is in stock, regular program, or dyed to order.
- Expect dyed cotton to need shade approval and more buffer.
- Consider a schedule-safe backup fabric for fixed launch dates.
Lock artwork before print tooling
Most custom cotton drawstring pouches for liquor retailers use screen printing because it is familiar, scalable, and economical for simple branding. One-color and two-color logos usually give the best balance of speed, visibility, and cost. The risk is not the method itself; the risk is approving artwork that has not been checked against fabric texture.
Cotton is not a coated paper surface. Very small text, fine reverse lines, tight registration, and heavy solid ink areas can behave differently on woven fabric. Ask the factory for minimum text size, minimum line weight, and any warning on white ink, metallic ink, or large solid coverage before finalizing the art file.
Print placement should be numeric. Center front is not a production specification. Define artwork size and placement from fixed points such as bottom seam and side seam. For bottle pouches, this matters because the upper channel gathers when closed and can change visual balance after the bottle is inserted.
When the same pouch body carries several liquor brands, approve each artwork version separately. A narrow vertical logo and a wide horizontal logo may need different print sizes even on the same pouch. Grouping them under one approval can create avoidable revisions after screens or strike-offs are already made.
- Use vector artwork with final logo size, color count, and placement stated.
- Ask for print limits before approving small text or fine lines.
- Use a strike-off for dark fabric, white ink, metallic ink, or large solids.
- Measure placement from fixed seams, not from a visual center description.
- Approve every artwork version that will run in bulk.
Quote by real production variables
MOQ is rarely one clean order-level number. For cotton bottle pouches, the real drivers are size, fabric color, artwork version, print color count, label requirement, and packing format. A project with three brand logos, two pouch sizes, and split delivery destinations may be several small production lots, not one simple bulk order.
A better RFQ uses a variant matrix. List each pouch size, fabric color, logo version, quantity, packing method, and destination. This allows the supplier to price what will actually be made and prevents later arguments about whether a quote included mixed SKUs, special carton marks, or separate bundle counts.
The same logic applies to consolidation. Combining regional demand can improve cutting, fabric use, and setup efficiency, but those savings shrink if every region needs a different print, carton label, or delivery split. Ask the supplier where savings come from and which customizations create extra cost or time.
Pilot orders should be planned differently from rollout orders. A small first run can be useful to test fit, store handling, and customer response. But a very small order with custom dyed fabric, several artwork versions, and special packing will usually have weaker cost efficiency and less schedule certainty than a straightforward natural cotton program.
- Break quantities by size, color, artwork, print color count, packing, and destination.
- Ask which MOQ applies to fabric, printing, sewing, and packing separately.
- Use a variant matrix instead of one blended quantity.
- Separate pilot-order assumptions from rollout-order assumptions.
- Confirm which setup items can be reused for repeat orders.
Use samples as decision gates
Sampling should answer specific questions in sequence. Trying to approve fit, print, material, sewing, and packing from one rushed sample often creates more delay than it saves. A staged sample plan is especially useful for first orders or bottle programs tied to a fixed launch date.
The fit sample proves bottle function. It should confirm insertion speed, shoulder clearance, neck exposure, drawstring closure, logo zone, and filled appearance. If store staff or a co-packer will load pouches in volume, have someone test the sample in the same handling style expected in production.
The print strike-off or decorated sample proves artwork behavior. It should use the intended fabric whenever possible, especially for dark cotton, white ink, fine text, or brand-critical colors. This is the point to adjust print size, opacity, line weight, or placement before production screens are treated as final.
The PPS should be the manufacturing reference. It should use final fabric, cord, print method, label placement if any, sewing construction, and packing instruction. Buyers should avoid releasing bulk cutting from a substitute-material sample unless the remaining difference is clearly documented and low risk.
- Fit sample: approve bottle loading and filled appearance.
- Strike-off: approve print clarity, color, opacity, and placement.
- PPS: approve the final production reference.
- Do not let bulk cutting start while major sample comments are unresolved.
- Write who can approve each stage and how long they have to respond.
Build the timeline around milestones
A useful lead time plan is more than one quoted production number. It should show the work before sewing, the approval gates that can stop the order, and the handoff after cartons are ready. The milestone table in this guide gives practical ranges for first orders and repeat orders, but the exact timing still depends on quantity, material route, artwork complexity, factory load, and freight mode.
For a first custom pouch order, a realistic plan often includes 2-5 working days for RFQ clarification, 5-10 working days for a fit sample, 5-12 working days for a strike-off, and 5-10 working days for PPS after materials and artwork are ready. If fabric is dyed to order, add roughly 7-15 working days for lab dip or shade approval and 12-25 working days for bulk material readiness depending on supplier and mill conditions.
Bulk production for many moderate cotton pouch orders may sit around 12-25 working days after PPS approval and material readiness. Simple repeats can be faster, but repeats still need confirmation of fabric stock, print setup, capacity, packing rules, and shipment booking. Inspection and dispatch should be planned as separate steps, not squeezed into the same date as production completion.
The best way to use the timeline is to protect the launch date first. Put internal approval time and receiving buffer on the calendar before negotiating factory days. If a buyer needs to compress timing, it is better to reduce variables, such as using natural cotton, fewer artwork versions, or standard packing, than to rely on every stage finishing at its fastest possible range.
- Use separate dates for sample approval, PPS approval, production finish, inspection, dispatch, and receiving.
- Add more buffer for dyed fabric, new artwork, multi-SKU packing, and peak-season capacity.
- Do not schedule inspection on the same day goods must leave the factory.
- Compress complexity before compressing quality checks.
- Keep a receiving and allocation buffer before the retail launch.
Inspect for usable output
Good QC for cotton drawstring pouches is not about demanding unrealistic perfection from a soft textile product. It is about making sure the pouches fit the bottle, present the brand cleanly, close properly, survive normal handling, and arrive in the right count and SKU split.
Start with measurement. Define whether width is measured seam to seam and whether height is measured from bottom seam to top edge or to the top of the channel. For many small to medium bottle pouches, ±5 mm can be practical, but the agreed tolerance should be written into the purchase order or inspection brief.
Flat measurement is not enough. Inspectors should run a bottle-fit check using the approved bottle or an accurate substitute. The check should cover insertion, shoulder clearance, neck exposure, drawstring closure, logo visibility, seam strain, and removal. A pouch that passes flat dimensions but loads poorly can still fail in retail operations.
Print inspection should use the approved textile sample as the reference. Check placement, opacity, color appearance, small text, line breaks, smear, pinholes, and registration. Construction checks should focus on top channel stitching, side seams, bottom seam, cord exits, drawcord length, knots, and smooth pull action.
Carton accuracy belongs in QC too. Count errors, mixed SKUs, unclear carton marks, and wrong destination labels create warehouse friction and shortage disputes. For B2B programs, these operational failures can cost more time than minor cosmetic variation.
- Define measurement points and tolerances before production.
- Check filled bottle fit during inspection.
- Judge print against the approved strike-off or PPS.
- Inspect seams, channel, cord exits, and drawcord function.
- Verify carton counts, carton marks, SKU separation, and destination labels.
Specify packing for the next handler
Factory standard packing may be cheap, but it is not always the lowest total cost. Liquor pouch orders may go to a retailer DC, contract packer, distributor, event team, or stores. The right packing format depends on who handles the pouches next and how quickly they must be issued.
Flat bulk packing works when one location consumes large quantities of one SKU. Counted inner bundles are better when pouches must be allocated to stores or fed to a co-packing line in controlled batches. Bundle count should match downstream work, not simply the factory's habit.
Carton marks should be a controlled specification. At minimum, include PO number, SKU or artwork code, pouch size, fabric color, quantity per carton, gross and net weight if required, carton sequence, and destination. If mixed cartons are allowed, the carton label and packing list must make the mix obvious.
Also confirm carton weight and size limits. Heavier fabric, larger pouches, or high unit counts can create handling issues at receiving. If pouches are going into a premium set, ask whether extra compression, moisture exposure, or rough folding could affect presentation before packing rules are finalized.
- Choose bundle counts based on warehouse or co-packer workflow.
- Avoid mixed cartons unless they are explicitly approved and clearly labeled.
- Write carton mark requirements into the PO or packing spec.
- Check receiving-site carton weight and size limits.
- Protect cords, print faces, and presentation folds where appearance matters.
Select suppliers for schedule confidence
The lowest FOB unit price is not automatically the best procurement result. A meaningful supplier comparison should include material certainty, bottle-fit support, sampling discipline, artwork control, QC clarity, packing capability, and transparency around schedule risk.
Landed cost is the cost per usable pouch delivered to the correct location in the correct split. It includes setup charges, samples, rejected or reworked goods, inspection, freight handoff, carton count errors, repacking labor, and the commercial impact of missing a launch window. A lower unit price can lose value quickly if the order is hard to receive or not ready when needed.
Supplier questions should be concrete. Can they recommend pouch size from bottle geometry? Can they explain the difference between stock natural cotton and dyed-to-order fabric timing? Can they control several artwork versions without SKU confusion? Can they provide a PPS that matches final production materials? Can they identify the most likely delay point in this exact order?
A strong supplier does not just promise a short lead time. They explain the trigger point, show the milestone path, state what depends on buyer approval, and call out risks such as fabric dyeing, peak capacity, artwork changes, inspection booking, or forwarder pickup. That gives procurement a schedule that can be managed instead of a date that can only be hoped for.
- Compare full specification, not only unit price.
- Treat schedule confidence as a procurement factor.
- Ask suppliers to split lead time into milestones.
- Check whether packing and carton control are included in the quoted price.
- Prefer clear risk disclosure over vague best-case timing.
Specification comparison for buyers
| Planning milestone | Typical first-order range | Repeat-order range | Buyer control point |
|---|---|---|---|
| RFQ clarification and size recommendation | 2-5 working days | 1-3 working days | Send bottle dimensions, use case, pouch quantity matrix, artwork count, packing needs, and destination-ready date before asking for a final schedule. |
| Fit sample without decoration | 5-10 working days after spec agreement | 3-7 working days if pattern is unchanged | Approve insertion ease, shoulder clearance, neck exposure, drawstring closure, and filled appearance before moving to decorated approval. |
| Print strike-off or decorated sample | 5-12 working days after artwork file approval | 3-8 working days for unchanged print method | Check logo size, placement, opacity, small text, line clarity, and print behavior on the intended cotton fabric. |
| Dyed fabric lab dip or shade approval | 7-15 working days when custom color is required | Usually skipped if repeat shade and fabric are reserved | Confirm whether color is stock, regular program, or dyed to order; dyed cotton can be the longest pre-production variable. |
| Pre-production sample approval | 5-10 working days after material and artwork are ready | 3-7 working days | Use final fabric, cord, print, label, sewing method, and packing instruction as the production reference. |
| Bulk material readiness | 3-10 working days for stock or regular natural cotton; 12-25 working days for dyed-to-order fabric | 2-7 working days if material is reserved | Ask whether bulk production days start only after material is in house and PPS is approved. |
| Bulk cutting, sewing, printing, and finishing | 12-25 working days for many moderate orders | 8-18 working days for simple repeats | Confirm whether the quoted range changes by quantity, artwork variants, peak season, or packing complexity. |
| Final inspection and carton correction window | 2-5 working days | 1-3 working days | Book inspection before the promised ship date, not on it, so carton, count, or labeling issues can be corrected. |
| Dispatch and freight handoff | 2-7 working days depending on forwarder booking and export documents | 2-5 working days | Separate factory dispatch readiness from actual carrier pickup, sailing, air uplift, or domestic delivery appointment. |
Buyer checklist before sampling
- Set the real deadline as warehouse-ready, co-packer-ready, or launch-staging-ready, not simply ex-factory date.
- Provide bottle height, base diameter, widest shoulder, closure type, filled weight if unusual, and the desired neck exposure above the pouch.
- State the pouch role: retail gift sleeve, reusable bottle bag, dust bag inside a rigid set, event giveaway, or co-packer-applied accessory.
- Specify fabric by GSM or oz, construction, cotton composition, natural or bleached or dyed route, and whether the quote assumes stock fabric or dyed-to-order fabric.
- List finished flat dimensions and clarify whether height includes the drawstring channel; note any bottom gusset, side label, hangtag, or retail label requirement.
- Break quantities by size, fabric color, artwork version, print color count, packing format, and destination split.
- Request separate timing for fit sample, strike-off, PPS, bulk material readiness, bulk production, inspection, dispatch, and freight handoff.
- Define practical QC tolerances for finished size, print placement, cord length, seam defects, shade variation, carton count, and carton marks.
- Confirm packing before PO release: units per bundle, units per carton, mixed-carton rules, carton weight limit, SKU separation, and destination labels.
- Ask the supplier to identify the two most likely delay points for this exact order, such as dyed fabric, artwork revision, PPS approval, peak-season capacity, or forwarder booking.
Factory quote questions to send
- What exact fabric is included in this quote: GSM or oz, weave or canvas type, cotton composition, color route, and whether it is stock, regular program, or dyed to order?
- Based on our bottle dimensions, what finished pouch size do you recommend, and should the design be flat or gusseted for better insertion and presentation?
- What event starts your quoted production lead time: deposit, artwork approval, PPS approval, material arrival, or all of these completed?
- Please split the schedule into fit sample, print strike-off, PPS, material readiness, bulk production, inspection readiness, dispatch readiness, and freight handoff.
- What MOQ and price breaks apply by pouch size, fabric color, artwork version, print color count, and packing format?
- Which sample stages are made in the intended bulk fabric, and which are only construction or artwork references?
- What print method do you recommend for this logo on this cotton, and what are the practical limits for minimum text size, line weight, and solid ink area?
- What finished size tolerance, print placement tolerance, and cord length tolerance do you normally control on sewn cotton bottle pouches, and how are they measured?
- How are the top channel and cord exits constructed to withstand store handling, co-packer loading, and repeated opening?
- What packing is included in the quote: bundle count, carton quantity, carton marks, SKU separation, mixed-carton policy, maximum carton weight, and pallet or forwarding instructions?
Quality-control points to confirm
- Measure finished pouch width and height flat after sewing using one agreed method; for many small and medium bottle pouches, ±5 mm is a practical starting tolerance when written into the specification.
- Run bottle-fit checks with the actual target bottle or an accurate substitute, confirming insertion ease, shoulder clearance, neck exposure, closure, logo visibility, and removal without seam snagging.
- Check print placement from fixed datum points such as bottom seam and side seam; ±3 mm to ±5 mm is often workable depending on pouch size and print window.
- Inspect print quality for filled-in text, broken lines, registration shift, smear, pinholes, weak opacity on darker fabric, and visible drift from the approved strike-off or PPS.
- Inspect top-channel construction for skipped stitches, uneven tunnel width, trapped cord, seam grin, fraying cord exits, and weak backtacking at stress points.
- Verify drawcord diameter, finished length, knot or tip finish, and pull action; both sides should close smoothly without obvious imbalance.
- Review fabric shade and handfeel against the approved reference, especially on natural cotton where slubs, seed specks, and tone variation need agreed acceptance limits.
- Reject or grade visible stains, oil marks, severe slubs in the print zone, broken stitches, panel skew, open seams, and bottom seam weakness that affects bottle security.
- Check inner bundle counts, carton counts, SKU separation, and carton marks against the PO and packing list; receiving disputes often start at carton level.
- Inspect at least one filled presentation sample from final production when the pouch is intended for premium gifting or front-of-store display.