Start with the date that actually matters
Cotton drawstring pouches look easy to buy. They are small, familiar, and usually less expensive than the items inside them. That is exactly why they get added late to the event plan. In production, though, a custom pouch still moves through a full textile workflow: material confirmation, cutting, sewing, decoration, trimming, packing, inspection, freight handoff, receiving, and distribution. A supplier may quote 20 production days after approval, but that number rarely includes the time your team spends approving artwork, reviewing a sample, revising carton labels, booking freight, or sorting cartons at the warehouse.
For event planners, the factory ship date is not the real deadline. The real deadline is the day correct pouches are in the right warehouse, counted, separated by version, and ready for kitting or venue delivery. If the program has sponsor versions, VIP tiers, regional inserts, registration-desk stock, or room-drop cartons, receiving and sorting can take longer than expected. A shipment can arrive before the event and still be too late for the way the event team actually works.
The safest planning method is a backward calendar. Start with the event date, then subtract venue delivery, domestic distribution, kitting, receiving inspection, international or domestic freight, export handoff, final inspection, packing, decoration, sewing, cutting, sample approval, and RFQ comparison. Once the steps are visible, procurement can decide where to simplify. Maybe the custom dye is worth protecting. Maybe individual polybags are not. Good lead-time planning turns those decisions into tradeoffs early, before the event week starts making decisions for you.
- Set the required in-warehouse date separately from the event date.
- Allow calendar space for receiving, counting, sorting, kitting, and venue delivery after cartons arrive.
- Ask suppliers to quote lead time from written approval, not from the first pricing request.
- Track separate dates for artwork approval, sample approval, bulk completion, inspection, shipment, and receiving.
- Treat late changes to artwork, packing, color, or quantity as schedule changes, not only design updates.
Translate the event use into a real specification
A useful pouch specification begins with the job the pouch has to do. A cotton bag for badges and lanyards can be light and simple. A pouch holding a glass bottle, tech accessory, cosmetics set, metal gift, or heavy sponsor item needs more thought. If the factory only receives a flat size and logo file, it may quote a pouch that looks fine empty but strains at the side seams, fails to close over the contents, or hides the printed logo once filled.
Tell the supplier what will go inside the pouch. Include approximate dimensions, total weight, bulky shapes, and any sharp or rigid edges. Also describe the handling path. Will a third-party kitting warehouse fill the pouches? Will staff hand them out loose at registration? Will they ship to several venues? Will they sit inside a larger gift box? A pouch touched once at check-in can tolerate different construction than one opened and closed repeatedly during a multi-day conference.
Be clear about the quality role of the pouch. Is it temporary event packaging, a reusable branded giveaway, or a premium presentation piece for sponsors and speakers? One-day packaging may prioritize cost, stock materials, and carton efficiency. A reusable attendee gift should put more weight on hand feel, cleaner stitching, durable decoration, and smooth cord action. This distinction helps buyers avoid both mistakes: overbuilding a disposable pouch or underbuilding an item that has to represent the brand after the event.
- List every intended item, with approximate size and weight.
- State whether the pouch must close fully with the contents inside.
- Tell the supplier if the pouch will be handed out loose, packed inside another box, shipped to venues, or used as retail-style merchandise.
- Identify functional risks such as sharp contents, heavy contents, repeated opening, barcode scanning, or multi-location distribution.
- Define the quality target as one-time giveaway, reusable event pouch, premium gift packaging, or retail-style presentation.
Break lead time into controllable blocks
Lead time becomes easier to manage when it is broken into blocks instead of treated as one promise. For most custom cotton drawstring pouch orders, the first block is quotation and specification alignment. The second is artwork proofing and sample production. The third is buyer approval. After that come bulk material preparation, cutting, sewing, printing or labeling, packing, inspection, freight booking, transit, and receiving. A quote that says 25 days can be perfectly honest and still hide the step most likely to slip.
The planning logic is consistent even though exact ranges vary by supplier, order quantity, location, season, and customization level. A stock natural-cotton pouch with one-color print is usually more predictable than a dyed cotton pouch with woven labels, individual packaging, barcodes, and venue-specific carton marks. Every additional version creates more setup control, line clearance, count checking, and packing separation. Those steps are not dramatic, but they consume time and create error points.
The buyer-controlled portion is often the bottleneck. If the factory waits three days for logo placement approval, the event calendar lost three days. If the buyer changes fabric GSM after reviewing the sample, the production clock may reset. Assign approval owners before the RFQ goes out. Artwork, sponsor logos, legal marks, budget signoff, and packing instructions should not sit unresolved after the supplier is ready to move.
- RFQ and quote comparison need extra time when specifications are incomplete or material availability must be checked.
- Digital proofing can move quickly, but sponsor-approved artwork often takes longer inside the buyer organization.
- Physical sampling requires both production time and transit time, especially for cross-border samples.
- Bulk production should be counted after written sample or production-standard approval.
- Final inspection, rework, freight booking, customs, receiving, and kitting need their own calendar space.
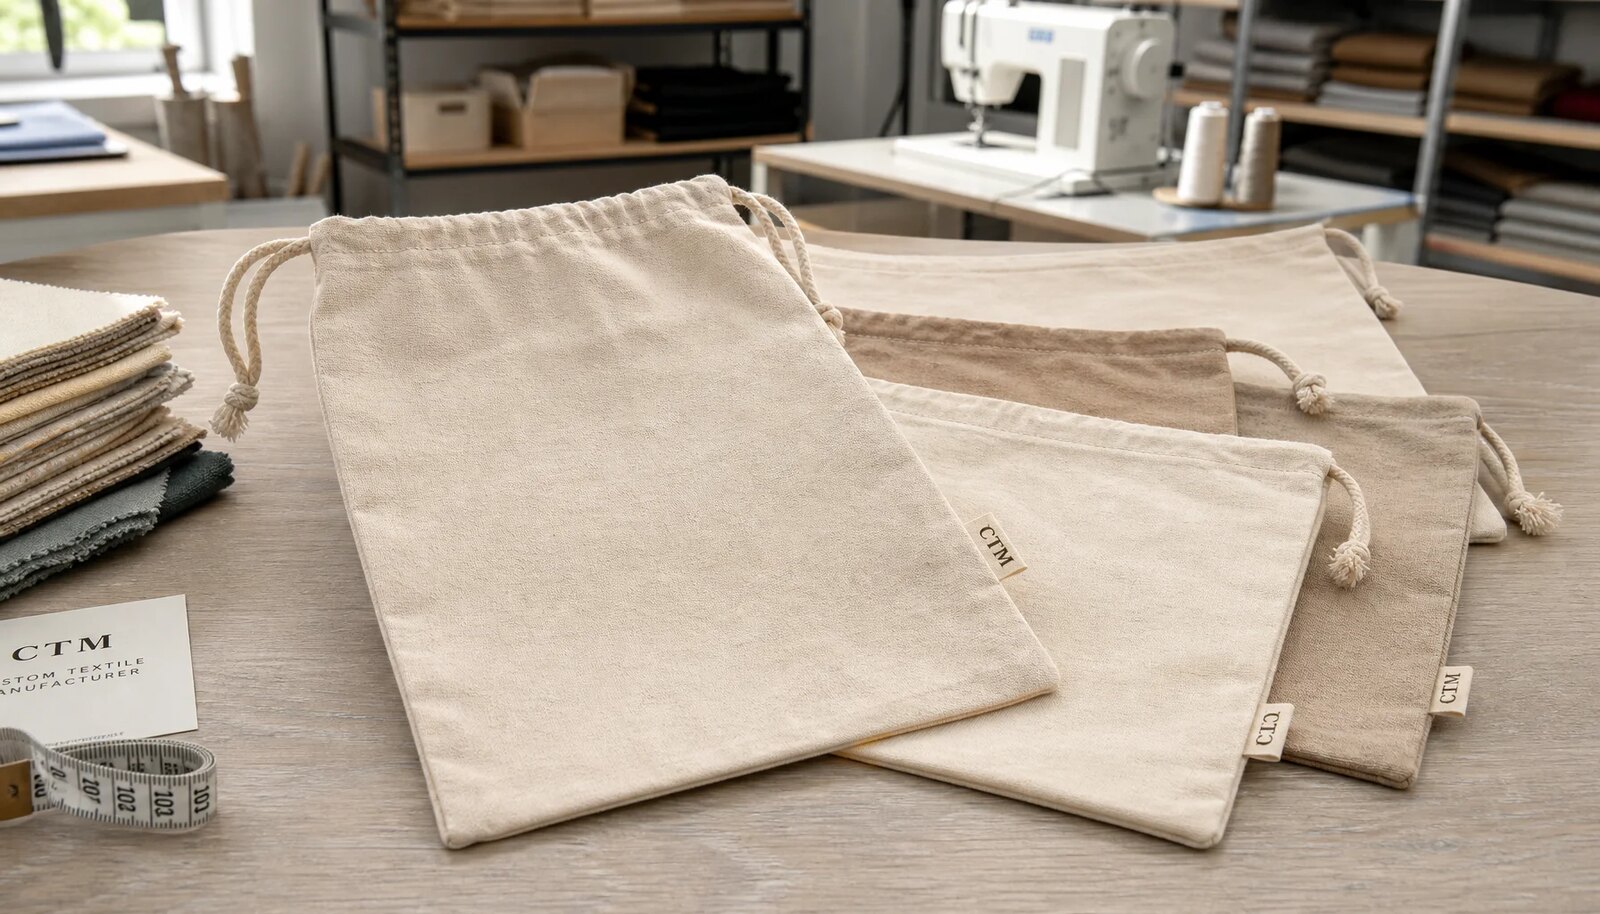
Specify size, seam, and closure details
Drawstring pouch size should be stated as flat width by flat height, with units and tolerances. Also clarify whether the height includes the cord channel and whether measurement is taken before or after pressing and cord threading. A pouch that measures 15 x 20 cm flat does not provide 15 x 20 cm of usable fill area. Side seams, bottom construction, seam allowance, and the cord channel all reduce usable space. If the contents are bulky, ask the supplier to recommend a finished size after reviewing the contents, not just price the requested number.
For many small and mid-size event pouches, buyers often discuss flat-size tolerances around plus or minus 0.5 cm, but the supplier standard should be confirmed in writing. Larger pouches, heavier cotton, washing, dyeing, and manual cutting may require wider tolerances. Print placement needs its own tolerance, usually tied to distance from a pouch edge, centerline, bottom seam, or cord channel. Without that language, a logo shift that feels unacceptable to the event team may be considered normal production variation by the factory.
Construction details deserve plain language. Ask about lockstitch or overlock seams, seam allowance, bottom seam or folded bottom construction, cord-channel width, cord exit style, and reinforcement at stress points. If the contents are heavy, a practical pull check is more useful than a vague request for strong stitching. The approved sample and final inspection should confirm that seams and cord channels hold under normal filling and pulling with the intended content weight.
- State flat dimensions and the expected usable fill requirement.
- Define tolerance for size, print placement, cord length, and label placement.
- Clarify whether the bottom is folded, seamed, gusseted, or flat.
- Confirm the cord-channel width and whether the closure is single-draw or double-draw.
- Use the actual contents during sample review to verify fit, closure, logo visibility, and seam stress.
Choose fabric with sourcing reality in mind
Fabric is one of the quiet lead-time drivers. Standard natural cotton in a common weight may be available quickly. A specific dyed shade, unusual GSM, washed finish, pre-shrunk treatment, or premium weave can add sourcing and approval time before cutting begins. Ask whether the fabric is in stock, reserved from an available lot, or purchased only after purchase order confirmation. Those answers carry different schedule risk even when the unit price looks similar.
For lightweight giveaways, 120-140 GSM plain-weave cotton is often practical when contents are small and carton weight matters. It can be semi-sheer, and it may show more puckering near seams or print areas. A 160-180 GSM cotton usually gives better hand feel and is a stronger middle option for corporate welcome kits or reusable sponsor pouches. A 200-220 GSM cotton or light canvas gives more structure for premium kits and heavier contents, but it can slow sewing, increase carton cube, and raise freight cost.
Color is a production specification, not just a brand preference. Natural unbleached cotton has shade variation, seed flecks, and texture; approve it against a physical swatch or sample range. Bleached white cotton offers stronger print contrast but shows stains, oil marks, and handling dirt more easily. Custom dyed cotton may require lab dips, dye-lot approval, and color tolerance language. If the brand requires a precise shade, confirm what standard will be used and whether the event calendar can absorb the extra approval steps.
- Ask for quoted GSM and GSM tolerance, such as supplier standard or plus or minus percentage.
- Confirm whether GSM is measured before finishing, after finishing, or on finished goods.
- Approve natural cotton by a physical sample range rather than a digital image.
- Use bleached white only with clean-handling and visible-mark inspection expectations clearly stated.
- For custom dyeing, build time for lab dips, shade approval, bulk dyeing, and possible correction.
Let decoration choices match the timeline
Decoration is often the step that turns a simple pouch into a custom production project. One-color screen printing is usually the most predictable method for event programs with bold artwork. It still needs setup, screen charges, placement approval, ink selection, and curing control. A low unit price is not a win if the print scuffs in transit, blocks when stacked, or transfers onto neighboring pouches inside the carton.
Multi-color screen printing needs tighter coordination because each color must register correctly. The purchase order should state acceptable registration tolerance, especially when the artwork includes small text, outlines, sponsor marks, or fine borders. Heat transfer can help with gradients, fine detail, and smaller runs, but the buyer should approve hand feel, edge appearance, adhesion, and any relevant rub or wash expectation. Embroidery can look premium, yet it may pucker lightweight cotton and adds setup, stitch-count, backing, and placement decisions.
Woven labels, sewn patches, and hangtags can make branding feel more elevated without covering the cotton face. They also add a trim supply chain. Label artwork approval, label MOQ, label production, and label delivery to the sewing line all belong in the lead-time plan. If labels arrive late, pouch panels may sit unfinished. For a fixed event date, simplify decoration early if artwork, label, or color approvals are not ready.
- Use one-color screen print for the most controlled custom event timeline.
- Limit multi-color screen print to artwork with enough time for registration checks.
- Approve heat transfer on a physical sample, not only a digital proof.
- Check embroidery on the intended GSM to confirm puckering and reverse-side finish.
- Freeze print size, print position, label position, and artwork colors before sample approval.
Write the RFQ like a production brief
A strong RFQ gives suppliers enough information to price the same product. A request for a cotton drawstring pouch with logo leaves too many assumptions open: fabric GSM, fabric color, cord diameter, cord length, print size, logo colors, packing method, carton marks, Incoterms, and delivery date. The resulting quotes may look comparable but represent different scopes. One supplier may include stock fabric and a simple print. Another may include custom fabric, labels, packing, inspection, and export delivery.
The RFQ should include flat pouch size, usable fill requirement, quantity by version, fabric GSM, fabric color, cord details, construction notes, decoration method, artwork size, artwork file format, color references, packing format, carton label requirements, destination, Incoterms, and target in-warehouse date. If the event has sponsor versions, VIP versions, regional versions, or venue-specific labels, list them separately. MOQ and lead time often change by version because screens, labels, trims, and carton labels must be controlled separately.
Ask for both price and timing breakdowns. Price should identify unit cost, setup charges, sample charges, screens or plates, label charges, packing charges, inspection if applicable, and freight assumptions. Lead time should identify proofing, sample, approval, bulk production, packing, inspection, export handoff, freight transit, and receiving assumptions. This makes it easier to compare a direct factory, sourcing partner, and local decorator on total landed cost and schedule risk rather than on an incomplete unit price.
- Send vector artwork where possible, such as AI, EPS, or print-ready PDF.
- State print dimensions and placement from pouch edge, centerline, bottom seam, or cord channel.
- List quantity by size, fabric color, cord color, artwork, label, and packing version.
- Define packing, including bulk count, inner bag count, master carton count, barcodes, inserts, and carton marks.
- Ask suppliers to identify assumptions instead of burying them in the quote.
Use samples as production standards
A digital proof is useful for artwork scale, logo placement, and spelling. It cannot confirm cotton opacity, fabric shade, hand feel, seam tension, cord action, print cure, or packing behavior. For a new custom pouch, a physical pre-production sample is the strongest control point. Ideally, it uses the actual fabric weight, actual color, actual cord, actual decoration method, label or patch, and intended packing reference. If the supplier uses any substitute material, that substitution should be written down.
Sample review should be hands-on. Measure flat width and height. Check the cord channel, seam alignment, cord length, and knot security. Fill the pouch with the intended contents and pull the cord several times. Confirm whether the pouch closes fully, whether the contents distort the logo, and whether the seam or cord channel shows stress. Review decoration under neutral light for color, edge sharpness, density, registration, and hand feel. If a QR code or barcode is printed, scan the physical sample at the intended size.
Approval should be written, dated, and specific. Attach sample photos, measurements, tolerance notes, approved artwork file name, approved packing method, and any accepted deviations. Separate must-fix comments from preferences when revisions are needed. A vague approval such as looks good can create problems later if bulk goods vary. A documented production standard gives the factory a target and gives receiving teams a fair reference when cartons arrive.
- Approve size, fabric, color, cord, decoration, label, and packing together whenever possible.
- Keep one approved sample with procurement and one with the factory if timing allows.
- Record accepted size tolerance, shade range, placement tolerance, and visible natural-fiber characteristics.
- Request a revised sample for material, decoration, or construction changes that affect function or appearance.
- Do not let bulk production start until the approval standard is clear and documented.
Control packing before production ends
Packing is part of the product for event orders. A pouch that is well made but packed under the wrong sponsor label or sent to the wrong venue can still damage the program. Packing decisions should be made before bulk production ends, while the supplier can still plan labor, labels, inner counts, and carton separation. Define whether goods are bulk packed, inner packed, individually polybagged, folded with insert cards, labeled with barcodes, packed by sponsor version, or marked for venue delivery.
Packing affects labor, lead time, and freight. Individual polybags, hangtags, barcode stickers, and insert cards add handling steps and material approvals. Mixed-SKU cartons require stronger line-clearance controls and count checks. Large cartons may reduce carton count but increase carton weight or dimensional freight. Small cartons may make venue distribution easier but increase handling. Ask for carton dimensions, gross weight, net weight, and carton quantity before the freight plan is finalized.
For multi-location events, carton marking should be treated as a QC item. Cartons should identify event name, PO number, SKU or pouch version, artwork version if relevant, quantity, carton number, destination, and handling instruction. If cartons go to a warehouse for kitting, inner pack counts should match the assembly workflow. If cartons go directly to venues, the label should help event staff identify the correct goods without opening every box.
- Approve carton marks and packing labels before the packing line starts.
- Confirm inner count, master carton count, fold method, and whether individual packaging is required.
- Ask for packing photos showing inner packs, carton labels, carton closure, and carton number sequence.
- Keep different artwork, sponsor, size, or destination versions physically separated during packing.
- Use carton dimensions and gross weight for freight estimates instead of relying on generic assumptions.
Inspect the defects that can disrupt the event
Quality control for cotton drawstring pouches should focus on function, brand presentation, and distribution accuracy. The product does not need luxury inspection rules unless it is being sold as retail merchandise, but it does need consistent size, working cords, secure seams, clean decoration, and accurate packing. The most disruptive defects for event buyers are wrong logo, wrong color, unusable closure, open seam, severe stains, incorrect quantity, and mislabeled cartons.
Define defect categories in the purchase order or inspection brief. Critical defects may include safety hazards such as broken needle fragments. Major defects can include wrong artwork, wrong size outside tolerance, broken or missing cords, open seams, severe stains, print transfer, unreadable barcode, incorrect version packing, or carton labels that could cause misdelivery. Minor defects may include a small loose thread, slight natural slub, or minor print variation within the approved tolerance. This language helps the supplier sort goods consistently before shipment.
Inspection is strongest at two points when the schedule allows: first-piece approval and final inspection. First-piece approval catches print placement, print color, cord setup, label position, and seam construction before mass production continues. Final inspection confirms finished and packed goods. For event programs, carton count and version accuracy deserve as much attention as the pouch itself because warehouse and venue teams rely on those labels under time pressure.
- Measure a sample set against the approved standard and tolerance.
- Pull cords repeatedly to check smooth closure, channel strength, knot security, and fraying.
- Check print cure with a dry rub test and review stacked pouches for blocking or transfer.
- Inspect for stains, oil marks, loose threads, skipped stitches, holes, and visible handling dirt.
- Verify carton labels, inner counts, master carton counts, barcode scans, version separation, and packing list accuracy.
Specification comparison for buyers
| Planning decision | Recommended option | When it fits | Buyer risk to check |
|---|---|---|---|
| Fabric weight | 120-140 GSM plain-weave cotton | Light event giveaways, jewelry, badges, sample sachets, small accessories, and programs where low carton weight matters | Can look semi-sheer and may pucker at seams or print areas. Confirm actual GSM tolerance, opacity with contents inside, and seam strength on the approved sample. |
| Fabric weight | 160-180 GSM cotton | Corporate welcome kits, reusable sponsor pouches, mid-weight merchandise, and events where hand feel matters | Material may not be stock in every color. Ask whether the quoted lot is available now and whether the GSM is measured before or after finishing. |
| Fabric weight | 200-220 GSM cotton or light canvas | Premium gifts, heavier contents, retail-style presentation, and repeat-use pouches | Higher bulk can slow sewing, increase carton volume, and raise freight cost. Confirm needle size, seam allowance, carton dimensions, and gross weight before approving. |
| Fabric color | Natural unbleached cotton | Earth-tone branding, sustainability-oriented programs, simple dark logos, and textured gift packaging | Natural shade varies by lot. Approve a physical shade range and avoid judging against a bright white digital mockup. |
| Fabric color | Bleached white cotton | Bright logos, high-contrast artwork, clean corporate kits, and printed inserts where a white background is important | White fabric shows stains, oil marks, and handling dirt. Require clean packing conditions, carton liners if needed, and final inspection for visible marks. |
| Fabric color | Custom dyed cotton | Brand-matched programs, multi-city events with consistent sponsor colors, or retail-style sets | Dyeing adds lab dip approval, dye-lot control, and possible shade variation. Confirm Pantone target, visual standard or Delta E target if used, and extra lead time for lab dips. |
| Decoration method | One-color screen print | Most event logos, simple sponsor marks, bold artwork, and controlled timelines | Confirm screen charge, ink type, print area, placement tolerance, and curing method. Under-cured ink can scuff, block, or transfer in packed cartons. |
| Decoration method | Two- or three-color screen print | Brand launches and sponsor kits needing moderate color separation | Each color adds registration risk. Request first-piece photos or video before the full print run and define acceptable registration shift. |
| Decoration method | Heat transfer | Small runs, gradients, fine detail, or artwork unsuitable for screen separation | Transfers can feel less integrated on cotton and may show edge lift. Approve hand feel, adhesion, and rub or wash behavior if reuse matters. |
Buyer checklist before sampling
- Set the event date, required in-warehouse date, kit assembly date, venue delivery date, and latest acceptable delivery date before asking for production lead time.
- Define the pouch as flat width by flat height in centimeters or inches, and state whether tolerance applies before filling, after pressing, or after cord threading.
- List the intended contents, approximate total content weight, sharp edges, bulky shapes, and whether the pouch must close fully with those contents inside.
- Specify fabric GSM, weave if known, fabric color, treatment, and whether the cotton is natural unbleached, bleached white, dyed, washed, pre-shrunk, or untreated.
- Ask for the actual GSM tolerance being quoted, such as plus or minus 5 percent or supplier standard, and confirm whether GSM is tested before or after finishing.
- State seam construction, expected seam allowance if critical, cord-channel width, and whether overlock, lockstitch, bartack, or reinforced stress points are required.
- Define cord material, color, diameter, finished length, knot or tip finish, fray-control method, and whether single-draw or double-draw closure is required.
- Provide decoration method, artwork size, artwork colors, Pantone references, file format, logo placement from pouch edges, and acceptable placement tolerance.
- Confirm MOQ by pouch size, fabric color, cord color, decoration version, label version, and packing version rather than accepting one blended MOQ.
- Ask the supplier to split lead time into artwork proof, material sourcing, sample production, sample transit, buyer approval, bulk production, packing, inspection, freight booking, transit, and receiving.
Factory quote questions to send
- What exact GSM, weave, yarn count if available, fabric color, and fabric treatment are you quoting, and is the material in stock, reserved, or purchased after order confirmation?
- What GSM tolerance, flat-size tolerance, seam tolerance, cord-length tolerance, and print-placement tolerance do you normally hold for cotton drawstring pouches?
- Is the quoted price for blank pouches, decorated pouches, labeled pouches, packed pouches, or freight-included delivery, and are screens, labels, sample charges, and artwork setup included?
- What is your MOQ by size, fabric color, cord color, artwork version, label version, and packing version, and how does MOQ change if we reduce artwork colors or use stock fabric?
- What is the standard lead time for digital proof, physical sample, sample transit, buyer comments, revised sample if needed, bulk production after approval, packing, inspection, export handoff, and freight transit?
- Which steps are performed in-house and which are outsourced, including fabric dyeing, screen printing, heat transfer, label weaving, embroidery, packing, inspection, and export trucking?
- Can the pre-production sample be made with the same fabric lot, cord, ink, label, and packing style intended for bulk production, or will any substitute material be used?
- How many production slots are available for our target ship date, and what is the latest written sample approval date needed to keep that slot?
- What decoration tolerance do you recommend for this artwork, including registration tolerance for multi-color printing and distance tolerance from pouch edge or cord channel?
- What first-piece approval process do you use before mass printing or sewing continues, and can you provide photos with a ruler and color reference?
Quality-control points to confirm
- Measure flat width, flat height, cord-channel width, seam allowance where visible, bottom seam position, and usable fill area against the approved sample and purchase order tolerance.
- Check fabric GSM by lot when feasible, and review shade, weave consistency, slubs, opacity, odor, and hand feel against the approved sample or swatch.
- Confirm the fabric lot, cord lot, ink, label, and packing materials match the approved production standard or documented approved substitute.
- Inspect cutting alignment and panel symmetry so the pouch does not twist, lean, bow, or close unevenly after the cords are pulled.
- Test side seams, bottom seams, cord-channel seams, and stress points with a practical pull check matched to the expected content weight.
- Verify cord material, color, diameter, finished length, symmetry, draw action, knot security, end finishing, and fraying risk before packing begins.
- Confirm print size, print placement, registration, ink density, edge sharpness, pinholes, smudges, and cure on first production pieces before the full print run continues.
- Perform dry rub checks on printed areas and review whether print surfaces block, scuff, stick, or transfer when stacked under normal carton pressure.
- Review fabric and print color under neutral light against the approved sample, swatch, or Pantone reference, especially for natural cotton and custom dye lots.
- Check labels, patches, hangtags, and barcode stickers for correct version, placement, stitching, scan readability, and attachment strength.