Start with the use case, not the mockup
For most tech startups, a cotton drawstring pouch is a working packaging component, not a decorative extra. It may hold a charging cable, wall plug, adapter set, earbuds, demo unit accessories, or a branded onboarding item. That sounds straightforward until the RFQ is built around a pretty mockup instead of the real contents, the handling pattern, and the warehouse flow.
A pouch that only groups a cable and card insert can be specified very differently from one that must hold a charger brick, cable, and printed guide without looking overstuffed. If the pouch goes inside a retail carton, the loaded shape matters. If it goes into event giveaway packs, cost and speed may matter more than premium hand-feel. If it supports a founder or employee welcome kit, logo clarity and consistent appearance may matter more.
That is why cotton drawstring pouches for tech startups wholesale buying checklist decisions should begin with four plain questions. What exactly goes inside? How often will the pouch be opened and reused? Is the pouch visible to the end user as part of the brand experience? How will warehouse or kitting teams receive and handle it? The answers move the spec in different directions, and they change fabric weight, size allowance, drawcord construction, decoration method, and packing format.
A strong B2B spec starts with function and then locks appearance. List the contents by item, note whether they are loose or bundled, record the loaded dimensions, and decide whether the pouch is a giveaway, internal-use kit, retail insert, or resale component. Buyers who do this early usually avoid the common failures: pouches that fit flat but not loaded, logos placed too close to the tunnel, and cartons packed in a way that creates recount labor.
It also helps to think in workflow terms. The pouch may be touched by sourcing, receiving, kitting, retail, or customer-facing teams. If each group needs a different outcome, note that upfront. Procurement works best when the pouch is treated as a defined component with a measurable purpose, not a generic branded add-on.
- Define the end use: internal kit, event giveaway, retail insert, or resale item.
- List the actual contents and loaded dimensions before requesting pouch size.
- Decide whether the priority is presentation, protection, repeat reuse, or lowest delivered cost.
- Map the warehouse flow: direct storage, kitting line, or resale distribution.
- Treat the pouch as a sourced component with its own spec, not a generic branded extra.
Size specification: finished dimensions, usable space, and tolerances
Size is where vague sourcing language creates the most avoidable disputes. Suppliers may quote a cut-panel size, a finished flat size, or a nominal size rounded for convenience. Those are not interchangeable. A cotton pouch loses usable space to side seams, top hem folding, and the gathered area created when the drawcord closes. A 150 x 200 mm finished pouch does not provide 150 x 200 mm of practical internal capacity.
For tech accessories, buyers should specify finished size in millimeters and then verify fit with the actual contents. That means sending or listing the dimensions of the charger, cable coil, adapter, or accessory bundle. If the contents are rigid, add enough allowance for easy insertion and closure; if they are soft and compressible, the allowance can be smaller. In many startup programs, the mistake is not underspecifying the pouch by a huge amount, but by a small amount that turns loading into repetitive warehouse friction.
Tolerance also matters. Sewn textile goods are not machined metal parts, so zero-variation expectations are unrealistic. But textile tolerance should not mean no control. Buyers should ask for a written finished-size tolerance and agree how it will be measured. Smaller pouches used for compact tech accessories may warrant tighter tolerance, while larger promotional pouches may allow more variation. What matters is that everyone measures the same way: laid flat, gently straightened, and from defined reference points.
A practical approval process is to measure the pre-production sample, confirm loaded fit with the real accessory set, and record the accepted finished dimensions on the purchase order or spec sheet. This makes final inspection objective. Without that step, a supplier can argue that a pouch is within their standard while the buyer argues that it does not function. The signed sample and written tolerance close that gap. For reorder programs, that same size note becomes the fastest way to keep future runs consistent.
If the pouch will sit inside a retail box or mailer, ask for the carton and insert dimensions too. The pouch should not only fit the product set; it should fit the rest of the packout. That extra line in the spec can save a lot of time later, especially when marketing and operations both expect the pouch to solve different problems at once.
- Write size as finished width x finished height in mm.
- State whether measurement excludes the drawcord knot area and how the hem is treated.
- Approve fit using the real accessory bundle, not only empty flat dimensions.
- Agree dimensional tolerance before production starts.
- Store the approved measurement method with the PO and sealed sample.
Fabric specification: GSM, weave, opacity, and sourcing accuracy
Cotton fabric should never be quoted as just cotton. Procurement needs at least composition, finished GSM, weave type, and color. For most startup accessory pouches, 120-140 GSM finished cotton is a practical working range because it balances cost, printability, and enough body to avoid a flimsy feel. Lighter fabric can work for low-cost promo use, but buyers should expect more show-through, more wrinkling, and greater sensitivity to seam distortion. Heavier fabric may improve body, but it also increases cost, carton weight, and finishing variability.
Weave construction affects quality as much as GSM does. A plain weave with even yarns typically performs better for repeatable cutting, sewing, and printing than a visibly loose construction. Loose weave can weaken edge definition in print, create more bias distortion during sewing, and allow contents or dark inserts to show through. For a tech pouch carrying cables or adapters, opacity and shape retention are often more important than softness alone.
Buyers should also clarify whether the GSM cited is finished weight. This matters because finishing processes and moisture content can affect how weight is presented. In a quote comparison, two suppliers may both say 130 GSM cotton while one is effectively quoting a lighter finished fabric. That does not necessarily mean the factory is acting in bad faith; it means the buyer did not lock the measurement basis. The remedy is simple: ask for finished GSM and compare samples in hand.
Color and lot consistency should be addressed early too. Natural or off-white cotton may vary from lot to lot, and dyed shades can vary even more if the order is split across fabric lots. If the pouch is part of a branded startup kit, visual consistency matters. Ask what the supplier uses as the approval standard: swatch, lab dip, or sealed sample. If the exact shade is important, make that explicit before bulk production rather than at final inspection. For repeat orders, keep the approved sample with the original shade note so future teams do not have to guess.
If sustainability claims matter to your brand, separate marketing language from sourcing requirements. Ask for the exact fiber description and any certification documents you need before making a claim downstream. That keeps procurement focused on what can be verified and avoids overpromising on a product page or kit insert.
- Specify composition, finished GSM, weave, and color on every RFQ.
- Use 120-140 GSM as a common starting range for general tech accessory use.
- Ask whether the quoted GSM is finished weight.
- Review opacity with actual contents inside the sample pouch.
- Control shade with an approved swatch or sealed sample, especially on repeat orders.
Drawcord and seam construction: small details, real failure risk
Buyers often focus on fabric and logo, but field complaints usually come from the functional parts: the drawcord, top hem, and side seams. A pouch that looks acceptable on a table can still fail in use if the tunnel is too narrow, the cord is too thin or rough, or the side seams lack reinforcement. Repeated opening and closing puts stress on the tunnel ends and on the area where the cord changes direction. If those points are weak, the pouch will not survive normal handling.
For standard cotton drawstring pouches, many buyers choose cotton cord for visual consistency, but polyester cord can provide better dimensional consistency and smoother running in some builds. The correct choice depends on branding priorities and functional need. Instead of debating materials in the abstract, ask the supplier what cord diameter is included, what the finish of the cut ends will be, and whether cord substitutions are common at your target price level. That gives procurement a clearer basis for comparison.
Seam quality should be reviewed as construction, not just appearance. Ask where back-tacking is applied, how the top hem is folded, and whether the tunnel width is consistent. A hem that varies too much can cause binding when the pouch closes. Low stitch density can save time for the factory, but it can also increase seam opening risk. You do not need to prescribe every sewing parameter if you trust the factory, but you do need the supplier to explain how they prevent skipped stitches, puckering, and pull-through at stress points.
During sample review, actually operate the pouch. Open and close it several times, check whether both sides gather evenly, and see whether the loaded pouch remains usable. This is a simple test, but it catches many problems early. A smooth-closing pouch with clean reinforcement is worth more than a pouch that only photographs well when laid flat. If the pouch is meant for repeated use by employees, customers, or event attendees, this small test becomes even more important.
It is also worth checking for loose threads, raw-edge exposure, and whether the tunnel ends are fully captured by stitching. Those details are easy to miss in a first look, yet they are exactly where a pouch starts to look worn before it should. Better sewing is not only about durability; it also supports a cleaner branded impression when the pouch is handed from one person to another.
- Confirm cord material, diameter, color, and end finish.
- Review top hem width and tunnel consistency on the sample.
- Ask how seam reinforcement is handled at tunnel stress points.
- Operate the sample repeatedly instead of only inspecting it visually.
- Reject cords that fray, slip out, or bind during closure.
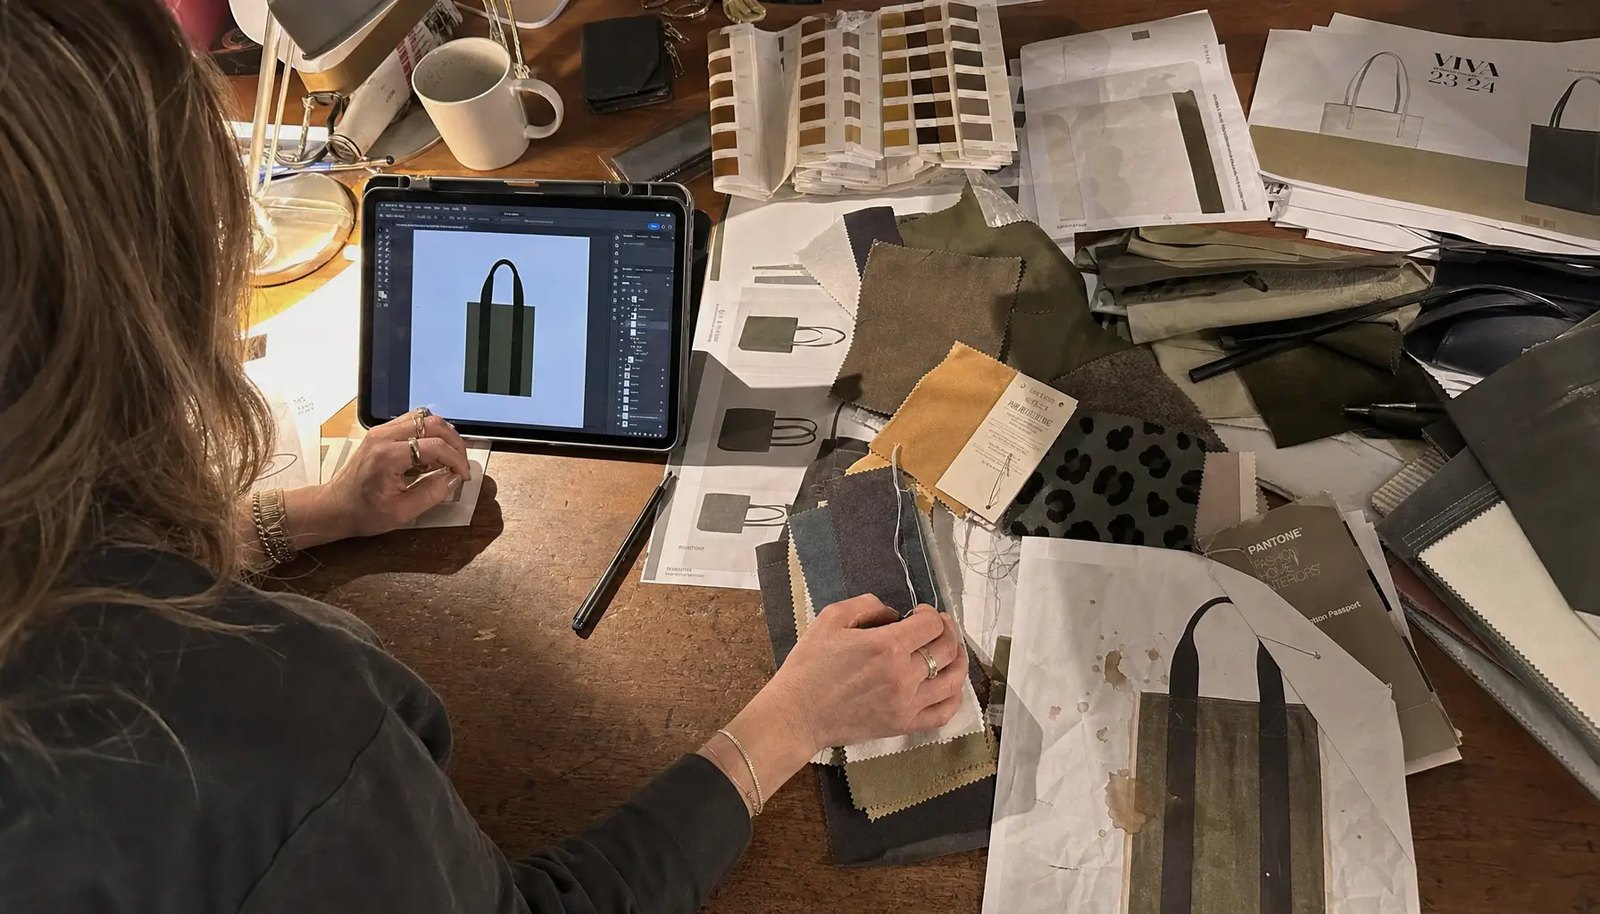
Logo method and artwork limits on cotton fabric
For most startup logo applications, one-color or two-color screen printing is the default because it is cost-efficient, scalable, and generally reliable on cotton. It works especially well for bold wordmarks, icons, and simple brand graphics. But buyers should not assume every logo file is suitable as-is. Cotton is textured, seams create uneven pressure, and the pouch surface may not stay perfectly flat during printing. Artwork that looks crisp in a digital proof can lose clarity on fabric.
The safest approach is to ask the supplier what they can reliably reproduce on the quoted construction. Request practical limits: minimum line thickness, minimum text size, and maximum print area relative to the pouch face. Also define placement using measurement, not visual language like center front. A proper spec might say the logo is centered horizontally and positioned a set distance below the top hem. That reduces interpretation differences between sample and bulk run.
If your artwork includes small text, fine outlines, or multiple shades, the supplier may suggest transfer decoration or another method. That may be the right technical answer, but it should be evaluated as a tradeoff. Transfer processes can improve detail but may change hand-feel, crack if poorly selected, or look less natural on cotton. Procurement should compare not just decoration cost but also readability, durability, and overall brand fit.
The pre-production stage is the right time to inspect decoration under real viewing conditions. Look at edge sharpness, density, placement, and how the logo appears when the pouch is full and when it is partially gathered. If the logo disappears into folds or sits too close to the drawcord tunnel, the file is not the problem; the placement spec is. Tightening that spec before bulk production is cheaper than arguing over a full shipment later.
It also helps to define artwork ownership and revision control. Ask who will hold the final production file, whether the supplier will send a proof with measurements, and how changes will be approved. Small process gaps here often lead to accidental reruns with the wrong version, especially when a startup is moving quickly across events, launches, and internal kit cycles.
- Use measured placement instructions rather than visual guesses.
- Ask for minimum line and text limits the supplier will stand behind.
- Keep artwork away from seams, tunnel folds, and heavily gathered areas.
- Review print under real light and on a loaded pouch, not just flat on a table.
- Treat decoration choice as a quality-and-function decision, not only a unit-cost decision.
MOQ and pricing logic: how to compare quotes on the same basis
MOQ confusion is common in textile sourcing because buyers and suppliers may be talking about different units of complexity. A factory may accept a total quantity target, but still require separate minimums by size, color, or print version. For example, a buyer hears 3000 pieces MOQ and assumes any assortment works, while the factory means 3000 total with a practical minimum per SKU to justify cutting, printing, and packing setup.
This matters because pouches look simple, yet each variation can create a new production path. A second pouch size changes marker planning and cutting efficiency. A second fabric color may require separate fabric sourcing or lot handling. A second logo color or placement may require another setup. Even a change in cord color can disrupt a supposedly standard build. The more variables added, the less useful a headline unit price becomes.
The cleanest quote comparison is to begin with one base SKU: one finished size, one fabric color, one cord spec, one print location, and one packing format. Then ask the supplier to price variations as separate line items. This lets procurement see what is driving cost rather than approving a blended quote that hides assumptions. It also makes future reorders easier because the base spec already exists in a controlled form.
Ask for price breaks at clear volumes such as 1000, 3000, and 5000 pieces and request that setup charges be shown separately if possible. Even if the supplier does not provide a full cost breakdown, their willingness to identify where cost changes occur is a useful signal. Clear suppliers are easier to manage. Vague suppliers often become expensive later through change fees, quality disputes, or missed expectations.
When comparing different factories, do not compare unit price alone. Compare how much is included: sample stages, packing, carton markings, inspection support, and whether the quote assumes finished cotton of a specific GSM. A lower number can be a real saving, or it can simply leave out the items your operation still has to pay for. The goal is not to buy the cheapest pouch; it is to buy the right pouch on the clearest terms.
- Separate base SKU pricing from variant pricing.
- Clarify MOQ by total order and by individual SKU.
- Request price breaks at defined quantity levels.
- Treat extra colors, sizes, and cord changes as separate cost drivers.
- Use the same RFQ template across suppliers to normalize comparisons.
Sampling and approval: the control process that protects the bulk order
A sample should do more than confirm that a pouch exists. For B2B buyers, the sample is the working standard for fabric, size, cord, logo placement, and seam quality. If approval is only verbal or only based on a digital mockup, the buyer has very little leverage when the bulk run varies. That is why a proper approval process includes a physical pre-production sample and one retained control sample sealed as the reference for final inspection.
The most useful sequence is straightforward. First, confirm quotation details and if necessary review a blank size sample. Next, review the decorated pre-production sample made with the intended fabric, print method, and sewing construction. After approval, retain one signed sample or written approval reference with date and PO details. That sample should be accessible to procurement and to any third-party inspector used at shipment stage.
Sample review should be documented like a mini inspection. Measure the finished size. Load the intended accessory set. Open and close the pouch multiple times. Check whether the print is centered and whether the logo remains readable when the pouch is in normal use. Record any deviations, however small. Many bulk issues start as sample details that someone noticed but did not formally resolve.
For repeat programs, the control sample becomes even more valuable. Startup procurement teams often reorder from memory, especially when the same pouch is used in employee kits, partner bundles, and trade show materials. Memory is not a specification. A retained sealed sample, paired with the original artwork and approved measurement notes, keeps the reorder consistent even if a different buyer, merchandiser, or factory coordinator handles the next PO.
If a supplier offers multiple sample stages, use them. A blank sample can validate hand-feel and size. A print strike-off can check decoration. A pre-production sample can confirm the final build. The small cost of sampling is usually far lower than the cost of correcting a full bulk order that missed one of those details.
- Approve a physical PP sample using the intended fabric and print method.
- Keep one sealed signed sample as the production reference.
- Measure, load-test, and operate the sample before sign-off.
- Record all changes in writing, including small placement adjustments.
- Use the retained sample to control future reorders, not memory or old photos.
Quality control plan: inspection points that matter for cotton pouches
A practical QC plan for cotton pouches should focus on the handful of defects that affect use, appearance, and receiving efficiency. The main categories are fabric conformity, finished dimensions, stitching, drawcord function, decoration quality, and packing accuracy. Buyers do not need a complicated lab program for most orders, but they do need objective checkpoints and a clear standard tied to the approved sample and PO.
At fabric stage, confirm that the incoming cloth broadly matches the approved color and GSM. At sewing stage, watch for skew, seam puckering, tunnel inconsistency, and visible defects such as oil marks or holes. At decoration stage, inspect placement, ink coverage, and readability. At finishing stage, remove loose threads and check drawcord operation. At packing stage, verify count accuracy and carton marking. This staged view is often more useful than a single end-of-line glance.
If a third-party inspection is planned, provide the inspector with the actual fit test and the sample reference. Without that, inspection may focus too heavily on visible defects while missing the practical issue: the accessory set does not load correctly or the cord binds. Inspection reports are strongest when they include measured dimensions, photo records of print placement, and count verification from opened inner packs and master cartons.
The key is not to overengineer the process. Cotton pouches are a simple product, but they still need a controlled standard. Most expensive disputes in this category come from basic gaps: no agreed tolerance, no defined print placement method, no retained sample, and no count verification. A concise, product-specific QC checklist solves more than generic quality language ever will.
For frequent reorder programs, it helps to separate critical defects from cosmetic ones. A tiny thread end may be acceptable if it does not affect function or presentation. A mis-sized pouch, weak tunnel, or unreadable logo is not. That distinction keeps inspections practical and avoids unnecessary hold-ups at the dock.
- Control fabric, size, stitching, cord function, print, and packing as separate checkpoints.
- Give inspectors the real accessory fit requirement, not only visual standards.
- Use the sealed sample as the final comparison reference.
- Physically recount opened inner packs and selected cartons.
- Document any accepted deviations so they do not become later disputes.
Packing, carton specs, and receiving efficiency
Packaging details affect landed cost and warehouse labor more than many buyers expect. If the pouch order is for kitting, fixed-count inner packs are usually the most useful format because receiving teams can check counts quickly and move stock into work-in-process without resorting to full recount. If the pouches are for resale or multi-location distribution, carton labeling and SKU separation become even more important.
A proper packing spec should define whether pouches are packed loose, folded, or individually polybagged; how many pieces go in each inner pack; how many inner packs go in each master carton; and what labels or marks must appear on the carton. Procurement should also ask for estimated carton dimensions, gross weight, and CBM before PO approval. Those numbers help compare true landed cost, not just ex-factory price.
For cotton products, cleanliness matters. Dust, odor, moisture exposure, and tangled cords can all create avoidable receiving problems. If the goods may be stored before use, ask what protection is included and whether carton sealing is sufficient for the transport route. This does not mean every order needs premium retail packing. It means the chosen packing format should match the way the startup or distributor will actually handle the goods after arrival.
Do not leave carton marks to chance. A clean carton label showing PO number, SKU, size, color, quantity, and carton sequence saves time at the dock and reduces picking errors. If your operation uses barcodes or warehouse labels, include that in the quote and sample process. Small labeling omissions often become expensive manual work later. The fastest receiving programs are usually the ones with the simplest carton logic.
If the pouch is going to a co-packer or a 3PL, ask who prints the labels, who applies them, and whether the cartons are palletized in a specific way. Those details matter more than they seem. A quote that ignores receiving labor can look attractive until the goods arrive and the warehouse has to sort out mixed cartons by hand.
- Set inner pack count and master carton count before production.
- Request carton dimensions, gross weight, and CBM for landed-cost planning.
- Specify whether cartons must be single-SKU only.
- Define carton marks clearly: PO, SKU, color, quantity, and carton number.
- Match packing method to your receiving and kitting workflow, not to supplier convenience alone.
Lead time, reorder planning, and supplier selection questions
For standard cotton pouches with approved artwork and in-stock fabric, many suppliers will quote around 25-35 days after pre-production sample approval. That can be realistic, but only if sample approval, packaging materials, and print setup are already aligned. Buyers should separate production lead time from total project timeline because sample courier transit, revision cycles, and internal approvals can easily add another week or more.
The most common delays are not dramatic factory shutdowns. They are ordinary process slips: artwork adjustments after sample review, unavailable matching cord, packaging details decided too late, or fabric shade concerns discovered after cutting. Procurement reduces these risks by freezing the functional spec early and resisting cosmetic changes once the PP sample is approved. If a change is necessary, ask immediately what it does to both schedule and cost.
Supplier selection should also be based on operational transparency, not just price. Whether you buy from a direct factory, trading company, or local source, ask who is responsible for fabric sourcing, cutting, sewing, printing, inspection, and packing. The more clearly a supplier can explain their process, the easier they usually are to manage when reorders or corrective actions arise. Clarity is especially important for startups that may scale fast and reorder under time pressure.
Finally, think beyond the opening order. If the pouch may become a repeat item for onboarding, channel kits, or product launches, ask what the reorder process looks like. Will the same artwork remain on file? What changes trigger new setup charges? How is color consistency handled on a new lot? A supplier that can answer those questions cleanly is usually a better long-term sourcing partner than one that simply offers the lowest first-run number.
It is also smart to ask how they handle rush orders, split shipments, and partial fills. Those are not edge cases for growing startups; they are common realities. The right supplier can explain what is possible without overstating capacity. That kind of honesty is often more valuable than a quote that looks fast and cheap on paper.
- Plan total project time, not only factory production days.
- Freeze artwork and packing details before PP approval where possible.
- Ask each supplier who controls fabric, sewing, printing, inspection, and packing.
- Evaluate reorder discipline, not just opening-order price.
- Treat transparency as a sourcing advantage, especially for repeat startup programs.
Specification comparison for buyers
| Spec decision | Recommended option | When it fits | Buyer risk to check |
|---|---|---|---|
| Fabric weight | 120-140 GSM finished cotton for most tech accessory pouches | Cable kits, charger sets, dongle packs, onboarding kits, event handouts | Below about 110 GSM can feel thin, show contents, and distort print; heavier cloth adds cost, carton weight, and may be unnecessary for light contents |
| Fabric construction | Plain weave cotton with even yarns and stable finished width | Programs needing repeatable sewing, cleaner printing, and predictable hand-feel | Loose weave increases skew, seam puckering, opacity issues, and logo edge distortion |
| Size specification | Finished size in mm plus usable internal capacity test | Orders where exact fit matters for adapters, earbuds, power banks, or bundled accessories | Flat dimensions alone can mislead; hem, seam allowance, and drawstring closure reduce usable volume |
| Dimensional tolerance | Agree tolerance by finished size, commonly ±5 mm to ±10 mm depending on pouch dimensions and construction | When pouches must fit a defined insert set or carton layout | No written tolerance means disputes after bulk production when pouches technically differ but supplier says they are acceptable |
| Print method | 1-color or 2-color screen print for bold logos; transfer only when artwork detail requires it | Simple startup branding and repeat campaigns | Tiny text, gradients, or hairlines may fail on textured cotton; transfer can change hand-feel and may crack if poorly matched to use |
| Drawcord build | Cotton or polyester cord around 4-6 mm diameter with secure knots and clean cut ends | Most standard drawstring pouches used repeatedly | Thin or inconsistent cord can cut into the tunnel, slip out, fray, or feel cheap |
| Seam construction | Lockstitch side seams and reinforced top hem/tunnel | Programs expecting repeated opening and closing | Low stitch density, skipped stitches, or weak back-tacking at tunnel ends lead to seam opening in use |
| MOQ route | One standard size, one fabric color, one print location for opening order | Buyers seeking clean cost comparison and lower setup complexity | Mixed colors, sizes, or print versions can trigger separate MOQ and setup charges |
| Packing format | Fixed-count inner packs plus marked master cartons | Warehouse receiving, kitting, and redistribution | Loose or mixed packing creates recount labor, SKU confusion, and contamination risk |
Buyer checklist before sampling
- Confirm the exact contents by SKU, bundle method, and maximum loaded dimensions before you ask for a pouch size quote.
- Specify finished pouch size in millimeters and define whether tolerance is measured laid flat before packing or after light conditioning.
- Test usable internal capacity with the real accessory set, not a paper estimate, because hem, seams, and closure reduce internal space.
- Lock fabric as finished cotton GSM, weave type, color, and whether recycled or conventional cotton is required.
- Ask if GSM refers to finished fabric weight; do not accept an unlabeled 'cotton pouch' quote without GSM.
- Define acceptable dimensional tolerance, such as ±5 mm for smaller pouches or ±10 mm for larger builds, before sampling.
- State logo method, print area in mm, artwork color count, placement from hem/seam, and whether both sides are decorated.
- Confirm the minimum line thickness and smallest text size the supplier will guarantee on cotton fabric.
- Approve a pre-production sample that uses the intended fabric, print method, and sewing construction rather than a substitute sample.
- Ask the supplier to quote the same spec across all options so size, fabric, print, and packing can be compared on equal terms.
Factory quote questions to send
- What exact fabric are you quoting: composition, finished GSM, weave type, color standard, and whether the weight is measured after finishing?
- What finished pouch dimensions are you quoting, what seam allowance is used, and what dimensional tolerance can you hold in bulk production?
- What usable internal size do you recommend for our actual accessory set, and have you allowed for reduced capacity after top hem and drawcord closure?
- Which print method do you recommend for this artwork on cotton, and what limits should we expect for line weight, small text, and edge sharpness?
- What print placement tolerance can you control from the top hem and side seam, and do you measure from the pouch centerline or the cut panel?
- What cord material and diameter are included in the quote, and are knots, cord color changes, or special cord ends extra cost items?
- What is your MOQ per size, color, and print version, and how does unit price change at 1000, 3000, and 5000 pieces?
- Can you break out sample fee, print screen/setup charges, unit price, packaging cost, and any labeling or barcode charges separately?
- What sample stages do you provide: blank sample, print strike-off, pre-production sample, and sealed approval sample?
- What is your standard stitch density or sewing standard for side seams and top hem, and where do you reinforce the drawcord tunnel?
Quality-control points to confirm
- Verify finished fabric GSM against the agreed spec and tolerance before cutting or at incoming inspection; do not rely only on the quote sheet.
- Measure finished pouch width and height laid flat using the agreed method, and record whether tolerance is within the approved range such as ±5 mm or ±10 mm.
- Check usable internal capacity with the actual accessory set because finished dimensions may pass while functional fit still fails.
- Inspect fabric shade consistency under consistent lighting against the sealed approval sample, especially if the order spans multiple dye lots.
- Review fabric surface for holes, oil marks, heavy slubs outside agreement, contamination, odor, and obvious weaving defects before sewing.
- Confirm side seams are straight, secure, and free of skipped stitches, loose threads, seam grin, or excessive puckering.
- Inspect the top hem and drawstring tunnel for clean folding, even width, secure back-tacking, and no raw-edge exposure where fraying can start.
- Test drawcord function by opening and closing repeatedly on sampled pieces; cord should move smoothly without binding, cutting the tunnel, or pulling out.
- Check cord diameter, material, color, and knot consistency against the approved sample; mixed cord lots should be flagged before packing.
- Measure logo placement from agreed reference points and confirm registration, ink coverage, edge quality, and readability at normal viewing distance.