Buying Problem: The Pouch Passes, Then the Carton Fails
Cotton drawstring pouches for craft fairs look simple on a sample table. A buyer checks the fabric color, pulls the cord once, glances at the logo, and the item seems ready. The problems usually arrive later, when the shipment reaches the warehouse or event team. Cartons may be too heavy for safe handling. Sizes may be mixed without labels. Retail packs may double the carton volume. A printed logo may be creased because the factory folded every pouch tightly through the artwork after approval.
Craft fair programs rarely serve one channel only. The same order might support booth operators, pop-up shops, gift stores, subscription boxes, local makers, distributor stock, and e-commerce picking. Each channel handles cartons differently. A distributor may want clean 100-piece bundles by SKU. A museum shop may need individual barcode labels. A regional event manager may ask for cartons pre-allocated by booth number. If those needs are left out of the RFQ, the lowest unit price can turn into the highest landed cost.
The stronger approach is to quote the pouch and the carton packing plan together. Fabric GSM, pouch size, print method, folding style, inner bundle count, export carton quantity, carton dimensions, net weight, gross weight, CBM, and carton marks should be compared in one view. A supplier that cannot provide carton data before production may also struggle to control mixed-SKU packing at the end of the order.
- Treat carton quantity, carton dimensions, gross weight, and carton marks as RFQ terms, not warehouse afterthoughts.
- Separate bulk replenishment, retail-ready packing, e-commerce packing, and event-kit allocation before requesting final prices.
- Use one approved packing plan per pouch size, fabric GSM, print version, and packing style.
- Require SKU names on bundle labels and carton labels to match the buyer purchase order, not only the factory item code.
- Compare suppliers by delivered cost, receiving effort, and packing accuracy as well as unit price.
Start With Finished Size and Usable Size
A reliable carton packing plan starts with a reliable pouch definition. Size language causes many avoidable disputes. One factory may quote cutting size before sewing. Another may quote finished flat outside size. The buyer may be thinking about usable inner size. Those measurements are not interchangeable. A 10 x 15 cm drawstring pouch will not comfortably hold a rigid 10 x 15 cm card because the side seams, bottom seam, drawstring channel, and closure shape take space away from the inside.
Give the supplier the item that will go into the pouch, or at least its dimensions and approximate filled weight. A flat jewelry card needs side clearance so the corners do not catch. A soap bar needs thickness allowance. A candle tin may need a wider opening so booth staff can insert it quickly. Ceramic ornaments, small tools, and multi-piece kits may need a larger pouch or a gusset instead of a flat pouch stretched beyond its natural shape.
A small drawing prevents a long argument later. Show finished width, finished height, usable inner width, usable inner height, channel height, seam allowance, opening width, and print area. If the pouch must hang on a peg, fit in a display bin, sit inside a mailer, or be prepacked into an event kit, include that too. Carton planning becomes much more accurate when the supplier knows whether pouches will ship flat, folded, tied, open, individually packed, or already kitted.
- State finished flat size and usable inner size in centimeters or inches with tolerances.
- Use typical tolerance targets of +/-5 mm for small pouches and +/-8 mm for larger pouches unless product fit requires tighter control.
- Provide product dimensions, thickness, and approximate filled weight for fit evaluation.
- Clarify whether a gusset is needed for bulky items such as tins, ornaments, candles, or multi-piece kits.
- Confirm whether pouches ship flat, folded, tied, open, individually packed, or inserted into event kits.
- Ask the supplier to mark the size basis on the quote: cutting size, finished size, or usable inner size.
Choose Cotton Fabric by GSM, Not by Vague Names
Fabric GSM is both a quality decision and a freight decision. Terms like muslin, calico, natural cotton, and canvas are too loose for B2B procurement. A 140 GSM cotton pouch and a 240 GSM canvas pouch can both be described as natural cotton drawstring pouches, yet they will feel different, print differently, weigh differently, and fill cartons differently. The RFQ should request composition, weave, finish, color, GSM range, and GSM tolerance.
For lightweight craft goods, 5 oz to 6 oz cotton, roughly 140 to 170 GSM, is often practical. It folds compactly, helps keep carton weight lower, and suits jewelry cards, stickers, seed packets, favors, soaps, ornaments, and small stationery. For premium reusable packaging or heavier contents, 7 oz to 8 oz cotton canvas, roughly 200 to 240 GSM, gives more structure and a stronger retail feel. The tradeoff is predictable: higher unit cost, more carton weight, more cube, and sometimes a stiffer drawstring closure.
Natural cotton can support a handmade look, but buyers should define what handmade means. Seed specks, light slubs, wrinkles, and slight shade variation may work for rustic craft branding. The same features may be unacceptable for cosmetics, museum stores, or higher-value gift kits. Bleached or dyed cotton can look cleaner, but it adds color approval and dye-lot risk. If the pouch will be washed, steamed, ironed, or heat processed before packing, ask about shrinkage because it can change both fit and print placement.
- Specify fabric as composition, weave, color, finish, GSM, and GSM tolerance instead of using only a fabric name.
- Use 140 to 170 GSM for lightweight goods where low cube and soft handfeel matter.
- Use 200 to 240 GSM canvas for premium reusable packaging or heavier craft contents.
- Request an approved swatch and define whether shade variation, seed specks, and slubs are acceptable.
- Ask for shrinkage data or a clear shrinkage warning if the pouch will be washed, steamed, ironed, or heat processed.
- Recalculate carton quantity and gross weight when changing from 6 oz cotton to 8 oz canvas.
Specify the Cord, Channel, and Sewing Before Price Approval
The drawstring is not a decorative extra. It is the moving part of the pouch. Cord material, cord diameter, channel height, stitching, knot type, and cord-end treatment affect how the pouch feels, how quickly it closes, and how well it survives handling. A cord that is too thick drags inside a narrow channel. A cord that is too thin can look cheap, cut into the fabric, or slip back into the channel. Flat cotton tape can look more premium, but it needs enough channel width to move without twisting.
Sewing details belong in the quote and the sample record. Ask for seam construction, stitch density, thread color, channel construction, bottom-corner reinforcement, and loose-thread trimming standard. Small pouches carrying light items may not need heavy reinforcement. Pouches for candles, ceramics, tools, or multi-piece kits deserve closer attention at the bottom corners and channel opening, where stress often shows first.
These choices also affect carton packing. Long cords can tangle when hundreds of pouches are packed in bulk. Bulky knots make bundles uneven and create pressure marks. Loose threads inside the pouch can catch on jewelry cards, product inserts, or small hardware. For retail-ready packing, the cord knots and hang tags must sit where they do not hide the logo, deform the opening, or make individual packs too thick for the carton plan.
- Define cord as cotton cord, braided cord, or flat tape with diameter or width and target length.
- Specify channel height and confirm the cord moves smoothly without dragging, twisting, or retracting.
- Set seam construction, stitch density, thread color, and bottom-corner reinforcement requirements.
- Check repeated opening and closing, then pull both cord ends firmly to test the channel and knot security.
- Require trimming of loose threads inside and outside the pouch before packing.
- Approve knot position and cord arrangement in the final folded bundle or retail pack.
Control Print Method, Placement, and Artwork Limits
Screen printing is a common choice for cotton drawstring pouches because it works well for one to three color logos, line art, icons, and simple brand marks. It can be efficient and repeatable, but cotton texture matters. Fine lines, small type, tight spacing, and large solid ink areas do not behave the same on 140 GSM cotton as they do on 240 GSM canvas. A PDF proof confirms layout; it does not confirm production quality. For bulk approval, buyers should review a real strike-off on the selected fabric.
Heat transfer and digital print may fit multi-color artwork, gradients, short seasonal runs, or artist collaboration pouches. They bring different risks. Transfers can feel stiff, crack on sharp folds, or show visible edges. Digital print may need pretreatment and tighter color management. If the pouch will be folded through the print area, bundled tightly, or handled repeatedly at craft fairs, inspect the print after folding and rubbing, not only while it lies flat and fresh.
Print position should be measured from fixed pouch edges while the pouch is laid flat and untied. Artwork placed too close to the drawstring channel will wrinkle when the pouch closes. Artwork too near the bottom seam may distort when filled. For small pouches, a placement tolerance around +/-3 mm may be practical when the process supports it; larger pouches or rougher fabric may require a wider agreed tolerance. The important point is simple: define the tolerance before mass production.
- Approve a printed strike-off on the same fabric, GSM, color, and print method planned for bulk production.
- State artwork size, print position, color references, print area, and placement tolerance in the purchase order.
- Ask the factory to flag minimum line thickness, minimum text height, and small gaps that may fill in on cotton.
- Confirm whether dark fabric needs a white underbase and whether that cost is included.
- Test dry rub and light wet rub on printed samples before approving mass production.
- Approve fold direction and bundle orientation for large prints to reduce cracking, blocking, or hard creases.
Plan MOQ Around Mixed Craft Fair SKUs
Craft fair buyers often need variety. One program may include several pouch sizes, multiple logos, seasonal artwork, and different packing styles. Factory MOQ is usually driven by fabric purchase, cutting setup, print setup, sewing efficiency, cord preparation, labeling, and packing complexity. A supplier may accept 1,000 pieces total, but that does not mean it can efficiently produce 100 pieces each across ten print versions, especially if each version needs separate screens, labels, and carton control.
One practical way to reduce MOQ pressure is to standardize the pouch body. Several products can share one natural cotton base size while the buyer varies the screen print, sticker, hang tag, or belly band. Another option is to buy blank pouches in larger quantities and decorate locally for very small events, although that moves print QC and scheduling responsibility to the buyer. For repeat programs, a narrow core size range is usually easier to reorder and inspect than too many one-off sizes.
The RFQ should split MOQ by size, fabric color, artwork, print color count, and packing method. Mixed cartons should be treated as a separate labor and control issue. Packing 20 SKUs into assortment cartons is not the same as packing full cartons by one SKU. If cartons need to be allocated by booth, store, region, or sales rep, the allocation matrix must be final before packing begins.
- Ask for MOQ by pouch size, fabric color, artwork version, print color count, and packing style.
- Expect the lowest MOQ from stock natural cotton, standard cord, standard size, and one print design.
- Plan screen setup charges per artwork and per color, even when sewing MOQ is low.
- Reduce SKU complexity by standardizing pouch bodies and varying paper accessories where possible.
- Confirm whether mixed cartons are allowed and what extra labeling or packing labor applies.
- Freeze event allocation data before packing starts to avoid rework and shipment delay.
Build a Bulk Carton Plan for Distributor Stock
Bulk packing is usually the efficient choice for importers, distributors, and buyers replenishing craft fair teams. Pouches are counted into fixed inner bundles, placed in a master polybag or carton liner, and packed into export cartons by SKU. The inner bundle count should be specified. It affects counting speed, crease risk, inspection sampling, and receiving accuracy. Small pouches may work well in 50-piece or 100-piece bundles. Larger canvas pouches may need smaller bundles to avoid compression marks and keep cartons manageable.
Carton planning needs both cube and weight. Many buyers prefer handling-friendly cartons in a gross weight range such as 12 to 18 kg, but the right maximum depends on the warehouse, destination market, and carrier rules. Lightweight pouches may reach carton-size limits before weight limits. Heavy canvas pouches may hit weight limits before the carton looks full. Ask the supplier to quote pieces per carton, carton dimensions, net weight, gross weight, and CBM per 1,000 pieces for each pouch size and fabric GSM.
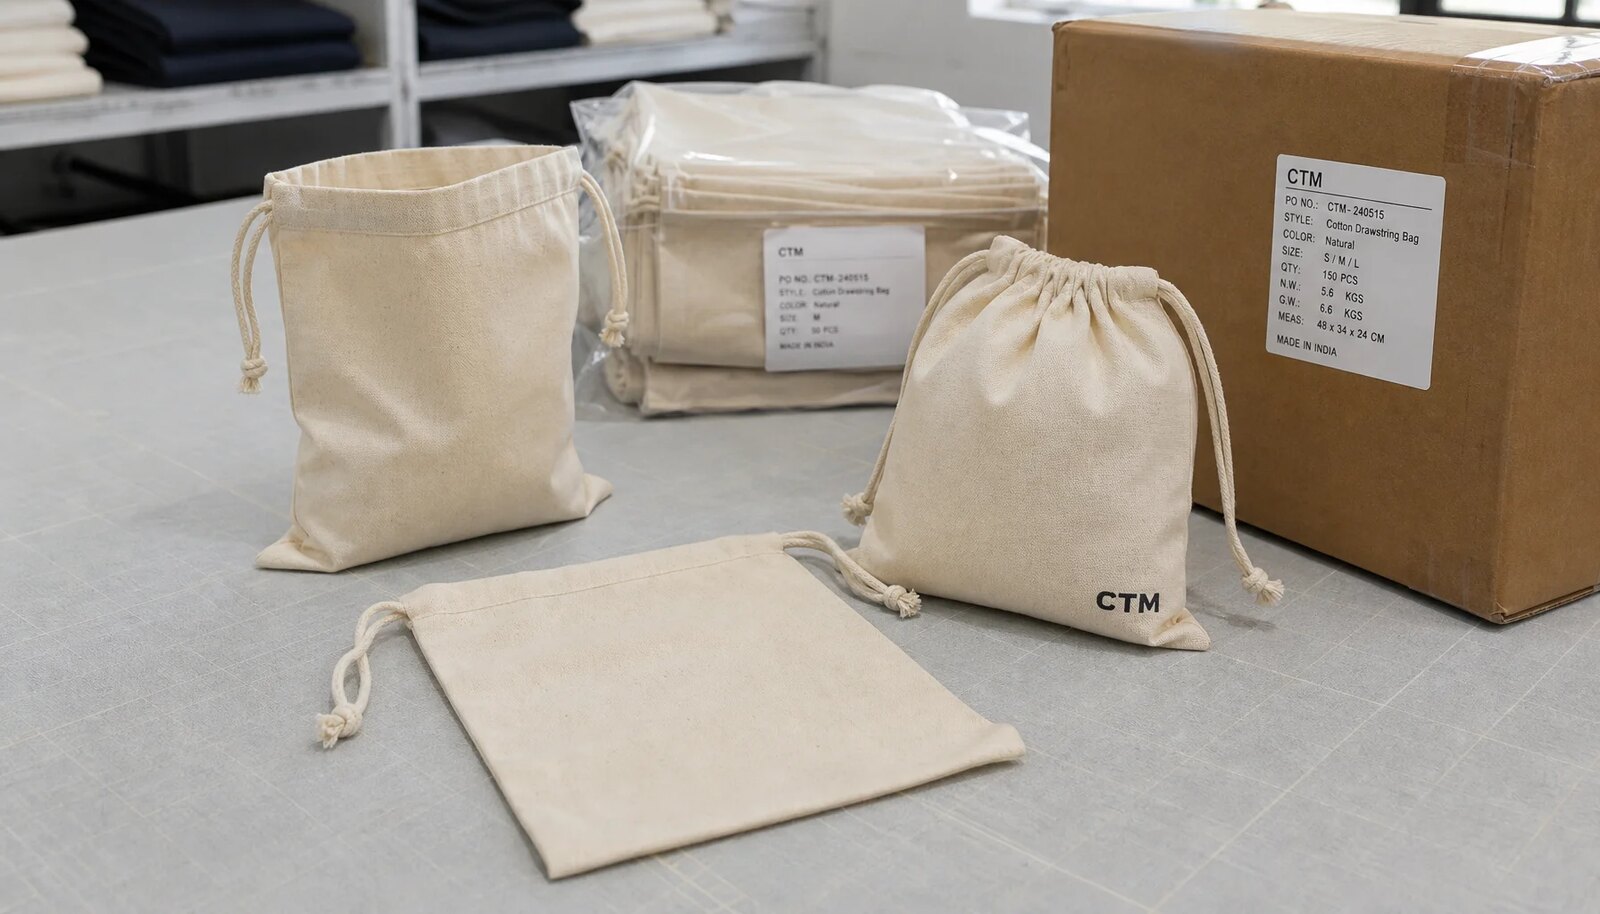
Bulk packing also needs clean identification. Inner bundle labels should show SKU, size, fabric color, print version, and quantity. Export cartons should show purchase order number, buyer item code, item description, carton number, total cartons, quantity, net weight, gross weight, and destination marks if required. If the carton is mixed, the label should clearly say mixed and connect to a SKU-level packing list.
- Use fixed inner bundle quantities such as 50 pieces or 100 pieces by size and GSM.
- Avoid random loose packing unless the pouches are low-risk blanks and the counting method is agreed.
- Set a maximum carton gross weight before the supplier calculates pieces per carton.
- Request carton dimensions, net weight, gross weight, and CBM per 1,000 pieces in the quote.
- Use double-wall cartons or stronger board for heavy canvas, LCL shipments, or repeated handling.
- Require inner bundle labels and master carton marks that match the buyer SKU names.
Add Retail-Ready and Event-Kit Requirements Early
Retail-ready packing solves a different problem than bulk replenishment. If pouches ship directly to gift shops, museum stores, consignment counters, e-commerce pick stations, subscription boxes, or prebuilt craft fair kits, each pouch may need a barcode, hang tag, belly band, size sticker, individual bag, or price label. This can save downstream labor, but it adds factory labor, packing material cost, inspection points, carton cube, and moisture risk.
Sample the retail pack in its final form. A belly band can cover the logo or compress the drawstring knot. A hang tag can tangle with cords inside a bundle. A barcode label can fail to scan if placed on wrinkled film or printed at low resolution. Individual polybags or glassine bags can trap moisture or odor if cotton is sealed too soon after printing, steaming, or ironing. These problems are easy to miss when approval is based only on a flat pouch sample.
Event-kit packing requires even tighter discipline. If cartons are allocated by booth, region, store, or sales rep, the buyer should provide a final allocation sheet before packing starts. Each carton should reference the allocation code and packing list. Late changes lead to rework, mis-picks, and shipment delays. When allocation data is not final, it may be safer to ship full cartons by SKU and allocate locally after receiving.
- Define barcode type, data source, label size, label position, and scan-quality expectation.
- Approve final folded shape, logo orientation, hang tag location, belly-band placement, and individual pack material.
- Recalculate carton quantity and CBM after adding individual bags, cards, bands, stickers, or hang tags.
- Check that retail packing does not trap moisture, flatten cords, scuff prints, or hide the logo.
- Provide final event allocation data before packing starts and freeze it after approval.
- Require carton labels that show allocation code, SKU contents, quantity, carton number, and total cartons.
Control Mixed Cartons, Pallets, and Carton Marks
Mixed cartons can reduce downstream sorting when craft fair assortments include many small SKUs. They only help, however, when they follow a buyer-approved matrix. A mixed carton should not contain leftover quantities selected by the packing team. It should follow a table showing SKU, size, fabric color, print version, quantity, and inner bundle count. Every bundle should be labeled, and the export carton should carry a mixed-carton mark that links to the packing list.
Pallet planning should be reviewed before production cartons are finalized. Cartons that are too large can crush under stacking even when the contents are light. Cartons that are too small and heavy can create unstable pallet loads. Ask for carton dimensions early enough to check pallet height, pallet weight, warehouse receiving rules, and freight forwarder preferences. This matters for LCL shipments, cross-docking, and regional redistribution.
Carton marks should help receiving staff, not only satisfy export paperwork. Clear marks reduce carton opening, shortage claims, and event delays. A standard mark may include PO number, buyer item number, supplier item number if needed, description, size, color, print version, quantity, carton number, total cartons, gross weight, net weight, and country of origin if required. If barcoded carton labels are needed, confirm file format, label size, resolution, placement, and scan verification.
- Use mixed cartons only with a SKU-level matrix approved before bulk packing starts.
- Label every inner bundle with SKU, size, color, print version, and quantity.
- Number cartons sequentially and make carton numbers match the final packing list.
- Review carton dimensions against pallet size, pallet height, weight limits, and warehouse rules.
- Specify whether carton marks are printed directly, applied as labels, or both.
- Ask for inspection photos of carton marks, inner bundles, mixed contents, and pallet arrangement if applicable.
Approve Samples and Lock Production Controls
Sampling should separate concept approval from production approval. An early sample can confirm approximate size, handfeel, and product fit, even if it is made from available fabric. A pre-production sample should use the confirmed bulk fabric, GSM, color, cord, stitching, print method, labels, folding method, inner bundle count, and carton packing method. If those differences are not documented, the buyer and supplier may believe different details were approved.
Craft fair calendars are usually fixed. Skipping the pre-production sample may save a few days, but it can create unusable goods, rushed repacking, or expensive air freight. A complete approval record should include measurement photos, fabric GSM, cord details, print color reference, print position, seam comments, loose-thread standard, folding method, packing material, bundle count, and carton layout. If approval happens by video, written measurements and photos should still be filed.
Run a small packing trial before mass packing. A pouch that looks clean individually may crease when 100 pieces are bundled. A transfer print may pass rub testing but block when stacked before full curing. Cotton cords may look fine on one sample and still tangle inside a bulk bundle. Ask for photos of the trial bundle, bundle label, carton layout, and carton marks before the factory packs the full order.
- Measure finished size, usable inner size, channel height, seam allowance, and print position on the sample.
- Confirm GSM with a supplier report or fabric reference, not only a descriptive fabric name.
- Open and close the drawstring repeatedly, then pull both cord ends to check function and strength.
- Rub the print with a dry white cloth and a lightly damp cloth to check basic transfer risk.
- Pack a trial bundle to check logo creasing, cord tangling, bundle thickness, and label placement.
- Record approved details in writing so production, inspection, and receiving teams use the same standard.
Specification comparison for buyers
| Spec decision | Recommended option | When it fits | Buyer risk to check |
|---|---|---|---|
| Lightweight craft goods | 5 oz to 6 oz cotton, about 140 to 170 GSM, with stated GSM tolerance such as +/-5% or buyer-approved range | Jewelry cards, soaps, seed packets, stickers, ornaments, favors, small stationery, and lightweight booth giveaways | Thin cloth can show contents, wrinkle heavily, or feel disposable; require actual GSM, fabric swatch approval, shrinkage expectation, and finished-size tolerance |
| Premium reusable packaging | 7 oz to 8 oz cotton canvas, about 200 to 240 GSM, with stronger seams and suitable cord diameter | Higher-value kits, cosmetics, small candles, ceramic accessories, reusable gift packaging, and retail shelf assortments | Heavier cloth raises gross weight and CBM; confirm carton quantity, drawstring friction, seam puckering, and whether cartons remain under the handling weight limit |
| Finished size definition | Finished flat outside size plus usable inner size after side seams, bottom seam, and drawstring channel | Orders where a soap bar, candle tin, jewelry card, or craft kit must fit without bending or distorting the pouch | Factories may quote cutting size instead of finished size; require a size drawing with channel height, seam allowance, usable height, and tolerance |
| Drawstring and channel | Cotton cord, braided cord, or flat cotton tape sized to channel width and pouch weight | Natural craft brands, eco-positioned gift packaging, maker-market merchandising, and reusable packaging programs | Cord can fray, retract into the channel, or pull unevenly; define cord diameter or tape width, cord length, knot style, tipping if any, and pull test |
| Logo printing | Direct screen print on approved bulk fabric for one to three color logos | Simple logos, line art, event icons, and repeat programs needing predictable unit cost | Small text may fill in and pale inks may fade visually on natural cotton; approve strike-off, print placement tolerance, ink color reference, and rub check |
| Complex artwork | Heat transfer or digital print when artwork has gradients, many colors, or short seasonal runs | Artist collaboration pouches, limited craft fair assortments, colorful event branding, and photo-like artwork | Transfers may feel stiff or crack when folded; digital print may need pretreatment; test adhesion, rub resistance, fold direction, and blocking risk |
| Bulk inner packing | Fixed-count inner bundles by SKU, size, fabric color, and print version, usually in a master polybag or carton liner | Importer stock, distributor replenishment, booth restocking, local tagging, and buyers allocating goods after arrival | Random mixing causes receiving disputes; require bundle labels, carton marks, SKU-level packing list, and carton count matching the PO |
| Retail-ready packing | One pouch per recyclable polybag, glassine bag, paper belly band, hang tag, barcode label, or size sticker as specified | Gift shops, museum stores, subscription boxes, e-commerce pick-and-pack, consignment counters, and event kits | Extra packing increases labor, cube, moisture risk, and inspection points; approve folded form, label placement, barcode scanability, and pieces per carton |
| Export carton specification | Single-wall carton for light pouches; double-wall or stronger board for heavy canvas, long transit, or repeated handling | Sea freight, LCL consolidation, domestic distribution, and programs where cartons may be stacked, cross-docked, or reopened | Cartons can crush, split, or become overweight; set max gross weight, carton dimensions, board strength, moisture protection, marks, and drop-test expectation |
Buyer checklist before sampling
- Define the pouch use case by product weight, product dimensions, retail display method, reuse expectation, and whether the pouch is primary presentation packaging or temporary transport packaging.
- Specify finished flat width and height, usable inner width and height, seam allowance, drawstring channel height, cord material, cord diameter or tape width, cord length, knot position, and closure direction.
- Choose fabric by GSM, construction, color, shrinkage, handfeel, opacity, and expected carton weight instead of accepting vague terms such as muslin, calico, natural cotton, or canvas without numeric data.
- State artwork size, file format, print colors, Pantone or physical color references, print method, print placement tolerance, and whether a strike-off on bulk fabric is mandatory before mass production.
- Separate packing requirements for distributor bulk stock, retail-ready gift shop delivery, e-commerce picking, subscription boxes, and pre-allocated craft fair event kits.
- Set maximum carton gross weight, target pieces per carton, carton board type, carton dimensions, inner bundle count, master polybag or liner requirement, and whether bundles need SKU labels.
- Request quote data in one comparable format: fabric GSM, finished size, usable size, print method, packing style, inner bundle quantity, carton quantity, carton size, net weight, gross weight, CBM, lead time, and payment terms.
- Approve a pre-production sample using the same fabric, cord, stitching, print, labels, folding method, inner bundle count, and carton packing method intended for bulk goods.
- Require sample checks for GSM, finished size, usable size, seam strength, cord pull, shrinkage, print rub, odor, moisture, folding marks, barcode scanability if used, and carton label accuracy.
- Build schedule buffer for artwork review, strike-off approval, fabric dyeing if used, barcode or belly-band printing, packing material sourcing, final inspection, carton correction, and freight booking.
Factory quote questions to send
- What exact fabric composition, weave, finish, color, and actual GSM range are included in the quotation, and what GSM tolerance will be accepted for bulk production?
- Is the quoted pouch size the cutting size, finished outside size, or usable inner size after side seams, bottom seam, drawstring channel, and top closure loss?
- What finished-size tolerance do you commit to for width, height, channel height, and print placement, and how will these points be measured during inspection?
- What seam construction, stitch density, thread color, channel construction, corner reinforcement, and loose-thread trimming standard are included in the unit price?
- What cord material, cord diameter or tape width, cord length, knot style, cord-end treatment, and pull-strength expectation are included?
- Which print method is included, what ink or transfer type is used, what maximum print area is included, and what extra cost applies for additional colors or larger print coverage?
- What is the MOQ by pouch size, fabric color, print design, print color count, packing style, and mixed-carton requirement?
- Can you provide a strike-off and pre-production sample using bulk fabric, bulk cord, actual stitching, final print, folding method, inner bundle count, and carton packing method?
- How many pouches are packed per inner bundle, master polybag or carton liner, and export carton for each pouch size, fabric GSM, and retail-pack option?
- What are the estimated carton dimensions, net weight, gross weight, and CBM per 1,000 pieces for each size and packing option?
Quality-control points to confirm
- Finished size should normally be controlled within +/-5 mm for small pouches and +/-8 mm for larger pouches unless the product fit requires a tighter buyer-approved tolerance.
- Usable inner size must be measured separately from finished outside size because the side seams, bottom seam, drawstring channel, and closure shape reduce usable space.
- Fabric GSM should be verified from a cut sample or supplier test report instead of estimated from descriptions such as light cotton, muslin, heavy cotton, calico, or canvas feel.
- Fabric appearance should be checked against the approved swatch for stains, oil marks, unacceptable slubs, shade variation, excessive cotton seed specks, uneven bleaching, and dye lot variation.
- Drawstring function should be tested by repeated opening and closing followed by a firm pull on both cord ends without channel tearing, seam distortion, knot slipping, cord breakage, or cord retraction.
- Seams should be checked for skipped stitches, open seams, broken thread, uneven topstitching, weak bottom corners, loose thread ends inside the pouch, and puckering near the channel.
- Print position should be measured from fixed pouch edges while the pouch is laid flat and untied, not judged only by visual appearance after the drawstring is closed.
- Ink adhesion should pass dry rub and light wet rub checks suitable for the print method, fabric color, and expected handling conditions.
- Large prints should be checked after folding, bundling, and short stacking because a logo can pass flat inspection but crease, block, or transfer when packed tightly.
- Retail-ready packs should be inspected for barcode scanability, label position, hang-tag attachment, belly-band tightness, pouch orientation, and whether packing materials trap moisture or hide the logo.