Why coffee roasters buy cotton drawstring pouches in the first place
For most coffee roasters, a cotton drawstring pouch is not primary food packaging. It is usually a secondary pack that holds a sealed coffee bag, gift set, sample kit, brewer accessory, or subscription item. That distinction matters because it changes the spec. You do not need to over-engineer barrier performance, but you do need a pouch that carries weight cleanly, presents the brand well, and survives retail handling without loose cords, skewed printing, or burst seams.
The buying mistake is to source these pouches like generic promo bags. Coffee brands often need a better hand feel, better logo presentation, and more consistent dimensions because the pouch sits close to a premium consumable product. A weak spec can save a few cents but create a shelf problem: the pouch slumps, the logo hides in the gathered top, or the coffee bag corners show through the fabric.
- Common uses: gift-with-purchase, holiday packs, cupping sample sets, merch bundles, subscription inserts
- Typical fill format: one retail coffee bag inside rather than loose beans directly in the pouch
- Main buying goal: balance presentation, freight efficiency, and unit cost
Start with the spec that affects cost fastest: size, fill weight, and fabric GSM
If your RFQ only says 'custom cotton drawstring pouch,' the quote spread will be wide and hard to compare. The fastest way to normalize supplier pricing is to lock three inputs first: finished size, intended contents, and fabric weight. A pouch for a 250 g coffee bag may work well in 140 to 200 GSM cotton. A pouch holding a 1 kg bag usually needs something closer to 270 to 340 GSM to avoid corner stress and a limp body.
For coffee roasters, pouch sizing should be based on the actual packed dimensions of the inner coffee bag, not the nominal coffee weight alone. A 500 g side-gusseted bag and a 500 g flat-bottom bag may need different pouch widths. Add enough clearance for insertion, but not so much that the pouch looks oversized and collapses awkwardly when cinched.
- Useful fabric reference: 140-200 GSM for promo use, 270-340 GSM for stronger retail presentation
- State size measured flat, for example 160 x 240 mm or 200 x 300 mm
- Clarify whether measurement includes the channel height
- Share photo or dimensions of the actual coffee bag to reduce fit disputes
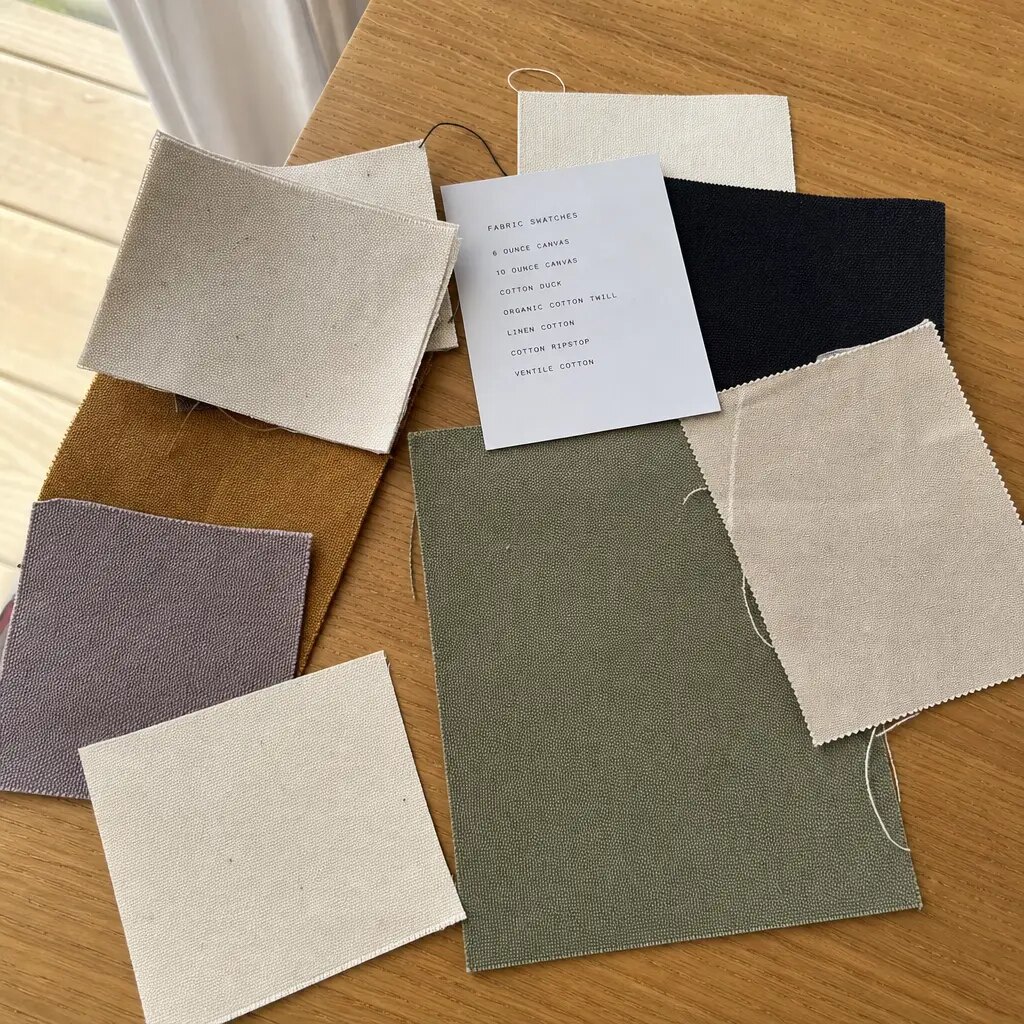
Choose the fabric type by brand position, not by the word canvas alone
Buyers often use 'cotton' and 'canvas' loosely, but the weave and weight change the result. Plain light cotton gives a softer, more casual pouch and a lower material cost. Heavier cotton canvas gives better structure, stronger corners, and a more premium feel for gifting. If your coffee line sits in specialty retail or curated subscription channels, heavier canvas often earns its cost because the pouch functions as a reusable brand object rather than disposable packaging.
Natural cotton also brings shade variation. If your branding needs a cleaner white base or strong color contrast, bleached or dyed fabric may be worth the extra cost. For natural cotton, small lot variation is normal, and buyers should not approve a bright-white digital artwork proof and then dispute the warmth of the actual cloth. The approved physical sample should define the acceptable look.
- Light cotton works for low-cost sampler kits and event promotions
- Heavier canvas suits premium roaster gift packs and reusable retail pouches
- Natural cotton shade can vary lot to lot; define if variation is acceptable
- Dyed fabric raises MOQ and lead time but can improve brand consistency
Printing decisions: logo clarity, ink durability, and placement above the drawstring chaos
For most coffee roaster pouches, simple screen printing is still the most practical print method. It handles one-color or two-color logos at good speed and reasonable cost, especially once order quantity moves beyond sample level. Heat transfer can work for small runs or detailed artwork, but it often creates a shinier patch and can feel less premium on natural cotton. Buyers comparing quotes should verify that all suppliers are pricing the same print process and color count.
Placement matters as much as the print process. The top area of a drawstring pouch gathers and folds, so the logo should sit below the channel seam. A centered logo with enough top margin remains visible when closed. If you place the artwork too high, the pouch can technically match the approved dimensions but still look wrong in use. That issue causes avoidable bulk disputes because the print may be centered on the flat panel but hidden when cinched.
- Screen print is usually the cleanest choice for simple coffee logos
- Use actual print size in mm on artwork approval, not only a visual mockup
- Keep logo below the channel seam so gathered fabric does not hide branding
- Request print opacity standard if using dark ink on natural cotton
MOQ logic: when stock materials save money and when custom details make sense
MOQ on cotton drawstring pouches is rarely one simple number. The pouch body may have one MOQ, the print another, and any custom dye, woven label, or special cord color another. This is why one supplier can look cheaper at first glance but become more expensive after the buyer adds the actual brand details. For trial orders or seasonal launches, stock natural fabric with standard cotton cord is usually the best route because it keeps MOQ practical and lowers sampling risk.
Custom dyed fabric starts making more sense when you need strong brand identity across multiple SKUs or repeat programs. The same applies to branded side labels or internal care labels. The commercial rule is simple: reserve low-volume orders for stock-supported components, and save custom material development for repeat volume where the setup cost is spread across enough pieces.
- Stock fabric usually shortens lead time and lowers MOQ pressure
- Custom dye adds cost, shade-approval steps, and often a higher minimum
- Separate the MOQ for pouch body, print colorway, and labels in every quote
- For mixed SKU orders, ask whether sizes can combine toward one fabric MOQ
What a pre-production sample must prove before you release bulk
A useful sample is not just a visual approval. It should prove the production route. That means the sample should use the actual fabric weight, actual cord, actual print method, and intended seam finish. Many sample problems come from development shortcuts: a supplier makes the sample in similar cloth, uses digital print instead of screen print, or approximates the final cord. The buyer approves the look, but the bulk goods feel different and the quote argument starts later.
For coffee roaster pouches, the sample should also be tested with the real inner coffee bag. Insert the bag, cinch the cord, and check how the pouch stands, folds, and displays. If this is a gift set or subscription insert, evaluate how it sits in the outer carton or mailer. A pouch can look fine empty and still fail in the live packing workflow.
- Approve against a physical sample, not only a PDF or 3D mockup
- Put the actual retail coffee bag into the pouch during sample review
- Review logo visibility in both open and cinched positions
- Record approved dimensions, fabric weight, and cord style on the sample sign-off
Sewing and QC thresholds that prevent the most common pouch complaints
The simplest pouch still has several failure points. The lower corners take the highest load. The channel opening can tear if back-tacking is weak. Cords can snag if the channel is too tight or seam allowance drifts. None of these issues are dramatic in an empty sample, but they show up quickly once the coffee pack is inserted and the pouch goes through filling, retail handling, or e-commerce packing.
A good QC plan should focus on what the pouch must do, not only how it looks on a table. Procurement teams should define acceptable tolerances for size, print position, seam security, and drawstring operation. If you leave these standards vague, the factory may inspect visually while your warehouse or merchandising team judges functionality.
- Size tolerance should be defined on width and height measured flat
- Print position should be measured from top seam and side seam reference points
- Drawstring should open and close smoothly without bunching or trapped stitching
- Corner seams and channel ends need secure back-tack or equivalent reinforcement
- Loose threads may be minor visually but can signal inconsistent sewing control
Packing details affect landed cost more than many buyers expect
Cotton drawstring pouches are light, but packing style still changes freight efficiency, receiving time, and damage risk. If the factory packs them flat in counted bundles, your inbound team can verify quantity faster and your freight cube stays tighter. If the pouches are mixed loosely inside cartons, counting errors and handling time go up. Individual polybags may protect against dust, but many brands now prefer bulk bundle packing to reduce packaging waste and avoid paying for unnecessary material.
Carton planning matters especially when the pouches are paired with coffee products at a co-packer or fulfillment center. Procurement should request pieces per bundle, bundles per carton, carton dimensions, and gross weight. This helps compare suppliers on total landed cost, not only unit ex-factory price. An apparently cheaper pouch can become less attractive if poor carton efficiency increases freight cost per piece.
- Flat bundle packing usually gives better count control than loose fill cartons
- Request carton size and gross weight before PO approval
- Avoid oversized cartons that crush easily or exceed warehouse handling preference
- If individual polybagging is required, state poly thickness and warning-label rules
Lead time planning: where drawstring pouch schedules usually slip
On simple cotton pouches, buyers often assume production is quick and low risk. In reality, the schedule can slip at fabric allocation, print approval, and final packing. Stock natural fabric can move fast, but custom dye, non-standard cord color, or revised logo placement can add approval cycles. If the pouch is part of a seasonal coffee launch, missing the launch week usually costs more than the pouch itself, so schedule realism matters more than an optimistic quote.
The safest timeline separates development from bulk clearly. First comes artwork confirmation, then pre-production sample approval, then bulk cutting and printing, then sewing and final inspection. If the supplier promises an unusually short lead time, find out which step they are compressing. A fast quote is only useful if it still allows proper print curing, sample sign-off, and carton marking control.
- Stock fabric usually reduces schedule risk compared with custom dye runs
- Pre-production sample approval should be locked before bulk cutting when logo placement is critical
- Lead time should include printing, sewing, inspection, and export packing
- Ask whether the quoted lead time starts from deposit, artwork approval, or sample approval
How to compare quotes without being fooled by a lower piece price
A lower unit price only means something if the suppliers are quoting the same construction, fabric, print, and packing. For coffee roaster pouches, the hidden quote differences usually sit in GSM, cord quality, print process, size tolerance, and export packing assumptions. One supplier may quote 140 GSM cotton while another prices 270 GSM canvas. On paper both are 'cotton drawstring pouches,' but the products are not equivalent.
The commercial comparison should include ex-factory price, sample charge, tooling or screen cost, carton efficiency, defect allowance, and expected reorder consistency. If this is a recurring SKU, stable repeat quality is worth paying for. If it is a one-time event item, lower-cost stock options may be acceptable. The right answer depends on the buying purpose, not only the quote line total.
- Normalize quotes to the same size, GSM, print color count, and packing detail
- Break out one-time costs such as screens, labels, and development samples
- Evaluate freight impact using carton dimensions, not only pieces per carton
- Consider reorder risk if the item will become part of a long-term coffee gifting program
Specification comparison for buyers
| Spec decision | Recommended option | When it fits | Buyer risk to check |
|---|---|---|---|
| Fabric weight for retail coffee pouch | 8 oz to 10 oz cotton canvas, about 270 to 340 GSM | Best for 250 g to 1 kg coffee packs when the pouch must hold shape and feel gift-worthy | Too light a fabric can sag, twist at the drawstring channel, and make prints look cheap |
| Fabric choice for low-cost promo pouch | 4 oz to 6 oz plain cotton, about 140 to 200 GSM | Fits giveaway packs, sampler sets, and short-life promotional use | Thin fabric may show coffee bag edges, distort printing, and have higher seam stress |
| Closure style | Double drawstring with knot-finished cotton cord | Preferred for retail presentation and smoother opening/closing at shelf and unboxing stage | Single-side pull can look budget and may not close evenly if channel width is inconsistent |
| Print method | Silk screen for simple 1-2 color logos; heat transfer only for small test runs or photo artwork | Screen print works for most coffee roaster branding with repeat bulk orders | Heat transfer can crack or feel plasticky; poor curing on screen print can rub off on light fabric |
| Logo position | Centered front print 20 to 30 mm below channel seam | Reduces distortion from gathered top area and keeps branding visible when pouch is cinched | Artwork placed too high disappears into folds and causes approval disputes after bulk |
| Inner construction | Unlined body with clean overlock inside seam or French seam for premium runs | Unlined works for coffee bags placed inside; lining only needed if brand wants thicker luxury feel | Unnecessary lining raises cost, material waste, and sewing time without improving coffee protection |
| MOQ route | Use stock fabric and standard cord color for 1,000 to 3,000 pcs; go custom-dyed above that | Balances unit cost and color consistency for most import trials and seasonal launches | Custom dye on low volume creates shade risk and surcharge that is hard to recover at retail |
| Packing method | Flat packed in PE master poly by bundle count, then export carton with size label | Best for freight efficiency and receiving control at warehouse or co-packer | Loose mixed packing slows inbound counting and can create carton count disputes |
| Sampling route | Digital artwork proof plus one pre-production sample in production fabric and print method | Best for avoiding surprises on hand feel, cord thickness, print scale, and seam finish | Approval based only on a mockup or wrong fabric sample often leads to bulk rejection arguments |
Buyer checklist before sampling
- State finished pouch size as width x height measured flat, and clarify whether size includes the drawstring channel.
- Specify fabric type and target weight in GSM or oz, not only 'cotton' or 'canvas'.
- Define intended coffee use: outer gift pouch for retail bag, sampler pouch, subscription pack, or merch item.
- List load expectation such as 250 g, 500 g, or 1 kg coffee bag placed inside, so seam strength and fabric choice match use.
- Choose closure style: single drawstring, double drawstring, self-fabric tie, or cotton cord with knot finish.
- State print method preference or let supplier quote alternatives for the exact artwork and order quantity.
- Provide artwork size and placement from top seam and side seams to avoid print shift disputes.
- Clarify whether natural cotton shade is acceptable or whether bleached white or dyed fabric is required.
- Set acceptable size tolerance, print position tolerance, and major defect standard before sampling.
- Request confirmation of inside seam finish: overlock, binding, or French seam for premium orders.
Factory quote questions to send
- What fabric options can you quote for this size pouch in 140, 200, 270, and 340 GSM cotton, and what is the unit cost difference at our target quantity?
- Is the quoted fabric stock greige, natural, bleached, or custom dyed, and what shade variation should we expect between lots?
- What cord material, cord diameter, and cord color are included in the base quote?
- Is the print price based on screen print, heat transfer, or digital process, and how many logo colors are included?
- What is the maximum printable area on this pouch size after allowing for the drawstring channel and side seam margins?
- What MOQ applies to the pouch body, the print colorway, and any custom label or woven tag separately?
- Can you provide one pre-production sample in bulk fabric and actual print method before mass production, and how is that sample charged?
- What are your standard tolerances for finished size, print position, fabric GSM, and carton quantity?
- How many pieces fit per export carton, what carton dimensions result, and what is the estimated gross weight per carton?
- What is your normal lead time for lab dip or color approval, sample making, bulk production, and final packing at our target order volume?
Quality-control points to confirm
- Measure finished width and height on at least 10 pcs per lot; keep tolerances aligned to approved sample and purchase order.
- Verify fabric weight against agreed GSM range; a lighter substitute is a common cost-down issue on simple pouches.
- Test drawstring movement on random samples; cords should slide smoothly without channel blockage or uneven cinch.
- Inspect seam security at lower corners and channel openings where stress is highest when filled.
- Check print position from top seam and side seam, not only visual centering; gathered fabric can hide placement drift.
- Rub test printed logos on light fabric to spot under-cured ink, powder residue, or color transfer.
- Confirm cord ends are heat cut, knotted, or folded as approved so they do not fray in retail handling.
- Open cartons by bundle to verify pack count accuracy; small pouches are often miscounted when bundled fast.
- Review carton markings, PO number, color, size, and quantity breakdown before container loading.
- Compare bulk product against approved pre-production sample for fabric hand feel, shade, print opacity, and stitch density.