Start With the Kit Contents
For tech startups, cotton drawstring pouches are rarely bought as standalone bags. They usually sit inside a launch kit, employee onboarding pack, investor gift, conference giveaway, retail accessory bundle, or subscription box. The pouch may be a small cost line, but it affects customer presentation, warehouse speed, carton volume, and landed cost. A pouch for one braided USB-C cable does not need the same size, fabric weight, or carton plan as a pouch holding a wall charger, adapter set, instruction card, and sticker sheet.
Before asking suppliers for pricing, build one physical kit stack exactly as it will be packed. Include cable ties, sleeves, compliance leaflets, cards, and any small extras that marketing may add later. Measure the width, height, and thickness of the bundle, then test how a person will insert it. A practical starting allowance for small tech accessories is 20-30 mm extra width and 30-50 mm extra height, but rigid chargers and adapters need more corner clearance. If the pouch is too tight, seams take stress, drawstrings do not close cleanly, and filled pouches create uneven cartons.
- Cable-only kits can use a flatter pouch with moderate width allowance.
- Chargers and adapters need corner clearance so hard plastic does not rub through cotton.
- Retail kits should look tidy after unboxing, not only survive transport.
- Employee kits should prioritize fast insertion, easy closure, and consistent counts.
Specify Cotton Weight Precisely
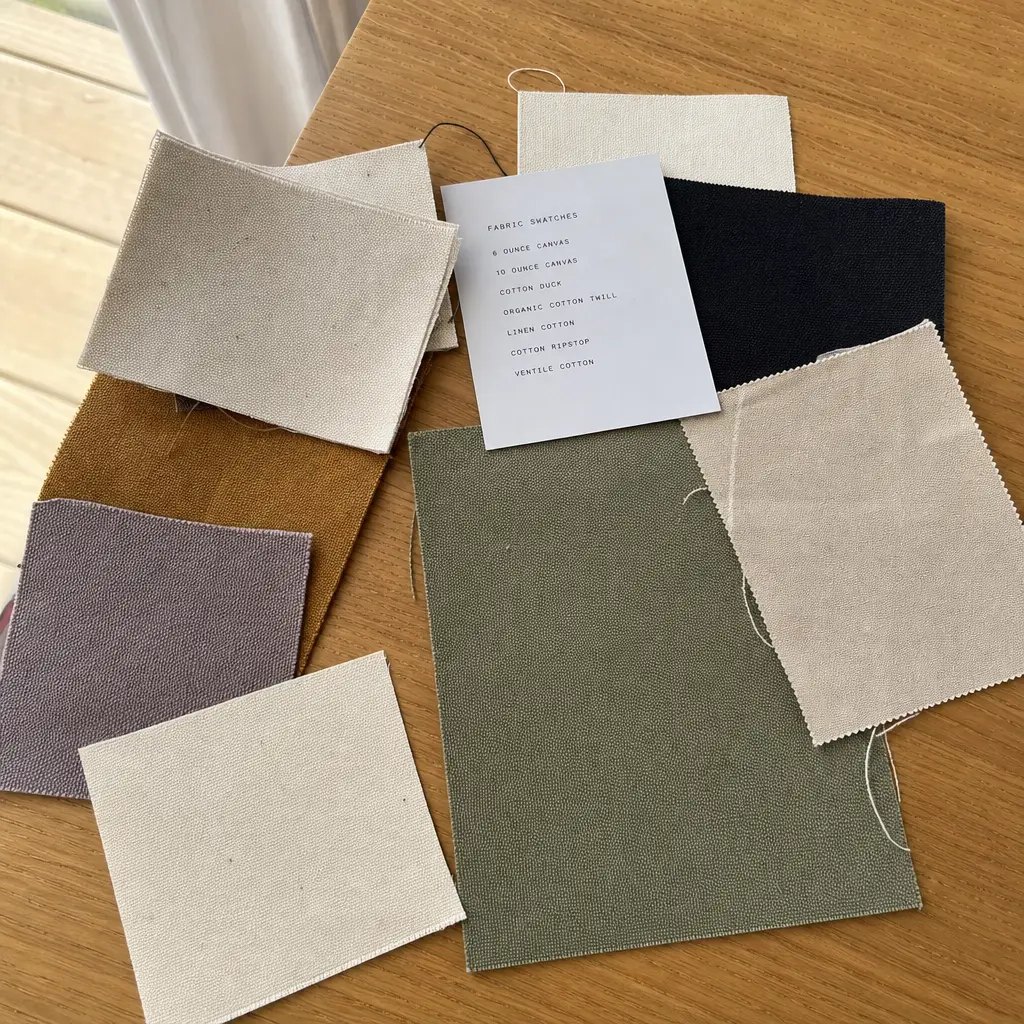
Cotton weight changes hand feel, print behavior, seam strength, carton cube, and freight cost. Avoid loose weight descriptions in RFQs. If the supplier quotes in ounces, ask whether it means ounces per square yard and request the GSM equivalent. As a useful reference, 6 oz/yd² is about 203 GSM and 8 oz/yd² is about 271 GSM. That does not mean every 6 oz pouch feels identical; weave, yarn, finishing, and washing still affect thickness and softness.
For most tech startup pouch programs, 6 oz cotton is a balanced specification for cables, earbuds, light adapters, and onboarding accessories. It feels more substantial than thin giveaway cotton while keeping carton efficiency reasonable. Move to 8 oz cotton when the pouch supports heavier chargers, premium retail positioning, or repeated reuse. Use 5 oz only when the pouch is a short-term giveaway and opacity is less important. Very heavy canvas can look premium, but it may be bulky for small drawstring pouches and can reduce pieces per carton.
- Quote 6 oz/yd² cotton as approximately 203 GSM to reduce sourcing ambiguity.
- Quote 8 oz/yd² cotton as approximately 271 GSM for heavier or premium pouches.
- Ask for a fabric swatch before approving color, opacity, and hand feel.
- Check natural cotton specks if the brand expects a clean white appearance.
Size the Pouch for Packing Speed
A procurement spec should define finished pouch dimensions, not only the approximate size. Finished size means the usable pouch after cutting, sewing, drawcord channel formation, and any washing or ironing. For small drawstring pouches, a few millimeters can affect insertion speed. A 160 x 220 mm pouch may look similar to a 150 x 210 mm pouch on a line drawing, but the smaller version may slow packing if a charger corner catches on the seam.
Test pouch size using the actual kitting process. Insert the accessory bundle ten or more times and check whether temporary warehouse staff could repeat the motion quickly. Then stack filled or folded samples as they will sit in the carton. Cord bulk often creates more carton volume than the fabric panel itself, especially when double drawstrings are used. A pouch size that is perfect for product fit can still fail commercially if it reduces carton quantity too much or creates unstable stacks.
- Define finished width and height with acceptable tolerance.
- Confirm whether the pouch ships empty, filled, folded, or flat.
- Measure the printable area after allowing for seams and drawcord channel.
- Test the largest kit version if one pouch size will serve multiple SKUs.
Choose Print and Folding Together
Logo printing is part of carton planning because ink curing, print placement, and folding direction affect defect risk. Screen printing is usually the practical choice for one to three solid colors on cotton drawstring pouches. It is easy to inspect, cost-effective at volume, and suitable for many startup logos, icons, and short taglines. Heat transfer can support gradients, small details, and complex multi-color artwork, but it may add a plastic hand feel and should be tested on the chosen cotton texture.
Fine QR codes, small app-store style text, and thin-line logos need caution. Cotton is not a coated label, so ink edges can spread slightly and fabric texture can break small details. Ask the factory to confirm minimum line thickness and printable area. If printed pouches are folded before ink is fully cured, ink can offset onto the next pouch in the inner polybag. The packing plan should define curing time, folding direction, and whether printed faces can touch each other.
- Use screen print for solid logos and predictable volume pricing.
- Use heat transfer only when artwork complexity justifies the feel and cost.
- Avoid placing artwork too close to seams or drawstring channels.
- Approve a folded printed sample, not only a flat artwork proof.
Use a Worked Carton Example
A useful carton packing plan gives real logistics data. The numbers below are only a sample model for buyer comparison; the factory should confirm final data with actual samples and a pilot carton. Assume an empty natural cotton pouch for a startup cable-and-adapter kit, finished size 160 x 220 mm, 6 oz/yd² cotton, one-color screen print, double cotton cord, folded once with the printed face protected inside the stack.
Sample packing plan: 50 pcs per inner polybag, 10 inner polybags per export carton, 500 pcs per carton. Example carton size is 50 x 40 x 35 cm. Net weight is about 16.0 kg if each finished pouch averages 32 g. Gross weight is about 17.5 kg after inner bags and 5-ply carton. CBM per carton is 0.070 using 0.50 x 0.40 x 0.35 m. For a 5,000 pc order, this plan creates 10 cartons, about 0.70 CBM total, with an estimated gross weight of 175 kg.
This example helps procurement challenge vague supplier quotes. If one supplier quotes 500 pcs per carton and another quotes 300 pcs per carton for the same pouch, the second option may increase freight and storage even if the unit price is slightly lower. If a supplier quotes 700 pcs per carton, ask for a pilot carton photo and compression check, because overpacking may crease print panels or split cartons.
- Sample pouch: 160 x 220 mm finished size, 6 oz/yd² cotton, one-color print.
- Sample inner packing: 50 pcs per polybag, counted and sealed.
- Sample export carton: 500 pcs, 50 x 40 x 35 cm, 0.070 CBM.
- Sample weight: 16.0 kg net weight and 17.5 kg gross weight per carton.
- Sample order model: 5,000 pcs equals 10 cartons and about 0.70 CBM.
Compare Landed Cost Scenarios
Unit price is only one part of the buying decision. A cheaper pouch can cost more after carton volume, packing labor, inspection time, receiving waste, and rework are included. Procurement should compare quotes using a simple landed-cost worksheet: unit price, setup charges, sample courier, inspection, pcs per carton, carton CBM, gross weight, shipping term, and destination handling. This is especially important for startups shipping launch kits under a fixed event deadline.
The biggest comparison gaps often come from inner packing. Individual polybags look organized but add labor, plastic, and carton volume when the buyer only needs empty pouches for a kitting center. Bulk inner bags of 50 or 100 pieces are usually more efficient for kit assembly. Filled pouches at origin can reduce local labor, but the carton plan must be tested with the actual contents because filled pouches may use two or three times the space of empty folded pouches.
- Compare cost per usable pouch after defect allowance, not only quoted unit price.
- Calculate freight using supplier carton dimensions and gross weight.
- Treat missing carton data as a commercial risk.
- Check whether quotes are EXW, FOB, FCA, CIF, or DDP before comparing.
- Include repacking cost if the supplier default packing does not fit warehouse needs.
Control MOQ and Lead Time
MOQ is driven by more than sewing capacity. Fabric roll minimums, dye-house batches, cord color, print screens, labels, and carton labels can all create separate minimums. Natural or bleached cotton with standard cord and one-color print usually has the simplest MOQ logic. Custom dyed fabric, matching drawcord, multiple artwork versions, and retail barcode packing can increase the real minimum even when the pouch construction is simple.
Lead time should be planned around approvals, not only production days. A practical sequence is to freeze kit contents, approve pouch size, approve fabric and cord, approve artwork at actual size, approve pre-production sample, confirm shipping marks, then approve pilot carton packing. Changes to charger size, leaflet count, or artwork after sample approval can alter pouch fit, carton quantity, and cost. For launch events, set approval deadlines in the PO so the schedule does not depend on loose email follow-up.
- Use stock natural cotton for pilot launches or small validation orders.
- Consolidate pouch size across SKUs when it does not hurt fit or presentation.
- List all artwork versions so print setup and carton segregation are clear.
- Confirm carton marks before cartons are printed or labeled.
- Schedule final inspection before shipment or balance payment where possible.
Inspect Product and Packing
Quality control should use measurable checks instead of broad phrases like good stitching or nice printing. For many small pouches, finished size tolerance of plus or minus 5 mm is workable; larger accessory bags may allow plus or minus 10 mm if agreed. Print position should be measured from a defined seam, centerline, or top reference. Cord length should be specified so the pouch closes fully without long tails that tangle during counting or kitting.
Inspection must cover packing accuracy as well as pouch quality. Product defects include open seams, skipped stitches, dirty marks, oil stains, wrong fabric, wrong cord, print smears, poor ink adhesion, and broken drawstrings. Packing defects include wrong inner counts, mixed artwork, unclear carton marks, crushed cartons, moisture damage, and packing list mismatches. Open cartons from different pallet positions or stack levels to check whether compression affects the printed panels or cord channels.
- Use AQL sampling when order quantity justifies formal inspection.
- Run dry rub, light scratch, and fold checks on printed areas.
- Recount inner polybags from several cartons during inspection.
- Check carton marks against PO, SKU, quantity, and destination requirements.
- Reject bulging or weak cartons before goods leave the factory.
Build a Clear RFQ
A strong RFQ makes the supplier price the same product and packing plan that procurement expects to receive. Include kit contents, target finished pouch size, fabric weight in oz/yd² and GSM, fabric color, cord style, drawstring side, print method, artwork size, order quantity, inner packing, carton marking, delivery term, destination, and approval schedule. If the final pouch size is not fixed, provide product dimensions and ask the supplier to recommend a size with a short rationale.
Separate mandatory requirements from optional upgrades. For example, the base request may be natural 6 oz/yd² cotton, one-color screen print, 50 pcs per inner bag, 500 pcs per carton, and FOB shipment. Optional lines may include 8 oz cotton, individual polybag, woven side label, custom dyed cord, or filled-pouch packing. This keeps quotes comparable while still giving brand, finance, and logistics teams clear trade-offs.
- Ask for pouch unit price, setup charges, sample cost, and courier cost separately.
- Request pcs per inner bag, pcs per carton, carton size, GW, NW, and CBM.
- Require a pilot carton approval for meaningful production orders.
- State barcode, retailer label, pallet, and shipping mark needs early.
- Ask suppliers to list exclusions such as testing, palletization, or special labels.
Specification comparison for buyers
| Packing scenario | Example packing basis | Commercial advantage | Buyer risk to check |
|---|---|---|---|
| Empty pouches for kitting center | 50 pcs per inner polybag, 500 pcs per 5-ply export carton | Low plastic use, easy receiving counts, efficient for warehouse kit assembly | Printed faces can crease if folded too tightly or packed before ink is fully cured |
| Empty premium pouches with heavier fabric | 25 or 50 pcs per inner polybag, 250-400 pcs per carton depending on cord bulk | Protects thicker 8 oz cotton and keeps carton weight manageable | Lower pcs/carton can increase CBM and reduce the value of a low unit price |
| Individual retail-ready pouches | 1 pc per clear bag or paper sleeve, then 100-200 pcs per carton | Useful for unit barcode labels, direct customer handling, and dust control | Higher labor, more packaging waste, slower unpacking, and larger carton volume |
| Filled tech kit pouches at origin | Filled pouch count set by pilot carton, often far fewer than flat pouches | Reduces buyer-side kitting labor and can support ready-to-ship launch packs | Hard accessories create pressure points, carton count changes quickly, and damage risk rises |
| Mixed SKU cartons | Separate inner bags by artwork or color with carton-level SKU marking | Allows several startup kit versions in one production run or shipment | Receiving errors increase if inner labels, carton marks, and packing list are not aligned |
| Palletized distributor shipment | Carton quantity set for stable pallet pattern and warehouse weight limits | Improves handling for 3PLs, retailers, and regional distribution centers | Oversized cartons may cube out pallets or fail distributor routing requirements |
Buyer checklist before sampling
- Freeze the actual kit contents before pouch sizing: cable, charger, adapter, card, sticker, sleeve, desiccant, and any leaflet.
- Define finished pouch size after sewing, with allowance for insertion and closure rather than only flat product dimensions.
- Specify fabric as oz per square yard and GSM where possible; for example, 6 oz/yd² is about 203 GSM and 8 oz/yd² is about 271 GSM.
- Approve logo size on the real pouch panel because seams, drawcord channel, shrinkage, and folding reduce usable print area.
- State whether pouches ship flat, folded, individually bagged, or bulk packed in counted inner polybags.
- Require pcs per inner bag, pcs per carton, carton dimensions, gross weight, net weight, and estimated CBM in the first quote.
- Set carton count using a pilot carton or sample carton, not only a theoretical supplier default.
- Confirm shipping marks, PO number, SKU, color, quantity, country of origin wording, barcode needs, and pallet instructions before packing.
- Use pre-shipment inspection that checks pouch defects, print accuracy, drawstring function, inner counts, carton marks, and carton condition.
- Keep a sealed golden sample showing fabric, cord, print color, pouch size, folding method, inner packing, and carton label format.
Factory quote questions to send
- What exact cotton fabric weight is quoted in oz per square yard and GSM, and is the fabric natural, bleached, dyed, washed, or recycled-content cotton?
- What are the finished pouch dimensions after sewing tolerance and after any washing, ironing, or finishing process?
- Which print method is quoted, what is the maximum printable area, and are screen, setup, artwork, or color-matching charges listed separately?
- What MOQ applies to fabric, pouch body, fabric color, cord color, print color, label, and carton marking, and which item drives the final MOQ?
- How many pieces are packed per inner polybag, how many pieces per export carton, and what are the carton dimensions in centimeters?
- What are the estimated gross weight, net weight, and CBM per carton, and are these based on a previous order or a pilot carton?
- Can the factory provide a sample carton photo or pilot carton approval before mass packing all goods?
- What lead time is required for material sourcing, sample approval, bulk cutting, sewing, printing, curing, final QC, and carton packing?
- Which tolerances are used for finished size, print position, print color, stitch defects, cord length, carton count, and carton weight?
- What information must the buyer provide for shipping marks, barcode labels, retailer routing labels, pallet pattern, and destination warehouse requirements?
Quality-control points to confirm
- Finished pouch size should normally stay within plus or minus 5 mm for small tech pouches and plus or minus 10 mm for larger accessory bags unless tighter tolerance is agreed.
- Fabric weight should match the approved swatch within a realistic commercial tolerance, and any substitution in cotton weight, weave, or finish should be approved before cutting.
- Logo print position should be measured from the pouch centerline, top seam, or side seam reference instead of judged only from factory photos.
- Ink adhesion should be checked by dry rub, light scratch, and folding around the printed area after curing.
- Drawstring channels must open smoothly without skipped stitches, trapped cords, broken stitches, or excessive loose threads near cord exits.
- Cord length should allow full closure without very long tails that tangle during kitting, warehouse counting, or retail display.
- Needle holes, dirty marks, oil stains, slubs, color variation, and uneven stitching should be graded against an agreed inspection standard before shipment.
- Inner polybag counts must match carton markings, with random recounts from several cartons during final inspection.
- Export cartons should not bulge, rattle excessively, collapse under stacking, show moisture damage, or exceed buyer warehouse handling limits.
- Carton marks and SKU labels should match the purchase order, packing list, commercial invoice, and distributor receiving requirements.