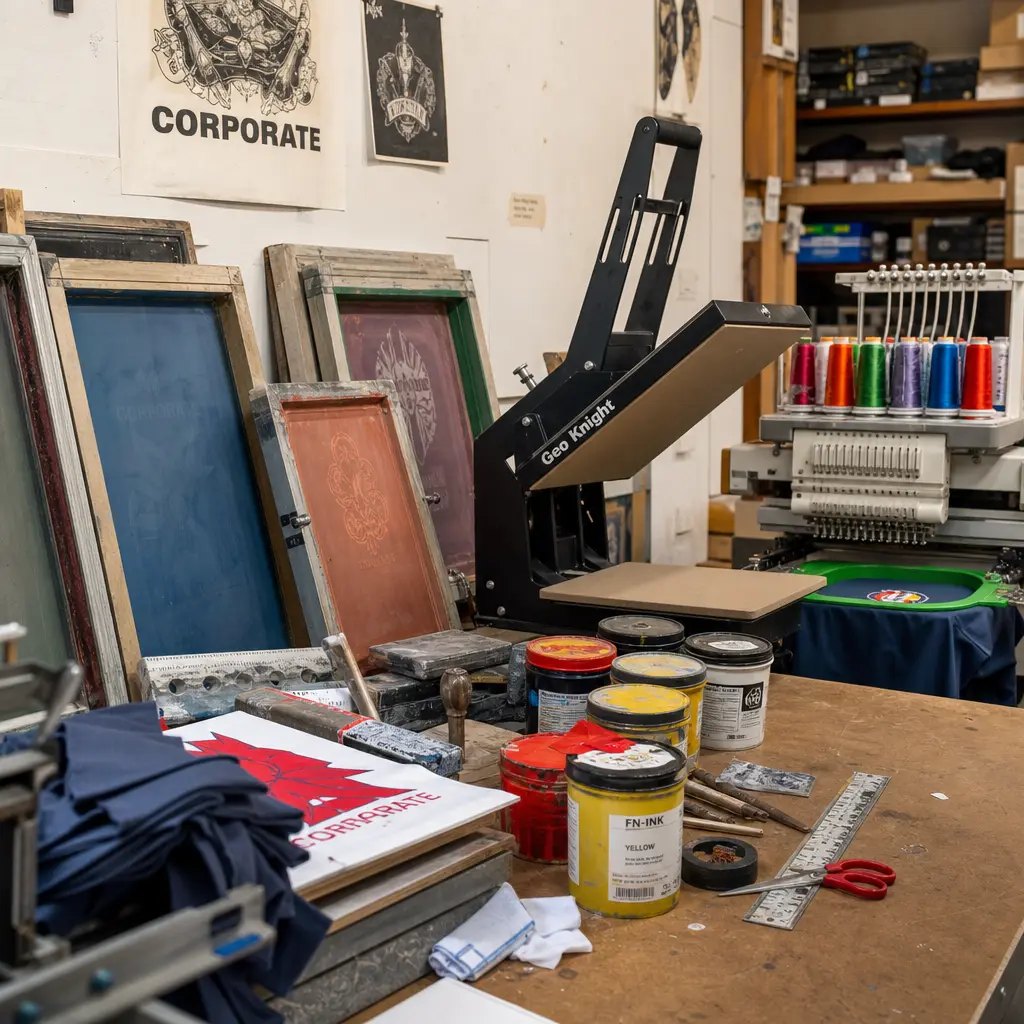
Why Salon Chains Need a Dedicated Print Proof Process
Salon chains order cotton drawstring pouches in bulk for retail product packaging, gift-with-purchase promotions, or subscription boxes. The pouch is often the first physical touchpoint a client has with the brand. A misaligned logo, off-color print, or faded ink after a few washes damages brand perception and creates returns or reorder friction.
A structured print proof process – from fabric selection through physical strike-off and wash testing – eliminates guesswork. It turns a subjective 'looks good' into measurable acceptance criteria. For procurement teams managing multiple SKUs or seasonal designs, a repeatable proof workflow reduces approval cycles and prevents costly reprints.
Salon pouches are often reused by clients, so print durability directly impacts brand recall. A single color mismatch can delay an entire production batch by 2–3 weeks. Standardizing proof steps across suppliers makes quote comparison more objective.
- Salon pouches are often reused by clients, so print durability directly impacts brand recall.
- A single color mismatch can delay an entire production batch by 2–3 weeks.
- Standardizing proof steps across suppliers makes quote comparison more objective.
Fabric GSM and Weave: The Foundation of Print Quality
Cotton drawstring pouches typically use 140–180 GSM fabric. Below 120 GSM, the fabric is too loose – ink bleeds through the weave, edges feather, and the print lacks crispness. Above 200 GSM, the pouch feels stiff and heavy, increasing shipping cost without adding value for salon use. Plain weave is standard for most print methods; twill weave has a diagonal texture that can distort fine details.
Before requesting a print proof, ask the factory for a fabric swatch of the exact GSM and weave they will use. Hold it up to light to check density. Run your fingernail across the surface – a smooth, tight weave holds screen-printed ink better than a loose, fuzzy one. Include the swatch reference in your PO so the proof is made on the same material.
For dark-colored pouches, verify that the fabric is pre-treated or scoured to improve ink adhesion. Avoid blended cotton-polyester unless you test print adhesion separately – ink behaves differently on synthetic fibers.
- Request a 10×10 cm fabric swatch cut from the same roll that will be used in production.
- For dark-colored pouches, verify that the fabric is pre-treated or scoured to improve ink adhesion.
- Avoid blended cotton-polyester unless you test print adhesion separately – ink behaves differently on synthetic fibers.
Print Method Comparison for Cotton Drawstring Pouches
Screen printing with water-based ink is the most common and cost-effective method for cotton drawstring pouches. It bonds with the fabric fibers, resulting in a soft hand feel and good wash durability. Plastisol ink sits on top of the fabric and can crack after repeated washing – avoid it if the pouch is meant to be reusable. Digital direct-to-garment (DTG) printing works for small runs with many colors but has lower opacity on dark fabrics and may fade faster.
For salon chains ordering 500–5,000 pieces per design, screen printing offers the best balance of cost, color accuracy, and durability. If your design includes fine text or gradients, request a sample printed with a 230-mesh screen (finer detail) versus a 110-mesh (bolder, more ink). The mesh count directly affects line sharpness and ink deposit.
Water-based ink: soft hand, good wash fastness, eco-friendly – preferred for cotton. Plastisol ink: more opaque on dark fabric but cracks over time – use only for short-life packaging. DTG: no screen setup cost, ideal for small batches (<200 pcs) but higher per-piece cost and lower durability. Always ask the factory for a printed sample on your exact fabric before committing to a method.
- Water-based ink: soft hand, good wash fastness, eco-friendly – preferred for cotton.
- Plastisol ink: more opaque on dark fabric but cracks over time – use only for short-life packaging.
- DTG: no screen setup cost, ideal for small batches (<200 pcs) but higher per-piece cost and lower durability.
- Always ask the factory for a printed sample on your exact fabric before committing to a method.
Color Matching: From Pantone to Physical Lab Dip
Brand colors are non-negotiable for salon chains. A Pantone TPX (paper) reference is the industry standard, but printing on cotton fabric changes the appearance – the same ink looks different on paper versus textured cotton. A lab dip (a small printed swatch on the actual fabric) is the only reliable way to approve color before production.
Specify the acceptable color tolerance in your PO. A ΔE (Delta E) value of 2.0 or less is typical for commercial print. Factories with spectrophotometers can provide a measurement report. If your brand color is very saturated (e.g., neon pink or deep purple), ask for a lab dip with two or three ink formulations – the factory may need to adjust the ink mix to match on cotton.
Always provide Pantone TPX numbers, not CMYK or RGB values – those are device-dependent. Request a lab dip on the exact fabric GSM and color (white, natural, or dyed). Keep the approved lab dip sealed in a plastic sleeve as the master reference for QC. If the factory cannot match within ΔE 2.0, ask for the closest achievable match and approve it in writing.
- Always provide Pantone TPX numbers, not CMYK or RGB values – those are device-dependent.
- Request a lab dip on the exact fabric GSM and color (white, natural, or dyed).
- Keep the approved lab dip sealed in a plastic sleeve as the master reference for QC.
- If the factory cannot match within ΔE 2.0, ask for the closest achievable match and approve it in writing.
Print Placement and Dimension Tolerances
A drawstring pouch has a top hem and a drawstring channel that takes up about 1.5–2 inches from the top edge. If the print is placed too high, it gets partially hidden by the drawstring knot or folds when the pouch is cinched. Too low, and the logo shifts downward when the pouch is filled. Standard placement is 2–3 inches below the top hem, centered horizontally.
Include a dimensioned diagram in your RFQ showing exact distances from the top hem and side seams. Specify tolerance – ±3 mm is achievable for most factories. Ask for a placement sample (a blank pouch with a marked grid) before the print proof. This avoids the common mistake of approving a digital mockup that looks centered but shifts in production.
Mark the drawstring channel area on the diagram so the printer knows the no-print zone. For pouches with a bottom gusset, ensure the print does not wrap into the gusset fold. If the pouch has a side seam, specify whether the print should be centered between the seams or offset.
- Mark the drawstring channel area on the diagram so the printer knows the no-print zone.
- For pouches with a bottom gusset, ensure the print does not wrap into the gusset fold.
- If the pouch has a side seam, specify whether the print should be centered between the seams or offset.
Proof Approval Workflow: Digital, Physical, and Pre-Production
A reliable proof process has three stages: digital mockup, physical strike-off, and pre-production sample (top-of-production). The digital mockup confirms layout and placement. The physical strike-off on actual fabric validates color, opacity, and texture. The pre-production sample is pulled from the first 50 pieces of the actual run and should match the approved strike-off.
Build proof cycles into your timeline. Each round adds 3–5 days. Standard practice is two rounds included in the price; additional rounds cost $50–$150 depending on the factory. For salon chains with multiple designs, batch the proof requests to save time. Require that the factory holds the approved physical strike-off until the order ships – it becomes the QC benchmark.
Digital mockup: confirm layout, font, and placement – do not approve color from a screen. Physical strike-off: approve color, opacity, and fabric interaction – keep as master sample. Pre-production sample: verify that production matches the strike-off – reject if any deviation. Include a clause that any reprint due to unapproved deviation from the strike-off is at factory cost.
- Digital mockup: confirm layout, font, and placement – do not approve color from a screen.
- Physical strike-off: approve color, opacity, and fabric interaction – keep as master sample.
- Pre-production sample: verify that production matches the strike-off – reject if any deviation.
- Include a clause that any reprint due to unapproved deviation from the strike-off is at factory cost.
Wash Testing and Print Durability for Reusable Pouches
Salon clients often reuse drawstring pouches for storage or travel. A print that fades, cracks, or transfers color after a few washes reflects poorly on the brand. The standard test is AATCC 61-2A, which simulates five home launderings. Request this test on a printed sample before approving bulk production.
If the factory does not have in-house wash testing, ask them to send a printed sample to a third-party lab (e.g., SGS, Intertek, or Bureau Veritas) at your cost – typically $50–$100 per test. Include the test report requirement in your PO. For pouches that will be washed frequently (e.g., salon tool bags), consider specifying a higher wash standard (10 or 20 launderings).
AATCC 61-2A: 5 launderings at 40°C with detergent and steel balls for abrasion. Pass criteria: no color change greater than Grade 4 (Gray Scale), no ink cracking, no color transfer. If the print fails, ask the factory to adjust the ink formulation or add a fixative – then retest. Keep a washed sample as a reference for future orders – it shows the true aged appearance.
- AATCC 61-2A: 5 launderings at 40°C with detergent and steel balls for abrasion.
- Pass criteria: no color change greater than Grade 4 (Gray Scale), no ink cracking, no color transfer.
- If the print fails, ask the factory to adjust the ink formulation or add a fixative – then retest.
- Keep a washed sample as a reference for future orders – it shows the true aged appearance.
Cost Drivers in Print Proof and Production
The cost of print proof is not just the sample fee – it includes screen setup, ink mixing, labor for strike-offs, and courier charges. A typical screen setup fee is $30–$80 per color per screen. A physical strike-off may cost $50–$150, including courier. If you need three proof rounds, budget an extra $200–$400 per design.
Production cost per piece depends on print complexity (number of colors, coverage area), fabric GSM, and order quantity. A 1-color screen print on a 140 GSM natural cotton pouch at 1,000 pieces might cost $0.15–$0.25 per print. Adding a second color increases screen setup and labor, raising the cost by 40–60%. For salon chains, consolidating designs into a single print color reduces per-piece cost and proof complexity.
Screen setup: $30–$80 per color per screen – non-recurring but paid per design. Physical strike-off: $50–$150 including courier – budget for 2 rounds. Per-piece print cost: $0.15–$0.25 for 1-color, 1,000 pcs; drops to $0.08–$0.12 at 5,000 pcs. Additional proof rounds: $50–$150 each – avoid by providing clear specs upfront.
- Screen setup: $30–$80 per color per screen – non-recurring but paid per design.
- Physical strike-off: $50–$150 including courier – budget for 2 rounds.
- Per-piece print cost: $0.15–$0.25 for 1-color, 1,000 pcs; drops to $0.08–$0.12 at 5,000 pcs.
- Additional proof rounds: $50–$150 each – avoid by providing clear specs upfront.
Packing and Shipping Considerations for Printed Pouches
Printed cotton drawstring pouches need protection during transit to prevent ink scuffing, fabric creasing, or moisture damage. Standard packing is polybagging 50–100 pouches per bag, then packing into export cartons. For salon chains, consider retail-ready packaging: individually polybagged pouches with a header card or barcode sticker – this adds $0.05–$0.10 per piece but saves labor at distribution centers.
Specify packing requirements in the PO: polybag thickness (1.5–2 mil), carton weight limit (15–20 kg for manual handling), and labeling (carton marks, barcode, country of origin). Ask the factory to include a sealed sample of the printed pouch in the first carton as a QC reference. For air freight, request vacuum packing to reduce volume – but test first that vacuum pressure does not distort the print.
Polybag: 50–100 pcs per bag, 1.5–2 mil thickness, clear or matte finish. Carton: standard export carton, max 20 kg, with printed label and barcode. Retail-ready: individual polybag with header card – add $0.05–$0.10 per piece. Include a sealed QC sample in the first carton – keep it as the shipment benchmark.
- Polybag: 50–100 pcs per bag, 1.5–2 mil thickness, clear or matte finish.
- Carton: standard export carton, max 20 kg, with printed label and barcode.
- Retail-ready: individual polybag with header card – add $0.05–$0.10 per piece.
- Include a sealed QC sample in the first carton – keep it as the shipment benchmark.
Schedule Risk: How Proof Cycles Affect Lead Time
A typical lead time for custom printed cotton drawstring pouches is 25–35 days from PO confirmation, assuming two proof rounds. Each proof round adds 3–5 days. If the first strike-off is rejected, the second round pushes the schedule by another week. For salon chains with fixed launch dates, a proof delay can miss the window entirely.
Mitigate schedule risk by sending complete specs upfront: Pantone numbers, dimensioned diagram, fabric swatch reference, and a signed approval matrix. Ask the factory to provide a proof schedule with milestones: day 5 – digital mockup, day 10 – physical strike-off, day 15 – pre-production sample. If you need to compress the timeline, request a 'rush proof' (1–2 days per round) – expect a 20–30% surcharge on the proof fee.
Standard lead time: 25–35 days including 2 proof rounds. Each proof round: 3–5 days – plan for 2 rounds minimum. Rush proof: 1–2 days per round, 20–30% surcharge. Avoid last-minute design changes – they reset the proof cycle.
- Standard lead time: 25–35 days including 2 proof rounds.
- Each proof round: 3–5 days – plan for 2 rounds minimum.
- Rush proof: 1–2 days per round, 20–30% surcharge.
- Avoid last-minute design changes – they reset the proof cycle.
Specification comparison for buyers
| Spec decision | Recommended option | When it fits | Buyer risk to check |
|---|---|---|---|
| Fabric weight (GSM) | 140–180 GSM plain weave | Salon retail giveaways or subscription bags | Below 120 GSM causes print bleed; above 200 GSM adds cost and stiff feel |
| Print method | Screen print (water-based ink) | Solid logos, 1–3 colors, medium run (500–5,000 pcs) | Plastisol ink cracks on wash; digital print fades faster on cotton |
| Color matching standard | Pantone TPX (paper) + lab dip on actual fabric | Brand color must be exact across seasons | RGB/CMYK conversions shift; always request physical lab dip before production |
| Print placement | Center front, 2–3 inches below drawstring hem | Standard brand logo visibility | Too high gets hidden by drawstring knot; too low distorts when pouch is full |
| Proof format | Digital mockup + physical strike-off on actual fabric | Any first-time order or new design | Digital-only proofs hide ink opacity and fabric texture effects |
| Ink opacity test | 3-layer screen print or high-opacity water-based | Dark fabric (navy, black, forest green) | Single-pass ink may look translucent; request opacity sample on your fabric color |
| Wash test standard | AATCC 61-2A (5 home launderings) | Salon pouches reused by clients | No test = risk of fading, cracking, or color transfer after 3 washes |
| MOQ per color/design | 500 pcs per print color per design | Salon chain with 50+ locations | Lower MOQ often means higher per-piece cost or limited color options |
| Lead time with proof cycles | 25–35 days (including 2 proof rounds) | Standard production schedule | Rush orders skip proof steps; ask for a proof timeline in the quote |
Buyer checklist before sampling
- Confirm fabric GSM and weave (plain vs. twill) affects print absorption – request a 10×10 cm fabric swatch from the production roll before proof.
- Require a physical strike-off on the exact production fabric, not on paper or a different cotton blend.
- Specify Pantone TPX numbers for each color; avoid RGB/CMYK references in the PO.
- Define acceptable color deviation (ΔE ≤ 2.0) in the factory’s quality agreement.
- Request a wash test report (AATCC 61-2A) for the printed pouch before approving bulk production.
- Verify print placement with a dimensioned diagram – include distance from drawstring hem and side seams, tolerance ±3 mm.
- Ask for a sealed pre-production sample that matches the approved strike-off, and keep it as the QC benchmark.
- Include a clause in the PO that any reprint due to unapproved color shift or print failure is at factory cost.
Factory quote questions to send
- What is your standard proof process – digital mockup, lab dip, or physical strike-off on the actual fabric?
- How many proof rounds are included in your quoted price, and what is the cost per additional round?
- Do you use water-based or plastisol ink for cotton drawstring pouches? Can you provide a wash test sample?
- What is your color tolerance (ΔE) for Pantone matching, and do you use a spectrophotometer to measure it?
- Can you print on both light and dark cotton fabrics with the same ink system? If not, what changes are needed?
- What is the MOQ per design per color? Is there a price break at 1,000, 2,500, or 5,000 pieces?
- How do you handle print placement tolerances – what is the acceptable shift in mm?
- Do you offer a pre-production sample (top-of-production sample) before bulk shipment?
- What is the lead time for the first proof, and what is the total lead time including two proof cycles?
- If the print fails the wash test, what is your reprint/remedy policy and who covers the cost?
Quality-control points to confirm
- Verify fabric GSM and weave against the approved swatch – any deviation affects print absorption.
- Check print color against the approved physical strike-off under D65 daylight (5000K) using a spectrophotometer if available.
- Measure print placement with a ruler – tolerance should be ±3 mm from the approved diagram.
- Perform a rub test (dry and wet) on the printed area to check ink adhesion – use a white cloth to check for transfer.
- Conduct a wash test per AATCC 61-2A on a random sample from the production run.
- Inspect for ink bleed, ghosting, or uneven opacity on the first 50 pieces of the run.
- Confirm drawstring color and material match the approved sample – contrast can affect print visibility.
- Check that the pouch interior is free of ink transfer or staining from the printing process.