Why print proofing matters on a bag this simple
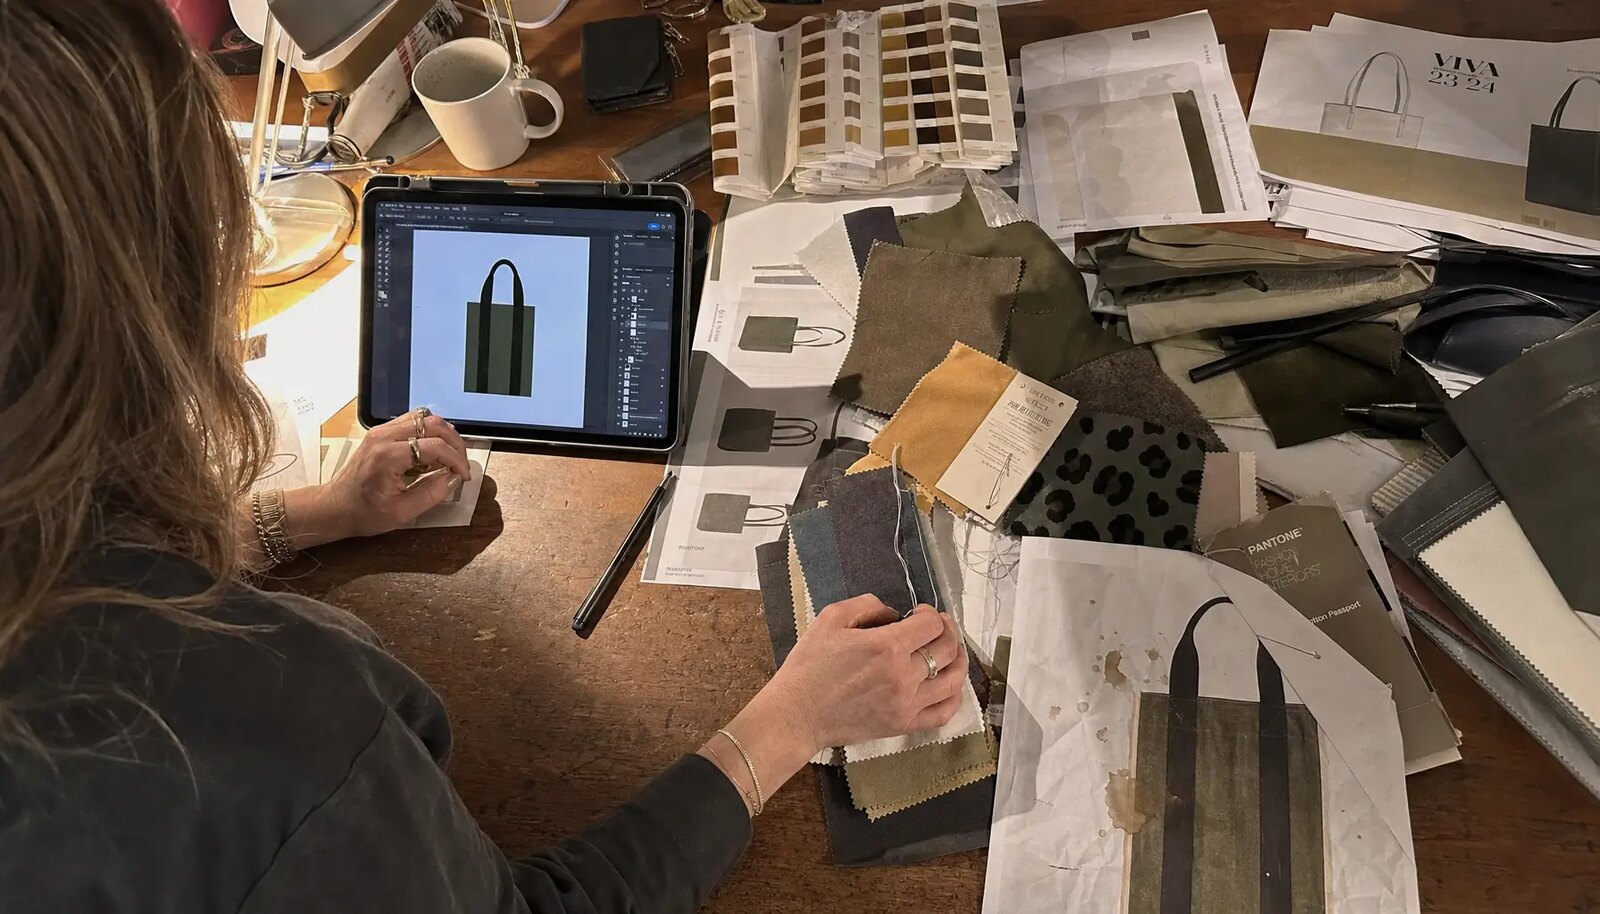
Cotton drawstring backpacks can look easy to source because the construction is plain: two panels or one folded body, a top channel, two cords, and a front mark. That simplicity is the problem. The print area is not a flat sheet of paper. It is affected by seam take-up, channel depth, cord exits, fabric relaxation, and the way the bag folds in packing. A logo that looks centered in a mockup can drift too close to a seam or land under a fold once the real bag is sewn and packed.
For eco apparel brands, the bag often carries more than a logo. It may replace disposable packaging, support a retail launch, or ship with a garment set. If the print is weak, the ink looks heavy, or the fold line cuts through the mark, the buyer sees a quality problem immediately. The product may still function, but the presentation loses credibility.
A useful proofing checklist links artwork to production reality. Procurement should know the fabric, the fiber claim, the print method, the safe print zone, the fold plan, the sampling route, and the inspection rule before bulk begins. When those items are not locked, the factory may still make a usable bag. It may simply not be the bag the brand thought it approved.
- Treat the printed area as a sewn surface, not a graphic layout.
- Use a physical strike-off or sample to judge the real print result on the selected cotton.
- Measure placement from sewn edges and channels, not from the center of a digital mockup.
- Include folding and packing in approval because they change how the print looks on arrival.
Start with fiber, weight, and traceability before print decisions
Fabric drives the whole outcome. For price-sensitive programs, 140-160 GSM cotton can be enough if the bag is a short-life promo item or a low-cost insert. For retail, private label, or repeated use, 180-220 GSM cotton canvas or drill usually gives a better handfeel, better body, and a cleaner base for print. Heavier cloth costs more and may sew differently, so the choice should follow use case, not a vague request for premium quality.
The fiber story matters just as much for eco apparel brands. If the product is sold as conventional cotton, that should be the claim. If the brand wants organic cotton or recycled cotton content, the supplier should be able to support the statement with the right chain of documentation. A sales rep saying the bag is eco is not enough when the product page, hangtag, or carton copy uses that claim. Match the wording to the evidence the supplier can actually provide.
Natural and unbleached cotton deserve a specific approval path. Shade variation, slubs, and seed flecks can be part of the intended look, but they should be treated as expected material traits, not defects. At the same time, stains, oil marks, holes, contamination, and severe shade mismatch remain rejects. The buyer should make that line clear before the bulk cloth is cut.
- Use 140-160 GSM for low-cost, short-use programs where light handfeel is acceptable.
- Use 180-220 GSM canvas or drill for retail-facing bags that need structure and better print stability.
- Lock the fiber claim and require documentation that supports it, especially for organic or recycled content claims.
- Approve natural-cotton variation with a physical standard so normal fiber character is not rejected later.
Lock construction before artwork placement is finalized
A print proof is only as good as the construction spec behind it. Common finished sizes are roughly 34 x 42 cm and 38 x 48 cm, but the size alone does not tell the print department where the usable face starts and ends. The buyer also needs the top-channel depth, seam allowance, cord exit position, bottom fold method, and whether the bag is made from one folded panel or multiple sewn panels. Those details shift the visual center of the front face.
Finished-size tolerance should be realistic for sewn cotton goods. A range of about +/-5-10 mm is usually more practical than asking every piece to match the drawing exactly. What matters is deciding what is critical: if the bag needs to fit a folded garment, capacity matters; if it needs to line up with a retail display or a packaging system, print position may matter more than total height. Put that priority in the drawing and in the purchase order.
Cord construction is part of the product, not an accessory detail. Cotton cord supports a natural look, but it can fray, shrink, or drag if the finish is weak. Cotton-poly or recycled-content blends may run more smoothly, but they can complicate a pure-cotton sustainability story. The cord exit should be reinforced when the bag is expected to carry apparel, samples, or other repeated-use contents.
- State finished width and height in millimeters and define how the bag is measured.
- Show top-channel depth, side seam allowance, and bottom construction on the spec drawing.
- Keep artwork clear of seams, channels, cord exits, and fold lines unless the supplier proves a tighter zone is stable.
- Confirm cord material, diameter, length tolerance, and reinforcement method in the quote.
Choose the print method based on artwork and order reality
Screen print is usually the most dependable bulk choice for simple one- to three-color logos on cotton drawstring backpacks. It scales well, it is repeatable, and the result can be compared against a physical strike-off. The limits are familiar: tiny type, fine lines, gradients, and dense color builds can lose clarity on a woven surface. A logo that looks crisp on a monitor may look softer once it meets cotton texture.
Transfer can be useful for short runs, detailed artwork, or higher color counts. It also creates its own approval points. The buyer should check handfeel, edge visibility, adhesion, and how the print behaves when the bag is folded or packed. If a supplier offers digital textile printing or another specialty method, ask to see the result on the same fabric type and approximate GSM, not on a different stock just to show capability.
Print terminology needs precision. Water-based ink, pigment, discharge, plastisol-style systems where allowed, and transfer film are not interchangeable. For eco apparel brands, the print system may affect restricted substance rules or internal product policy. The right question is not whether the method sounds green. It is whether the actual process can be documented and repeated on the selected cotton.
- Use screen print for bold logos and repeat orders that need consistency.
- Use transfer only after checking handfeel, edge quality, adhesion, and fold performance.
- Avoid very small type unless the supplier states the minimum printable line width on the actual fabric.
- Record print pricing by setup and by unit so reorder cost is clear.
Build a proof package the factory can execute without guessing
A proof package should let the factory produce the bag without interpretation. It needs a dimensioned bag drawing, actual-size artwork, color references, print method, placement measurements, excluded zones, tolerance limits, and approval notes. Helpful instructions are specific: top of logo 85 mm below the finished top edge, logo centered between the sewn side seams, horizontal tolerance plus or minus 5 mm. Vague directions like front center or large logo invite drift.
Artwork should be supplied in production-ready form. Vector AI, EPS, or PDF is best for logos, with fonts outlined and strokes expanded where needed. For transfer art, a 300 dpi minimum at final size is a practical floor. Screenshots and presentation slides are fine for discussion, but they should not become the factory file. If color is governed by Pantone, state which book is being used and whether the target is a strict match or an approved visual match on cotton.
Version control matters more than most buyers expect. If a buyer updates placement in a comment thread while the print room is still using an old file, the wrong revision can move into bulk. Keep one approved production PDF, mark the revision number clearly, and get the supplier to acknowledge it before sampling and production. For multi-SKU programs, each fabric color, artwork version, and print color deserves its own approval record.
- Specify artwork size in millimeters, not only by scaling percentages.
- Show the distance from the top edge, side seams, and bottom fold on the proof drawing.
- Outline fonts and convert strokes so the file does not change during handling.
- Retire older proof versions in writing and keep one approved production file.
Compare supplier quotes on the same specification
A cheap quote is only useful if the supplier is quoting the same bag. One factory may assume 140 GSM cotton, bulk packing, and one-color screen print. Another may assume 200 GSM canvas, individual polybags, and a separate setup fee for each color. Procurement should send one specification to all suppliers and ask them to quote the same fabric, size, print method, artwork size, label, packing, inspection level, carton plan, incoterm, and order quantity.
Setup costs need close attention because they are easy to bury inside the unit price. Screen print can involve screen or film setup by color, artwork preparation, and sometimes mix charges. Transfer can involve film creation or sheet pricing. Some factories roll setup into the piece price. Others list it separately or re-charge if artwork changes on a reorder. Ask every supplier to show setup even when the number is zero. That makes total landed cost much easier to compare.
MOQ should be read in practical terms. A factory may accept 500 pieces total but require 500 per fabric color. Another may allow a color split but charge a separate setup for each artwork version. If the order is a test launch, ask whether MOQ can be split by bag color, print color, or shipment and what surcharge applies. This is especially relevant for eco apparel brands that run multiple seasonal designs and need to move fast without buying excess stock.
- Compare quotes only after GSM, finished size, print method, artwork size, and packing are aligned.
- Ask for unit price plus separate setup, label, packing, inspection, and carton costs.
- Clarify whether MOQ applies per order, color, artwork, or shipment split.
- Confirm lead time, payment terms, quote validity, and incoterm before price comparison.
Use sampling to approve separate decisions, not one vague sample
Sampling works best when each stage answers one question. A fabric swatch approves cloth. A lab dip or bulk swatch approves shade. A blank sample checks construction, size, and cord function. A print strike-off shows how the logo behaves on the selected cotton. A pre-production sample confirms the finished product, including label, fold, and packing. Packing all of those decisions into one rushed sample can work for simple orders, but it also makes it easy to miss the one detail that later becomes a dispute.
The pre-production sample should act as the production master. It should use final or approved-equivalent fabric, cord, stitching, print process, label position, folding method, and packing. If the sample used substitute fabric or a different print line, that should be written down. A buyer can still review the sample, but substituted parts should not be treated as final production approval unless they truly match the bulk plan.
Approval should happen while everyone is looking at the same object. Measure finished width, finished height, print size, top distance, side distance, cord length, and any label position. Photograph the front, back, inside, print close-up, seam close-up, cord exits, and folded presentation. Seal or mark the approved sample so the buyer, supplier, and inspector are comparing bulk to the same reference.
- Use swatches for fabric, strike-offs for print, blank samples for construction, and pre-production samples for full approval.
- Do not treat a sales sample as production approval unless it matches the final spec.
- Measure and photograph the approved sample before sign-off.
- Record any substituted material so the approval record stays honest.
Set QC limits and defect rules before bulk starts
Quality control becomes useful when the acceptance standard is measurable. Instead of saying the logo must be centered, define the allowed movement from fixed points: for example, print centerline within plus or minus 5 mm of the approved drawing, or top of print within plus or minus 5 mm of the target distance from the top edge. Instead of saying color must be close, define the comparison standard: signed strike-off, Pantone reference under a named light source, approved visual master, or Delta E if both sides use instruments.
Defect classification keeps the conversation from turning into a style debate at the dock. Critical defects can include wrong artwork, severe contamination, mold, unsafe components if any are present, or mixed goods that cannot be sold. Major defects can include print placement outside tolerance, wrong fabric GSM, open seams, weak cord exits, severe stains, wrong SKU, wrong packing, or missing labels. Minor defects can include loose threads, slight fold marks, or natural cotton slubs that stay within the approved appearance range.
Many buyers use AQL sampling for export inspection, but the level should be selected before production. General inspection Level II is a common starting point for soft goods, with AQL values chosen by defect severity. For a brand launch, add an early in-process check after the first production print run. Catching print drift at the start is far cheaper than sorting packed cartons later.
- Start with print placement tolerance around plus or minus 5 mm unless the design or factory capability requires another value.
- Use finished-size tolerance around plus or minus 5-10 mm depending on fabric and construction.
- Treat wrong artwork, mold, contamination, and unsafe components as shipment-stopping defects.
- Treat print outside tolerance, weak seams, wrong GSM, and wrong packing as major defects.
Verify eco claims, packing, and carton details together
For eco apparel brands, the product claim does not stop at the fabric. If the bag is sold as organic, recycled, or traceable, the claim needs to survive packaging, carton marking, and product page copy. That means the supplier should know exactly what can be printed on the bag, the hangtag, the inner pack, and the outer carton. If the claim is vague or unsupported, the cleaner approach is to keep the claim off the product until the documentation is in place.
Packing can protect the print or quietly damage it. Cotton drawstring backpacks are often shipped flat, folded, or grouped in inner packs. If the main fold runs through the logo, the buyer may receive a creased mark before the customer even opens the carton. If cords are trapped unevenly or twisted during packing, the bag can look sloppy on receipt. Approve the fold direction and cord placement during sampling, then request pre-shipment photos of the packed product.
Carton planning matters because cotton bags are light but bulky. Ask for pieces per carton, carton dimensions, gross weight, net weight, and estimated cubic meters. Add carton marks that support receiving: PO number, SKU, color, artwork version, quantity, carton number, and country of origin if required. Mixed cartons create avoidable warehouse friction unless the buyer specifically wants them.
- Match eco claims to the documents the supplier can actually provide.
- Avoid folding through the main print area unless the sample has already approved that fold line.
- Request pre-shipment photos showing fold direction, cord placement, inner packing, and sealed cartons.
- Confirm carton quantity and carton marks so receiving is clean and traceable.
Final buyer checklist before PO release
Before release, the buyer should be able to answer six questions without chasing the factory: what is the fabric, what is the claim, where does the artwork sit, how was the sample approved, what are the inspection limits, and how is the product packed. If any of those are unclear, the order is still a spec draft, not a production order. That is the point where many quality problems are preventable.
For procurement teams, the goal is not to over-specify the bag. It is to make the few important variables unambiguous. Cotton drawstring backpacks are a small product, but the approval path should still reflect the reality of sewn goods, printed surfaces, and eco-brand scrutiny. A clear proofing process saves time on the factory side and reduces the risk of hidden changes on the buyer side.
If you want a quick operational rule, use this one: no bulk until the fabric claim, construction drawing, strike-off, pre-production sample, and carton plan all point to the same product. That standard is strict enough to protect quality and simple enough for a supplier to follow.
- Fabric claim and supporting documents are complete.
- Dimensioned drawing and artwork revision are frozen.
- Strike-off and pre-production sample match the same production intent.
- QC limits, AQL, and defect definitions are written into the order file.
- Packing and carton assumptions are documented before bulk starts.
Specification comparison for buyers
| Spec decision | Recommended option | When it fits | Buyer risk to check |
|---|---|---|---|
| Fabric weight | 140-160 GSM for low-cost promotions; 180-220 GSM cotton canvas or drill for retail, private label, or repeated-use programs | Event bags, apparel inserts, subscription kits, and branded merchandise | Lock the actual GSM range in writing and check whether the fabric is pre-shrunk or likely to relax after sewing |
| Fiber claim and traceability | Use conventional cotton only when that is the true claim; use organic or recycled cotton only when the supplier can support it with the right paperwork | Eco-positioned assortments where the fiber story appears on hangtags, product pages, or carton markings | Ask for mill traceability, origin documents, and certificate references that match the claim wording, not just a sales statement |
| Weave and finish | Plain weave for price-sensitive programs; canvas or drill for better structure and print stability; unbleached natural cotton when shade variation is acceptable | Collections where the cotton texture is part of the design language | Natural slubs, seed flecks, and shade variation should be approved as normal material traits instead of treated as defects |
| Bag size and usable print zone | Common finished sizes are about 34 x 42 cm and 38 x 48 cm; keep artwork away from seams, channel, cord exits, and bottom folds | Apparel packaging, gym bags, event kits, and lightweight retail carry bags | Measurement must be taken from the finished sewn bag, not only from the artwork file or cut panel |
| Print method | Screen print for simple spot-color logos; transfer for short runs or detailed graphics; embroidery only on heavier fabric after testing | Campaign logos, retail marks, and private-label branding | Check handfeel, opacity, edge quality, and whether a reorder needs the same setup or a fresh setup charge |
| Cord and reinforcement | Cotton cord, recycled cotton blend, or cotton-poly blend with reinforced exits and bar tacks | Programs where the bag will be handled repeatedly or carry more than flat inserts | Pure cotton cord can fray or shrink more; blended cord may weaken a pure-cotton sustainability claim if that matters to the buyer |
| MOQ and SKU split | Typical MOQs may land around 300-1,000 pieces depending on fabric stock, print setup, and artwork complexity | Pilot launches, multi-color drops, and seasonal retail runs | MOQ may apply per fabric color, artwork version, print color, or shipment split |
| Sampling route | Swatch, blank sample, print strike-off, then pre-production sample using final fabric, cord, print, label, fold, and packing | Orders with placement sensitivity or multiple internal approvers | A generic sales sample does not prove production readiness |
| QC tolerances | Start with measurable tolerances such as print placement within about ±5 mm and finished size within about ±5-10 mm | Brand-sensitive orders that need a clear inspection rule | Avoid vague acceptance language and define defect levels, AQL, and sampling size before PO release |
Buyer checklist before sampling
- Write the exact fiber claim in the spec: conventional cotton, organic cotton, recycled cotton blend, or another declared composition.
- Request supplier traceability documents that match the claim, such as mill source notes, transaction certificates, or recycled-content evidence where applicable.
- Set the finished bag size in millimeters and show where the top hem, side seams, cord channel, and bottom fold are measured from.
- Define the usable print area on a dimensioned drawing, including the minimum distance from seams, channel, cord exits, and fold lines.
- Supply print artwork as vector files when possible and include the final print size, Pantone or approved color reference, and file revision number.
- Separate digital mockup approval from physical print approval; a screen image is not the same as a strike-off on the selected cotton.
- Require a pre-production sample that uses the same fabric, cord, stitching method, print process, label, fold, and packing method planned for bulk.
- Record measurable tolerances for print placement, finished dimensions, registration, color variation, and acceptable natural cotton marks.
- Ask for proof that eco claims can be supported on product, label, hangtag, web copy, and carton markings before the order is released.
- Check cord length balance, reinforcement at the exits, and seam strength on the sample before moving to full production.
Factory quote questions to send
- What exact fabric are you quoting, including fiber content, weave, GSM, finish, color, and GSM tolerance?
- Is the fabric stock-held or made to order, and what changes to lead time or cost apply if the approved shade is unavailable?
- What finished bag size is included in the unit price, and how is size measured on the finished product?
- What cord material, cord diameter, cord length, tip finishing, and reinforcement method are included in the quote?
- Which print method is included, and what artwork limits apply to line width, small type, gradients, and color count?
- How do you price setup: per color, per screen, per artwork, per transfer, or per placement?
- What is the maximum print size included in the quoted unit price, and what is the safe printable area away from seams and cord channels?
- Can you provide a dimensioned proof showing logo size, placement, excluded zones, and the approved revision number?
- Will the pre-production sample use final bulk fabric and the same print line, or is it made on a separate sample setup?
- What inspection standard do you use for finished goods, and what tolerances do you apply to print placement, size, and color?
Quality-control points to confirm
- Check incoming fabric GSM against the approved spec and document the checking method.
- Compare fabric shade to the approved swatch or lab dip under consistent lighting before cutting and printing.
- Inspect for stains, oil marks, holes, loose yarns, excessive slubs, skew, contamination, and shade variation beyond the approved natural-cotton range.
- Measure finished bag width and height flat after normal relaxation, not straight off the sewing line.
- Measure print location from fixed sewn references, such as the finished top edge and side seams, rather than from the cut panel.
- Compare print color to the approved physical strike-off, not only to a digital file.
- Review opacity, edge sharpness, pinholes, ghosting, feathering, and screen marks on the actual weave.
- Run dry rub and fold checks on the printed area when the print method or finish makes that risk relevant.
- Check the inside of lightweight bags for strike-through, ink bleed, or transfer show-through.
- Measure cord length on both sides, check exit reinforcement, and verify that the cord runs smoothly without twisting or uneven drag.