Start with the event reality, not the product name
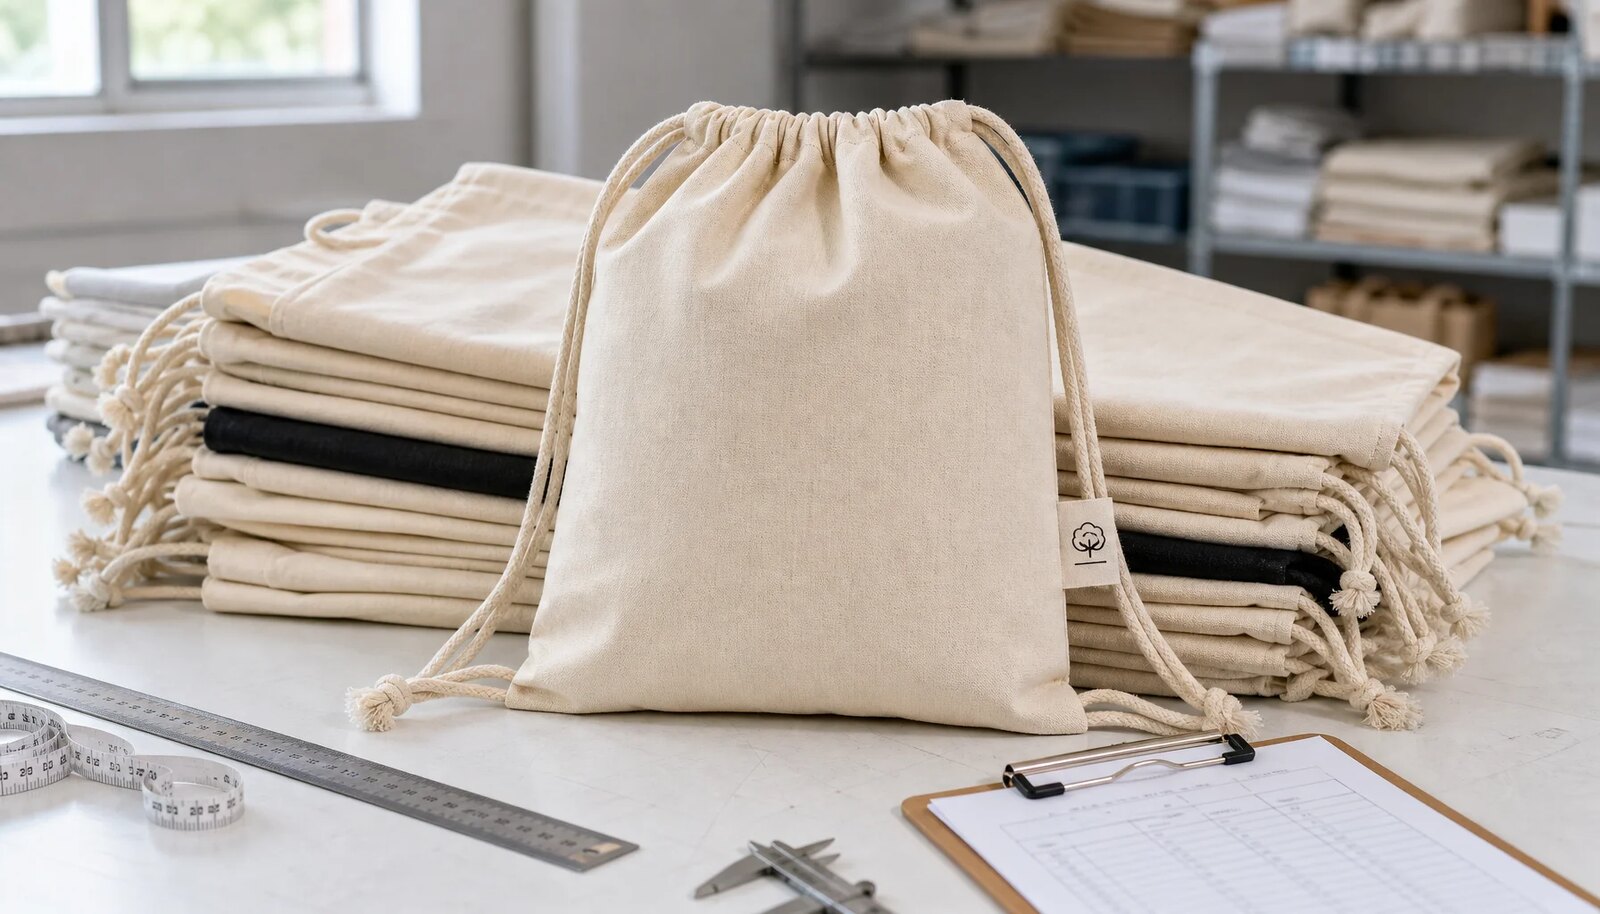
Cotton drawstring backpacks look easy to buy until the cartons arrive two days before registration opens. At that point, a crooked sponsor logo is no longer a production issue. It is a line of attendees waiting at a desk. A wrong carton label is not paperwork. It is the wrong version going to the wrong venue, hotel, booth, or VIP room.
That is why event planners and procurement teams need a sourcing-grade quality inspection checklist before the purchase order is placed. The bag may be a simple cotton item, but the buying context is not simple. It can involve fixed event dates, sponsor approvals, multi-location delivery, temporary staff, kit assembly, and artwork that must satisfy several stakeholders.
A useful checklist turns the event brief into measurable requirements. It connects what the attendee will carry with the fabric GSM, cord type, seam reinforcement, print method, packing fold, carton marks, and inspection standard. The goal is not to over-engineer a giveaway. The goal is to remove the vague areas that cause rework, arguments, rush freight, and last-minute sorting.
- Write the use case in the RFQ: attendee giveaway, registration bag, sponsor kit, booth handout, staff pack, retail-style merchandise, or VIP gift.
- Define the expected contents and approximate load before asking suppliers to recommend fabric and construction.
- Use one approved reference sample that shows fabric, cord, print method, stitching, size, and packing fold together.
- Assign internal owners for artwork approval, sample approval, packing rules, carton marks, routing labels, and final inspection release.
- Treat carton labeling and packing accuracy as event quality issues, not back-office details.
Translate the brief into a measurable specification
A request for "cotton drawstring backpacks with logo" creates quotes that may look similar but are not comparable. One factory may price 120 GSM cotton. Another may assume 160 GSM canvas. A third may include one-color screen print but exclude setup fees, carton labels, or individual packing. The lowest price may simply be the thinnest specification.
A procurement-ready specification should define the finished size, cotton type, GSM, fabric color, decoration method, print size, cord construction, sewing details, packing method, carton marks, and schedule milestones. Finished size deserves special attention. A common event size is around 34 x 42 cm or 14 x 17 in, but that does not automatically fit every program. If the bag must hold an A4 folder, notebook, T-shirt, bottle, badge envelope, or sponsor sample kit, state those contents and ask the supplier to confirm usable capacity.
Tolerances also need to be written down. Cotton fabric can move during cutting, printing, sewing, and pressing. A practical finished-size tolerance may be around +/-1 cm for height and width, depending on construction. Print placement may need a tighter or looser tolerance depending on artwork, panel shape, and print method. The key is to agree the tolerance before bulk production, then inspect to that standard.
- Specify finished height, width, top opening, bottom style, and gusset or flat construction.
- List fabric composition, weave, GSM target, GSM tolerance, color reference, and fabric finish.
- Attach real-size artwork with print dimensions, color references, sponsor marks, minimum line weights, and QR codes if used.
- State the decoration method: screen print, transfer, digital print, embroidery, woven label, or a combination.
- Clarify whether the bag needs a woven side label, internal care label, hangtag, barcode sticker, or no extra label.
- Define packing: bulk pack, fixed-count inner packs, individual bags, kit-ready packing, destination sorting, or warehouse routing.
- Identify the required date precisely: factory ready date, forwarder handover date, warehouse arrival date, or event-site arrival date.
Choose fabric by load, print needs, and brand perception
For most event programs, 140-180 GSM cotton is the practical buying range. A 140-150 GSM bag can work well for high-volume conferences, school fairs, orientation events, and light handouts where the contents are mainly brochures, badges, or a thin notebook. A 160-180 GSM bag usually feels more substantial, lies flatter for printing, and suits sponsor kits or attendee gifts that should survive beyond the event day.
GSM is important, but it is not the full quality story. A tight plain weave or light cotton canvas usually gives cleaner screen-print edges than a loose, irregular weave. Yarn regularity, fabric finish, and surface stability affect logo sharpness, seam strength, and how the bag lies on a registration table. If the artwork includes small sponsor names, fine text, or QR codes, the cotton surface needs to be stable enough to hold detail.
Color control needs the same level of discipline. Natural cotton may show seed flecks, slubs, and shade variation. That can be acceptable, even desirable, for a sustainability-themed event, but it should be approved on a physical swatch. White cotton should be checked for yellowing, oil marks, and show-through. Dyed cotton needs shade-lot control, and dark fabric usually needs extra attention to ink opacity and rub performance.
- 140-150 GSM: useful for cost-sensitive, light-load giveaways and large-volume attendee handouts.
- 160-180 GSM: stronger choice for sponsor kits, premium perception, cleaner print presentation, and heavier contents.
- Natural cotton: approve shade, flecks, and surface character with a physical swatch before bulk production.
- Dyed cotton: confirm shade reference, lot control, and whether crocking or color-rub checks will be performed.
- White cotton: inspect for stains, yellowing, oil marks, handling dirt, and print show-through under normal event lighting.
- Ask whether the bulk GSM tolerance is +/-5%, a fixed GSM range, or another measurable standard.
Inspect construction where bags actually fail
Most drawstring backpack failures happen in predictable places: the top cord channel, cord exits, side seams, bottom corners, and anchor points. These areas take repeated stress when attendees open the bag, cinch it closed, sling it over one shoulder, or carry books, bottles, samples, and apparel between sessions.
The top hem should be folded cleanly and stitched evenly so the drawcord moves without dragging against raw fabric. If the channel is too narrow, the cord can jam. If it is too shallow or loose, the top edge can twist and look untidy when closed. Cord exits should not have rough edges that cut or fray the cord. Bottom corners should have the reinforcement agreed in the specification, whether that means secure backstitching, bar-tacks, double stitching, or another construction suited to the load.
Panel geometry matters more than many buyers expect. A bag can look acceptable when held in the air but appear twisted when stacked flat. Lay checked pieces on a table. Look at side seam alignment, top-edge levelness, squareness, and whether the front panel lies flat enough for a centered logo. If sewing variation shifts the panel, the print may look wrong even when the printer followed the setup marks.
- Check top channel width, folding, raw-edge control, stitch consistency, and smooth cord movement.
- Inspect bottom corners for the agreed reinforcement method and enough seam allowance.
- Measure finished height and width on multiple pieces, not just the sample kept by the factory.
- Pull both cords repeatedly to confirm even closure, no snagging, and no twisting to one side.
- Inspect inside seams for loose threads that could snag contents or wrap around the drawcord.
- Check woven label and care label attachment points because loose labels make the whole order feel poorly controlled.
Match the print method to the artwork
One-color or limited-color screen printing is often the strongest option for cotton drawstring backpacks used in events. It can be efficient, durable, and visually clean when the fabric surface, mesh, ink, curing, and placement are controlled. Still, screen printing is not automatically risk-free. Fine text can fill in. Small sponsor logos can blur. Light ink may look weak on natural cotton unless opacity is tested.
Heat transfer and digital transfer methods can work when the order is short, the artwork has many colors, or the design includes gradients or detail that screen printing would not handle efficiently. The tradeoff is process sensitivity. Transfers depend on temperature, pressure, dwell time, adhesive compatibility, and fabric surface. They also need folding and abrasion checks, especially when bags will be compressed in cartons or routed through multiple warehouses.
Artwork approval should be physical and measurable. A mockup is useful for layout, but it cannot prove ink opacity, hand feel, transfer edge behavior, or color on the actual cotton. Approve print dimensions, placement references, color standard, and tolerance in writing. If the bag includes a QR code, scan the printed physical sample at the intended size. If it includes a sponsor list, review legibility on the actual cotton, not on a bright digital proof.
- Use screen print for simple logos, event names, bold sponsor marks, and limited-color artwork when quantity supports setup cost.
- Use transfer or digital methods only after checking adhesion, fold resistance, edge feel, scuffing, and packing abrasion.
- Approve print size in millimeters or inches, not only as a visual scale on a mockup.
- Measure placement from stable points such as top edge, side seam, bottom fold, or an approved panel reference.
- Define placement tolerance in writing, often in a practical +/-5 mm to +/-10 mm range depending on bag style.
- Check light ink on natural, black, or dyed cotton for opacity; ask whether an underbase or extra pass is needed.
- For QR codes, print and scan the sample before authorizing bulk production.
Use sample approval as a stress test
A sample is not just a photo opportunity. It is the main chance to prove that the product, decoration, and packing plan work together. A blank stock sample may help confirm rough size, but it should not be treated as final approval if the bulk order will use different fabric, cord, sewing, printing, or folding.
The pre-production sample should match the planned bulk product as closely as possible. That means the same cotton GSM and color, same cord, same channel construction, same print method, same print size, same placement, same seam standard, and the same packing fold. If timing forces an early decision, approve a material swatch first and document which risks remain open.
Test the sample the way the event team will use it. Put in the intended contents or equivalent weight. Open and close the top several times. Carry it by the cords. Lay it flat and check whether the logo still looks centered. Fold it the way bulk will be packed, put it under light pressure, then inspect the print for cracking, scuffing, sticking, transfer marks, and hard crease lines. These checks are simple, but they often reveal the problems that a visual approval misses.
- Approve a material swatch before a full sample if fabric shade, GSM, or hand feel is uncertain.
- Do not approve a blank sample as final when print behavior, logo color, and placement are untested.
- Perform a load test with intended contents or equivalent weight before signing off.
- Open, close, cinch, and carry the sample repeatedly to check cord function and stress points.
- Fold the printed sample as packed and inspect for cracking, scuffing, transfer, sticking, or crease damage.
- Seal and label a golden sample with PO number, approval date, fabric GSM, color, print method, size, placement, cord type, and packing fold.
- Request a matching factory reference sample so inspection teams and production teams work from the same standard.
Compare quotes beyond the unit price
MOQ and pricing for cotton drawstring backpacks are shaped by fabric booking, color choice, cutting efficiency, cord purchasing, printing setup, sewing-line planning, and packing labor. A low unit price may apply only to natural cotton, one artwork version, one-color print, and basic bulk packing. Add dyed fabric, several sponsor logos, different cord colors, barcode labels, individual bags, or destination sorting, and the quote can change quickly.
A good B2B comparison separates the cost components. Ask suppliers to show product cost, decoration cost, sampling cost, setup charges, packing cost, labeling cost, and any shipment-readiness services. Screen charges, artwork adjustment, pre-production samples, inner packs, carton labels, routing labels, pallet requirements, and urgent production may be small individually but meaningful across a full event order.
Carton data belongs in the quote stage, not only after production. Units per carton, carton dimensions, gross weight, and estimated total carton count affect freight cost, warehouse labor, and event-kit assembly. A bag that is cheaper per piece can become more expensive delivered if the cartons are inefficient, poorly labeled, or hard for temporary staff to count.
- Request MOQ by fabric color, logo version, print color count, cord color, and packing style.
- Ask for pricing at the target quantity and one alternate quantity to understand cost sensitivity.
- Separate fabric and sewing cost from decoration, packing, samples, setup fees, and labeling charges.
- Confirm whether sample fees are charged, refundable, credited to bulk, or repeated after artwork changes.
- Ask whether individual polybags, inner packs, carton liners, barcode labels, and destination sorting change unit cost.
- Require carton dimensions, units per carton, gross weight, and estimated carton count before PO approval.
- Clarify cost and schedule impact if artwork changes after screen setup or quantity changes after material booking.
Make packing event-ready before cartons close
Packing decides how the bags look when event staff open the cartons. Cotton wrinkles. Printed areas can scuff. Over-compressed cartons can leave hard crease lines across a logo. Loose packing can let products shift, crush, and rub during transit. These are not cosmetic details when the bag is the first branded item attendees receive.
The right packing format depends on how the order will be handled. Bulk packing with a clean carton liner can be efficient when the buyer will repack bags into registration kits. Fixed-count inner packs help warehouse teams count quickly and allocate units by room, sponsor, booth, or destination. Individual bags may suit retail-style merchandise or mixed kits, but they add material, labor, carton volume, and unpacking time.
Carton labels should be inspected as carefully as the logo. Multi-city events, sponsor-specific versions, attendee tiers, and warehouse routing rules leave little room for label confusion. Before shipment release, request photos of packed cartons showing shipping marks, carton sequence, version labels, and any routing labels. If a warehouse guide or pallet standard applies, send it before final packing begins, not after cartons are sealed.
- Define units per inner pack and units per master carton before packing starts.
- Use a clean carton liner or approved inner protection when natural or white cotton must stay clean.
- Avoid over-compression when the logo is large, thick, heat-transferred, or sensitive to creasing.
- Confirm whether printed faces should be folded inward, outward, or separated to reduce abrasion.
- Require carton marks with PO number, item name, fabric color, logo version, quantity, carton number, and destination.
- For split shipments, request a packing list mapping carton numbers to destination, event location, sponsor, or attendee tier.
- Review carton photos before shipment release, especially when the order includes multiple colors or artwork versions.
Control lead time with approval milestones
Event orders do not have flexible deadlines. A supplier statement such as "25 days production" is not enough unless the buyer knows when that clock starts and what it includes. Does it begin after deposit, artwork approval, sample approval, or fabric arrival? Does it include printing, sewing, trimming, inspection, packing, carton labeling, and rework? If those details are missing, the schedule is not yet useful.
Build the sourcing calendar around milestones: artwork review, swatch approval, sample production, sample transit or photo review, buyer approval, fabric booking, cutting, printing, sewing, trimming, final QC, packing, carton photo approval, and shipment handover. Some tasks can overlap. Others cannot. Bulk printing should not begin before artwork and placement are approved. Carton labels should not be finalized before destination splits and pack counts are locked.
The fastest way to protect the schedule is to freeze decisions early. Artwork, print size, fabric color, cord choice, packing method, carton marks, and destination split should be approved before cutting whenever possible. If the deadline is tight, ask the supplier to identify the real bottlenecks and the approval dates they need from you. A responsible answer will name risks, not just promise speed.
- Ask for a dated production calendar with buyer and supplier responsibilities assigned.
- Separate sample lead time, buyer approval time, bulk production, final inspection, packing, and freight handover.
- Freeze artwork, print placement, fabric color, cord choice, and packing plan before bulk cutting starts.
- Reserve time for inspection and rework; a schedule with no correction buffer is fragile for fixed-date events.
- Confirm whether the required date means factory ready, forwarder handover, warehouse arrival, or event-site arrival.
- For multi-destination programs, add time for sorting, carton labeling, packing-list verification, and routing compliance.
Classify defects before inspection day
Pre-shipment inspection should find systemic problems before goods leave the factory. The inspector should pull samples from different cartons, colors, logo versions, production periods, and stack positions. Checking only one carton prepared for photos gives a false sense of control. The inspection should verify identity, quantity, size, print, construction, function, packing, and carton labels against the specification and golden sample.
Defect classification prevents slow, subjective debates. Critical defects may include wrong item, wrong logo, unsafe contamination, severe stains, or mixed goods that cannot be used at the event. Major defects may include open seams, broken cords, badly crooked print, wrong fabric color, poor print adhesion, incorrect carton labels, or quantity shortages. Minor defects may include small thread tails or slight slubs that fall within the approved natural cotton standard.
Many procurement teams use an AQL-style inspection approach for consumer goods, with sample size and acceptance level chosen by the buyer or third-party inspection provider. Event orders may need a stricter view on artwork, carton labels, and major print defects because there is often no time to sort mistakes after delivery. The final report should show measurements, photos, carton numbers, defect categories, and a clear release, rework, or hold recommendation.
- Open cartons from different pallet or stack positions, not just one carton selected by the factory.
- Verify item name, PO number, color, logo version, quantity, and carton sequence against the packing list.
- Measure finished bag size, print size, and print placement against the approved specification and golden sample.
- Inspect front, back, inside seams, top channel, bottom corners, cord ends, labels, and stress points.
- Perform dry rub and light damp rub checks suitable for the chosen print method and fabric color.
- Load-test selected bags with intended contents or equivalent weight, then inspect seams, corners, channels, and cords.
- Check carton labels, routing labels, destination splits, and packing list accuracy before shipment release.
- Document defects with close-up photos, measurement evidence, defect category, and carton number for targeted rework.
Specification comparison for buyers
| Spec decision | Recommended option | When it fits | Buyer risk to check |
|---|---|---|---|
| Finished size | Typical event size around 34 x 42 cm or 14 x 17 in; state finished size tolerance, such as +/-1 cm for height and width | Conference giveaways, registration packs, orientation kits, trade show handouts, sponsor merchandise, and light welcome bags | Undersized bags may not fit folders or apparel; oversized bags in light fabric can collapse, wrinkle, and shift print placement |
| Fabric weight | 140-180 GSM cotton for most event programs; agree a bulk tolerance such as +/-5% or a stated GSM range | 140-150 GSM for high-volume light giveaways; 160-180 GSM for better hand feel, sponsor kits, and stronger print presentation | A low quote may use lighter fabric than the approved sample; heavier fabric can raise carton weight, freight cost, and packing labor |
| Fabric construction | Plain weave cotton or light cotton canvas with even yarn, stable surface, and controlled shrinkage | Best when the logo needs clean edges and the bag must lie flat on registration tables or inside kits | Loose weave can distort panels, create fuzzy print edges, weaken seam grip, and show shade or yarn irregularity |
| Fabric color | Natural, white, black, or dyed color approved against a physical swatch, Pantone TCX reference, or buyer-approved bulk shade | Natural cotton supports sustainability-themed events; dyed bags support brand campaigns, team colors, and sponsor tiers | Natural shade and seed flecks vary by lot; dyed colors need crocking and shade-lot control; black or dark cotton needs stronger ink opacity |
| Print method | 1-color or limited-color screen print for standard event volumes; transfer or digital print when artwork requires detail or many colors | Simple event logos, sponsor marks, large text, limited-color graphics, and repeat procurement programs | Fine text can fill in; light ink may look dull on natural cotton; transfers can crack, lift, or mark if heat, pressure, or packing are not controlled |
| Print tolerance | Specify print size, color reference, placement points, and tolerance; a practical placement target is often within +/-5 mm to +/-10 mm depending on bag and method | Brand-sensitive events, sponsor-funded programs, QR codes, retail-style merch, and orders with multiple artwork versions | Without a written tolerance, visibly off-center prints may be treated as acceptable; panel shrinkage and sewing variation can move placement |
| Drawcord style | Cotton cord, cotton rope, or blended cord matched to bag weight; specify diameter, color, length, and end finish | Natural-material positioning, comfortable hand feel, and routine attendee use through a one-day or multi-day event | Thin cords can cut into hands, fray, or pull unevenly; rough exits or narrow channels can damage cord and slow opening |
| Top finish and closure | Double-fold top hem with a smooth channel; reinforced cord exits or clean sewn channel construction | Events where attendees repeatedly open and close bags for badges, notebooks, samples, and apparel | Single-fold hems and shallow channels can twist, tunnel, tear, or expose raw edges after repeated pulls |
| Stitching standard | Even stitch density, no skipped stitches, secure backstitching, and bar-tacks or reinforcement at stress points where applicable | Bags carrying brochures, notebooks, bottles, T-shirts, samples, badge materials, or mixed sponsor items | Weak corners and open seams are often found only after load testing; visual inspection alone is not enough |
Buyer checklist before sampling
- Define the event use case: registration giveaway, sponsor kit, trade show booth handout, retail-style merchandise, university orientation bag, VIP gift, or internal staff pack.
- State the expected contents and estimated load: brochures, notebook, water bottle, T-shirt, badge materials, samples, electronics accessories, or other event items.
- Confirm finished size, usable opening width, and whether the bag is flat, boxed, or gusseted; include dimensional tolerances in the specification.
- State fabric composition, weave, GSM target, GSM tolerance, color standard, and whether the fabric is natural, bleached, dyed, washed, preshrunk, or otherwise finished.
- Request the sample in the same fabric, cord, sewing construction, print method, and packing fold planned for bulk production; do not treat a substitute sample as a golden sample.
- Weigh or otherwise verify sample fabric against the quoted GSM; visual approval alone is not material approval for a B2B order.
- Approve artwork at real size with Pantone or brand reference, print dimensions, minimum line weight, QR-code size if used, and placement measured from a stable seam or edge.
- Review a physical print proof on the actual cotton color; do not approve bulk based only on a digital mockup or a print on different fabric.
- Check stitching at the top cord channel, cord exits, bottom corners, side seams, inside seam allowance, and any woven label or care label attachment points.
- Open and close the sample repeatedly, checking for smooth cord movement, even loop length, no snagging inside the channel, and no fraying at ends or exits.
Factory quote questions to send
- What is the exact fabric composition, weave, yarn style if known, measured GSM, and allowed GSM tolerance for bulk production?
- Will the bulk fabric be natural, bleached, dyed, washed, preshrunk, or coated in any way that may affect shrinkage, print adhesion, hand feel, or shade?
- Can you provide a physical swatch from the actual fabric lot or approved substitute, and how will you control shade variation across bulk lots?
- What finished size will you quote, what is the expected size tolerance, and how will panel shrinkage after printing or pressing be controlled?
- Is the bag flat, gusseted, boxed, or folded at the bottom, and what is the actual usable capacity for the buyer's intended contents?
- Is printing done in-house or subcontracted, and who is responsible for print setup approval, color matching, curing, defect rework, and schedule impact?
- Which decoration method do you recommend for this artwork, and what are the limits for fine text, sponsor logos, QR codes, halftones, gradients, or light ink on natural cotton?
- What print color system will you use, how close can you match the brand reference on cotton, and will an underbase be needed on dark or natural fabric?
- How do you measure print placement, from which edge or seam, and what bulk placement tolerance can you hold for this bag style?
- What cord material, diameter, color, length, end finish, and tensile or pull-performance standard will be used?
Quality-control points to confirm
- Fabric weight: confirm sample and bulk lot stay within the agreed GSM range or tolerance; use swatch weight, supplier test record, or buyer inspection method instead of hand feel alone.
- Fabric appearance: inspect for stains, oil marks, dirt, weaving defects, excessive slubs beyond the approved standard, foreign fibers, yellowing, shade variation, and visible crease damage.
- Fabric color: compare natural or dyed fabric to the approved swatch under consistent lighting; separate acceptable natural cotton variation from unacceptable lot-to-lot mismatch.
- Finished size: measure height, width, top opening, bottom width, and gusset or fold depth across randomly selected pieces; variation must not reduce capacity or distort print placement.
- Panel geometry: lay each checked bag flat and inspect squareness, side seam alignment, top edge levelness, and whether the front panel lies flat enough for a centered logo.
- Stitching: inspect side seams, bottom seams, cord channels, hem turns, overlock edges, labels, and stress points for skipped stitches, broken threads, open seams, loose tails, puckering, and seam slippage.
- Reinforcement: confirm backstitching, bar-tacks, double stitching, or other agreed reinforcement at cord exits, bottom corners, and high-pull areas.
- Print placement: measure logo position from the approved reference point and compare it to the written tolerance and golden sample.
- Print appearance: check logo sharpness, ink opacity, pinholes, edge definition, color consistency, registration, ghosting, ink spots, and contamination around the print area.
- Print durability: perform light dry rub and damp rub checks suitable for the method; fold printed pieces as packed and inspect for cracking, transfer, scuffing, sticking, or abrasion marks.