Start With the Launch Use Case
Cotton drawstring backpacks for brand launches should not be treated like generic promo bags. A launch bag has to do three jobs at once: carry the kit, carry the logo, and support the brand impression when the buyer opens the box or receives the giveaway. That means the spec should start with the launch format, not with a random catalog size. A retail bundle bag needs a cleaner finish and tighter packing than an event handout. A product insert bag needs stronger seams and a flatter fold. A media kit bag needs print quality that still looks right in photos.
The quickest way to waste money is to let every supplier quote a different assumption. One may price a light 5 oz cotton body with a simple cord channel, another may quote a heavier 10 oz canvas with eyelets and a woven label, and both will call it a cotton drawstring backpack. Before you ask for numbers, define what sits inside the bag, how much weight it needs to hold, and whether the bag is being judged as packaging, merchandise, or both.
- Write the launch use case in one line: giveaway, retail bundle, PR kit, event pack, or resale item.
- State the target fill weight and the largest item that must fit through the opening.
- Decide whether the bag must look premium enough to be kept and reused after the launch.
Choose the Cotton Body by Weight
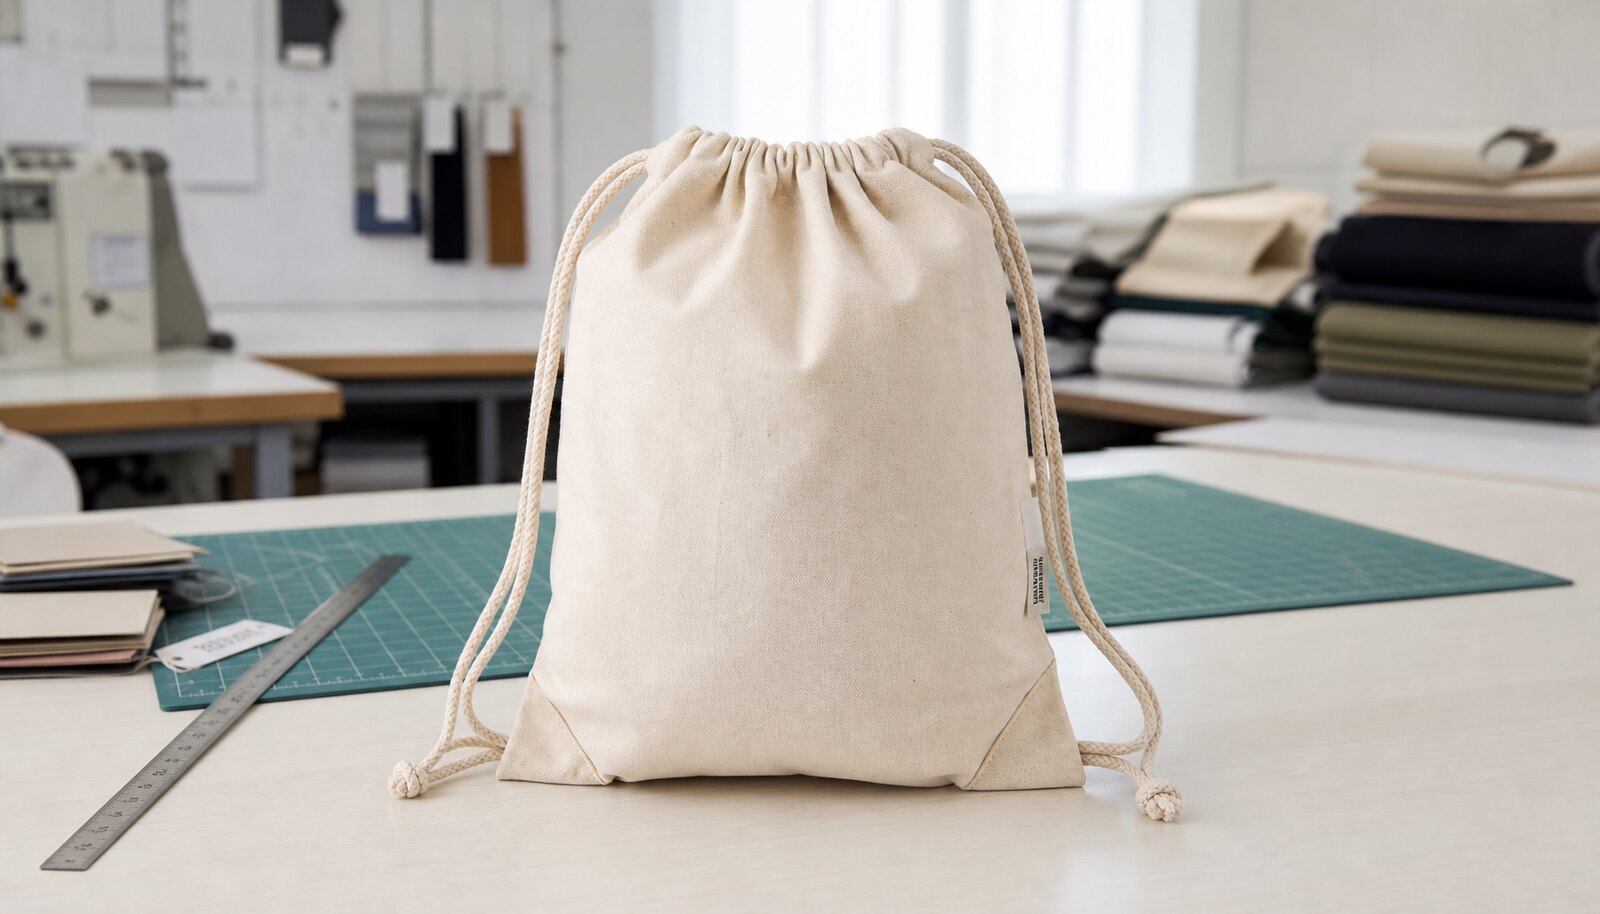
Fabric weight drives both price and perception. Lightweight cotton around 5 oz to 6 oz is usually enough for a low-cost promo bag or a short-term launch item that will not carry heavy contents. Midweight cotton around 8 oz is a stronger balance for brand launches because it gives better drape, better print stability, and fewer complaints about thin, wrinkled cloth. Heavier 10 oz cotton or canvas belongs in premium retail kits, higher-value merchandise, or any launch where the bag itself is part of the product story.
Do not let a supplier substitute the cloth under a generic description like "cotton material." Ask for the exact fabric construction, width, and finish. A plain weave can look different from twill, and a brushed or washed finish can change both appearance and shrink behavior. If the bag will be printed, request a prewash or stabilization plan if the fabric is prone to shrinkage. If the bag will be blank with only a label, make sure the weight and weave still produce a tidy surface instead of a limp promotional sack.
- 5 oz to 6 oz: light, lower cost, best for giveaways with modest load.
- 8 oz: the most balanced choice for many brand launches.
- 10 oz and above: better for premium kits, resale, or repeated use.
Lock the Construction Before Pricing
Construction details affect both quote accuracy and field performance. A drawstring backpack can be built as a simple single-panel body, a gusseted body with more volume, or a more structured cut-and-sew style with reinforcement at the stress points. If the bag needs to hold a bottle, catalog, sweatshirt, or boxed item, the gusset matters. If the bag is only carrying lightweight inserts, a simpler body may be fine and will cost less. The wrong structure adds freight weight, changes carton count, and can push a launch over budget without improving the buyer experience.
The small details are what usually fail in production. Specify whether the cord runs through a stitched channel, metal eyelets, or a fabric tunnel. Ask for reinforcement at the top corners and the bottom seam where the cord tension transfers into the body. If the bag is expected to be reused, a double-row seam or bartack at the cord attachment point is worth the extra sewing time. If you leave these points open, every quote becomes hard to compare because one supplier prices a basic promo build and another quotes a more durable version.
- Choose the body type based on actual contents, not on the artwork layout.
- Define whether the opening must close smoothly when the bag is full.
- Specify reinforcement at the top corners, cord exits, and bottom seam.
Decoration Methods That Hold Up
For cotton drawstring backpacks, decoration should be matched to the logo, the fabric, and the launch timeline. One-color screen print is usually the safest route for a sharp, cost-controlled brand mark on a cotton surface. It is strong for large logos and simple text, but it needs clean artwork and enough print area. If the design uses multiple colors, gradients, or small details, screen print can still work, but the risk of fill-in and misregistration rises quickly. For premium launches, a woven label or side patch can give a more durable brand signal without crowding the front panel.
Embroidery can look strong on thicker cotton, but it is not the default answer for every launch. On lighter fabrics, embroidery can pucker or distort the body, and it raises stitch time. Heat transfer may help when the logo has fine detail, but buyers should test abrasion and wash resistance if the bag will circulate after launch. The practical rule is simple: use the method that fits the logo geometry and the fabric surface, then verify a physical sample under the same viewing conditions your customer will use.
- Use screen print for simple, flat brand marks and controlled unit cost.
- Use woven labels or side tags when the launch needs a premium finish.
- Use embroidery only when the fabric weight and logo size support it.
Read Quotes Like a Buyer, Not a Shopper
A useful supplier quote should break the bag into cost components. The buyer should be able to see the base body cost, decoration setup, print labor, labels or hangtags, packing, and any sample fees. When a supplier gives only one unit price, you lose the ability to compare sources properly. A slightly cheaper bag can become more expensive once you add carton changes, individual polybags, or a second print screen. For a brand launch, quote structure matters as much as the number at the bottom.
The same rule applies to MOQ logic. Ask what quantity unlocks the quoted price and where the next break sits. Many factories will price a lower MOQ with a higher per-unit cost because they need to absorb setup time across fewer pieces. That is not a problem if the launch is a pilot, but it becomes expensive if the buyer later repeats the order in volume and the supplier changes the spec to hit the target price. A clean RFQ should state the launch quantity, the forecast repeat quantity, and whether the factory should quote both.
- Separate base bag, decoration, packing, samples, and freight in every quote.
- Request price breaks at 500, 1,000, 3,000, and 5,000 units if those levels matter to your launch.
- Make the supplier state what changes when the MOQ changes.
Use the Comparison Table to Pick a Sourcing Route
The comparison table is meant to stop buyers from treating every supplier route as interchangeable. A direct factory is usually the best fit when you need repeatability, tight control over sewing and print, and a stable spec for future launches. A trading company can help when the order includes multiple products or when the buyer wants one point of contact across several factories. Stock-and-branding routes are useful for fast tests, but the buyer must accept narrower choice on fabric and size.
The mistake to avoid is choosing the route first and the spec later. If the launch depends on a premium feel, a custom cut-and-sew factory may be the right route even if the price is higher. If the launch is a short-term event, a stock bag with local branding may preserve margin and time. The route should match the business goal: speed, margin, repeatability, or retail presentation. If the supplier cannot explain which part of the process they own, the route is probably too loose for a launch where brand perception is on the line.
- Use direct factory sourcing when the same bag will be reordered.
- Use stock-plus-branding when speed matters more than exact fabric choice.
- Use a hybrid route only if the color and print approval process is already controlled.
Sample Approval Without Surprises
A sample is not only a preview of appearance. It is the moment to lock the things that usually cause claim disputes later: size, print position, cord length, seam quality, and pack-out. Review the sample against a written spec sheet, not against memory or a screenshot. If the bag will be packed with a launch kit, fill it with the actual items and confirm that the opening, strap pull, and fold still work. If the sample feels close but not exact, write down the correction while the factory still has the material and the pattern open.
For launch work, I would not approve a sample until the buyer has checked the bag in daylight, under retail lighting, and when packed. A logo that looks fine on a flat sample can distort once the bag is full. A cord that feels smooth can still dig into the fabric if the channel is too narrow. If you need several approvals, keep them structured: first the blank sample, then the decorated sample, then the pre-production sample. That sequence costs time upfront but saves far more time than reworking a full order.
- Approve size, structure, and decoration separately if the launch is complex.
- Test the sample with the actual contents, not an empty bag.
- Capture photos of the approved sample next to the signed spec sheet.
Packing and Kitting for Retail or Events
Packing should support the way the bag will reach the customer. A launch giveaway often needs a simple fold and bulk carton pack to keep cost low. A retail or PR kit may need an individual polybag, insert card, barcode label, or branded hangtag. Each choice changes labor and freight. If the bag is thin and creased badly, the opening photo in a launch kit will look cheap even when the print is correct. If the bag is overpacked, the carton may deform and the contents can crease or scuff the logo.
Ask the factory to quote the pack method the buyer actually wants, not the easiest one to produce. Carton count should be optimized for shipping efficiency and warehouse handling. If the order is going into retail, confirm whether the carton needs a master label, item code, carton quantity, and country-of-origin marking. If the bag is part of a larger kit, confirm whether the factory is responsible for kitting or only for bag supply. That division matters because the quote and the lead time change when assembly is added.
- Confirm whether each bag is folded flat, rolled, or stuffed for shipment.
- Define whether individual polybags are needed and whether they should include warnings or barcodes.
- Ask for carton dimensions and carton count before approving freight planning.
Lead Time, Risk, and Production Buffer
Launch timing fails when buyers treat lead time as one number. A real production schedule has separate gates: sample preparation, sample approval, raw material booking, print preparation, sewing, finishing, packing, and shipment. Cotton can also introduce variability through shrinkage, shade lot differences, or fabric rebooking if the first lot is not enough. For a brand launch, build a buffer around the approval step, because decoration changes are where schedules usually slip. A two-day delay at the sample stage can turn into a two-week slip if fabric or print screens have to be redone.
The buyer should also look at risk by source route. A stock bag can move quickly but offers less control over exact fabric and color. A custom factory route gives more control but needs more discipline on artwork and pre-production sign-off. If the launch date is fixed, the safest tactic is to freeze the spec early and avoid late changes to cord color, logo size, or packing count. A small change can trigger a new material order, a new print screen, or a new carton layout, and each of those costs time even if the unit price stays the same.
- Separate sample timing from mass production timing in the schedule.
- Add buffer for artwork approval and fabric booking.
- Avoid late changes to cord color, label type, or pack format after sampling.
QC Thresholds and Final Release
Final QC should be built around the risks that matter for a launch bag: size consistency, decoration quality, seam integrity, cord performance, and pack accuracy. A good shipment is not just visually clean; it is consistent across cartons. Check that the bag dimensions stay within the allowed tolerance and that print placement does not drift from left to right or from one batch to another. If the bag is going into retail, inspect the first and last cartons from the run, not only the middle. That catches packing drift and late-stage material variation.
For launch work, the release standard should be written before production starts. If the bag will carry products, test it loaded to the expected use weight and watch the stress points. If the print must survive handling, rub the surface gently and inspect whether ink transfers or cracks. If you are using labels, make sure the label edges are clean and the stitching does not distort the body. Final release should be a formal decision tied to these criteria, not a casual visual approval when the factory is eager to ship.
- Use a written tolerance for size, print placement, and seam quality.
- Inspect both the first and last cartons from the run.
- Release shipment only after load, rub, and pack checks match the approved sample.
Specification comparison for buyers
| Spec decision | Recommended option | When it fits | Buyer risk to check |
|---|---|---|---|
| Primary sourcing route | Direct factory with in-house sewing and print | Best for repeat launches, custom sizes, and buyers who need the same spec every season | Confirm that the factory actually controls fabric, printing, and packing instead of subcontracting each step |
| Primary sourcing route | Trading company or sourcing office | Useful when the launch includes multiple item types or when the buyer needs one contact for several factories | Watch for spec drift, unclear margin, and weak ownership of production issues |
| Primary sourcing route | Stock bag plus local branding | Good for fast launches, pilot drops, or smaller initial retail tests | Color, size, and fabric weight are limited to stock availability and may not match the brand brief exactly |
| Bag structure | Simple single-panel body with stitched channel | Works for promo launches where cost and speed matter more than premium structure | Load-bearing performance is weaker than a gusseted build if the bag is filled heavily |
| Bag structure | Gusseted body with reinforced seams | Better for retail bundles, kit bags, and launches where the bag is part of the product experience | Check seam alignment, extra sewing time, and whether the gusset changes your target carton size |
| Decoration route | One-color screen print | Best for clean logos, large marks, and controlled unit cost at scale | Fine lines, gradients, and small reverse text can fill in or lose edge sharpness on textured cotton |
| Decoration route | Woven label or side tag plus small print | Useful for premium launches that need brand visibility without a large front print | Check label placement, stitch quality, and whether the label adds enough value to justify the extra operation |
| Supply model | One factory handles fabric, sewing, decoration, and packing | Best when schedule risk matters and the launch window is tight | Single-point failure is higher if one process slips, so confirm backup capacity and approval gates |
| Supply model | Split production across bag factory and local finishing | Fits buyers who need a faster art test or local compliance steps | Color matching, transfer durability, and rework costs can rise when the work is split across suppliers |
Buyer checklist before sampling
- Define the actual launch use case: giveaway, retail bundle, event pack, or product packaging, because the use case drives fabric weight, print area, and packing.
- Lock the target fabric weight in GSM or oz before requesting quotes, so each supplier prices the same body and does not substitute a lighter cloth.
- State the exact decoration method, artwork size, color count, and print placement, including whether the logo must wrap over one or two panels.
- Confirm the drawcord material, cord diameter, stitch reinforcement, and whether the bag needs eyelets, a channel, or a self-fabric tunnel.
- Set the MOQ target and ask suppliers to quote price breaks by quantity, not just one unit price.
- Request sample photos, fabric swatches, and a pre-production sample before mass production starts.
- Specify packing detail: fold method, individual polybag or not, barcode label, insert card, and master carton count.
- Ask for lead time split between sample approval, material booking, production, and packing, not one vague total lead time.
- Match the quote to Incoterms and destination port or delivery point so landed cost can be compared correctly.
- Require a defect tolerance and inspection standard before deposit, especially on print registration, seams, and cord strength.
Factory quote questions to send
- What is the exact fabric composition, weight, and finish you are quoting, and can you share a swatch photo or mill spec?
- Is the bag body quoted as a single panel, a gusseted body, or a fully custom cut-and-sew structure?
- Which print method is included, how many colors are priced, and what is the setup or plate charge per design?
- What is the MOQ at the quoted price, and what is the next price break at higher quantities?
- Does your price include drawcord, eyelets, labels, hangtags, and any reinforcement stitching?
- What packing is included per unit and per carton, and can you quote with and without individual polybags?
- What is the sample fee, and will it be credited back after mass order confirmation?
- What is the production lead time after sample approval, and how many days are needed for fabric booking and print approval?
- What inspection standard do you use before shipment, and can you share the defect categories you reject?
- Which Incoterm are you quoting, and what costs are excluded from the unit price?
Quality-control points to confirm
- Measure finished size against the approved spec and allow only the tolerance you define in writing before production.
- Check fabric weight and handfeel on arrival; a lighter cloth can pass visual inspection while failing on load performance.
- Inspect print placement, ink coverage, and color match under daylight, not only in factory lighting.
- Pull and inspect the drawcord channel or eyelets for tearing, skipped stitches, or rough edges that can cut the cord.
- Open seams at the bottom corners, side seams, and top hem to confirm reinforcement where the load transfers.
- Verify that the logo on the sample matches the approved art file in size, position, and orientation.
- Confirm that folded pack-out fits the retail carton or master carton without crushing the print or deforming the body.
- Check carton count, barcode placement, carton marks, and whether the outer case matches the agreed pack plan.
- Request random pull tests on cords and seams using the actual filled weight expected in market use.
- Hold shipment if there are color lot shifts, print smudging, or any sign of mixed sizing across cartons.