1. Start With the Corporate Gifting Job, Not the Portfolio Shape
A canvas zipper portfolio looks simple, but in procurement terms it is a container for a specific business moment. It might be handed to new employees on day one, placed on seats at a conference, shipped to dealers with a product catalog, or presented to clients in an executive meeting. Each scenario changes the right specification. A conference handout must pack quickly and survive bulk distribution. An onboarding kit may need to hold a welcome letter, notebook, pen, ID instructions, and policy sheets. An executive gift usually needs better shape retention and cleaner hardware because it will be judged immediately in the handover moment.
The fastest way to lose control of quotes is to ask for “a canvas zipper portfolio with logo” without telling suppliers what must fit inside. One supplier may quote a flat document sleeve. Another may quote a lined portfolio with gusset, slip pocket, and heavier zipper. Both prices may be honest, but they are not comparable. Before asking for cost, write the use case and packing contents into the RFQ. This turns the request into a buying specification rather than a decoration exercise.
For a corporate gifting program, also consider the delivery path. Will the goods ship to one event venue, to regional offices, or to a fulfillment warehouse that will add other items? If the portfolio is part of a kit, it may need to arrive flat, clean, and easy to open at a packing line. If it is a direct gift, individual presentation may matter more than carton efficiency.
- Conference programs usually favor slim profiles, fast packing, and consistent carton counts.
- Onboarding kits often need more internal organization and enough clearance for HR documents or a welcome notebook.
- Executive gifts justify better zipper pullers, lining, and a cleaner logo method.
- Dealer or sales kits may need extra gusset depth for catalogs, price sheets, or product inserts.
- Event delivery should include a required arrival date, venue receiving rules, and carton labeling instructions.
2. Define Finished Dimensions and Real Internal Clearance
Size is one of the largest cost drivers because it controls fabric consumption, zipper length, lining, carton volume, and packing method. Many buyers only state the outside size, but the user experiences the inside size. A portfolio that measures 34 x 25 cm outside may not hold A4 documents comfortably if the zipper seam, lining, and rounded corners reduce the opening. For letter-size documents, the same issue applies: the paper may fit inside the body but catch at the zipper opening.
A practical A4-oriented canvas zipper portfolio might be specified at about 34 x 25 cm outside, with at least 31.5 x 22.5 cm clear internal space. A letter-size version may need about 13.5 x 10 inches outside, with internal clearance checked against an actual folder or notebook. If a tablet is included, specify the device model or maximum device size with case thickness. A 10.9-inch tablet without a case is a different requirement from the same tablet in a protective cover.
The zipper opening matters as much as the body dimensions. A straight top zipper is cheaper and packs flatter, but a wrap-around zipper that runs down one or both sides can make document access easier. If the portfolio will be opened at a registration desk and stuffed quickly, a wider opening can reduce labor frustration. If it will be mailed, the simpler top zip may reduce bulk and cost.
- State outside finished size and minimum internal clearance as separate requirements.
- Confirm whether documents must fit loose, inside a folder, or with a notebook and pen.
- Measure tablets with the protective case, not only the device body.
- Ask the supplier to show the usable opening width after zipper seam allowance.
- Set a size tolerance, such as plus or minus 0.5 cm for slim builds or plus or minus 1.0 cm for larger gusseted portfolios.
3. Choose Canvas Weight, Lining, and Structure With Cost in Mind
Canvas weight affects price, hand feel, print quality, and shape retention. For most canvas zipper portfolios wholesale programs, 12 oz to 14 oz finished canvas is a practical range for document carry and standard corporate gifting. It has enough substance to feel like a business accessory without making the product too bulky for cartons or mailers. For higher-end gifts, 16 oz canvas can feel more substantial, but it also increases fabric cost, sewing resistance, and freight weight.
The word “finished” matters. A supplier may quote greige fabric weight before dyeing, washing, coating, or finishing. The final hand feel may be lighter or stiffer than expected. Ask whether the fabric is piece-dyed, yarn-dyed, washed, coated, or pre-shrunk. If the canvas will be screen printed, a tighter weave usually gives cleaner logo edges. If the fabric is too loose or hairy, ink can bleed and small type may look fuzzy.
Structure should match the gifting tier. An unlined single-layer portfolio is economical, but it can feel floppy and may expose internal seam allowances. A partial lining improves presentation and hides construction. Light interfacing can support the front panel and zipper area, but too much interfacing can create hard edges, bulky corners, or a warped front panel. For B2B buyers, the target is not maximum thickness; it is consistent shape at the agreed price.
- Use 12 oz to 14 oz finished canvas for most practical corporate gifting orders.
- Consider 16 oz canvas for executive gifting where hand feel matters more than the lowest freight cost.
- Specify lining type and color, not only “with lining.”
- Use light interfacing around panels or zipper zones when better shape retention is needed.
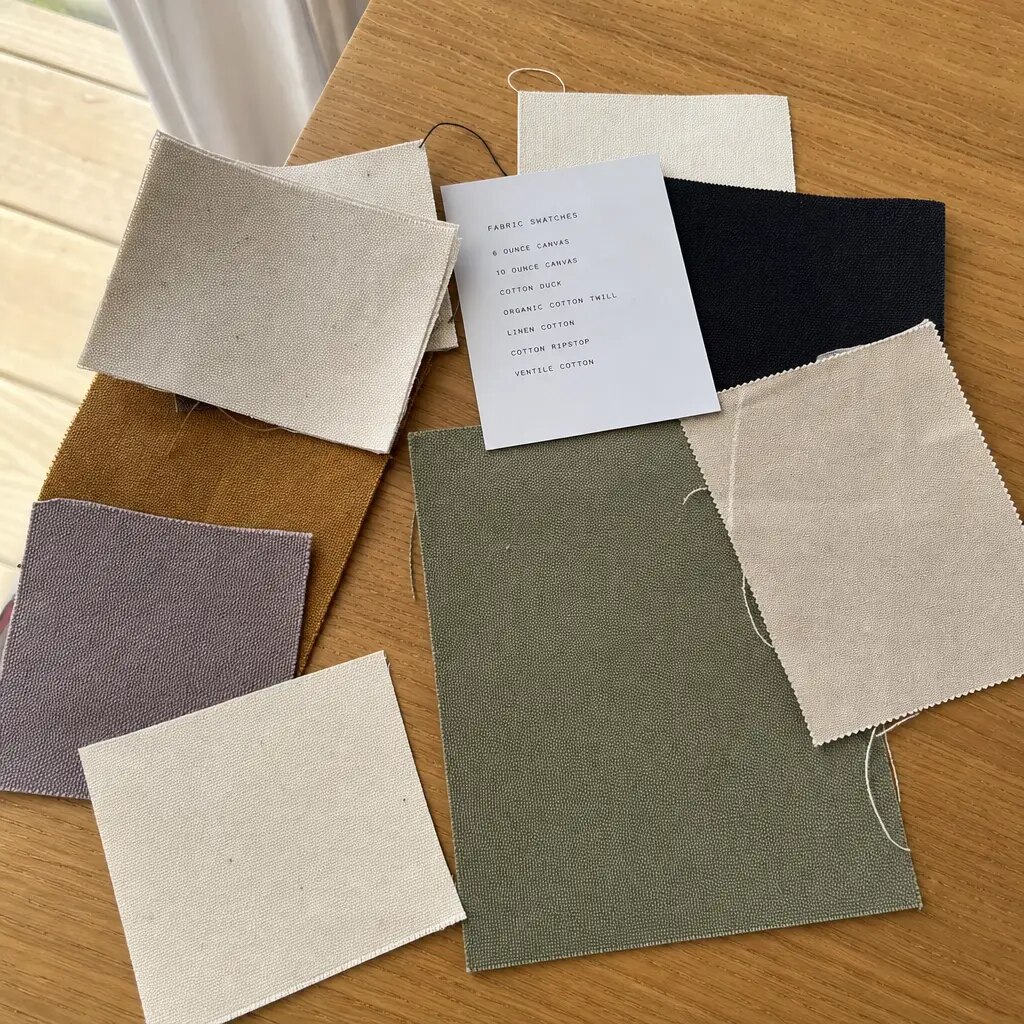
- Request fabric swatches and a made sample before approving bulk fabric purchase.
4. Specify Zipper, Puller, Pockets, and Sewing Details
The zipper is the part users touch most, so it deserves a real specification. Nylon coil zippers are usually the safest choice for canvas zipper portfolios because they are smooth, relatively lightweight, and easier to sew over long runs than many metal zippers. A 5# nylon coil zipper often works for slim document portfolios. An 8# zipper can be appropriate for wider, heavier, or gusseted designs that will be opened frequently. Metal zippers can look premium, but they can also add weight, scratch contents, and create higher rejection risk if the tape or seam construction is weak.
Do not approve a quote that says only “good zipper.” Specify zipper size, tape color, slider finish, puller shape, and whether the puller is plain, metal, molded, leather-like, or custom branded. A custom puller can improve perceived value, but it may require a mold fee and longer lead time. If the logo is tiny or the finish is poor, a custom puller may look worse than a clean standard pull.
Interior features should be useful, not excessive. One main compartment, one slip pocket, and a pen loop may be enough for many onboarding or conference kits. Extra card slots, dividers, mesh pockets, and elastic loops increase sewing time and inspection points. If pockets are needed, define usable pocket width and depth. A pocket that exists on paper but cannot hold the intended item creates complaints without adding value.
- Specify 5# or 8# zipper, nylon coil or metal, tape color, slider finish, and puller style.
- For wrap-around zippers, test the corner turn so the slider does not catch the seam allowance.
- Define pocket dimensions by usable opening, not just panel size.
- Request stitch density guidance, such as consistent stitching around zipper and pocket edges with no skipped stitches.
- Use bartacks or reinforced stitching at pocket openings and zipper ends where stress is expected.
5. Match Branding Method to Artwork, Canvas, and Order Volume
Corporate buyers often overcomplicate decoration. A clean one-color logo, woven side label, or restrained embroidery mark usually looks more professional than a large multi-color graphic on rough canvas. The correct branding method depends on logo complexity, fabric color, order quantity, and the role of the gift. A conference sponsor logo may need visibility from a distance. An executive gift may work better with a small tonal mark or woven label.
Screen printing is usually economical for simple logos and larger quantities. It can look sharp on tight canvas, but fine lines may bleed on rough fabric. Embroidery adds texture and durability, but small lettering can close up, and dense stitching can pucker the panel if the fabric is not stabilized. Woven labels keep small logos crisp and are useful when the same label may be used across multiple products. Heat transfer can reproduce complex artwork, but it requires rub, adhesion, and heat-resistance checks.
Never approve decoration from a digital mockup alone. A mockup can show placement, but it cannot prove ink edge, thread density, fabric distortion, or color match. Ask for a print strikeoff, stitch-out, or label sample on bulk-intent material. For logo placement, define tolerance. For example, the logo center may be allowed plus or minus 0.3 cm to 0.5 cm from the approved position depending on method and panel construction.
- Use screen print for simple, bold artwork and cost-sensitive volume orders.
- Use embroidery only when the logo is not too detailed and the panel can be stabilized.
- Use woven labels for small logos that must stay crisp across batches.
- Provide Pantone or approved color references instead of vague color names.
- Set logo size, position, and placement tolerance before production begins.
6. Compare Suppliers With a Commercial Matrix, Not a Single Unit Price
A low unit price can be useful, but it is not a sourcing decision by itself. Canvas zipper portfolios have many quote variables: fabric weight, lining, zipper quality, puller finish, decoration method, pocket count, sampling route, packing format, carton strength, and inspection responsibility. If one supplier quotes a lower number, the first question should be what is missing, not why everyone else is expensive.
Use a supplier comparison matrix that normalizes the commercial terms. Each supplier should quote the same finished size, same canvas weight, same zipper, same branding, same packing, and same delivery term. Then compare price tiers at 500, 1,000, 3,000, and 5,000 pieces. MOQ tiers reveal how much of the cost is fixed setup versus true production cost. At 500 pieces, setup and material sourcing may dominate. At 3,000 pieces, unit economics usually become clearer because cutting, printing, and packing are spread over more units.
Also verify who actually performs the work. Instead of asking only “Do you make it in-house?”, request evidence tied to the process. Ask for production line photos for similar portfolios, a short video of sewing and zipper installation, the name or location of the printing area, and whether a third-party inspection can visit the actual production site. This is especially important when a trading company or promotional supplier coordinates multiple vendors.
- Compare suppliers on identical specs and identical packing assumptions.
- Request tiered pricing at 500, 1,000, 3,000, and 5,000 pieces.
- Separate unit cost, setup cost, sample cost, mold cost, inspection cost, and packing upgrade cost.
- Ask whether quoted materials are stock or must be custom sourced after deposit.
- Verify production control through samples, factory documentation, process photos, video, or inspection access.
7. Use the Pre-Production Sample as the Approval Gate
The pre-production sample is not a courtesy item; it is the physical contract for the bulk order. It should be made with bulk-intent canvas, zipper, lining, interfacing, thread, label, and decoration method. A showroom sample is useful for first discussion, but it may use better fabric or a different zipper than the mass-production quote. If the buyer approves the wrong sample, the factory can honestly produce to a different standard than the buyer expected.
Sample review should be practical. Pack the actual contents into the sample: documents, notebook, pen, brochure, tablet, or welcome card. Open and close the zipper repeatedly. Check whether the opening is wide enough for fast stuffing. Look at the front panel after it has been packed flat overnight. Review whether the logo is readable from normal distance and whether the decoration distorts the canvas. If the item will be included in an onboarding kit, test it in the final mailer or gift box.
Keep sample approval controlled. Mark the approved sample with date, version, dimensions, materials, and signature. Photograph important details such as zipper puller, inside pocket, logo position, and carton packing. If revisions are needed, record them in writing. Do not rely on chat messages scattered across a long thread. Procurement teams should treat the signed sample, spec sheet, and PO as one approval package.
- Reject samples made from upgraded materials that are not listed in the quote.
- Test the sample with real inserts, not only a ruler.
- Check zipper smoothness, logo quality, pocket usability, and shape after packing.
- Keep one approved sample with the buyer and one sealed reference sample at the factory.
- Do not release mass production until all sample changes are confirmed in the spec sheet.
8. Build Procurement-Grade QC: Defects, AQL, Checkpoints, and Pass/Fail
Quality control for corporate gifting should be more formal than “send photos before shipment.” A gift item with a broken zipper, wrong logo, strong odor, or stained canvas can damage the campaign and create repacking labor. Before the PO is confirmed, define defect classes, inspection timing, and pass/fail rules. This gives the supplier a clear standard and gives the buyer leverage if goods are not acceptable.
A practical defect system separates critical, major, and minor defects. Critical defects include mold, unsafe sharp hardware, severe chemical odor, wrong logo, or contamination. Major defects include broken zipper, open seam, missing pocket, wrong material, size outside tolerance, severe print misplacement, or visible stains. Minor defects include small thread ends, slight removable dust, or minor shade variation within the approved range. Inspection can use general level II sampling with AQL 2.5 for major defects and AQL 4.0 for minor defects, unless your company requires a stricter standard.
QC checkpoints should happen before it is too late to fix issues. Check incoming fabric and zipper trims before cutting. Check first output after sewing starts. Review decoration after the first production print or embroidery run. Conduct final random inspection after goods are packed but before shipment release. For event-critical orders, a pre-shipment inspection is less expensive than discovering defects at the venue.
- Incoming material check: fabric weight, shade, shrinkage risk, zipper type, puller finish, lining, and labels.
- In-line sewing check: seam allowance, stitch density, pocket position, zipper installation, and panel shape.
- Decoration check: logo size, placement, color, registration, embroidery density, and print adhesion.
- Final inspection: dimensions, zipper function, cleanliness, odor, packing, carton marks, and quantity.
- Pass/fail rule: define rework, replacement, reinspection, and shipment hold procedures before production starts.
9. Packing, Cartons, Event Delivery, and Retail-Ready Tradeoffs
Packing is part of the product because it affects appearance, damage rate, warehouse receiving, and landed cost. For most wholesale corporate gifting orders, flat packing in an individual polybag and export carton is efficient and easy to count. The portfolio stays cleaner, and the warehouse can verify quantity quickly. However, polybags can trap moisture or wrinkle decoration if the product is packed too soon after printing, so the supplier should confirm drying and airing time.
Retail-ready packing is different from gift-ready bulk packing. Retail may require hangtags, barcode labels, printed belly bands, shelf cartons, or individual gift boxes. These improve presentation and downstream scanning but add material cost, labor, carton volume, and freight. For internal onboarding or event distribution, a simple clean polybag with carton label may be enough. For executive gifting, a paper sleeve or branded insert may make sense, but it should be quoted as an option rather than hidden inside the base price.
Carton specifications should be reviewed before the PO is final. Ask for units per carton, carton dimensions, net weight, gross weight, and total CBM. If cartons are overpacked, portfolios can crease and zipper tape can deform. If cartons are underfilled, goods can shift, scuff, or crush. Event orders also need clear carton marks: item name, PO number, color, quantity, carton number, destination, and any kit sequence information.
- Quote both economical bulk gift packing and retail-ready packing if stakeholders are undecided.
- Confirm print is dry and odor is controlled before individual packing.
- Request carton dimensions, gross weight, and CBM before freight booking.
- Use carton labels that match the packing list and warehouse receiving requirements.
- For event venues, confirm delivery window, pallet rules, liftgate needs, and carton numbering before shipment.
10. Lead Time, MOQ Tiers, and Landed-Cost Award Logic
Lead time is more than sewing time. A new custom portfolio may include artwork proofing, fabric sourcing, sample making, sample revision, material booking, cutting, sewing, decoration, inspection, packing, and freight handover. If the supplier says production takes 20 days but has not included sample approval or material lead time, the calendar is incomplete. Corporate gifting programs often have fixed launch dates, so missing one week can be more expensive than paying a slightly higher unit price to a better-controlled supplier.
MOQ should be evaluated in tiers. At 500 pieces, the buyer may be paying a high share of setup, print screens, material minimums, and sampling. At 1,000 pieces, the price may improve but still carry trim sourcing cost. At 3,000 to 5,000 pieces, cutting, sewing, printing, and packing efficiencies are easier to see. The best supplier is not always the one with the lowest MOQ; it is the one that explains how cost changes with volume and what compromises are needed at lower quantities.
Award the order on landed cost, not factory unit price alone. Landed cost includes product cost, setup, sample, inspection, inland freight, export packing, international freight, duty, warehouse receiving, kitting, repacking, and replacement risk. A supplier that packs efficiently, holds size tolerance, and avoids zipper failures can be cheaper after delivery even if the unit price is slightly higher. For event-driven gifts, process reliability is part of the cost model.
- Build a timeline with separate dates for sample approval, material booking, production start, final inspection, packing, and shipment handover.
- Ask whether canvas, zipper, lining, labels, and cartons are stock materials or custom purchases.
- Compare MOQ tiers at 500, 1,000, 3,000, and 5,000 pieces with fixed costs shown separately.
- Include carton volume and packing method in freight estimates before awarding the order.
- Choose the supplier with the best combination of compliant sample, clear QC plan, realistic lead time, and total landed cost.
Specification comparison for buyers
| Supplier / quote model | Best fit | Commercial checks to compare | Procurement risk to control |
|---|---|---|---|
| Direct cut-and-sew factory with sample room | Repeat corporate gifting programs, tighter technical control, custom interiors, and stable reorders | Ask for tiered pricing at 500, 1,000, 3,000, and 5,000 pcs; confirm sample fee, setup fee, print charge, packing charge, and payment terms separately | Verify capability with factory photos or video of cutting, sewing, printing, inspection, and packing areas; require a bulk-intent pre-production sample before deposit release |
| Trading company managing multiple workshops | Smaller buyers that need sourcing support, mixed products in one gift kit, or flexible vendor communication | Compare whether the quote includes commission, local transport between vendors, consolidated packing, and export documentation | Require disclosure of which workshop sews the portfolio and which vendor prints it; ask for inspection access at the actual production site |
| Promotional-products supplier | Fast corporate campaigns with simple logo decoration and standard shapes | Check whether the item is stock blank plus decoration or fully custom production; confirm available colors, decoration area, and rush fees | Stock dimensions may not fit your inserts; request a physical blank and decoration proof rather than approving only a digital mockup |
| Premium bag manufacturer | Executive gifts, board packs, partner awards, and higher perceived-value programs | Compare 16 oz canvas, lining, zipper grade, puller finish, edge finishing, individual gift packaging, and lower defect allowance | Higher unit cost can be justified only if the finish is visibly better; define pass/fail criteria for seams, logo placement, odor, and shape retention |
| Low-price online quote or marketplace vendor | Initial market scan or very basic trial order with limited customization | Normalize all inclusions: fabric weight, zipper size, print method, polybag, carton mark, sampling, and inspection | Low price often excludes packing, QC, or upgraded trims; do not award until the quote is converted into a signed spec sheet |
| Local decorator using imported blanks | Short-deadline events, small quantities, or domestic fulfillment | Compare blank cost, decoration cost, reject allowance, local freight, kitting labor, and event-delivery service | Blank supply may vary by batch; confirm exact finished dimensions and run a test pack with the real notebook, documents, and inserts |
Buyer checklist before sampling
- Define the gifting scenario first: employee onboarding, conference handout, executive meeting pack, dealer incentive, university welcome kit, or retail resale.
- List the real contents to be packed: A4 or letter documents, notebook thickness, pen, business cards, charger cable, tablet size, brochure, or welcome letter.
- Specify finished outside dimensions and minimum usable internal clearance; for example, 34 x 25 cm outside with at least 31.5 x 22.5 cm clear space for A4 inserts.
- Confirm whether the zipper opens only across the top or wraps down one or both sides for easier document access.
- State canvas weight as finished fabric weight, not only greige fabric; ask whether it is dyed, washed, coated, or pre-shrunk.
- Lock the structure: unlined, partial lining, full lining, light interfacing, padded panel, gusset depth, pen loop, slip pocket, card pocket, or divider.
- Specify zipper size, zipper type, tape color, puller material, puller finish, and whether a custom puller or plain puller is included.
- Attach vector artwork and define decoration size, position, color standard, and acceptable registration tolerance.
- Request price tiers at 500, 1,000, 3,000, and 5,000 pieces, with setup, sampling, decoration, packing, and inspection costs shown separately.
- Ask for two packing options: economical bulk gift packing and retail-ready packing with hangtag, barcode, or branded sleeve if needed.
Factory quote questions to send
- What are the finished outside dimensions and the guaranteed minimum internal clearance after seam allowance, lining, and zipper installation?
- Is the canvas weight quoted as greige, finished, washed, or coated fabric weight, and what shrinkage range do you expect after dyeing or printing?
- What is the exact zipper specification: nylon coil or metal, 5# or 8#, tape width, slider type, puller finish, and zipper source or equivalent grade?
- Which parts are made in-house and which are subcontracted: cutting, sewing, printing, embroidery, label making, inspection, and packing? How can we verify this before production?
- What is included in the unit price: logo decoration, woven label, hangtag, barcode label, individual polybag, desiccant, carton marking, inner divider, and export carton?
- How does the price change at 500, 1,000, 3,000, and 5,000 pieces, and what cost items remain fixed at each tier?
- What seam allowance, stitch density, bartack position, and thread type will you use around the zipper opening, pocket edges, and stress points?
- What tolerance can you hold for finished size, logo placement, pocket opening width, zipper length, and color shade?
- What AQL level and inspection sampling plan do you normally use for bags, and will you accept major defects at AQL 2.5 and minor defects at AQL 4.0 or another agreed level?
- Can the pre-production sample be made with bulk-intent fabric, zipper, lining, puller, and decoration, and will you keep one signed sample at the factory for production reference?
Quality-control points to confirm
- Use an approved pre-production sample as the control sample. One signed sample should stay with the buyer and one with the factory production team.
- Classify defects before inspection. Critical defects include unsafe sharp hardware, broken zipper, severe odor, mold, wrong logo, wrong material, or contaminated product. Major defects include unusable zipper, open seam, wrong size beyond tolerance, obvious print misplacement, severe staining, missing pocket, or distorted shape. Minor defects include small thread ends, slight shade variation within approved range, or minor removable marks.
- Apply an agreed sampling plan. For many bag orders, buyers use general inspection level II with AQL 2.5 for major defects and AQL 4.0 for minor defects, unless the buyer’s internal standard requires stricter limits.
- Check finished dimensions with a flat measurement method. Example tolerance: outside length and height within plus or minus 0.5 cm for slim portfolios and plus or minus 1.0 cm for larger gusseted builds, unless otherwise approved.
- Check usable internal clearance, not only outside size. An A4 portfolio should still accept the intended folder, notebook, or tablet after zipper tape, seam allowance, and lining are sewn in.
- Inspect zipper function on sample and bulk goods. The zipper should open and close smoothly across the full track without catching lining, twisting tape, separating teeth, or damaging the puller.
- Test zipper durability at the sample stage with repeated open-close cycles. A practical pre-production check is at least 20 smooth cycles on each sample, plus extra attention at corners if the zipper wraps down the side.
- Review stitch quality at stress points. Look for skipped stitches, loose thread, uneven stitch density, broken thread, puckering, weak bartacks, or seam slippage around the zipper, pocket edge, and gusset.
- Check logo accuracy against the approved proof. Confirm position, size, color, registration, edge sharpness, embroidery density, and readability at normal viewing distance.
- Evaluate canvas shade under consistent light. Compare bulk goods with the approved swatch under daylight or a light box; avoid approving color from phone images alone.