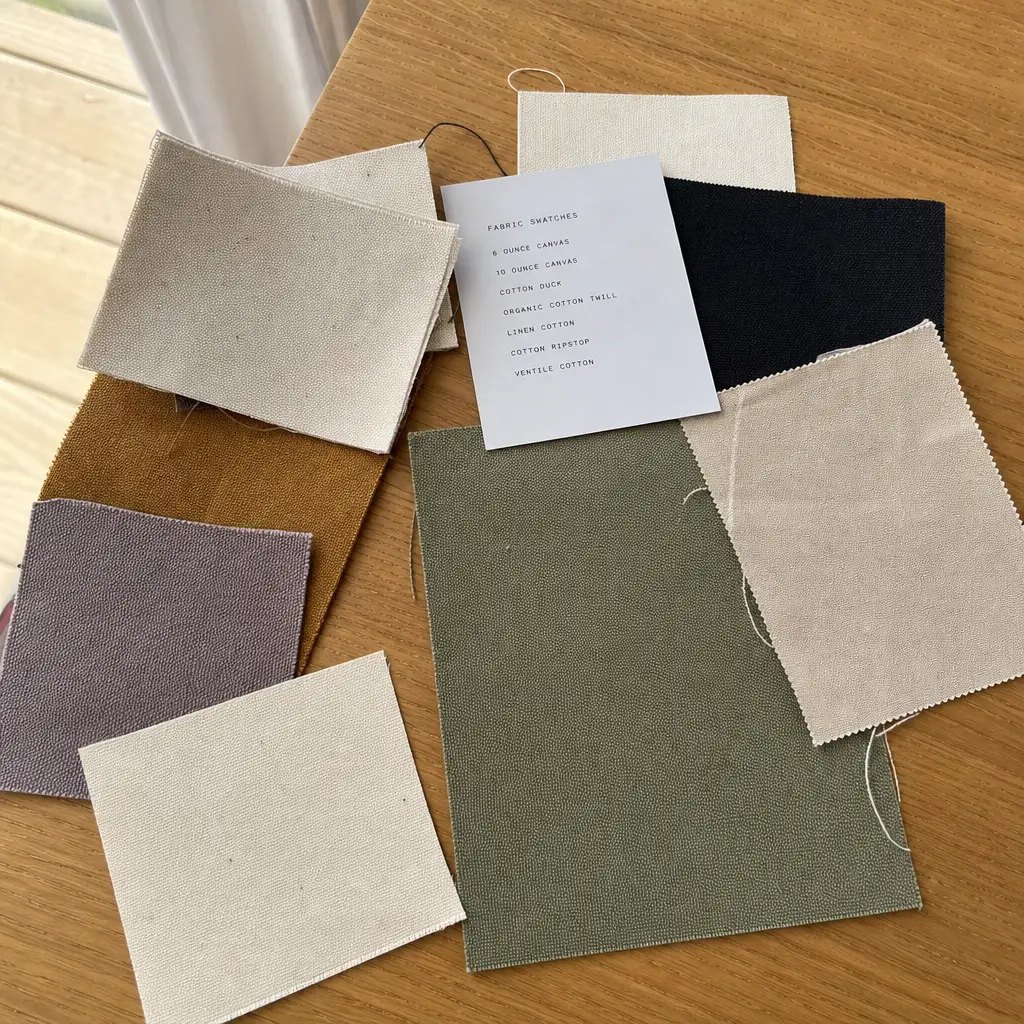
Why logo placement is the main buying problem on canvas zipper portfolios
For liquor retailers, a canvas zipper portfolio is usually not a fashion item. It is a working tool for distributor meetings, supplier appointments, tasting events, menu rollouts, or premium store gifting. That means the logo has to stay readable when the portfolio is carried, stacked, zipped, and opened many times. Buyers often focus first on canvas thickness or zipper style, but production problems usually start with branding placement. A logo that looks centered on a flat artwork file can land too close to a curved zipper seam, a hidden pocket stitch line, or an internal reinforcement board edge. The result is not always a rejected sample; more often it is a bulk order that looks slightly off and feels cheaper than expected.
The safest approach is to treat logo placement as a structural decision, not just a decoration note. On zipper portfolios, the usable branding area depends on the panel pattern, seam allowance, lining construction, and whether the front panel carries hidden pockets or foam. Liquor retail buyers also tend to use compact logos with serif text, shield icons, wine bottle graphics, or store emblems. These details can fill in, crack, or shift if they are printed on textured heavy canvas in the wrong position. A better RFQ identifies the exact logo zone and the reason for that choice, so suppliers can quote the same build instead of each factory interpreting the artwork differently.
- Common failure: logo too near zipper piping, causing wave distortion
- Common failure: logo centered on artwork but not on sewn panel
- Common failure: internal pen loop stitch shows through front print area
- Best practice: define print zone on panel pattern, not only on finished photo
Choose the right portfolio construction before you choose the logo method
Canvas zipper portfolios come in several basic constructions, and each one changes branding options. The simplest style is a soft zip-around document portfolio with canvas outer, lining, and stitched internal pockets. This version usually gives the largest printable front panel because there is less rigid reinforcement and less seam pull. A more structured version adds foam, cardboard, or PP board to hold shape. That looks more premium in meetings, but it also reduces how forgiving the front panel is during print and sewing. If the board edge sits close to the logo area, the print can show pressure lines or irregular ink contact.
For liquor retailer use, 12 oz to 14 oz canvas, around 340-400 GSM, is often the safest range. It feels substantial enough for sales materials and branded presentation use, but it is still workable for sewing, panel flattening, and logo application. At 8 oz to 10 oz, the body can become too soft and the printed logo may wrinkle when the portfolio is partly filled. Above 16 oz, the portfolio can look premium but costs rise from higher fabric usage, lower sewing efficiency, and more difficult edge turning around zippers. If you want a patch, embroidery, or debossed badge, the heavier body may help support it. If you want a clean one-color front print, midweight canvas usually performs better.
- Soft construction = larger safe print zone, lower cost
- Board-reinforced construction = better shape, higher seam and panel distortion risk
- Recommended fabric for most programs: 340-400 GSM canvas
- Natural and black stock fabrics usually reduce MOQ and shorten lead time
Best logo positions for liquor retail programs and where they usually fail
The most reliable logo positions on a canvas zipper portfolio are the lower right front panel, the lower center front panel, or the upper center area with good seam clearance. Lower right works well for store logos, distributor marks, or understated private label branding because it avoids the zipper crown area and leaves room for the product texture to look clean. Upper center works for larger logos when the design needs quick recognition at meetings or counter presentations, but it requires more attention to zipper track spacing and handle any front pocket construction. Full-center logos can look balanced on paper and still print unevenly if the panel pulls inward after zipper attachment.
Problems increase when logos are too large or too close to panel edges. A practical rule is to keep the logo at least 20-30 mm away from zipper seam lines, edge binding, piping, and bottom fold points. For textured canvas, small reverse-out text below 2 mm line width can lose definition, especially on natural cotton shades. If the buyer wants a crest, bottle silhouette, or script wordmark, ask for a test strike or digital print simulation only as a rough preview, then approve against a physical sample on the same canvas. A clean art file does not guarantee a clean production result once that art meets woven fabric texture and stitched construction.
- Safest zone: flat front panel away from zipper curve and pocket stitch paths
- Practical seam clearance: 20-30 mm minimum
- Avoid tiny serif or reverse text on coarse canvas unless physically tested
- Large centered logos need a panel-flatness review after sewing
Screen print, transfer, embroidery, or patch: what actually works on canvas portfolios
For most wholesale liquor retail programs, one-color or two-color screen printing is the most economical and repeatable branding route. It works best on flat panels before final assembly or on fully sewn panels if the machine setup allows a stable print bed. Screen print gives clean retail branding for chain programs and distributor volume orders, especially on black or natural canvas. On natural cotton, dark ink coverage is usually good, but bright brand colors may need underbase or adjusted pigment load. On black canvas, white or metallic-effect inks need extra attention to opacity and abrasion resistance. If the artwork is simple and the unit cost matters, screen print usually wins.
Embroidery, woven labels, and sewn patches fit different buying goals. Embroidery gives a premium gift look but can pucker lighter canvas and reduce usable logo detail on small text. A woven label is low-risk and clean, but the brand impact is more subtle. A PU or leather-look patch can raise perceived value for higher-end liquor retail promotions, but patch size, color bleed, and edge stitching all need review. Heat transfer can work for multicolor logos, though buyers should understand that on textured canvas the edge sharpness depends heavily on pressure consistency and fabric grain. For large-volume importer orders, it is often better to compare two branding methods side by side in sampling rather than debate them from artwork alone.
- Lowest-risk value option: 1-color screen print
- Best for premium feel: sewn patch or controlled embroidery
- Best for subtle branding: woven side label
- Multicolor logos need physical testing on the chosen canvas texture
How MOQ really changes with logo choice, fabric color, and internal features
Buyers often receive confusing MOQ answers because there are several MOQs inside one product. The factory may quote a bag MOQ, but the true commercial minimum also depends on fabric color, print method, custom pullers, labels, and packaging. A stock black or natural canvas zipper portfolio with one-color print may be available from 300-500 pcs, depending on size and internal complexity. Move to custom dyed fabric, custom metal zipper pullers, a sewn patch, and gift-box packing, and the workable MOQ can jump to 1000 pcs or more. If procurement compares quotes without separating these cost triggers, the cheapest supplier may simply be assuming fewer custom details.
Liquor retail buyers should request an itemized MOQ logic rather than a single MOQ line. This is useful when one part of the program needs a lower trial order and another part needs full retail rollout. For example, the body may run at 500 pcs, but a custom embossed patch may require 1000 pcs, and a custom-dyed burgundy canvas may require a fabric mill minimum beyond that. If you know this upfront, you can often redesign the program around stock black canvas plus a branded patch and stay under the desired buying threshold while keeping the premium look.
- Stock fabric lowers MOQ more than most buyers expect
- Custom dyed canvas often raises both MOQ and lead time
- Custom zipper pullers, patches, and gift boxes commonly have their own minimums
- Request MOQ by component, not one blended factory answer
Sample approval that prevents bulk logo disputes
A portfolio order should not move from artwork approval straight into bulk production. The lowest-friction sampling path is three stages: structure sample, branded pre-production sample, and sealed reference sample. The structure sample confirms size, panel shape, zipper path, pocket layout, and whether the front panel sits flat enough for the proposed logo area. This can be made in substitute material if speed matters, but the branded pre-production sample must use the actual or equivalent canvas texture, the actual logo method, and the final location. Without that step, many small defects become visible only after bulk assembly.
When approving the branded sample, buyers should evaluate more than color and spelling. Look at edge distance, visual centering on the sewn product, logo coverage on heavy texture, and any pull or warping after the portfolio is zipped and opened. If the inside contains a notebook sleeve or multiple card slots, fill the sample and close it again. Some logos look fine on an empty shell but distort once the product is used as intended. A sealed reference sample should then be dated and tied to the PO, especially when the order is split across production dates or repeat orders.
- Stage 1: blank fit sample for structure and panel flatness
- Stage 2: branded pre-production sample on target material
- Stage 3: sealed reference sample tied to PO and QC standard
- Use the sample in real conditions: filled, zipped, opened, and carried
Quote comparison: where two similar supplier prices can hide different products
With canvas zipper portfolios, small quote differences can come from major construction differences that affect brand appearance. One supplier may quote 340 GSM canvas with a lining and reinforced front panel; another may quote a softer shell with no real inner support. Both may use the same external dimensions on paper. The logo method can also be quoted differently. A one-color screen print from one factory may include a standard plate and print on cut panels, while another price assumes print after sewing with a smaller effective area and looser alignment. If procurement compares only unit price and sample freight, the wrong supplier can look competitive.
A practical quote sheet should separate body material, inner structure, logo process, zipper grade, packing method, and sample cost. For importers and distributors, the landed-cost effect often comes less from the fabric itself and more from carton efficiency and claim rate risk. A slightly higher price for flatter packing, stronger zipper quality, or a safer logo method can lower total program cost if it reduces rework, markdowns, or replacement units. The goal is not to force all suppliers to one design choice, but to expose where their quoted assumptions differ.
- Compare quoted GSM, not only 'canvas' wording
- Check whether logo is priced before or after sewing
- Separate sample charge from reusable tooling or plate cost
- Review carton quantity and gross weight for landed-cost impact
Packing rules that protect the logo and reduce warehouse complaints
Packing is often treated as a last-step admin detail, but for printed portfolios it directly affects product appearance on arrival. When units are packed too tightly, zipper pulls can mark adjacent panels, sewn patches can press into fabric, and fresh print surfaces can rub during ocean transit. For simple bulk programs, individual polybags and flat packing in export cartons are usually enough. If the front panel has a larger print or a raised patch, adding a tissue interleaf or a thin insert board may be justified. This is especially relevant for liquor retail programs where products may be re-shipped through distributor warehouses before reaching stores.
Carton planning also affects labor and damages. Portfolios should be packed so corners stay square and zipper shape is not crushed. Overloading cartons may reduce freight count but can create compression lines across the logo area. For larger-format portfolios, 20-30 pcs per carton is a common practical range, though the right count depends on thickness, insert board use, and the inner structure. Buyers should request carton dimensions and gross weight early so they can compare loading efficiency across quotes. Good packaging is not premium decoration; it is a way to preserve branded appearance and avoid avoidable claims.
- Standard protection: individual polybag and flat pack
- For raised logos or patches: add tissue or thin insert board
- Avoid over-compressed cartons that imprint zippers onto front panels
- Request carton size, count, and gross weight during quote stage
Lead time risks tied to branding decisions, not just factory capacity
Buyers often hear that canvas goods need a certain number of days in production, but lead time on custom portfolios is usually driven by pre-production dependencies. Custom dyed fabric may add days or weeks for lab dips and fabric finishing. Embossed patches, custom pullers, or branded zipper parts may rely on outside suppliers. If your order ships in time-sensitive relation to seasonal liquor promotions, tasting kits, or store rollout windows, these linked components matter more than the sewing line speed. A factory can have capacity and still miss ship date because the approved patch sample came late.
For routine stock-fabric screen printed orders, production may move relatively fast after sample approval. For more customized programs, the safest schedule is built backward from the in-warehouse date with time reserved for sample revision, logo strike-off, and packaging approval. Buyers should also watch for holiday periods, port congestion, and whether multiple processes are subcontracted. The right question is not only 'what is your lead time' but 'which step controls the critical path for this exact logo and construction.'
- Stock canvas plus simple print = shortest route
- Custom dye, patch tooling, and pullers commonly extend the critical path
- Sample approval delays usually hurt more than sewing time
- Map the critical path by component, not only final assembly days
Acceptance criteria procurement teams can write into the PO
A strong PO for canvas zipper portfolios should translate design intent into measurable acceptance points. This reduces open-ended quality arguments after cargo arrives. Logo placement should have a stated position from two fixed edges and a placement tolerance, such as plus or minus 5 mm. Canvas weight should be listed in GSM or ounces with practical production tolerance. The zipper should open and close smoothly with no tooth gaps or tape fray. Stitch density does not need to be over-specified, but visible seam quality, loose thread limits, and front-panel puckering should be described. If your retail channel is appearance-sensitive, include a clause that the front logo area must remain visually flat under normal empty and lightly filled conditions.
Commercially useful QC language does not need to be technical for every line item. It should simply be clear enough that both factory and third-party inspector can assess the same standard. For importer programs, it is also smart to define what is considered a major defect versus a minor one. A tilted logo, unreadable text, wrong body color, or zipper failure is major. A tiny removable thread end may be minor. By putting these standards in the order file, procurement reduces subjective debate and helps the factory target the right output from the start.
- List logo coordinates from fixed edges with tolerance
- State canvas GSM and acceptable variance
- Define zipper function standard and front-panel flatness expectation
- Separate major defects from minor cosmetic issues
Specification comparison for buyers
| Spec decision | Recommended option | When it fits | Buyer risk to check |
|---|---|---|---|
| Front panel branding method | 1-color screen print on flat front panel | Best for chain liquor stores, distributor programs, and reorderable bulk runs above 500 pcs | Artwork must clear zipper seam, pocket seams, and panel distortion; request print position tolerance in mm |
| Premium logo finish | Debossed PU patch sewn onto canvas | Fits gift-with-purchase programs, executive sales kits, and higher perceived value branding | Patch edge stitching quality, patch adhesion before stitching, and color migration onto natural canvas |
| Logo position | Lower right front panel or centered top third with 20-30 mm seam clearance | Works when the portfolio includes inside folders and zipper piping that can affect outer panel tension | Large logos near zipper curve can wrinkle or print unevenly after sewing |
| Canvas weight | 12 oz to 14 oz canvas, roughly 340-400 GSM | Good balance for portfolios carrying price sheets, tasting notes, and sales documents without feeling floppy | Below 10 oz may collapse and distort logo; above 16 oz may raise sewing difficulty and unit cost |
| Body color route | Stock black or natural canvas | Best when buyers want lower MOQ, faster sampling, and simpler shade control across repeat orders | Custom dyed shades often raise MOQ and create print opacity issues, especially with water-based inks |
| Inner construction | Document sleeve plus pen loop plus small card pocket | Suitable for liquor reps, distributor meetings, supplier presentations, and retail account visits | Too many stitched inserts can push seam bulk and reduce smooth logo area on front panel |
| Zipper selection | Nylon zipper with metal puller matched to body color | Most practical for daily sales use and bulk procurement | Poor zipper tape color match and low cycle performance create early claims even if logo quality is acceptable |
| Packaging route | Individual polybag plus 20-30 pcs per export carton with flat packing | Best for logo protection and warehouse handling in mixed retail programs | Compressed packing can transfer print marks, bend patches, or create zipper impressions on adjacent units |
Buyer checklist before sampling
- State final use clearly: sales rep document portfolio, retail gifting, supplier presentation kit, or member club merchandise
- Define finished size closed and open, not only A4 or letter format wording
- Specify canvas weight in GSM or oz and whether body is natural, black, or custom dyed
- Mark exact logo location on dieline with distance from seams, zipper edge, and bottom edge
- Name the print or branding method: screen print, heat transfer, woven label, embroidery, or sewn patch
- Set artwork size tolerance and print placement tolerance in millimeters
- List internal features required, such as pen loop, business card slot, notebook sleeve, or document divider
- Approve zipper color, puller finish, and whether branded pullers are needed
- Define sample approval sequence: blank fit sample, pre-production branded sample, then bulk reference sample
- Request carton packing quantity, carton size, gross weight, and whether flat packing or insert boards are used
Factory quote questions to send
- What is your quoted canvas weight in GSM after finishing, and what is the acceptable production tolerance?
- Is the logo price based on screen print, transfer, embroidery, woven label, or patch, and how many colors are included?
- What maximum printable area is safe on this portfolio after sewing without distortion near the zipper?
- Does your MOQ change if we move from stock black or natural canvas to a custom dyed body color?
- Can you quote both stock fabric and custom-dyed fabric so we can compare MOQ, lead time, and shade risk?
- How do you construct the front panel: single layer, foam-backed, lined, or with internal board reinforcement?
- What zipper brand or quality grade are you using, and do you perform open-close cycle checks before packing?
- What is included in sample cost: blank structure sample, branded pre-production sample, revised sample after comments?
- What print placement tolerance and finished size tolerance will you commit to in the order confirmation?
- How are units packed to prevent logo rubbing, zipper marks, and crushed corners during export transit?
Quality-control points to confirm
- Canvas weight should match approved spec within agreed tolerance; random GSM cuts should be taken from bulk panels if needed
- Logo placement should stay within approved tolerance, commonly plus or minus 5 mm unless otherwise agreed
- Print coverage should be even with no pinholes, smudging, ghosting, or visible underbase spread
- Embroidery or patch attachment should show no loose threads, skipped stitches, or tilted alignment
- Zipper should run smoothly without tooth gaps, tape twisting, or puller detachment
- Front panel should remain visually flat with no severe puckering caused by internal pocket stitching
- Body color should match approved sample within practical commercial tolerance, especially for black and dyed shades
- Inside pocket dimensions should hold standard documents or notebook size stated in the PO
- Needle holes around logo area should not break print edges or create seam stress marks
- Packed goods should arrive free of fold lines through logo, moisture exposure, or carton over-compression