Start With the Event Job
Trade show portfolios are not generic pouches. The same item may be handed out at a booth, carried to buyer meetings, used by sales reps on the floor, or reused for a second event months later. That use case decides the material mix. A flat brochure holder can be light and simple. A sample carrier or tablet folder needs more structure, better zipper support, and tighter fit control.
Procurement gets better results when the brief starts with handling, not branding. How often will the portfolio be opened? Will it be loaded once and carried all day, or refilled repeatedly at the booth? Will it sit on a table, slide into a briefcase, or travel in a shipment carton? A product that looks acceptable in a studio photo can still fail on the show floor if the zipper catches, the corners crease under load, or the contents push the seams apart.
This is why the first decision is the job profile. It also helps separate the product into three practical classes: low-load literature kits, mid-load sales folders, and high-touch reusable portfolios. Once you know which class you are buying, the material and construction choices become much easier to compare.
- Use a low-load spec for brochures, agendas, and handouts.
- Use a mid-load spec for catalogs, notebooks, and literature packs that are carried all day.
- Use a reinforced spec for tablets, sample boards, or reusable sales kits.
- Ask the event team how the item will actually be packed, opened, and reloaded during the show.
Size From the Contents, Not the Label
A4 size, letter size, and custom size are not enough on their own. A portfolio that fits a single sheet can fail when the full stack includes brochure covers, dividers, sleeves, or a tablet case. Zipper tape, seam allowance, pocket depth, and corner shaping all reduce usable space. Buyers often discover the problem after approval, when the first real pack-out is too tight.
Write the dimensions in two ways: outside size and usable inside size. Outside size matters for costing, carton planning, and appearance. Usable inside size matters for function. If the item must hold a tablet, define the exact model or a dummy dimension with the case still attached. If it holds catalogs, measure the largest stack, not a single brochure. If it holds sample cards, test the thickest board and the fastest loading direction.
Tolerance should be part of the quote, not a late argument. For a simple flat sewn canvas portfolio, a moderate tolerance can be reasonable, but the exact number depends on the construction and the approved sample. The goal is not to force an unrealistically tight spec. The goal is to make sure the final item still closes cleanly when it is full.
- Measure the largest insert, the thickest fill, and the loading direction before confirming size.
- Document outside size and usable inside size separately.
- State whether the portfolio is measured flat, zipped, or filled.
- Approve size only after a real pack test with the actual contents or dummies.
Compare Canvas Options, Not Just Weight
Canvas weight affects structure, cost, and shipping weight, but it does not tell the whole story. A 12 oz fabric can feel sturdier than a heavier fabric if the weave is tighter and the finish is better controlled. A loose weave may print differently, distort more at the seams, and show the contents more clearly. For buyers, that means the material decision should include fiber type, weave, finish, and lot consistency, not only ounces or GSM.
For most trade show portfolios, 12 to 14 oz cotton canvas is the most useful starting point. Lighter cloth works for simple document packs and urgent event giveaways. Heavier cloth gives more body for reusable kits and better concealment of the contents. Recycled cotton can support sustainability goals when the sourcing documentation is real, but it should be treated as a separate approval path because shade variation can be wider. Cotton-poly blends reduce wrinkling and help sizing stability, while washed or soft-finished canvas gives a more relaxed premium feel but can change the final dimensions and print contrast.
The right choice depends on how the item is handled. A one-day handout folder can prioritize speed and price. A portfolio intended to live through multiple shows should prioritize shape retention, stitching stability, and consistent re-order performance. That is a sourcing decision, not a purely visual one.
- Treat canvas weight, weave, finish, and composition as one package.
- Require a swatch from the exact base cloth, not a generic reference photo.
- Watch for lot-to-lot variation on recycled, washed, or naturally dyed canvas.
- Compare quotes only after the fabric spec is normalized.
Choose a Build That Matches the Load
The simplest build is a flat zipper portfolio with one main compartment. It is efficient and works well for paper-only kits. Problems begin when the portfolio is forced to carry thicker content than the design allows. That is when the zipper line starts to wave, the corners bunch, or the seams pull. Adding fabric weight alone is not always the fix. Sometimes a small gusset or a slightly deeper opening performs better than a heavier cloth.
Interior structure should match the contents. A single-layer build may be enough for a low-cost literature pack. A lined build gives a cleaner interior and protects inserts from rough canvas backing or loose threads. A nonwoven layer or thin foam can add body, but it also increases bulk at the corners and zipper ends. Those thicker points must be tested under the real load, not judged from a flat sample.
Pocket count deserves restraint. One well-sized document pocket usually beats three small pockets that are hard to load on a busy booth day. Add more pockets only if they solve a real handling problem. Otherwise, they add sewing time, alignment risk, and rejection risk without improving use.
- Use a flat build for paper-only kits.
- Add lining when the item carries tablets, premium catalogs, or repeated-use sales materials.
- Use a small gusset when content thickness is the real issue.
- Keep pockets simple and dimension them around the actual inserts.
Treat the Zipper as a Wear Part
The zipper is the component that gets touched constantly, so it should be specified like a working part, not treated as a generic trim. Size 5 nylon coil is a practical default for most canvas portfolios because it balances smooth travel, flexibility, and strength. Smaller zippers can look neat but feel weak under load. Larger zippers can work, but they may overpower a slim business portfolio and add unnecessary stiffness.
The quote should define the zipper in detail: tape color, coil or tooth type, slider finish, puller style, and end-stop construction. If the puller will be used while standing in a booth or walking between meetings, grip matters more than appearance. A short pull tab may look tidy but feel awkward. A longer fabric pull can improve handling, but it should not scratch the contents or leave pressure marks on the front panel.
Assembly quality is where zipper issues usually start. If the tape is stretched while sewn, the closure can wave. If the seam allowance is too close to the slider path, the zipper can catch lining or loose threads. If the end stop is weak, the failure will show up exactly where the user pulls hardest. Ask for close-up sample photos of the zipper ends, slider path, and corner turn before you approve bulk production.
- Use size 5 nylon coil unless you have a clear reason to change it.
- Define the puller style and grip length, not just the zipper color.
- Test the zipper empty and filled, then repeat after light carton compression.
- Inspect zipper ends, not only the front view of the portfolio.
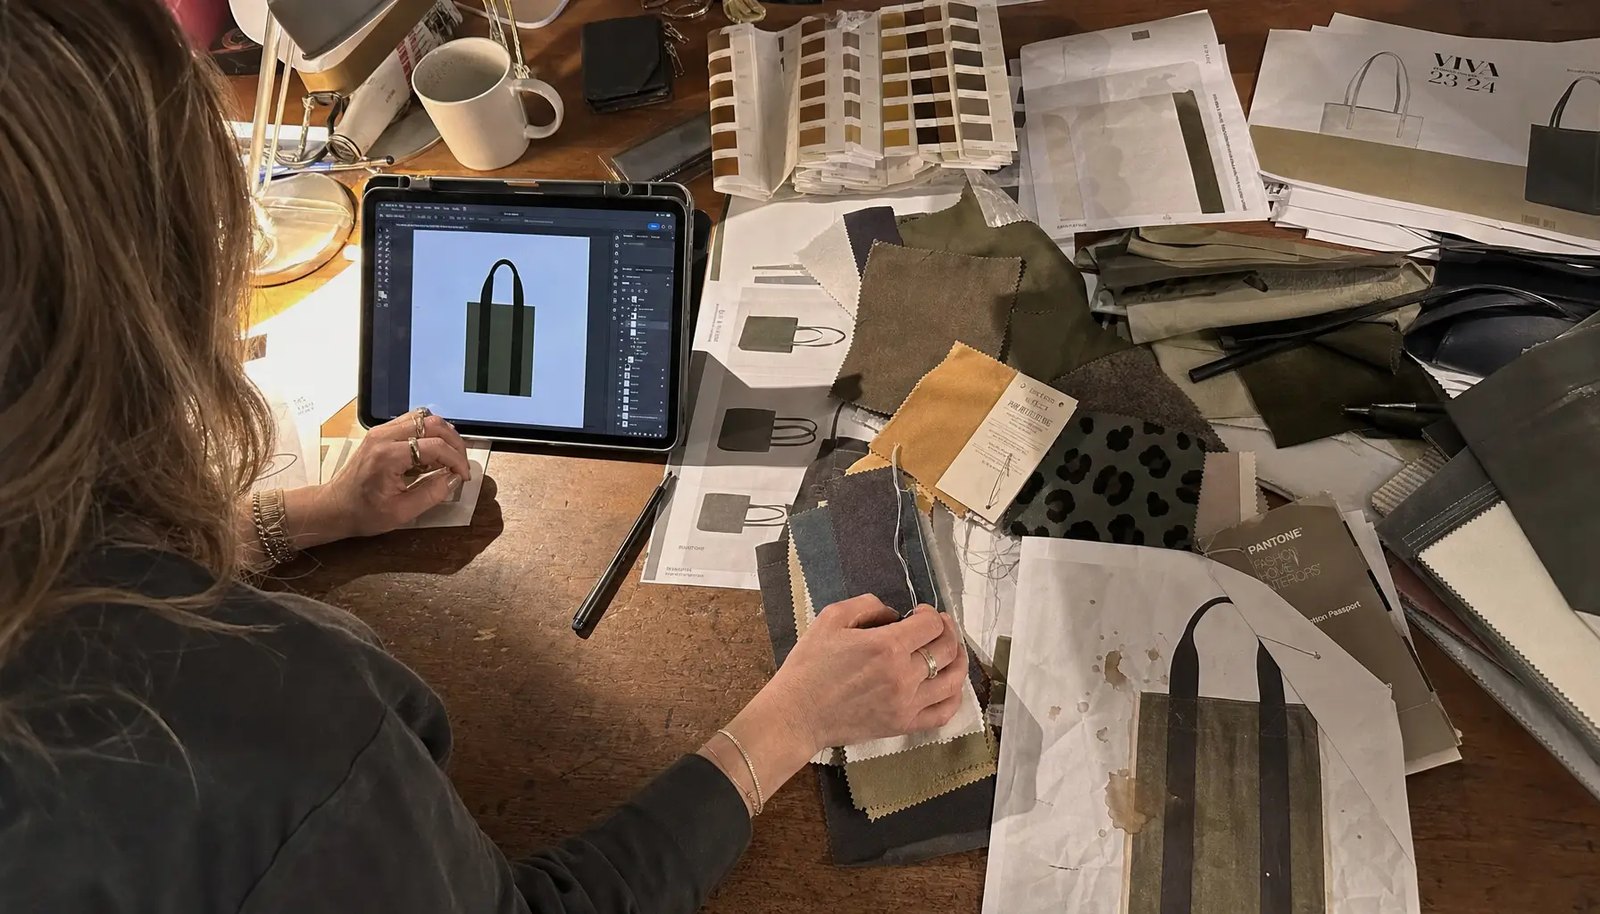
Design the Interior for Fast Use
Interior finish is easy to overlook because it is not visible in a shelf photo. It becomes obvious the first time a buyer opens the portfolio at a booth table. A raw inside edge may be acceptable for a low-cost handout folder if the seam is neatly overlocked and there are no loose fibers. For premium kits, a lined or bound interior looks cleaner and reduces abrasion against brochures, tablets, and sample cards.
Reinforcement should go where the load concentrates. That usually means zipper ends, pocket openings, bottom corners, gusset turns, and any loop or tab attachment. A small bar tack in the right place can do more for durability than a decorative trim strip. If the portfolio is meant to carry catalogs or sample boards, share the expected filled weight with the factory so the seam allowance and reinforcement can be matched to the load.
Thread and stitch behavior should be written down, even if the buyer is not trying to engineer every seam. The practical standard is simple: even stitch lines, no skipped stitches, no broken thread at stress points, and no visible loose loops on the exterior. If the thread is meant to contrast, approve it on the sample. If it is meant to disappear, make sure it does not create a noisy visual line against the canvas.
- Choose full lining for tablets, premium folders, or rough-edged sample sets.
- Choose bound seams when you want a cleaner interior without full lining cost.
- Reinforce zipper ends, corners, pocket openings, and tabs.
- Set an expectation for loose-thread trimming and stitch appearance before bulk starts.
Choose Decoration by Brand Risk
Decoration should follow the artwork, not the other way around. Silkscreen is usually the best fit for bold logos, simple text, and one- or two-color branding on canvas. It is repeatable and clean when the fabric weave is appropriate. Heat transfer is useful for more complex color work, but it should be checked for edge lift, shine, cracking, and marks from heat or pressure. Embroidery can look strong on heavier canvas, but dense stitching can pucker lighter panels unless the backing and structure can support it.
The decoration spec needs more than a logo file. State the print or embroidery size, the exact position from fixed edges, the color target, the minimum line thickness, and the clearance from seams and folds. Canvas is not a flat coated board. Very small type, thin lines, gradients, and marks that cross zipper zones or seam lines are all risky. In most procurement reviews, a smaller and cleaner logo is better than a large graphic that degrades under the weave.
Color approval should use the actual fabric, not only a Pantone number on paper. Natural canvas, recycled canvas, and washed finishes all shift how color reads. If the program matters to the brand, approve a strike-off or pre-production decorated sample and keep it on file. Repeat orders are much easier when the factory has a physical reference instead of a vague approval email.
- Use silkscreen for clean, repeatable branding on suitable canvas.
- Use heat transfer only after checking adhesion and flex behavior.
- Use embroidery when fabric weight and backing can support the stitch density.
- Keep artwork away from zipper tape, corners, folds, and high-compression areas.
Price, MOQ, and Lead Time by Supplier Route
The sourcing route changes the economics as much as the product spec. A direct OEM factory usually gives the best control over fabric, zipper, lining, pocket layout, and packing. It also requires cleaner artwork, clearer sampling, and more lead time. A regional stock blank supplier with local decoration is faster and easier for urgent events, but it gives up control over base material consistency and sometimes the exact closure or pocket shape. Trading companies and promotional distributors can be useful when procurement wants one contact for multiple event items, but the buyer still needs to know which factory makes the portfolio and who owns quality decisions.
Lead-time bands are best viewed as working ranges, not promises. Stock blank plus local decoration can often move in about 5 to 15 working days if artwork is simple and inventory is on hand. A regional decorator or domestic supplier using stocked blanks usually needs roughly 2 to 4 weeks depending on artwork approval and packing rules. Direct OEM custom production commonly lands in the 4 to 7 week range after sample approval and material confirmation. New fabric colors, custom pullers, multiple artwork versions, or busy-season orders can push that longer.
When the calendar is tight, the answer is often to simplify the construction rather than squeeze the supplier. Use one canvas color, one zipper color, one logo position, and the least complex pocket layout that still works. If the contents are light and the event date is near, choose a stock blank route. If the portfolio must carry tablets, repeat for several shows, or match a premium brand program, move to a heavier canvas, lining, and tighter QC even if the quote is higher.
- Use Asia OEM sourcing when you need custom size, trim control, and repeatable bulk production.
- Use North America or EU local decoration when speed and lower freight complexity matter more than custom construction.
- Use a regional distributor when you need one PO across multiple event SKUs.
- Expect longer lead times when you add custom pullers, new fabric colors, extra pockets, or special packing rules.
Set QC That Can Actually Reject Bad Goods
QC only works when it can tell the difference between normal variation and unacceptable work. Start with a written AQL plan. A common buyer default is Critical 0, Major 2.5, Minor 4.0, but your lot size, brand sensitivity, and shipping window may justify tighter limits. The important point is to define the failure classes before the factory starts packing, not after the goods are already on the truck.
Critical defects are the ones that make the portfolio unusable or wrong: wrong size beyond fit tolerance, wrong logo, broken zipper, missing components, contamination, or the wrong product variant. Major defects include poor stitch security, zipper catching, loose seams, badly aligned pockets, visible stains, or decoration out of position. Minor defects are cosmetic issues that do not affect function but still hurt presentation, such as small loose threads, light wrinkles, or faint handling marks. A clear pass/fail threshold keeps the inspection team from arguing after the fact.
The inspection itself should be structured. Pull samples across cartons and across variants so every color and logo version is represented. For small custom runs, a practical pre-shipment check is usually at least 32 pieces or the charted AQL sample, whichever is larger. Measure at least 10 units against the size sheet, and load at least 5 units per lot or variant with the real contents. On those loaded units, run 20 full zipper cycles and reject any unit that splits, jams, or catches the lining. Check carton count, carton marks, and pack format against the PO before release.
- Use Critical 0, Major 2.5, Minor 4.0 unless your program calls for tighter limits.
- Reject wrong size, wrong logo, broken zipper, missing parts, and contamination as critical defects.
- Test the zipper on loaded samples, not only on empty goods.
- Verify carton count, variant split, labels, and pack rules before shipment release.
Lock the RFQ and Sample Path
A good RFQ is short on filler and heavy on facts. It should define the contents, the finished size, the usable inside size, the canvas spec, the zipper build, the interior construction, the decoration method, the tolerance targets, the inspection plan, the packing format, and the delivery date. When those fields are clear, suppliers quote the same item and the buyer spends less time comparing apples to oranges.
Sample stages should prove different things. A material swatch confirms the base cloth. A decoration strike-off confirms the print or stitch look. A prototype confirms size, pocket layout, zipper behavior, and general workmanship. A pre-production sample confirms the final combination of materials, trim, and packing. If a sample uses temporary material or a substitute trim, write that exception directly on the approval sheet so it does not become the bulk standard by accident.
Keep the approval record simple but complete. Save the approved sample, the measured size sheet, the artwork placement spec, the packing rule, and photos of the reference piece. That record is what prevents disputes when the factory starts production or when a repeat order is placed months later. Without it, procurement ends up re-litigating basic decisions that should have been closed the first time.
- Use the RFQ to define the product, not just the price.
- Approve swatch, decoration strike-off, prototype, and pre-production sample in sequence.
- Record dimensions, artwork placement, zipper spec, and packing rules with the sample.
- Tie any approved exception to the approval sheet so it does not become the bulk baseline.
Specification comparison for buyers
| Material option | What it gives you | Best fit | Tradeoff to check |
|---|---|---|---|
| 10 to 12 oz cotton canvas | Lightest feel, lower fabric cost, easier sewing, softer drape | Flat literature kits, brochure holders, handout folders, short-use event giveaways | Can collapse when filled, show interior outlines, and feel too flimsy for tablets or sample cards |
| 12 to 14 oz cotton canvas | Better body, cleaner panel shape, stronger booth-day handling, familiar promotional look | Most trade show portfolios, sales folders, and reusable buyer kits | Adds weight and bulk at seams; confirm the zipper and pocket construction can still close cleanly |
| Recycled cotton canvas | Supports recycled-content sourcing requests and keeps a natural canvas appearance | Programs with sustainability requirements where documentation matters | Shade and fiber variation can be higher; require approved swatches and a tighter lot-control conversation |
| Cotton-poly canvas | Improved dimensional stability, less wrinkling, and more consistent sewing behavior | Repeat programs that need stable sizing and a slightly lower risk of shrink or distortion | Hand feel is less natural; print and heat processes should be tested on the exact base cloth |
| Washed or soft-finished canvas | Softer hand, more premium casual look, easier to pack flat | VIP kits, higher-touch meeting portfolios, and retail-adjacent event programs | Pre-wash or soft finish can change size, shade, and logo contrast; approve the actual finished swatch |
| Material | 300D-600D polyester, 10-12 oz canvas, or recycled PET with backing stiffness matched to document weight | Before price comparison | Different cloth weights, backing, or certification claims make quotes hard to compare |
| Construction | zipper gauge, zipper tape width, puller finish, binding tape, corner reinforcement, seam allowance, and document-size tolerance | Before sampling | Weak stress points create returns and failed inspections |
| Decoration | screen print, heat transfer, woven label, or rubber patch placed away from zipper stress and fold lines | Before artwork approval | The wrong method can crack, bleed, pucker, or fail on the chosen fabric |
Buyer checklist before sampling
- Map the use case first: brochure kit, sales folder, tablet carrier, sample holder, VIP meeting pack, or reusable multi-event portfolio.
- Measure the real contents, not the brochure cover. Include the thickest catalog stack, tablet case, sample board, pen, and any insert sleeves.
- Write the finished size, usable inside size, pocket depth, and zipper opening width into the RFQ, with a tolerance that still fits the contents.
- Name the canvas weight, composition, weave or finish, and color reference, and keep the approved swatch tied to the order.
- Choose the zipper build early: size, coil type, tape color, puller style, slider finish, and end-stop construction.
- Decide whether the interior needs lining, bound seams, overlock, nonwoven interlayer, foam pad, or a simple single-layer build.
- Lock pocket count and pocket dimensions around actual inserts so the interior stays usable instead of overdesigned.
- Place logo artwork away from zipper tape, corners, fold lines, and seam allowances, and set a minimum line thickness for print or embroidery.
- Request a prototype and pre-production sample for any custom size, premium artwork, new material, or hard event date.
- Ask for bulk material photos before cutting starts, including canvas roll labels, zipper tape, sliders, pullers, lining, and thread colors.
Factory quote questions to send
- What is the exact canvas specification in GSM or oz, the composition, weave or finish, and the approved color reference for bulk production?
- Will the bulk fabric come from one lot or controlled lots, and how will shade variation be managed across rolls and between replenishment orders?
- What zipper size, coil type, tape material, slider finish, puller style, and end-stop construction are included in the quoted price?
- What interior build is included by default: single layer, lined panel, bound seam, overlock, nonwoven interlayer, foam pad, or reinforced pocket?
- What is the MOQ per canvas color, zipper color, logo version, and packing format, and what changes if those variants are combined?
- Is the price for blank goods, decorated goods, individually packed goods, export-carton packed goods, or fully shipment-ready goods with carton marks?
- Which decoration method is included, what are the limits on line thickness, small text, gradients, or seam-crossing artwork, and how is adhesion checked?
- What sample stages are available, what does each stage prove, and which sample, setup, or digitizing fees are refundable against bulk order?
- What finished-size tolerance, logo placement tolerance, stitch appearance standard, and carton quantity tolerance do you use for this product?
- Which parts of the work are done in-house and which are subcontracted, including print, embroidery, washing, labels, or special packing?
Quality-control points to confirm
- Use a written AQL plan before production. A common buyer default is Critical 0, Major 2.5, Minor 4.0, applied to each lot and each variant.
- Treat wrong size beyond fit tolerance, wrong logo, wrong zipper type, missing parts, contamination, and nonfunctional closure as critical defects.
- For a practical pre-shipment pull, inspect across cartons and variants so every color and logo version is represented; small custom runs usually need at least 32 pieces or the charted AQL sample, whichever is larger.
- Check the canvas for stains, odor, shade bands, weaving defects, slubs beyond the approved natural character, and visible finish inconsistency before packing release.
- Measure at least 10 sampled units per lot or per color against the approved size sheet, and reject any unit that cannot fit the real contents without forcing the zipper.
- Run a zipper cycle test on at least 5 sampled units per lot or per variant: open and close each one 20 full cycles with the intended fill, and reject if it splits, jams, catches the lining, or pulls away from the seam.
- Inspect stitching at corners, zipper ends, pocket openings, pull tabs, and seam transitions. Broken stitches, skipped stitches, loose loops, and poor bar tacks are major defects.
- Check logo position against fixed edge references, not eyeballing. Misplacement, smeared print, cracked transfer, embroidery puckering, or visible scorch marks should fail the lot if they exceed the approved tolerance.
- Open a carton audit against the packing list and count by variant, then verify carton marks, unit count, polybag or tissue rules, and any insert card or barcode requirement.
- Reject any unit with sharp zipper burrs, exposed raw edges that were not approved, or loose thread ends longer than 10 mm on exterior-facing surfaces or in the zipper path.