Define the portfolio by use class
Canvas zipper portfolios look simple in product photos, which is why they are easy to under-spec. The real failures appear after the buyer starts using them: the zipper drags around a thick notebook, the top edge bows under a swatch deck, the print scuffs during carton transit, or the handle stitches loosen after repeated sales calls. A sourcing brief should begin with use, not with a generic request for a custom canvas zipper portfolio.
Separate the program into a clear use class. A document-only folder may carry less than 0.5 kg and open a few times at an event. A daily sales portfolio may carry line sheets, a notebook, trim cards, and light swatches at 1-2 kg. A heavier sample kit can put concentrated pressure on corners, gussets, zipper ends, and handle roots. Those categories should not share the same fabric, reinforcement, testing, or packing assumptions.
The brief should state contents, loaded weight, contents thickness, carry method, and presentation requirement at delivery. A giveaway can tolerate different surface variation than a retailer-facing launch kit. A sales-team tool must survive repeated handling. A warehouse replenishment item may prioritize cost and carton efficiency. When those differences are visible in the RFQ, suppliers quote the same product instead of guessing.
- Name the use class before comparing unit prices.
- Record loaded weight, contents thickness, and largest rigid insert.
- Decide whether the portfolio is a giveaway, sales tool, retailer kit, or internal sample carrier.
Compare constructions before locking specs
Procurement teams often compare quotes too early. One supplier may price 12 oz canvas, a flat body, and bulk packing. Another may include 14 oz canvas, reinforcement, branded inner bags, and a better zipper. On paper, the cheaper quote looks competitive; in use, it may be a different product. A true comparison table should show construction choices, not only technical specifications.
For most eco apparel brands, the decision is between a slim flat portfolio, a gusseted portfolio, and a reinforced sample-kit construction. Flat bodies are efficient for documents and catalogs. Gussets help with thickness but add seam stress and shape-control work. Reinforced sample kits cost more because the factory must control corners, zipper ends, handle roots, and carton protection. Those differences are commercial decisions as much as design choices.
Use the main comparison table to align the buyer, factory, marketing team, and QC partner. Once the construction route is chosen, the detailed tech sheet can define material, zipper, sewing, branding, tolerance, and packing. That order matters. A perfect 14 oz fabric spec will not save a portfolio if the chosen construction is wrong for the contents.
- Compare flat, gusseted, handled, lined, and reinforced builds as different options.
- Normalize quotes by construction before negotiating price.
- Treat packing method as part of the construction decision when logo scuffing or presentation matters.
Set finished dimensions and tolerances
A portfolio spec should use finished-goods measurements: width, height, gusset depth, handle drop, zipper opening width, and usable internal space. Pattern dimensions are useful to the factory, but buyers approve finished products. Canvas can shift during cutting, sewing, pressing, washing, and packing, so final measurement is the control point that matters for procurement.
For many sewn canvas zipper portfolios, +/- 5 mm on finished width and height is a practical starting tolerance. Logo placement can often be held around +/- 3 mm when the panel is stable and the artwork position is clearly marked. Tighter tolerances may be possible, but they should be confirmed before pricing because they can change cutting, sewing, inspection, and rejection rates.
Measure the approved sample empty, then measure and inspect it loaded. A zipper opening that is adequate on an empty product may narrow once contents push against the gusset. A portfolio that appears square on a table may twist when it carries a thick insert. These checks are not complicated, but they prevent one of the most common B2B problems: approving a clean sample that does not fit the real kit.
- Use finished size, not flat artwork size, as the buying standard.
- Define tolerance for body size, zipper opening, handle drop, and logo placement.
- Test the sample with the intended contents before final approval.
Choose canvas by structure and finish
Canvas weight should follow the use class. A 12 oz canvas, about 340 GSM, can work for light document folders, event kits, and cost-sensitive programs. A 14 oz canvas, about 400 GSM, is often the strongest starting point for daily-use portfolios because it balances body, sewing control, and product weight. A 16 oz canvas, about 450 GSM, may suit heavy swatch contents or premium presentation kits, but it increases bulk, freight weight, and corner-sewing difficulty.
GSM alone is not a complete material specification. The quote should identify composition, weave, finish, shrinkage range, color standard, and any treatment such as washing, bio-washing, preshrinking, brushing, stiffening, or coating. Washed canvas may feel softer and more natural but can show more shade variation. Stiff finishes may help shape retention but can mark or crease under carton pressure.
Eco apparel brands often accept natural texture, but natural does not mean uncontrolled. Small slubs, fiber flecks, and mild tonal character may be acceptable if they are consistent and approved. Oil spots, strong odor, misweave, color bands, stains, coating streaks, and heavy shade panels should be rejectable unless the buyer explicitly accepts them. Build a small defect standard from fabric swatches or sample photos before bulk cutting.
- Specify oz, GSM, composition, weave, finish, shrinkage, and color standard.
- Use a realistic GSM tolerance, often around +/- 5% unless agreed otherwise.
- Create separate standards for natural variation and rejectable defects.
Verify sustainability claims by component
Sustainability sourcing is a documentation exercise before it is a marketing exercise. A canvas zipper portfolio can include certified cotton canvas, non-certified zipper tape, recycled polyester lining, conventional thread, paper wraps, and mixed packaging. If the product page or hangtag says more than the documents support, the brand carries the risk.
Narrow every claim to the component it covers. Organic cotton, recycled cotton, recycled polyester, FSC paper, compostable packaging, and restricted substances compliance each need their own scope. Useful procurement evidence may include material declarations, certificate scope, transaction certificates where applicable, test reports, restricted substances statements, and factory audit summaries when your program requires them.
Packaging deserves the same attention as the body fabric. A buyer may verify the canvas and forget the inner bag, paper wrap, sticker, or carton claim. Retailers and compliance teams increasingly review the full pack, especially when sustainability language appears on packaging. Keep documentation tied to the item number, purchase order, component, and revision so repeat orders do not drift.
- Limit claims to documented components.
- Keep certificate scope, dates, and item references in the procurement file.
- Verify packaging claims as carefully as fabric claims.
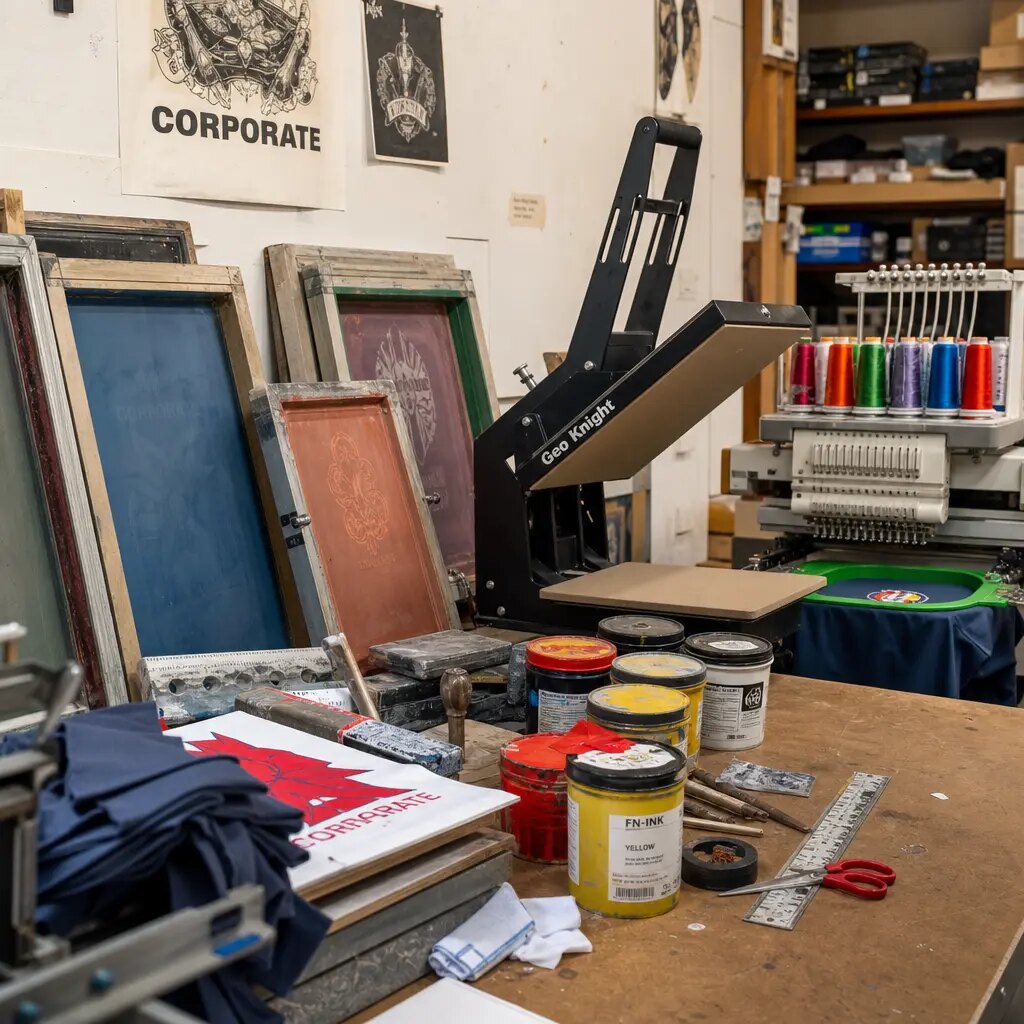
Treat the zipper as the core function
The zipper determines whether the portfolio feels useful or cheap in daily handling. For most standard canvas zipper portfolios, a No. 5 nylon coil zipper is a practical default because it is flexible, smooth, and suitable for sewn fabric panels. Heavier sample kits may justify a larger coil, stronger slider, molded teeth, or reinforcement at zipper ends, but those choices should be proven through samples rather than accepted as vague upgrades.
The zipper spec should cover type, size, tape color, tape width when relevant, slider gauge, puller material, puller finish, end-stop method, and zipper length tolerance. Length matters: a short zipper reduces usable opening width, while an overlong or poorly finished zipper can create bulky ends. Tape twist, uneven insertion, and weak end stops are production issues that directly affect function.
Durability checks should be performed empty and loaded. A zipper can run smoothly on an empty folder and fail when a swatch stack pushes against the teeth. During inspection, look for rough travel, snagging, tape waviness, slider derailment, tape split, broken pullers, skipped teeth, and end-stop movement. Record the exact zipper on the trim card so repeat orders do not quietly change.
- Use No. 5 nylon coil as the common baseline for standard portfolios.
- Control slider, puller, tape, and end-stop details as approved trim.
- Run zipper checks with real contents or agreed test weight.
Engineer seams and stress points
The strongest-looking canvas panel will not help if load transfers into weak stitching. Common failure points include handle roots, zipper ends, gusset intersections, pocket mouths, and corners where rigid contents push against the body. Reinforcement should be mapped by location on the tech sheet, not covered by a broad note that says reinforced sewing.
For canvas construction, 7-9 stitches per inch is often a practical range, depending on thread, fabric thickness, and machine setup. Too few stitches may reduce control and create a coarse appearance. Too many stitches can perforate heavy canvas or cause puckering. The approved sample should establish the stitch density, thread appearance, seam allowance, and bar-tack pattern expected in bulk.
Inspection should combine visual review and stress behavior. Check skipped stitches, loose tension, seam grin, broken thread, weak backstitching, uneven seam allowance, and distorted corners. Then load the portfolio and inspect again. Some problems only appear when contents push outward or when the handle carries the weight. If the product includes a gusset, pay special attention to the corners because they concentrate load and reveal sewing inconsistency quickly.
- Map bar-tacks, double rows, binding, or patches by exact location.
- Check stitch density and seam allowance against the approved sample.
- Inspect stress points under load, not only on an empty product.
Select branding for wear and placement
Branding on canvas is not only a graphic decision. It affects abrasion, packing, compliance, and rejection rates. Screen print is efficient for simple artwork on flat panels, but it depends on ink choice, curing, surface texture, and placement. Embroidery and woven labels are often more tolerant of rubbing, though they add thickness and may create puckering or edge issues. Heat transfer can support complex artwork but needs careful testing on textured canvas.
Placement should account for the zipper pull path, fold lines, handle position, carton stacking, and any rigid insert behind the panel. If a metal puller rests on a printed logo during shipping, scuffing may happen before the buyer receives the goods. If the logo sits over a pressure point, print cracking or shine can appear after handling. A modest move to a flatter, lower-abrasion area can reduce claims without changing the brand feel.
QC should check placement tolerance, color match, registration, ink coverage, edge lift, cracking, print transfer, embroidery puckering, loose threads, label skew, and trim cleanliness. If sustainability wording appears on a woven label, hangtag, or print, confirm the claim matches component documentation. A nice-looking claim that is broader than the file supports should not pass approval.
- Place logos away from zipper pull scrape zones and hard fold points.
- Run dry rub, light wet rub, and packing scuff checks where relevant.
- Tie claim wording to documented component scope.
Build a durability test checklist
Durability testing is most useful when the method, sample size, load, and pass-fail rule are written before production. For many B2B orders, a practical factory-level durability checklist can catch the main risks without creating an oversized lab program. Retailer-controlled orders may still need formal methods, but everyday procurement should at least define what will be tested and what failure means.
For zipper cycling, a practical starting point is 500 open-close cycles for standard daily-use portfolios and 1,000 cycles for heavier sample kits. Test at least the approved pre-production sample and a defined production sample set, such as 3-5 units per lot or per color for smaller runs, with higher sampling for higher-risk orders. Pass criteria should be functional: no slider derailment, tooth damage, tape split, end-stop failure, broken puller, or rough travel that prevents normal closure.
Loaded closure should use the intended contents or a defined test load. A useful setup is the declared working load, plus a margin such as 1.5x for short-duration stress, held closed for 60 seconds and then opened and closed several times. Reject functional failures such as seam popping, zipper spreading, handle distortion, or closure requiring excessive force. Cosmetic issues should be graded separately: mild natural canvas slub may pass, while stains, strong odor, logo cracking, and visible print transfer should fail under the agreed standard.
For seam strength, use a lab method such as ASTM D1683, ISO 13935-2, or an agreed equivalent when the program warrants it. As a practical starting point for standard portfolios, body seams should not rupture below 120 N and handle roots should be set higher, such as 180 N, if handles carry load. For abrasion, a Martindale or ASTM D3884-style check can be used with buyer-defined endpoints: no obvious print cracking, peeling, fabric hole, or transfer at normal viewing distance after the agreed cycle count.
- Define sample size, cycle count, load condition, and pass-fail rule before bulk.
- Separate functional failures from cosmetic workmanship issues.
- Use defect boards or approved photos to distinguish natural canvas character from rejects.
Control sampling, packing, and final QC
The pre-production sample should use production-intent fabric, zipper, thread, reinforcement, branding, labels, lining if any, and packing materials. Temporary trims may be acceptable for early concept review, but they should not release bulk production. If the sample does not match the material and construction that will ship, it is not a reliable approval gate.
Keep one golden sample tied to the purchase order, revision date, artwork file, trim card, and packing specification. During final inspection, compare bulk goods against that physical standard and the written QC checklist. Check dimensions, fabric, zipper function, seam quality, branding, labels, claim wording, odor, packing, carton marks, and presentation condition after unpacking.
Packing can create failures that are not visible at the sewing line. Zipper pulls can scratch printed panels, tight cartons can crease stiff canvas, and bulk packing can transfer ink or create pressure marks. For presentation orders, inspect units after they have been packed and unpacked. For bulk cartons, review carton count, gross weight, carton dimensions, interleaving, moisture protection, and whether products arrive flat enough for the intended channel.
- Approve a production-intent sample before bulk.
- Inspect after packing, not only before packing.
- Keep golden sample, trim card, artwork, and QC checklist under the same revision.
Specification comparison for buyers
| Construction option | Best for | Strengths | Trade-offs and checks |
|---|---|---|---|
| 12 oz canvas with No. 5 coil zipper | Event folders, light document kits, low-load brand handouts | Lower material weight, easier sewing, practical for flat papers and short-term use | Test loaded closure at the real document thickness; lighter canvas can crease, distort at corners, or feel too soft for premium sales kits |
| 14 oz canvas with No. 5 coil zipper | Daily sales portfolios, line-sheet packs, notebook plus light swatches | Balanced structure, weight, sewing control, and cost for many B2B programs | Confirm GSM tolerance, shrinkage, zipper smoothness under load, and whether reinforcement is included at zipper ends and handle roots |
| 16 oz canvas with larger coil or reinforced No. 5 zipper | Heavier swatch decks, rigid inserts, showroom tools, repeat-use kits | More body and abrasion resistance; better support for contents that push against seams | Bulkier corners, higher freight weight, slower sewing, and greater risk of puckering; sample must prove zipper alignment and seam strength |
| Flat portfolio without gusset | Documents, catalogs, line sheets, certificates, slim onboarding kits | Clean profile, easier packing, lower distortion risk when contents are flat | Poor fit for thick swatch stacks; set maximum contents thickness and check whether the zipper closes without forcing the top edge |
| Gusseted portfolio | Mixed sample kits, notebooks plus trim cards, thicker presentation packs | More usable capacity and better protection for bulky contents | Gusset seams become stress points; inspect corner shape, seam allowance, and loaded standing or stacking behavior |
| Screen printed logo | Simple artwork, larger flat panels, budget-sensitive programs | Efficient for repeat orders and clear brand presentation on canvas | Run rub and scuff checks; avoid zipper pull contact zones, fold lines, and areas pressed by rigid inserts |
| Woven label or embroidery | Premium apparel-brand kits, repeat handling, abrasion-prone positions | Usually more tolerant of rubbing than delicate print and easier to control as a trim component | Adds thickness and possible puckering; confirm placement tolerance, label skew limits, thread trimming, and claim wording |
| Individual presentation packing | Retailer-facing kits, sales-team shipments, premium launch materials | Reduces scuffing, improves receiving presentation, separates units cleanly | Adds material cost and claim risk if packaging is called recycled or compostable; verify packaging spec and carton cube |
| Bulk carton packing with interleaving | Internal sales tools, warehouse replenishment, lower-cost B2B programs | Lower packing labor and less inner-pack material | Higher risk of print scuffing and zipper pull marks; perform carton shake or transit-style inspection before approving |
Buyer checklist before sampling
- Classify the use: document-only folder, daily sales portfolio, light swatch kit, heavy swatch kit, retailer presentation pack, or internal sample-room tool.
- Record target loaded weight, maximum contents thickness, and the largest rigid item that must fit without forcing the zipper.
- Define finished width, height, gusset depth, handle drop, zipper opening width, and practical tolerances before requesting final pricing.
- Choose canvas weight by use class, then document oz, GSM, GSM tolerance, composition, weave, finish, color standard, and shrinkage expectation.
- Separate natural canvas character from defects: list acceptable slubs and shade texture separately from stains, oil marks, odor, misweave, color bands, and coating faults.
- Specify zipper type, size, tape color, slider finish, puller shape, end-stop method, zipper length tolerance, and whether the zipper is sourced from an approved trim supplier.
- Map reinforcement points at handle roots, zipper ends, gusset corners, pocket mouths, and any edge that carries rigid contents.
- Select one branding method and define artwork size, color standard, placement tolerance, abrasion expectation, setup cost, and repeat-order control.
- Document sustainability claims by component, including fabric, zipper tape, labels, thread, packaging, and any product or hangtag wording.
- Set durability test sample size, cycle count, load condition, pass-fail threshold, and retest rule before pre-production approval.
Factory quote questions to send
- Which construction are you quoting: flat portfolio, gusseted portfolio, handle portfolio, lined portfolio, or sample-kit construction?
- What loaded weight and contents thickness did you assume when selecting fabric, zipper, reinforcement, and packing?
- What is the exact canvas composition, oz weight, GSM, GSM tolerance, weave, finish, color standard, and shrinkage range?
- Is the canvas raw, dyed, washed, bio-washed, preshrunk, brushed, stiffened, coated, or otherwise finished?
- Which component supports any sustainability claim, and what certificate scope, transaction document, material declaration, or restricted substances report is available for that component?
- Which zipper size, type, tape width, tape color, slider gauge, puller material, puller finish, and end-stop method are included in the price?
- Is zipper insertion done in-house or subcontracted, and what inline checks catch tape twist, slider drag, uneven sewing, and end-stop weakness?
- What reinforcement is included at zipper ends, handle roots, gusset intersections, pocket openings, and load-bearing corners?
- What stitch density, thread type, seam allowance, and bar-tack pattern are planned for the approved construction?
- How many zipper cycles, loaded closure checks, seam strength checks, and packed-goods scuff checks are included before shipment?
Quality-control points to confirm
- Measure finished width, height, gusset depth, handle drop, and usable zipper opening after sewing, pressing, and packing, not only on cut panels.
- Apply the agreed tolerance, commonly +/- 5 mm for finished dimensions and +/- 3 mm for logo placement unless the PO states otherwise.
- Verify production canvas GSM against the approved material specification and tolerance before or during cutting.
- Check shade, slub level, odor, stains, oil marks, misweave, coating inconsistency, crease marks, and color bands against an approved defect board or written standard.
- Confirm that sustainability claims on labels, packaging, product pages, or hangtags match documented component scope for the exact SKU.
- Compare zipper tape, slider, puller, end stops, thread, labels, lining, binding, and packing materials against the approved trim card.
- Cycle the zipper on sampled units and record rough travel, snagging, slider derailment, tape twist, skipped teeth, tape split, broken pullers, and end-stop failure.
- Perform loaded closure with the agreed contents or test weight and check for seam pop, zipper spreading, top-line distortion, forced closure, or handle deformation.
- Inspect zipper insertion for alignment, length, end finishing, tape waviness, and whether the puller rubs the printed logo or body fabric during packing.
- Inspect stitch density, seam allowance, thread tension, skipped stitches, broken threads, backstitch security, seam grin, bar-tack length, and corner distortion.