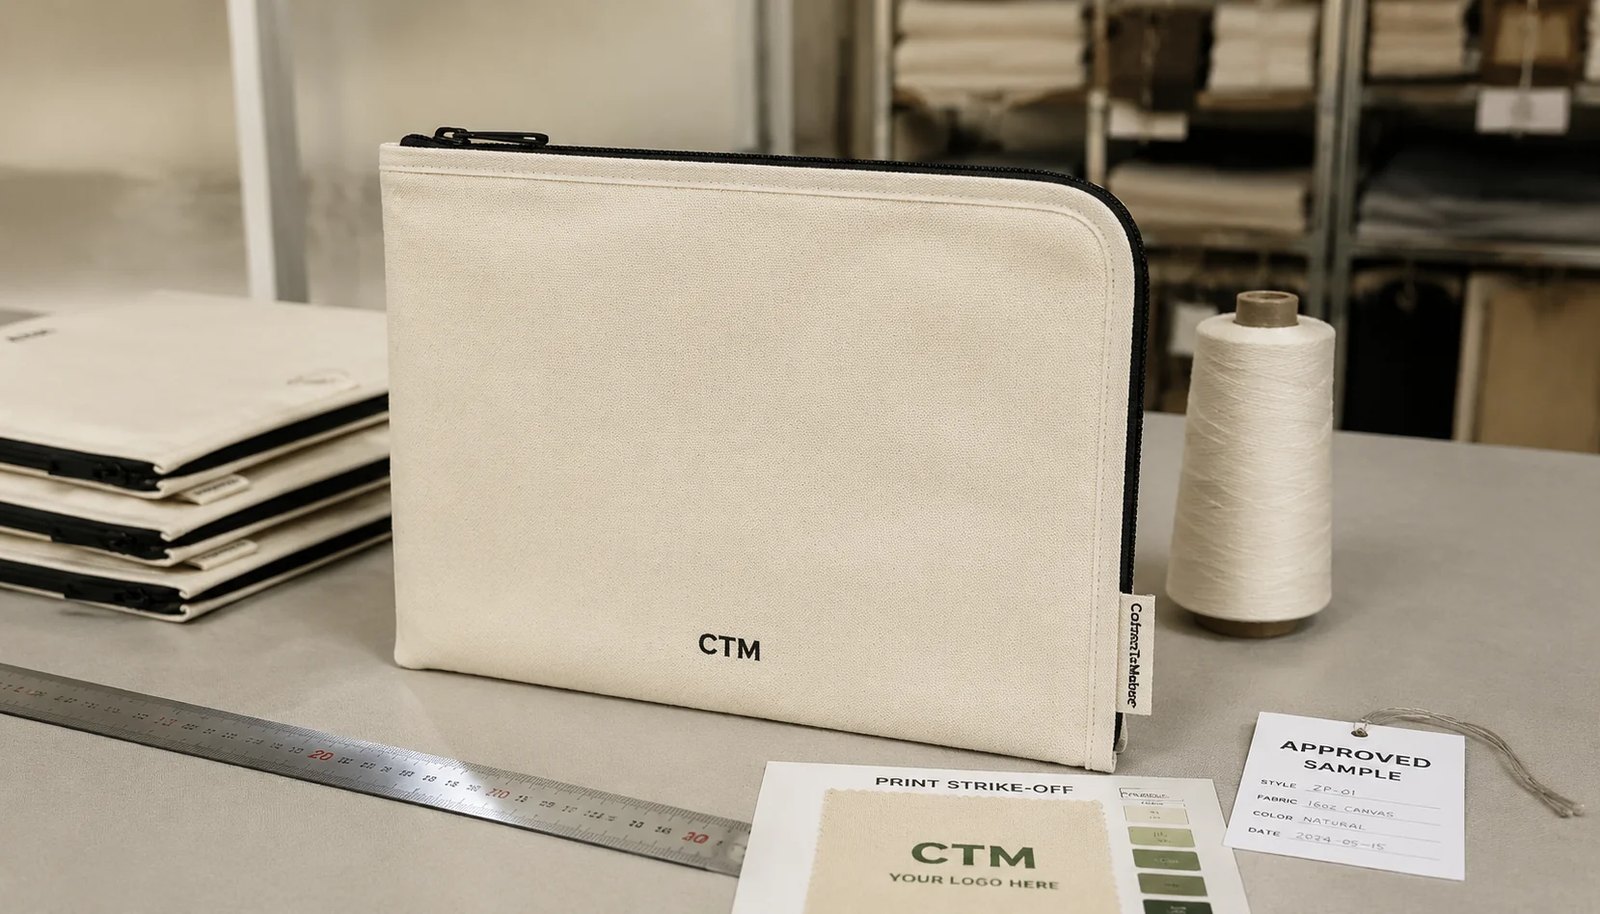
Why logo placement causes more problems on zipper portfolios than on tote bags
A canvas zipper portfolio looks simple until branding is added. On a tote bag, the front panel is usually a large flat rectangle with forgiving construction. A zipper portfolio has corner turns, edge binding, panel reinforcement, and often a stiffener or internal pocket stack. Those details change how the front panel sits before and after sewing. If the logo is placed using only a visual center without fixed measurements from seams and zipper lines, one supplier can quote the same artwork and still deliver a noticeably different result than another.
Natural grocer buyers usually want branding that feels clean, understated, and easy to repeat across stores, distributor kits, vendor onboarding packs, or employee materials. That means the issue is not just whether a logo can be printed. The issue is whether it stays visually balanced once the portfolio is zipped, filled with papers, and stacked in cartons. A good RFQ should lock down placement relative to finished construction, not just artwork size.
- Portfolio panels can shrink or stretch slightly after printing, especially on lighter canvas
- Binding and zipper seams reduce usable print area near the edges
- Corner radius and zipper wave can make a low logo appear crooked even when the print itself is straight
- Interior structures can create pressure points that show through on the front panel
Start with the finished body spec before discussing the logo
The most common sourcing mistake is to choose artwork placement before the portfolio body is finalized. For wholesale programs, a practical baseline is 12 oz canvas, around 340 GSM, with a zipper closure and light internal organization. This weight gives enough surface stability for clean printing while keeping sewing manageable. If you go down to 8-10 oz, around 230-280 GSM, the body may collapse or ripple, especially on wider front panels. If you go much heavier, the body prints well but sewing at corners and binding areas becomes slower and can raise reject rates.
For grocer-related use, many buyers prefer natural, black, olive, or muted earth tones. These shades affect print selection. A dark body with light ink can need an underbase in screen printing, which adds cost and can change hand feel. A natural canvas body is usually the easiest route for a crisp one-color logo with low setup complexity. If the brand needs a premium retail look, a small woven side label or sewn patch may be better than a large front print, but the body dimensions still need to support that placement.
- Typical wholesale closed size: around A4 or letter-compatible, such as 250 x 330 mm to 280 x 360 mm
- Common canvas range: 280-400 GSM depending on structure and price target
- Light lining or nonwoven backing can improve front-panel smoothness but should be priced separately
- If a writing pad sleeve is included, the front panel may feel firmer and print flatter
Best logo zones for natural grocer branding and why they work
For this product, the safest front-panel logo zone is usually centered horizontally and placed in the lower third of the front panel, around 45-60 mm above the bottom seam or binding. That gives enough breathing room so the logo does not visually crash into the zipper line, and it keeps the mark visible when the portfolio is carried under the arm or stacked flat. For understated grocery branding, a logo width of about 70-120 mm often reads cleanly without overpowering the product.
Top-center placement can work, but it becomes more sensitive to zipper alignment and any waviness near the opening edge. Full-center placement looks balanced on paper but can appear high or low depending on interior bulk. Side-label branding is often the most repeatable if the buyer wants a subtle retail identity. It is also less exposed to panel distortion. The tradeoff is lower visibility in presentations and merchandising photos.
- Use two measured references in artwork approval, not one: for example, from left finished edge and from bottom finished edge
- Avoid placing print closer than about 20-25 mm to heavy binding or zipper seam unless tested on a sewn sample
- If the logo includes a tagline, test readability on actual canvas texture before approving final size
- For sewn labels, define folded edge, visible size, and insertion point in mm
Choose the print method by artwork detail, reorder volume, and panel behavior
Screen printing is usually the best fit for wholesale canvas zipper portfolios with simple natural grocer logos. It offers low unit cost at scale, good opacity on natural canvas, and stable repeatability if the print area is flat and the fabric is consistent. For one- or two-color artwork with medium to large quantities, it is typically the most quote-friendly option. If the logo is very small, has multiple colors, or uses fine detail, heat transfer may hold edges better, but buyers should watch for a more synthetic hand feel and possible shine on matte canvas.
Embroidery can look premium, but it changes the panel behavior. Dense stitching can pull the canvas and create a slight puckering effect, especially below 340 GSM or on panels without backing. Woven labels are excellent for subtle branding and low print risk, but they add sewing steps and can be inserted incorrectly if the approval sheet is vague. A mixed approach often works well: a small front screen print plus a woven side label for supplier identity and retail polish.
- Screen print: best for simple spot-color logos and lower unit cost on repeat orders
- Heat transfer: better for small multicolor marks, but test adhesion and gloss level
- Embroidery: premium look, higher cost, may distort panel if too dense
- Woven label: subtle and durable, but placement and fold type must be controlled
How MOQ logic changes the right branding approach
MOQ is not only about total units. It can split into body MOQ, fabric color MOQ, print setup MOQ, and custom trim MOQ. Buyers often compare supplier prices without noticing that one quote assumes a stock body with custom screen print while another assumes a fully custom portfolio with new pattern, label, and custom puller. The first route can be right for testing a regional program or distributor launch. The second route makes more sense for a repeat chain program where branding consistency matters across many reorders.
If order volume is modest, use the budget on the front branding and keep the structure standard. A stock or semi-custom body with one-color screen print usually gives the best value. If annual volume is stronger, consider investing in a custom front panel height and side-label insertion point to lock in cleaner logo placement. That reduces variation across reorders and can lower dispute risk more than upgrading to a more expensive print method.
- Lower-volume route: stock body, standard zipper, one-color front print, optional care label change
- Mid-volume route: custom body color, front print, woven side label, custom carton marks
- Higher-volume route: custom pattern, organized interior, branded puller, retail-ready packaging
- Always ask whether MOQ applies per colorway, per artwork, or total PO quantity
Build a sample approval workflow that catches placement errors early
A digital mockup is not enough for this product. Canvas texture, seam take-up, and zipper construction all affect how the logo reads in real life. A practical approval path includes an artwork proof on a measured dieline, a print strike-off on the actual fabric color, and a sewn pre-production sample made with intended construction. If the supplier skips the strike-off and goes straight to sewing, small logos can lose detail or look too faint once printed on textured canvas.
The sample should be reviewed both empty and loaded with standard contents. A portfolio can look centered and flat when empty but shift visually when a pad, product sheet set, or card insert is added. Buyers should not approve from one front-facing photo. Request flat measurements, side photos, zipper-closed photos, and close-ups showing the logo relative to the bottom binding and side edge.
- Approve artwork size in mm and line thickness before approving position
- Use the same fabric color lot for strike-off and pre-production sample where possible
- Measure logo placement from finished sewn edges, not cut panels
- If interior inserts are part of use, review a loaded sample as well as an empty sample
Cost drivers buyers should separate when comparing supplier quotes
The cleanest quote comparison separates body cost, branding cost, trim cost, packing cost, and sample cost. Otherwise a low total price can hide downgraded canvas weight, a smaller print area, or basic packing that does not protect the front panel. For zipper portfolios, the hidden cost drivers are usually internal organization complexity, binding labor at corners, logo method, and carton efficiency. Fabric itself matters, but sewing layout often changes the real cost more than buyers expect.
For example, two suppliers may both quote 12 oz canvas. One may price a one-pocket interior with one-color print and loose bulk packing. Another may include card slots, pen loop, woven side label, and individual sleeves. Without line-item logic, the buyer may treat these as directly comparable when they are not. A better quote sheet makes tradeoffs visible and easier to negotiate.
- Typical quote elements to separate: canvas body, lining or backing, zipper set, interior pockets, logo method, labels, packing, sampling, and inspection
- One-color screen print usually scales well; each added color increases setup and registration control
- Heavier canvas can lower print risk but raise sewing time and freight cost
- Individual sleeves or polybags reduce scuff risk but add material and packing labor
QC thresholds that reduce disputes on branded zipper portfolios
QC on this item should go beyond general sewing appearance. Logo placement needs a measurable tolerance, usually stated in millimeters from fixed references. For a medium-size front logo, plus or minus 3 mm is often achievable on stable canvas and straightforward construction. If the logo is very small or positioned near binding, you may need a tighter process and should expect a higher reject risk. Without a stated tolerance, suppliers may classify visible drift as acceptable because the item is handmade.
Zipper function is the second major issue. A portfolio can pass visual inspection and still fail in use if the zipper catches near corners or the tape puckers after printing or pressing. Include operational checks in the inspection plan, not only appearance checks. Also inspect carton pressure marks on printed faces, especially if units are packed too tightly or stacked under high warehouse load.
- Logo position tolerance example: plus or minus 3 mm from approved placement
- Color standard should be based on approved strike-off under neutral lighting
- No obvious print blur, broken fill, smear, or visible off-angle placement at arm's length
- Zipper should run full cycle smoothly multiple times without tooth skip or corner catching
- Carton packing should not leave permanent crease or rub marks on logo face
Packing details that protect print quality and improve landed cost
Packing has a direct effect on both delivered quality and freight efficiency. For wholesale portfolios, individual polybags or paper sleeves are common, especially when the printed face must stay clean. If sustainability goals are strict, paper sleeves can replace polybags, but they provide less moisture protection. The best choice depends on route and storage conditions. For natural-canvas bodies, dust and rub marks show easily, so bulk loose packing is rarely worth the savings unless the item is for internal use only.
Carton count should balance compression risk and freight cube. Overpacking can flatten zipper curves, transfer ink rub, or leave pressure shadows around embroidered logos. Underpacking raises freight cost per unit. For many A4-size portfolios, 20-40 pieces per export carton is a practical range, depending on thickness and interior organization. Buyers should also cap carton gross weight for easier warehouse handling and lower damage risk.
- Specify unit packing: polybag, paper sleeve, tissue interleave, or none
- Request carton dimensions and gross weight before PO approval
- For barcode or channel-specific distribution, define outer carton marks and inner pack quantities
- If shipping during humid season, discuss desiccant or moisture barrier options
Lead time planning and the schedule risks buyers usually miss
The visible production time is only part of the lead time. The hidden delays usually happen in artwork approval, fabric shade confirmation, strike-off revision, and accessory arrival. A buyer trying to save a few days by skipping print strike-off often loses more time later if bulk output needs rework or replacement. For customized zipper portfolios, the realistic timeline should include sample review cycles, especially when logo position accuracy is important.
Peak seasons add pressure to printing and sewing capacity, but custom trims can be an even bigger schedule risk. A woven side label or special puller may have a separate lead time from the body. If the launch date is fixed, simplify trims before downgrading canvas or print quality. A stable body with standard zipper and approved print method ships more reliably than a heavily customized build with too many external dependencies.
- Typical sequence: quote approval, artwork proof, strike-off, pre-production sample, material booking, bulk production, final inspection, shipment
- Longer lead time risk points: custom labels, custom pullers, dyed canvas shades, revised interior layout
- Peak season buffer is worth adding when the item has both printing and heavy sewing steps
- Do not align vessel booking before pre-production sample approval if logo position is still open
Specification comparison for buyers
| Spec decision | Recommended option | When it fits | Buyer risk to check |
|---|---|---|---|
| Base fabric weight | 12 oz canvas, about 340 GSM | Best balance for grocery brand portfolios that need structure without moving into padded case cost | Below 280 GSM can wrinkle around the logo area and show zipper wave; above 400 GSM may raise sewing cost and carton weight |
| Logo position on front panel | Centered horizontally, 45-60 mm above bottom seam or binding | Works for most store kits, vendor packs, and employee onboarding portfolios | If the zipper track curves at corners, artwork placed too low can distort visually once the portfolio is filled |
| Print method for simple logo | Silk screen, 1-2 spot colors | Most economical for clean grocer branding and medium to high volume runs | Fine lines under about 0.4 mm may fill in on textured canvas; request a strike-off on actual fabric |
| Premium logo treatment | Woven side label plus small front print | Useful when buyers want retail-ready branding without a large front graphic | Woven labels can be sewn upside down or into seam allowance; specify fold type and label exposure length |
| Portfolio closure construction | Nylon zipper with metal puller, single slider | Standard wholesale format for document and notepad portfolios | Cheap zipper tape can shrink after print heat setting; require opening and closing test during pre-shipment QC |
| Inner structure | Single document pocket, card slots, pen loop, optional writing pad sleeve | Best for distributor kits, supplier presentations, and store training materials | Too many compartments increase sewing time and misalignment risk; interior logo placement may be hidden by inserts |
| MOQ route | Use stock body with custom print for lower MOQs; full custom pattern for repeat programs | Good way to test a region, chain, or seasonal launch before committing to tooling and bulk trims | Stock body dimensions can limit exact logo placement or panel height; request a flat layout drawing before deposit |
| Packing method | Each in polybag or paper sleeve, 20-40 pcs per export carton depending on size and inserts | Suitable for wholesale distribution where logo face must stay clean during transit | Overpacked cartons can leave pressure marks on printed panels; require carton weight cap and drop test standard |
Buyer checklist before sampling
- State finished portfolio size closed and open, with tolerance in mm
- Define canvas weight in GSM, color standard, and whether recycled or conventional cotton is acceptable
- Mark logo location from fixed reference points such as left edge, bottom seam, and zipper line
- Specify logo size in mm and maximum allowed print position deviation, for example plus or minus 3 mm
- Choose print method by artwork detail: screen print for simple solids, heat transfer for small multicolor logos, embroidery only if panel distortion is acceptable
- Request artwork proof on dieline plus physical strike-off on actual fabric color
- List all interior features that affect sewing layout, including pocket count, card slots, pen loop, and pad sleeve
- Approve zipper color, puller finish, binding tape color, and lining if any, because trim contrast changes logo visibility
- Set packing requirement by channel: bulk carton, inner packs, barcode labels, hangtags, or store-ready assortments
- Include AQL level, logo position tolerance, seam tolerance, zipper function standard, and carton weight limit in the PO
Factory quote questions to send
- What is the quoted canvas specification in GSM, weave, and cotton content, and what is the finished fabric tolerance?
- Is the logo price based on screen print, heat transfer, embroidery, woven label, or mixed branding, and how many colors are included?
- What is the exact logo placement reference in your costing sheet: from bottom seam, binding edge, or panel cut edge?
- Are you quoting a stock portfolio body or a custom pattern, and what dimensions or pocket layouts are fixed versus changeable?
- What MOQ applies to the body, the print colorway, and any custom zipper puller or woven label separately?
- What sample stages are included: digital artwork, print strike-off, pre-production sample, and production sample from bulk fabric lot?
- What is your expected lead time for sampling, material booking, printing, sewing, inspection, and vessel cutoff under normal season and peak season?
- What packing is included in the unit price: individual polybag, tissue, desiccant, carton marks, carton size, and carton gross weight?
- How do you control print position drift during cutting and sewing, and what is your internal tolerance standard?
- What defects would be classified as major for logo placement and zipper function in your final inspection report?
Quality-control points to confirm
- Front logo placement matches approved sample within stated tolerance, measured from two fixed panel references
- Print color visually matches approved standard under neutral light and shows no pinholes, ghosting, or excess ink on canvas texture
- Canvas weight and hand feel match approved sample; no obvious panel-to-panel shade difference within the same carton
- Zipper opens and closes smoothly through full travel without catching at corner turns or binding tape puckering
- Seam allowance and binding are even, with no skipped stitches, raw edge exposure, or twisted corners
- Interior pockets and pen loop are positioned squarely and do not cover any approved interior branding area
- Portfolio lies reasonably flat when empty and when loaded with standard insert set; no severe front-panel warping around print
- Individual packing protects the printed face from rub marks, and export cartons stay within agreed weight and dimension limits