Start Proofing From The Bottle, Not The Logo
A canvas wine carrier looks simple until the bottle size changes. Many print problems and sewing disputes start because the RFQ says “wine bag” but does not define the bottle. A 750 ml Bordeaux bottle, a Burgundy bottle, a sparkling wine bottle, and a tall slim bottle do not sit the same way inside a carrier. The body width, gusset, divider, handle drop, and print position all depend on the bottle profile.
For trade show exhibitors, the carrier may be displayed flat, handed out with a filled bottle, used as a tasting room gift, or packed into a booth kit. Each use changes the acceptance standard. An empty sample can look fine on a desk while a filled bottle pushes the side seams, twists the divider, and pulls the printed logo below the visual center. Before artwork proofing, lock the bottle and use case.
- For a single 750 ml Bordeaux bottle, define bottle height, widest diameter, and cap or cork finish.
- For mixed wine assortments, approve the largest bottle profile instead of the easiest one.
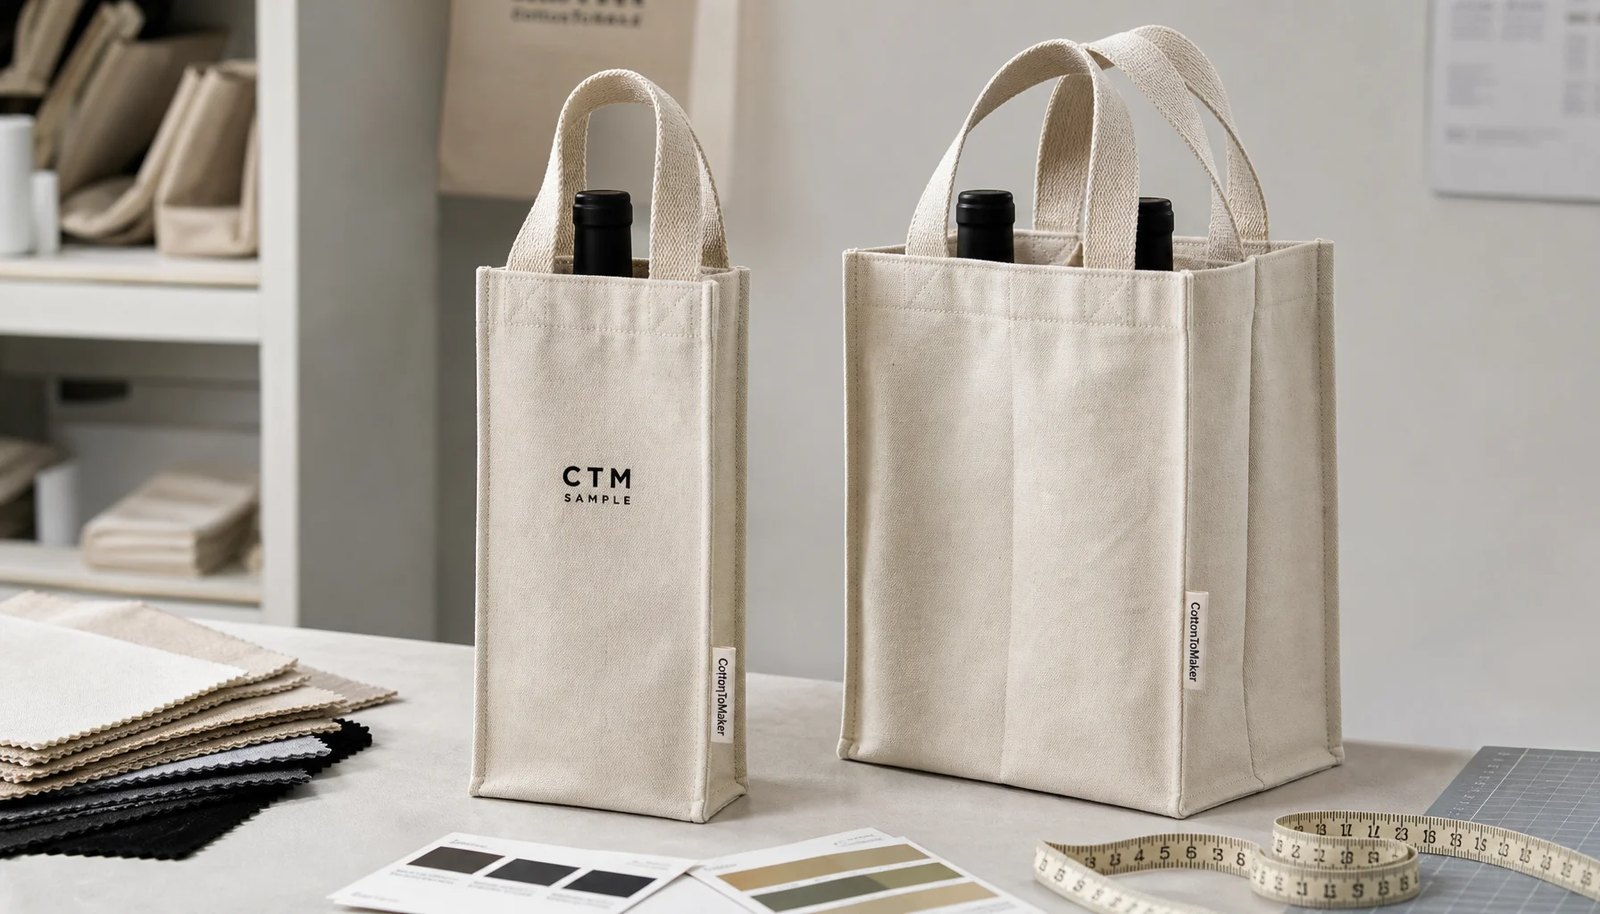
- For two-bottle carriers, require divider width and seam strength checks with two filled bottles.
- For booth giveaways, make sure the carrier can stand neatly when filled because buyers will judge it on a table, not only in hand.
Choose Canvas Weight With Print And Freight In Mind
Canvas wine carriers usually sit between light promotional cotton bags and heavier retail packaging. A common exhibitor-grade specification is 10 oz to 12 oz cotton canvas, roughly 280-340 GSM. This weight gives enough body for screen printing and normal bottle handling without pushing freight too high. It is also easier to sew cleanly than very heavy canvas when the pattern has a divider, gusset, and multiple handle attachment points.
Premium retail or gift-pack carriers may use 14 oz to 16 oz canvas, roughly 400-540 GSM. The heavier fabric feels more substantial and holds shape better, but it increases material cost, needle stress, carton weight, and sometimes MOQ. If the brand wants custom-dyed canvas, the MOQ may be driven by the fabric dye lot, not by the sewing line. Natural canvas is usually more flexible for lower MOQs, but shade variation must be accepted and controlled within a reasonable range.
- 6 oz to 8 oz cotton can work for very light promotional bottle sleeves, but it often lacks structure for filled bottles.
- 10 oz to 12 oz canvas is a practical trade show range for balanced cost, print quality, and strength.
- 14 oz to 16 oz canvas fits premium wine clubs, retail kits, and higher perceived-value gifts.
- Custom dyed canvas should be quoted with dye lot MOQ, lab dip time, and shade tolerance clearly separated.
Match The Print Method To The Artwork
Screen print remains the safest choice for many canvas wine carriers because the print area is usually a front panel with a brand mark, event logo, or distributor message. It handles solid colors well, and the cost is predictable when the artwork uses one to three spot colors. The key is to proof on actual canvas, because open-weave cotton absorbs ink differently from paper or coated polyester.
Full-color artwork is possible, but it should be treated as a different production route. DTF transfer, heat transfer, or digital print may be suitable when artwork has gradients, photos, or many colors. The buyer should approve hand feel, edge finish, rub resistance, and whether the print remains clean over fabric texture. A beautiful digital file can become disappointing if small type fills in, transfer film looks shiny, or the print sits too close to a fold line.
- Use screen print for solid logos, Pantone colors, and clean promotional branding.
- Use transfer methods when color count is high or the order does not justify multiple screens.
- Avoid tiny reversed text, thin serif lettering, and detailed QR codes unless the factory proves readability on the same fabric.
- Keep the main logo away from seams, handle stitch boxes, gusset folds, and bottom corners.
Build A Real Print Proofing Sequence
A practical proofing sequence has three levels: artwork proof, print strike-off, and pre-production sample. The artwork proof confirms scale, placement, color references, and print area. The print strike-off confirms how ink or transfer behaves on the actual fabric. The pre-production sample confirms the finished carrier, including stitching, divider, handle, logo position, and packing fold.
Skipping the strike-off is risky for natural canvas because the surface is not perfectly smooth. Ink can spread into the weave, natural cotton flecks can show through light ink, and the same Pantone target can look warmer on unbleached fabric. For an event-dated order, approve a physical strike-off before mass production. If timing is tight, the factory can sometimes make the strike-off and sewn sample in parallel, but the buyer should understand that this reduces correction time.
- Artwork proof: approve logo dimensions, color references, printable area, and seam clearance.
- Strike-off: approve ink coverage, color appearance, edge sharpness, and curing or adhesion.
- Pre-production sample: approve fabric weight, bottle fit, sewing, handle strength, divider shape, and finished logo location.
- Mass production approval: release only after written confirmation of all sample comments and final packing method.
Set Tolerances Before The Factory Prints
Print proofing is not only a visual preference. It should create measurable acceptance criteria that the factory, inspector, and buyer can use during production. For a simple front logo, a placement tolerance of plus or minus 3 mm is often workable. For artwork that lines up with a seam, divider, or panel edge, the tolerance may need to be tighter, but tighter tolerances can reduce production speed and increase rejection risk.
Color tolerance also needs a practical standard. Pantone references are useful, but canvas color, ink layer, lighting, and fabric absorption affect the final look. A physical approved strike-off is usually the most reliable reference. For natural canvas, buyers should avoid judging the print only against a digital PDF. The final inspection should compare production pieces against the approved sample under consistent light, with clear rules for major defects.
- Logo placement tolerance: define acceptable movement horizontally and vertically.
- Print defects: classify heavy bleeding, missing ink, wrong color, sticky ink, and cracked transfer as major issues.
- Sewing defects: classify open seams, broken handle stitches, and divider failure as major or critical depending on use.
- Fabric defects: reject obvious stains, holes, mildew smell, or large slubs inside the main print area.
Understand MOQ Logic Behind The Quote
MOQ is rarely only about sewing. For canvas wine carriers, MOQ can be controlled by fabric availability, fabric color, print setup, handle webbing, divider construction, and packing requirements. A factory may accept a lower MOQ for natural canvas with one-color screen print because fabric and handles are already in stock. The same factory may require a higher MOQ for custom dyed canvas, custom webbing color, four-color print, or a special bottle divider.
This is why buyers should compare quotes using the same specification sheet. A low quote may be based on 8 oz cotton, no reinforced base, no divider, and bulk packing. A higher quote may include 12 oz canvas, reinforced handles, a printed front panel, divider sewing, carton marks, and a physical pre-production sample. Those are not equal offers. Force the details into the quote so the commercial comparison is honest.
- MOQ may drop when using stock natural canvas, standard handle webbing, and one-color screen print.
- MOQ may rise for custom dyed fabric, printed lining, special divider shape, custom woven labels, or multiple artwork versions.
- Separate one-time costs such as screens, sample charges, courier fees, and inspection costs from the unit price.
- For multiple exhibitor locations, quote total volume and split shipment requirements at the same time.
Sample Approval Should Include Bottle Testing
A canvas wine carrier sample should not be approved only by looking at a flat photo. Put the intended bottle inside it. For a two-bottle carrier, load both bottles and lift the bag repeatedly. Check whether the base sits level, whether the divider pulls out of shape, whether the handle feels comfortable, and whether the print still looks centered when the fabric is under load.
The sample should also be measured against the spec sheet. Finished dimensions can vary slightly because cotton canvas shrinks, folds, and behaves differently after sewing. The question is whether the variation affects function or brand presentation. If the logo is visually too low after loading, move the print position before production. If the carrier is too tight for a sparkling bottle, widen the gusset or define the acceptable bottle type more narrowly.
- Insert the largest intended bottle and confirm easy loading without forcing the opening.
- Lift with filled bottle weight and inspect handle stitch points after repeated handling.
- Photograph the sample loaded, standing, flat, front view, side view, and packed as shipped.
- Approve or revise the sample with written comments, not only a verbal message.
Packing Can Damage A Good Print
Many buyers focus on the print proof and forget that packing can create the final defect. Canvas wine carriers are often flat packed to save space, but pressure from folded handles, rough carton interiors, or over-compression can mark the print surface. Transfer prints may be more sensitive to pressure and heat during storage. Screen prints need proper curing before packing to avoid blocking or tacky surfaces.
For trade show exhibitors, presentation at booth setup matters. If the carrier arrives badly wrinkled, crushed, or dusty, staff may not have time to steam, reshape, or clean hundreds of units. Packing specifications should cover pieces per inner bundle, whether polybags are allowed, how dividers are folded, carton strength, moisture protection, and carton markings for show-site handling.
- Use flat packing that does not place handle pressure directly on the printed logo.
- Confirm whether individual polybags are required, optional, or restricted by the buyer's sustainability policy.
- Specify carton marks with item name, PO number, quantity, destination, and event reference if needed.
- Request carton dimensions and gross weight early so freight and booth handling costs are not guessed.
Plan Lead Time Backward From The Show Date
Trade show orders do not have flexible deadlines. The correct schedule starts with the booth delivery date or warehouse receiving deadline, then works backward through domestic delivery, customs, export transit, final inspection, production, sample approval, print proofing, and artwork correction. A normal-looking production lead time can become unsafe if the buyer forgets sample courier time or inspection booking.
Lead time should also identify approval gates. Does the clock start after deposit, after artwork approval, after strike-off approval, or after pre-production sample approval? Factories and buyers sometimes use different definitions. For event merchandise, the safest RFQ states the required delivery date and asks the factory to provide a dated schedule with responsibility for each approval step.
- Reserve time for artwork cleanup if the logo file is not production-ready vector artwork.
- Allow time for a physical strike-off, especially for new ink colors or natural canvas.
- Book inspection before goods are packed into export cartons if the print and sewing need visible review.
- Do not use the vessel departure date as the deadline; use the actual warehouse or show-site receiving date.
Compare Landed Cost, Not Only Unit Price
Canvas wine carriers are bulky compared with many small promotional items, especially when they include dividers, thick handles, and heavier canvas. A unit price that looks attractive can lose value once carton volume, gross weight, packing format, and domestic event handling charges are included. Procurement teams should request carton data at quote stage, not after production.
Landed-cost comparison should include unit price, setup costs, sample and courier charges, inspection, export packing, freight, duty assumptions, local delivery, and any show contractor handling fees. A heavier 16 oz carrier may be the right retail choice, but it should be selected knowingly. For a simple booth giveaway, a well-made 10 oz or 12 oz carrier may deliver better total value because it protects print quality while keeping freight manageable.
- Compare quotes using the same Incoterm, such as EXW, FOB, CIF, DAP, or DDP.
- Request carton quantity, carton dimensions, net weight, and gross weight before choosing the supplier.
- Separate tooling and sample charges so repeat-order economics are visible.
- For urgent shows, compare air freight feasibility against a smaller quantity by air plus balance by sea.
Specification comparison for buyers
| Spec decision | Recommended option | When it fits | Buyer risk to check |
|---|---|---|---|
| Fabric weight for exhibitor giveaways | 10 oz to 12 oz cotton canvas, about 280-340 GSM, pre-shrunk if available | Good balance for single-bottle and two-bottle carriers where the buyer needs structure without making freight weight excessive | Very light 6 oz to 8 oz canvas may collapse around the bottle and show more print distortion near seams |
| Fabric weight for premium wine retail kits | 14 oz to 16 oz canvas, about 400-540 GSM, with reinforced base and handle stitching | Best for retail bundles, VIP tasting gifts, or reusable wine club packaging where hand feel matters | Higher GSM increases unit cost, carton weight, needle holes, and minimum fabric dyeing quantity if custom color is requested |
| Print method for solid logo on natural canvas | Screen print with matched ink color and a production strike-off approved on actual canvas | Most reliable for one to three spot colors, event logos, distributor marks, and tasting room branding | Ink gain on coarse canvas can close small gaps, so fine text below about 1.5 mm stroke width should be avoided |
| Print method for full-color artwork | DTF transfer or heat transfer tested for adhesion, hand feel, and rub resistance | Useful when the artwork has gradients, photos, or many colors and the order quantity does not justify many screens | Transfers can feel plasticky on canvas and may crack if the artwork sits across fold lines or heavy fabric texture |
| Bottle capacity and divider structure | Single-bottle carrier for simple sampling; two-bottle carrier with sewn divider for gift sets | Single-bottle designs reduce cost and packing volume; two-bottle styles improve perceived value at trade events | Divider width must match bottle diameter; narrow dividers can stress seams when buyers insert Burgundy or sparkling bottles |
| Handle construction | Cotton webbing handles with box stitch or reinforced bar tack at stress points | Suitable for filled bottles, retail carryout, and repeated trade show handling | Self-fabric handles may look cleaner but can stretch or wrinkle if not reinforced with enough stitch density |
| Proof approval level | Physical pre-production sample after artwork proof and print strike-off | Required when the order is event-dated, retail-facing, or uses a new logo, new fabric color, or new print method | Digital proofs alone cannot show ink absorption, fabric texture, seam alignment, or actual bottle fit |
| Packing format | Flat packed in export cartons with print protected from handle pressure and divider deformation | Works for most exhibitor shipments where cartons go to a warehouse, show contractor, or distributor | Over-compression can leave fold lines through the print area or make carriers look crushed at booth setup |
Buyer checklist before sampling
- Define bottle type before quoting: 750 ml Bordeaux, Burgundy, Champagne, slim wine bottle, craft spirit bottle, or mixed use.
- State whether the carrier is for empty display, filled bottle handout, retail sale, or post-show gift fulfillment.
- Specify fabric weight in oz or GSM, fabric color, and whether natural canvas shade variation is acceptable.
- Send vector artwork with Pantone references, logo size, print placement, and minimum clear distance from seams and handles.
- Require a print strike-off on the same canvas quality before approving the pre-production sample.
- Measure the physical sample with real bottles, including height clearance, divider width, base stability, and handle drop.
- Set acceptance criteria for logo position tolerance, print color tolerance, sewing tolerance, and visible fabric defects.
- Confirm packing method, carton quantity, carton size, gross weight, carton marking, and whether inner polybags are allowed.
- Build the trade show schedule backward from booth delivery date, including proof time, sample shipping, production, inspection, export, and domestic transfer.
- Compare quotes using the same spec sheet; do not compare a 10 oz unreinforced carrier against a 16 oz reinforced retail bag as if they are the same product.
Factory quote questions to send
- Which canvas weight, yarn count, and GSM are included in the quote, and is the fabric stock available now?
- Is the quoted fabric greige, bleached, dyed, or natural cotton canvas, and how much shade variation should we allow?
- Which print method is quoted, how many colors are included, and what is the maximum printable area on this carrier pattern?
- Can you provide a print strike-off on actual production fabric before making the full pre-production sample?
- What is the MOQ for this style, and does the MOQ change by fabric color, print method, handle color, or divider construction?
- What sample cost, tooling cost, screen cost, and courier cost should be separated from the unit price?
- What stitch type and reinforcement will be used at the handle, divider, side seams, and bottom gusset?
- How many pieces per export carton, what carton dimensions, and what estimated gross weight are used for freight quoting?
- What lead time starts after deposit, after artwork approval, or after pre-production sample approval?
- Can the factory support third-party inspection using AQL, and which defects would be considered critical, major, and minor?
Quality-control points to confirm
- Logo print location should stay within the approved tolerance, commonly plus or minus 3 mm for simple front-panel placement unless the design requires tighter control.
- Print color should be compared under consistent lighting against the approved strike-off, not only against a screen image.
- Ink coverage should be even on canvas texture without pinholes, heavy bleeding, sticky surface, or cracked transfer edges.
- Carrier must fit the intended bottle type without forcing the bottle through the opening or stressing the divider seam.
- Handle attachment should pass a reasonable loaded pull test using the buyer's expected bottle weight and handling condition.
- Stitching should be straight enough for retail presentation, with no skipped stitches, loose threads, open seams, or broken bar tacks.
- Fabric should be free from obvious oil marks, weaving holes, large slubs in the print area, mildew odor, and unacceptable shade panels.
- Cartons should protect printed panels from abrasion, moisture, crushing, and direct pressure from metal staples or rough divider edges.