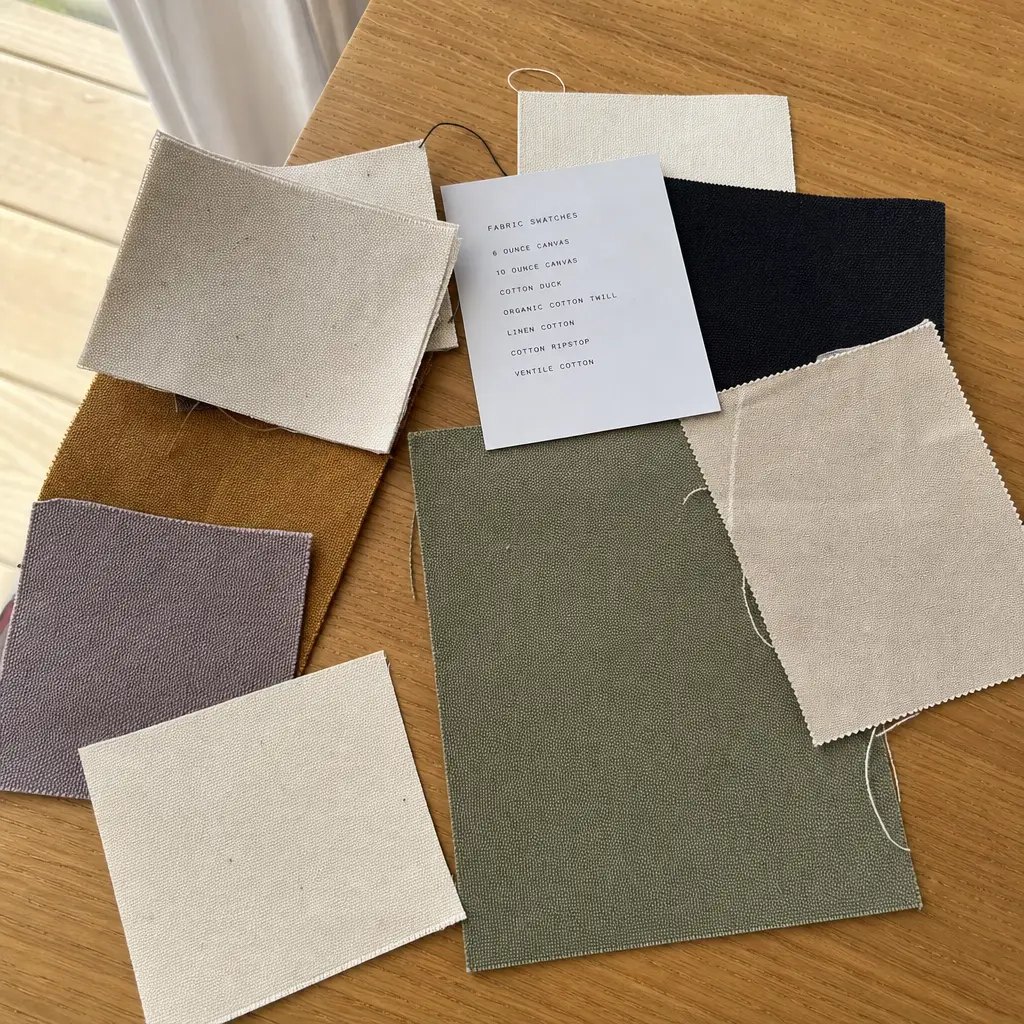
Why print proofing matters more than artwork approval
Most sourcing mistakes in canvas wine carriers do not start with the logo file. They start when a clean digital design is pushed onto a textured, absorbent fabric that has seams, handles, gussets, and reinforcement changing how the panel sits after sewing. A PDF can look centered and sharp while the real carrier prints lower than expected, runs into a seam allowance, or softens enough that fine text becomes unreadable. On canvas, the weave, surface nap, and absorbency can change the final appearance more than the artwork itself.
For tech startups, the commercial risk is bigger than a cosmetic miss. These carriers are often used for onboarding kits, investor gifts, event giveaways, client thank-you packages, or launch bundles. That means the product has to look consistent across a short run and still be repeatable later if the campaign gets reordered. A weak proofing process can create launch delays, emergency reprints, or a mismatch between the sample on the buying desk and the units that actually reach recipients.
Procurement should treat proofing as a production control point, not a design review. If a supplier only asks for a logo file and a yes-or-no PDF signoff, the buyer should ask what happens when the fabric lot changes, the seam line shifts, or the printable area shrinks after cutting and hemming. Good proofing also protects the re-order cycle. Once the first batch is approved against the right fabric and the right construction points, the supplier can repeat the result with far less back-and-forth on future runs.
The practical rule is simple: if the artwork is not being checked on the final fabric with the final print method, it is not truly approved yet. That applies even more to canvas than to smooth woven packaging materials, because the rougher the substrate, the more the substrate itself influences the final look.
- Treat sample approval as a production decision, not only a design review.
- Use the final canvas shade and the final print method before bulk release.
- Measure logo placement from fixed construction points, not from the edge of a loose cut panel.
- Ask the factory which panel is printed and whether fabric grain direction changes the result.
Start with the right canvas weight and carrier structure
Canvas wine carriers should be sourced like a small packaging component that has to carry load, protect the print, and present well. Canvas weight is the starting point. In many branded programs, 14 oz to 16 oz cotton canvas is the safer sourcing range because it holds shape better, resists wrinkling around the logo, and supports the bottle without sagging. Twelve-ounce canvas can work for short-run promotional use, but it is less forgiving when the carrier is reused, stacked, or filled with a heavier bottle. Heavier cloth also tends to print more cleanly because the panel holds itself flatter during handling.
Structure matters just as much as fabric weight. A single-bottle carrier should have a reinforced base and a defined sleeve, divider, or body shape so the bottle does not torque the front panel. If the design includes a gusset, flap, tie closure, or double-layer bottom, those details should be drawn into the spec sheet before the supplier quotes. A closure that looks simple on paper can reduce the printable area once seam allowances and folding are added. Handle construction is another common miss: cotton webbing with bar-tack or boxed reinforcement is usually more reliable than light decorative stitching when the carrier is picked up repeatedly or stacked for shipping.
Buyers should also define how the carrier will be used after arrival. A one-time event gift can tolerate lighter material and simpler stitching better than a carrier that will live in a showroom, be carried between events, or be reused by recipients. If the startup wants the product to feel premium, the body should stay square when empty and hold shape when loaded. That is a better predictor of quality than raw fabric thickness alone.
For procurement, the key is to translate appearance into measurable specs. Ask for exact finished width, finished height, handle drop, base depth, and seam allowance, because fabric cut size alone does not show the true fit. If the bottle touches the seam or distorts the front panel, the print will look worse even if the artwork itself is correct.
- Use 12 oz canvas only for simple promo programs with light handling and bold artwork.
- Use 14 oz to 16 oz canvas when you need cleaner edges, better shape retention, and a more premium handfeel.
- Specify reinforcement at the base, handle anchors, and divider seam to keep the carrier square.
- Confirm finished internal bottle width, handle drop, and base depth; raw fabric size is not enough.
Choose a print method that matches the logo and the budget
The right print method depends on logo complexity, fabric color, order quantity, and the look the brand wants to present. Screen printing is usually the most economical choice for one- or two-color art with solid fills and clean edges. It is a strong fit for startup logos that need to remain readable from a distance and repeated across a short program. Heat transfer can help when the art includes finer detail, small text, or multiple colors, but procurement should still test how the transfer sits on rough canvas and whether it changes the handfeel in a way the brand dislikes. Woven labels and stitched patches work better when the buyer wants a tactile premium finish or a merch-style presentation.
Do not accept a quote that says only “print included.” Ask what print system is being used, how many colors are included, whether the supplier charges separate setup fees, and what the printable area is after stitching allowances are removed. On textured canvas, thin lines may break up, small text may fill in, and light logos may disappear on natural or undyed fabric. The supplier should show a strike-off on the exact canvas shade, then state whether the logo needs to be enlarged, simplified, outlined, or moved away from the seam. That matters especially for tech startup branding, where logos often use fine geometry, small taglines, or tightly spaced lettering.
Repeat orders matter too. If the first run uses a print method that is cheap to set up but hard to repeat accurately, the original savings can disappear on the next launch. A stable one-color screen print with a clean proof often beats a fancier method that is harder to reproduce. The best choice is not the most impressive technique on paper; it is the one the factory can repeat with the lowest proofing risk and the fewest correction cycles.
Ask the supplier to state the minimum line width and minimum text height they recommend for the selected method. If they cannot define that, the artwork may be too fine for the substrate, especially on a coarse weave or darker canvas tone.
- Choose screen print for bold logos and predictable unit cost.
- Choose heat transfer when small details would otherwise break on textured canvas.
- Choose a woven or sewn label when the brand wants a premium tactile finish and more stable repeatability.
- Ask for minimum line width and minimum text height before approving artwork.
How to compare supplier quotes without missing hidden costs
A useful quote should let procurement compare landed value, not just a factory’s first-line unit price. On canvas wine carriers, the biggest cost differences often sit in the details: fabric weight, print setup, packing format, sample path, and whether the supplier has included enough labor for reinforcement or label attachment. A lower quoted price can disappear once the supplier adds screen charges, extra colors, custom hangtags, barcode stickers, or retail-ready packing labor. If one supplier quotes 14 oz canvas and another quietly quotes 12 oz, those quotes are not equivalent.
Ask each supplier to break out fabric, sewing, print setup, packaging, and sample charges. Then ask whether the price changes by logo size, number of print colors, or handle construction. Some factories use an attractive base price but add cost for small artwork changes, special closures, or nonstandard carton counts. Others provide a clearer all-in quote with obvious MOQ tiers and better visibility on re-order savings. A quote that explains where the cost moves is more useful than one that looks cheap until the last revision. Procurement should also ask whether plate making, test prints, rework, or replacement of defective units are included or billed separately.
The cleanest comparison method is to request the same checklist from every supplier: exact canvas weight, print method, carton pack count, sample charge, production lead time, and overrun or underrun tolerance. That makes it possible to compare suppliers on structure rather than sales language. If a supplier cannot tell you the packed carton dimensions or the print setup cost per color, the quote is not ready for procurement review yet. The landed-cost conversation should also include freight weight, because a heavier, better-structured carrier may cost slightly more at the factory but reduce damage risk and rework later.
For procurement teams, a quote should be usable as a decision document. It should make clear what is fixed, what can vary by lot, and what must be re-approved if the specification changes. That is especially important when the carrier is part of a launch bundle and small delays ripple across the entire campaign.
- Compare unit price at multiple volumes, not only at the target order size.
- Separate print setup from sewing cost so repeat orders are easier to price.
- Check whether the quote includes cartons, barcode labels, tissue, and overrun tolerance.
- Ask for packing dimensions and gross weight because they affect freight more than many buyers expect.
Supplier routes: direct factory, trading company, or local converter
The sourcing route changes how much control you have over print proofing. Factory-direct is usually the strongest option when you need measured print placement, visibility into fabric lot consistency, and a reliable re-order path. You can ask to see the sample room, the cutting approach, and the exact point where the logo is positioned before mass production. A factory-direct relationship is especially useful if the startup plans to reorder the same carrier for launches, partner gifts, or regional events. The tradeoff is that the buyer has to manage more of the spec discipline upfront.
A trading company can be useful when the order includes multiple items, mixed packaging, or combined shipping from several factories. The upside is coordination; the downside is that the buyer may not see the full production floor until late in the process. That can slow sample correction if the print proof needs adjustment. Local converters are worth considering for urgent programs or smaller domestic runs, especially when lead time matters more than the lowest unit cost. In that case, however, the buyer often has fewer choices in canvas weight, print finish, and handle style.
For procurement, the important question is not which route is best in general. It is which route gives the cleanest accountability. Someone must own the print proof, someone must sign the carton photo, and someone must be responsible if the first batch deviates from spec. If the route does not make ownership obvious, it will be harder to fix problems quickly when the order is already in production.
A practical sourcing rule: if the supplier cannot tell you who will inspect the strike-off, who will approve the pre-production sample, and who will release the cartons, the communication chain is too vague for a controlled branded item. The buyer may still use that supplier, but only with tighter documentation and a more conservative timeline.
- Factory-direct gives stronger control over sample approval and artwork execution.
- Trading routes help with mixed sourcing but can blur accountability if proofing fails.
- Local converters reduce transit time but often limit canvas weight and print finish options.
- Ask who signs off on the final production sample before bulk sewing starts.
Sample stages that prevent launch-day surprises
A reliable proofing workflow for canvas wine carriers usually has three stages: blank sample, printed strike-off, and pre-production sample. The blank sample confirms the carrier shape, seam allowances, bottle fit, handle height, and how the product sits when empty and when loaded. This is where procurement checks whether the bottle rubs too tightly against the side seams, whether the base stands upright, and whether the closure style truly matches the intended use. The blank sample is also the right moment to check whether the print zone is being interrupted by seams or edge folding.
The printed strike-off confirms how the logo behaves on the real canvas lot. This is the moment to inspect ink opacity, edge sharpness, registration, and whether the artwork needs to be enlarged or simplified. On natural canvas, a color that looked bright on screen may appear muted after the first print pass. If the logo has thin strokes or small type, the strike-off should be reviewed at arm’s length and under the same lighting conditions the end customer is likely to use. The goal is not only to see the logo; it is to verify that the artwork survives the substrate.
The pre-production sample confirms the full build at the final stage: actual handles, final labels, stitching pattern, and intended packing method. This sample should be treated as the production reference. If the factory changes the fold, label position, or carton count after approval, procurement should require a new signoff. Skipping one of the three stages usually creates a problem that is not obvious until the order has already moved through the line.
If time is tight, the minimum acceptable compromise is a printed strike-off on the final canvas lot plus a pre-production sample with the final construction and packout. That still gives the buyer a much better control point than approving art alone. The more critical the launch date, the more important it is to protect the sample schedule instead of rushing it.
Useful sample records include dated photos of each stage, measured placement notes, and the name of the approver. Those records make re-orders easier because the supplier can match the approved reference instead of reconstructing the decision from memory.
- Approve shape and bottle fit on the blank sample first.
- Approve color, opacity, and edge quality on the strike-off second.
- Approve the full assembly, labels, and packing on the pre-production sample last.
- Keep photo records of each sample stage so future re-orders can be compared.
Packing rules that protect print quality in transit
Packing is part of the product for printed canvas wine carriers. If the carrier is folded too tightly, the print can crease at the fold line or crack where the fabric has been compressed. If it is packed too loosely, the load can shift inside the carton and scuff the fabric or crush the handle loops. Buyers should ask the supplier to show how the carrier is folded, how many pieces fit in the master carton, and whether there is a slip sheet, tissue layer, or other barrier protecting the printed panel.
Bulk packing is usually the most economical option for wholesale distribution, but it still needs a defined fold direction and a carton count that is easy to verify on arrival. Individual polybags are better when the product is retail-facing, stored for a long time, or expected to move through fulfillment centers where dust and scuffing are common. If the buyer wants a cleaner presentation, tissue wrap or a simple insert card can help, but those additions should be weighed against labor and freight cost. Packaging choices often have a bigger effect on landed cost than another few grams of canvas.
Before approval, ask for carton dimensions, net and gross weight, pack method, and outer carton marking format. Also ask whether the supplier can provide carton photos after packing and whether the master cartons are strong enough for stacking. For a startup launch, the wrong pack method can create avoidable issues like bent handles, marked prints, or difficult receiving counts. A neat product that arrives damaged is still a failure from the buyer’s perspective.
If the carrier includes a print on only one side, the fold direction should protect that panel from pressure points. If the carrier is double-sided or has a sewn label, the pack method should protect both surfaces from rubbing. This is a detail worth writing into the PO, because once the pack style changes, the risk of print damage changes too.
- Bulk pack for cost efficiency when the product will be relabeled or redistributed later.
- Use individual polybags only when retail presentation or scuff control justifies the labor.
- Request carton photos after packing to confirm fold direction, count, and mark placement.
- Verify that the print panel does not sit against a hard fold crease during storage or transit.
Lead time and MOQ logic buyers should expect
MOQ should follow production logic rather than a generic sales policy. For canvas wine carriers, the minimum often depends on print setup, the number of sewing operations, and how efficiently the factory can cut the fabric from one layup. A simple one-color carrier with a straightforward open top may support a lower MOQ than a design with a flap, a custom divider, and a sewn label. If a supplier quotes a very low MOQ, the buyer should ask whether the price includes a special setup fee, a simplified structure, or a narrower size tolerance. The lowest MOQ is not always the lowest risk.
Lead time is usually driven by sample approval, fabric availability, print scheduling, sewing capacity, and packing labor. Procurement should separate sample lead time from bulk lead time in every quote so the team can see where the schedule is vulnerable. Many delays happen before production begins because artwork changes, color corrections, or sample revisions take longer than expected. If the startup has a fixed event date, the safest approach is to work backward from the ship date and allow time for at least one correction cycle.
The right way to ask about MOQ is not “What is your minimum?” but “How does MOQ change if we alter print colors, packaging style, or handle construction?” That reveals whether the factory is giving a true production minimum or only a commercial target. Similarly, ask the supplier what events can extend lead time: fabric re-dyeing, line congestion, holiday shutdowns, or carton changes. Clear answers here help procurement avoid optimistic schedules that fail the moment the order reaches the factory floor.
It also helps to ask whether lead time starts from deposit receipt, artwork approval, strike-off approval, or pre-production approval. Those start points are not interchangeable, and mixing them up is a common reason internal teams think the supplier is late when the order is still waiting on buyer-side signoff. A controlled schedule should name the milestone that actually starts the clock.
- Ask MOQ per color, per print setup, and per carton configuration.
- Separate sample time from mass production time in the schedule.
- Build buffer for one revision if artwork is fine-lined or color-sensitive.
- Confirm whether the lead time starts at sample approval or at deposit receipt.
Acceptance criteria for print, sewing, and carton inspection
A practical QC plan for canvas wine carriers should be written in measurable terms, not general language. For print, define where the logo must sit, how much variation is acceptable, and what level of blur or edge feathering counts as a defect. For sewing, define whether loose threads, uneven topstitching, seam puckering, or slight asymmetry are acceptable. For packaging, define carton count, carton marking, and whether the outer carton must arrive retail-clean or only shipping-safe. If those standards are not written down, the factory will use its own interpretation, and that may not align with the buyer’s brand or channel requirements.
The inspection method should fit the end use. A distributor may accept slightly looser cosmetic criteria for a bulk gift program, while a retail buyer may need tighter tolerances because end customers will open, inspect, and possibly photograph the product. The best approach is to define major defects and minor defects separately. Major defects should include wrong logo placement, missing reinforcement, torn handles, ink smears, or incorrect carton count. Minor defects might include small thread tails or light natural variation in canvas tone, provided the piece still matches the approved sample.
Procurement should also ask for in-line QC photos, not only a final pack photo. That helps catch a problem while there is still time to correct it. If the buyer is ordering multiple colors or multiple regions, each colorway should have a color-approved physical reference. That prevents the factory from treating a “natural” canvas order as interchangeable when the actual woven tone may vary between lots.
If the supplier can provide an inspection report, ask for the sample size, defect categories, and rework method used. Even a simple internal report is better than a vague claim that everything “passed.” Buyers do not need a complicated quality system to manage this category, but they do need enough evidence to know the production run matched the approved sample.
- Write logo position and seam tolerance into the PO or approval sheet.
- State what counts as a major defect versus a minor cosmetic issue.
- Require final packed photos and carton count confirmation before shipment release.
- Use a physical approved sample as the color reference for every re-order.
A landed-cost view that helps procurement make the call
The landed cost of canvas wine carriers is often shaped more by packaging, freight, and rework risk than buyers first expect. A heavier canvas grade may raise the factory price slightly but reduce damage risk and improve presentation. A cheaper carrier that fails print proofing can lead to sample rework, delayed launches, chargebacks, or emergency shipping, all of which cost more than the small material savings. Procurement should compare ex-works price, sample charges, packing format, and freight weight together instead of focusing on unit price alone.
For tech startup programs, the best commercial outcome is usually a carrier that is stable enough to repeat without changing the spec every time. That means locking the canvas weight, print method, and packing style early. Once those variables are stable, the supplier can quote repeat runs more accurately and keep the product closer to the approved sample. Repeatability matters because startup gifting and brand programs often come back in waves rather than in one large annual order. A product that is easy to reorder is usually more valuable than one that looks slightly cheaper on the first run.
Procurement should also think about how the carrier fits into the broader campaign. If the item is bundled with bottles, inserts, or other branded components, the carrier’s dimensions and pack method can affect the whole kit’s cost structure. A small change in carton count can alter freight efficiency enough to outweigh a small reduction in unit price. That is why the approved sample should be used as the reference point for future quotes: it gives the buyer a stable benchmark for quality and cost planning.
When comparing bids, ask each supplier to quote the same run at at least two volumes and with the same packing rule. That way, the team sees whether the price change is due to scale, setup, or packaging. If one quote looks low only because it excludes packing materials or underestimates carton weight, it will not hold up in procurement review.
- Compare ex-works price, sample charges, packing labor, and freight weight together.
- Weigh re-order stability more heavily than the first order discount.
- Use the approved sample as the reference point for all future quotes.
- Check whether a slightly higher fabric grade reduces the chance of reprints or returns.
Specification comparison for buyers
| Spec decision | Recommended option | When it fits | Buyer risk to check |
|---|---|---|---|
| Canvas weight | 14 oz to 16 oz cotton canvas; 12 oz only for short-run, light-duty giveaways | Onboarding gifts, event packs, client thank-you kits, and re-orderable branded programs | Below 14 oz, the panel can bag out, seams telegraph more, and print edges can look less crisp on textured cloth |
| Fabric finish | Natural, bleached, or piece-dyed canvas confirmed by physical swatch | When color consistency, brand tone, or ink contrast matters | A supplier saying “natural canvas” without a swatch can hide lot-to-lot shade variation and print visibility issues |
| Print method | 1-color or 2-color screen print for most simple logos; woven label or stitched patch for premium branding | Simple startup marks, bold typography, or repeat runs with low artwork complexity | Thin lines, small text, and gradients can break up on coarse canvas; approve on the actual fabric lot |
| Placement basis | Measured from top edge, side seam, and base seam on the sewn sample | Any first-time artwork or any carrier with gusset, flap, or divider | Placement from a flat dieline can shift after sewing; ask for a physical reference sample |
| Handle construction | Cotton webbing or self-fabric handles with bar-tacks or boxed reinforcement | When the carrier will be lifted repeatedly or shipped in bulk | Weak anchors can twist the body panel and move the logo out of square |
| Base structure | Reinforced bottom with defined seam allowance and minimum finished width confirmed | One-bottle carriers that must stand upright or resist bottle torque | If the base is underbuilt, the carrier can lean and distort the print zone |
| Sample path | Blank sample + printed strike-off + pre-production sample | Any new supplier, new colorway, or new logo placement | Approving only a PDF can miss absorbency, seam pull, and actual print opacity |
| Packing method | Bulk folded with tissue or slip sheet; individual polybag only if retail-ready | Wholesale distribution, kitting, or ecommerce fulfillment | Tight folds can crease print; loose packing can scuff fabric and crush handles |
| Supplier route | Factory-direct with sample-room proofing and carton photos | When you need strict control over specs and reorder repeatability | Trading layers can delay correction cycles and blur accountability for defects |
Buyer checklist before sampling
- Confirm canvas weight in oz and GSM, plus whether the fabric is natural, bleached, dyed, washed, or coated before printing.
- Lock artwork file format, exact print size, print color count, and logo placement measured from seam, top edge, and base seam.
- Approve a physical printed strike-off on the actual canvas lot, not only a PDF, render, or screen photo.
- Specify handle type, handle length, bar-tack or box-stitch method, base reinforcement, and any gusset, divider, or flap dimensions.
- Set pack style, carton quantity, carton dimensions, barcode location, and retail labeling needs before production starts.
- Request MOQ by colorway, sample charge policy, production lead time, and overrun/underrun tolerance in writing.
- Ask for pre-production photos, inline QC photos, and final packed carton images before shipment release.
- Confirm acceptable print variance, stitch tolerance, and fabric shade variation against the signed physical reference sample.
Factory quote questions to send
- What is the exact canvas weight in oz and GSM, and is that weight measured before or after washing, dyeing, or finishing?
- Can you identify the canvas finish and provide a physical swatch or sample that matches the quote?
- Which print method are you quoting, how many colors are included, and what is the setup cost per color or per screen?
- What is the printable area after seam allowances, hem folds, and handle anchors are removed from the flat panel?
- Can you show the logo placement measured from the top edge, side seam, and base seam on a sewn sample?
- What is the MOQ per colorway, per print setup, and per carton configuration, and how does the unit price change at 500, 1,000, and 3,000 pieces?
- What sample stages do you provide: blank sample, printed strike-off, and pre-production sample, and what does each one cost?
- How are the handles reinforced, what stitch pattern is used, and do you have a pull-test standard or internal spec for the anchor points?
- What packing method is included in the quote, how many pieces per master carton, and what are the carton dimensions and gross weight?
- What is your standard production lead time after sample approval, and what events can extend it, such as fabric re-dyeing, line congestion, or holiday shutdowns?
Quality-control points to confirm
- Logo placement should stay within ±5 mm of the approved physical spec measured from the same construction points on every unit in the run.
- Print registration should show no visible blur, doubling, or edge feathering at normal arm’s-length inspection under neutral lighting.
- Color should stay within the approved Pantone target or approved physical strike-off; natural canvas may require a wider agreed tolerance than bleached canvas.
- Handle anchors should pass a pull check without twisting, gaping, or stitch breakage, and the handles should remain centered after repeated lifting.
- Base and side seams should remain flat with no puckering, tunnel effect, or skew that bends the carrier body or shifts the print panel.
- Stitch count, bar-tacks, and reinforcement rows should match the signed sample; loose thread tails should be trimmed within the agreed cosmetic standard.
- Carton count should match the packing list, cartons should be dry and undamaged, and outer marks should be legible on at least two sides.
- AQL or defect criteria should be written in the PO or QC sheet, including what counts as a major defect versus a minor cosmetic issue.