1. Start with the use case, not the product name
Canvas wine carriers only look simple until a buyer has to source them at scale. For a tech startup, the same item may be used for investor gifts, launch-night handouts, employee milestones, partner thank-yous, conference kits, or retail-style bundles. Those programs have different priorities. One might need the lowest landed cost. Another may need a sturdier carrier that photographs well, stands upright in a meeting room, and feels deliberate when handed to a guest. Once that use case changes, the quote should change with it.
The phrase “canvas wine carriers for tech startups bulk pricing plan” can be useful for search, but it should not drive the sourcing logic. Buyers do not purchase a keyword. They purchase a measured sewn product with a bottle-fit requirement, a decoration requirement, and a packing requirement. If those are not defined, suppliers can quote very different constructions under the same name and still seem comparable. That is how a low number wins the RFQ and becomes an expensive surprise later.
A more reliable sourcing mindset is to treat the carrier as a small but functional packaging component. The product needs to hold a bottle safely, support the intended bottle weight, protect the logo, and stay consistent across reorders. In practice, that means the procurement team should focus on the few details that actually move cost and quality: bottle dimensions, fabric weight, handles, reinforcement, decoration, and packaging. If those are controlled early, the bulk price becomes a real procurement tool rather than a rough guess.
- Compare only suppliers quoting the same build, not just the same product name.
- Keep bottle fit, handle strength, and artwork placement as non-negotiable requirements.
- Use the buyer’s use case to define the construction, not the other way around.
2. Define the bottle profile before asking for a price
The bottle determines the pattern more than the pattern determines the bottle. A standard 750 ml Bordeaux bottle is usually easier to fit than a wider Burgundy bottle, and a Champagne or sparkling bottle usually creates the most challenges because it can be wider, heavier, and shaped differently at the shoulder. If the carrier is sized only from a web photo or a vague “fits one bottle” description, the sample may look fine until the bottle is actually inserted. That is too late in the process to discover the mismatch.
A useful measurement sheet should include the maximum bottle diameter, overall height, shoulder height, base diameter, and neck or foil clearance. If the bottle will be inserted into a carrier during packing, the buyer should also confirm whether the bottle goes in before or after the carton is closed, banded, or tagged. Those handling details affect how much extra room the opening needs and whether the carrier needs a little compliance at the top edge. A tight sleeve can save material but become difficult to use in a real shipping or gifting workflow.
If the startup will use more than one bottle style, the buyer should decide whether to standardize on the largest profile or create separate SKUs. Trying to force one carrier to fit a slim Bordeaux bottle and a wide sparkling bottle usually creates compromise on both. It can also lead to inconsistent presentation when the bottle sits too deep, leans, or appears compressed. From a procurement angle, one clean fit standard is easier to quote, inspect, and reorder than a broad “universal fit” claim that nobody can prove on the line.
- Send the actual bottle or a dimension sheet; do not rely on generic wine terminology.
- Check maximum diameter, not just height or label width.
- If one carrier must serve multiple bottles, approve it against the widest and heaviest bottle.
3. Choose canvas weight based on handling, print, and freight
Canvas weight drives the feel of the carrier, but it also affects print behavior, seam appearance, folding, and carton weight. In supplier conversations, canvas is usually quoted in ounces per square yard or grams per square meter. A rough conversion puts 12 oz canvas at about 407 gsm and 16 oz canvas at about 542 gsm. The number is only useful if both sides agree on how it was measured. Greige fabric, finished fabric, dyed fabric, and pre-shrunk fabric can behave differently after processing, so the quote should state the basis clearly.
For many bulk gifting programs, 12 oz canvas is a practical starting point. It usually has enough body to look intentional without pushing the carrier into a heavier, more expensive category. It tends to fold and pack reasonably well, and it is often a good balance between price and presentation. If the buyer wants a more premium look, a 14–16 oz canvas can help the carrier stand more confidently and feel sturdier in hand. The tradeoff is straightforward: more material, more weight, more sewing effort, and sometimes more risk of puckering on denser seams.
A buyer should never accept a nominal fabric weight without a tolerance. A commercial tolerance around ±5% is common, but it should be written into the order rather than assumed. If the product will be washed, dyed, or pre-shrunk, the supplier should explain how that affects the final weight, hand feel, and shrinkage. Natural canvas also deserves a clear shade agreement, because slubs and small specks can be normal while still needing a defined acceptable range. Good sourcing is less about demanding perfection and more about agreeing on what normal looks like before production starts.
- Use both oz and gsm in the RFQ to avoid unit confusion.
- Ask whether the quoted fabric weight is pre-finish or finished weight.
- Keep an approved swatch and shade reference for reorders.
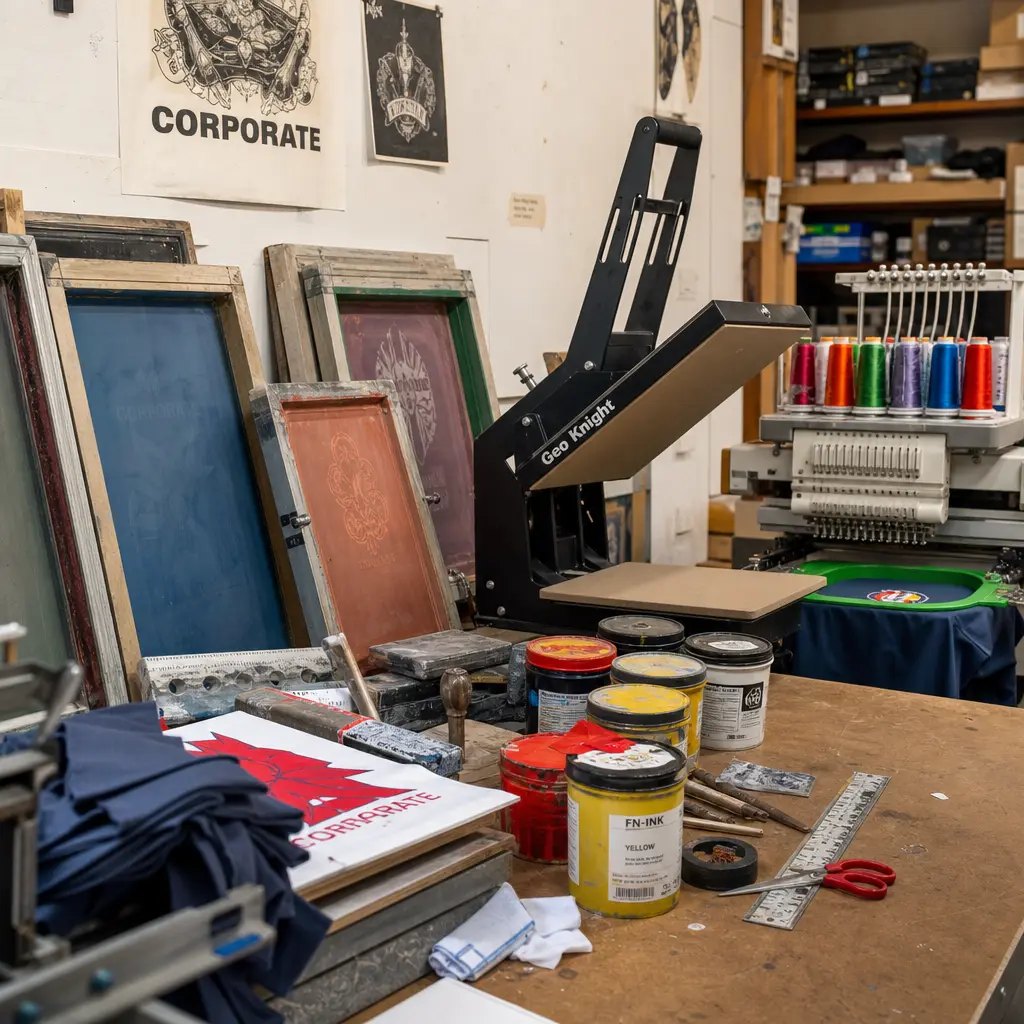
4. Specify the structure: base, handles, and seam reinforcement
The structure is where a wine carrier becomes usable or frustrating. A simple open-top sleeve is the lowest-cost route, but it depends heavily on fabric weight and bottle shape. A boxed or gusseted base improves standing behavior and gives the product a more intentional retail look. A covered base board can improve structure even further, but it must be enclosed cleanly so there are no sharp edges, exposed corners, or hard points that could damage the fabric or the bottle. For procurement, the question is not whether the structure sounds premium. It is whether the structure matches the program and can be repeated at scale.
Handles carry most of the real-world stress. A loaded bottle can feel heavier than expected, and sparkling bottles are often worse. That is why the spec should name the handle material, width, drop length, attachment method, and thread color. Cotton webbing in the 25–30 mm range often makes sense when the buyer wants strength and a clean finish. Self-fabric handles can look more integrated, but they usually require closer attention to reinforcement and sewing consistency. If the carrier is part of a gift kit or event pack, the handle also affects how the bag presents in photos and whether recipients will reuse it later.
Reinforcement belongs in the spec, not in a vague “strong stitching” note. Buyers can ask for box stitch, box-x stitch, or bar tack at the handle joins and should ask the factory which method it uses on the actual machine setup. The point is not to chase a universal stitch count. It is to ensure the same stress points are built the same way every time. Skipped stitches, loose corners, broken thread, and seam tearing in load-bearing areas should be treated as defects, because they turn a simple carrier into a claim or replacement issue.
- Name handle width, handle drop, and reinforcement method instead of saying “durable handles.”
- Require a loaded-bottle lift test during sample approval.
- If a base board or divider is used, require covered edges and no exposed corners.
5. Pick branding that matches the canvas and the timeline
Decoration is a cost decision, not just a design decision. On canvas, the logo method affects lead time, yield, inspection workload, and the risk of rework. For simple startup branding and higher-volume orders, one- or two-color screen printing is often the easiest to control. It is usually the most straightforward method to repeat, and it is relatively easy to inspect when the artwork is simple and the placement is well defined. For a launch campaign or a recurring gift program, that reliability can matter more than a highly decorated finish.
Heat transfer can work when the artwork is more detailed or when the design has multiple colors, but it should be tested on the exact canvas that will be used in bulk. Textured fabric changes adhesion and can reveal edge lift or gloss variation after folding and handling. Embroidery and woven labels can feel more premium, but they also bring their own tradeoffs: embroidery can pucker lighter canvas, while woven labels and patches need extra sewing time and a clear placement plan. The right answer depends on the budget, the delivery window, and how the startup wants the carrier to appear in use.
Artwork placement should be measured, not described vaguely. The buyer should receive a template that shows the finished bag outline, seam lines, base fold, top hem, and the usable live area. A sensible rule is to keep the design at least 20–25 mm away from seams and folds unless the factory confirms a tighter placement is achievable. The quote should also state the allowable placement tolerance in millimeters. That matters because a logo that drifts slightly too close to a seam can look acceptable in a digital proof and wrong in production. Buyers want a result they can repeat, not a one-time photo opportunity.
- Use screen print for simple, repeatable logos when volume and cost control matter.
- Test heat transfer on the actual canvas, not just on a smooth swatch.
- Ask for an artwork template with live area, seam clearance, and placement tolerance.
6. Turn the bulk pricing plan into a comparable quote
Bulk pricing gets messy when each supplier prices a different product. The quote needs to show what is included in the body, decoration, sample, trims, packing, and export cartons. If one supplier includes individual polybags and another quotes flat bulk packing, the comparison is already off. If one supplier is pricing finished 12 oz canvas and another is pricing lighter 10 oz canvas, the low price may simply reflect a lower material standard. Procurement buyers should force the quote into a common frame before they start comparing numbers.
Quantity tiers should reflect actual buying behavior. A useful structure is 500 pieces for a pilot, 1,000 for a launch or event, 2,500 for a broader team or customer program, and 5,000 for a larger annual run. Ask each factory to quote the same tiers and to specify whether the MOQ changes by fabric color, logo design, print color count, or packing style. This is where many hidden differences appear. A supplier may seem competitive on a single price point but become expensive once the buyer adds a second colorway or a different pack-out.
Buyers should also compare landed cost, not just ex-factory cost. Freight cube, carton weight, packing efficiency, warehouse handling, and inspection expense can matter as much as the unit price. For bulky textile goods, inefficient folding or overpacking can increase shipping cost faster than many teams expect. Before approving the budget, ask for folded dimensions, units per carton, master carton size, and gross weight. That gives finance and logistics a more realistic view of the total cost of ownership and keeps the conversation away from a falsely attractive unit price that does not survive freight.
| Quote line | Required detail | Why procurement needs it | | --- | --- | --- | | Body spec | Canvas oz/gsm, size, structure, handle, reinforcement | Confirms the product being priced is actually the same | | Decoration | Method, color count, location, setup, placement tolerance | Prevents logo-related add-ons and rework | | Sample | Fee, sample type, revisions, credit policy, timing | Defines development cost and approval path | | Packing | Inner pack, carton quantity, carton size, carton marks | Controls freight cube and warehouse handling | | Lead time | Days after deposit, artwork approval, and PP sample approval | Protects event and launch deadlines | | Exclusions | Labels, hangtags, polybags, palletization, inspection support | Avoids late cost surprises |
- Ask every supplier to price the same spec and the same quantity tiers.
- Separate MOQ by color, logo, and packing type.
- Use landed cost when presenting the decision to finance or operations.
7. Use sampling to remove assumptions early
Sampling is the point where the concept becomes real. A first sample can show the shape and the general look, but it may not use the final bulk fabric, final print screen, or final packing method. For a startup order, it helps to distinguish between a prototype sample, a salesman sample, and a pre-production sample. The pre-production sample matters most, because it should reflect the actual bulk fabric lot, final trims, final artwork, and final packaging. If the buyer skips that step, the sample may get approved while the bulk lot still behaves differently.
The schedule should be built backward from the event date or receiving deadline. The real path usually includes pattern confirmation, material sourcing, sample sewing, logo proofing, review, possible revisions, bulk material procurement, production, final inspection, and shipment booking. Lead time should begin after the required approvals are in place, not when the first email is sent. If artwork changes, fabric changes, or packing changes after approval, the timeline should be reset openly. That is not a failure. It is simply a change in scope that needs to be recognized before anyone promises a ship date.
Startup timelines are often tighter than they look on paper because several groups want input at once: marketing, operations, executive staff, and finance. That creates a lot of version drift. Use one version number for the spec sheet, artwork proof, quote, sample approval, purchase order, and inspection checklist. If the logo changes or the bag size changes, the factory should reconfirm price and lead time. That small amount of discipline saves much more time than it costs.
- Approve a pre-production sample before bulk cutting or sewing whenever the order is custom.
- Tie lead time to specific approvals: deposit, artwork, material, sample, and packing.
- Keep the approved sample and measurement sheet available for inspection.
8. Lock packing and cartonization before freight is booked
Packing changes the economics of the order. Canvas wine carriers can be flat bulk packed, individually polybagged, banded with paper, or wrapped for retail presentation. Flat packing usually gives the best freight efficiency, but it can create crease lines if the fold points are not controlled. Individual polybags protect the surface better and may fit a gift-ready expectation, but they add material, labor, and volume. If the startup has sustainability goals, a retail standard, or a warehouse rule, those should be written before the packing method is finalized.
Cartonization should be part of the quote, not a later warehouse question. Ask for units per carton, folded unit size, master carton dimensions, gross weight, net weight, and carton label content. Heavy cartons are harder to move and more likely to be damaged. Loose cartons allow the carriers to shift, scuff, or press against one another, which can flatten the logo panel or crease the body. A sensible packing plan balances freight efficiency with protection and count accuracy. The cheapest carton plan on paper is not always the cheapest one in the warehouse.
Mixed-SKU packing adds complexity and deserves extra attention. It can be useful for fulfillment or distributor programs, but it raises the risk of count errors and labeling mistakes. If the carriers go directly to a 3PL, office, or distributor, carton marks should include the PO number, SKU, color, quantity, carton number, gross weight, and destination if needed. Barcode labels, hangtags, and paper inserts should be named separately unless the supplier clearly states they are included. That is one of the easiest places for a quote to grow after approval, so it pays to pin it down early.
- Confirm whether inner packing, export cartons, labels, and SKU separation are included in unit price.
- Request a carton-loading photo or packing mockup before the first shipment.
- Avoid changing packing after production starts; it affects cost, count, and freight.
9. Put QC checks in writing before production starts
Good QC for a wine carrier is less about generic sewing quality and more about the failure points that matter to the buyer. The critical issues are handle failure, open load-bearing seams, wrong size that blocks bottle fit, exposed inserts, and incorrect artwork. Major issues include print misplacement, visible stains, broken stitches, severe puckering, wrong packing, and fabric weight outside tolerance. Minor issues can be acceptable if they do not affect use or appearance beyond the approved standard, but the inspection team needs the definitions in writing before they start checking cartons.
Dimensional checks should be made on the finished carrier, not only on cut fabric panels. Sewing, pressing, and folding can all change measurements. A sensible inspection plan covers total height, body width, base depth, opening width, handle drop, and logo placement. Critical fit dimensions may need tighter tolerances, such as ±5 mm, while less sensitive measurements may allow ±10 mm. The goal is not to demand the same tolerance everywhere. The goal is to match the tolerance to the function of the dimension.
A practical load test should also be stated in the PO or QC sheet. The buyer can request a sample test with the actual bottle or with a defined test weight. A 3 kg or 5 kg short-duration hanging test can reveal obvious handle or seam weakness, but the exact method should be written so both sides know what pass or fail means. That test does not replace proper sewing. It simply shows whether the carrier can survive normal use without immediate failure.
If AQL inspection is used, the inspection standard, sample size logic, and defect definitions should be agreed in advance. “Looks good” is too vague to enforce. Write down critical, major, and minor defects. Add photos if helpful, especially for natural canvas texture, print coverage, acceptable thread ends, and seam appearance. Natural materials vary, and a reference image often prevents a dispute that a sentence cannot resolve later.
- Classify defects before inspection so decisions are not subjective.
- Measure finished goods against the approved sample and tolerance sheet.
- Include bottle-fit, handle-strength, print-placement, and packing checks in final inspection.
10. Build the RFQ pack once, then reuse it for reorders
The fastest way to get useful bulk pricing is to send one complete RFQ pack instead of a series of disconnected messages. Include the bottle dimension sheet, target canvas weight, finished size, handle details, structure, logo file, decoration method, packing requirement, carton label needs, quantity tiers, QC expectations, and delivery date. If the factory has to fill in the blanks, it will write assumptions into the quote. Those assumptions are what create most later cost disputes, especially when the order moves from marketing interest to purchase order.
Version control matters because startup procurement often involves several stakeholders at once. Use one version number for the specification sheet, artwork proof, quote, sample approval, purchase order, and inspection checklist. If the logo changes, the fabric changes, or the packing method changes, update the version and ask the supplier to confirm price and timing again. That discipline is simple but powerful. It helps prevent an older sample or older artwork file from being used as approval for a newer build.
Reorders need the same control, even when the supplier already knows the product. Fabric shade, canvas weight, webbing, print ink, carton configuration, and label format can drift over time if they are not pinned down. If the program is likely to repeat quarterly or annually, ask how long the supplier will retain patterns, screens, and approved references. Also confirm whether the reorder MOQ is the same as the first order and whether setup charges repeat. The first order is often where the process gets built; the reorders are where the process proves whether it was built well.
- Send one complete RFQ pack rather than scattered assumptions.
- Use spec version numbers across artwork, samples, quotes, and POs.
- For reorders, reconfirm fabric, trim, print, packing, MOQ, and setup charges before issuing the PO.
Specification comparison for buyers
| Spec decision | Recommended B2B starting point | When it fits | Buyer risk to check |
|---|---|---|---|
| Bottle profile | Approve against the exact bottle type and measurements: Bordeaux, Burgundy, Champagne/sparkling, or a custom bottle | Startup gifting, launch events, customer thank-you kits, retail bundles, and distributor programs | A carrier built for a narrow Bordeaux bottle may not fit a wider sparkling bottle; require maximum diameter, height, shoulder, and cap/foil clearance data |
| Fabric weight | 12 oz canvas, about 407 gsm, for most bulk gifting; 14–16 oz, about 475–542 gsm, for premium structure | Programs where hand feel, shape retention, and print clarity matter more than the lowest possible unit price | Confirm whether ounce weight is pre-wash or finished weight; require a written tolerance and ask how finishing changes the fabric hand |
| Finished size tolerance | Set critical dimensions at ±5 mm for opening/base width and ±10 mm for total height where practical | Repeat orders, retail packaging, and strict cartonization plans | Loose tolerances can cause bottle rub, seam strain, print drift, and inconsistent carton counts |
| Carrier structure | Single-bottle sleeve with boxed or gusseted base; optional covered base board for better standing | Corporate gifts, bundled wine sets, launch kits, and distributor programs | Uncovered boards, sharp insert corners, or weak bottom seams can damage fabric or bottles during handling |
| Handle construction | 25–30 mm cotton webbing or self-fabric handles, reinforced with box stitch, cross stitch, or bar tack | Orders where the carrier is lifted repeatedly or shipped loaded inside gift kits | Handle failure is a critical defect; define stitch pattern, thread type, and a load test before production |
| Decoration method | 1–2 color screen print for high-volume simple logos; woven label or embroidery for premium branding; heat transfer only after testing | Tech startup logos, event campaigns, internal gifting, and partner kits | Transfers can crack or lift on textured canvas; embroidery can pucker lighter fabric; screen print needs adequate seam clearance |
| Artwork placement | Front panel live area with 20–25 mm minimum seam clearance and written placement tolerance | Logos that must stay readable in photos, gift boxes, and retail displays | Artwork too close to seams or the base fold can distort after sewing and packing |
| MOQ and price tiers | Request 500, 1,000, 2,500, and 5,000 pc price breaks for the same spec; separate MOQ by color, print design, and packing type | Pilot orders, recurring startup events, holiday gifts, investor relations programs | A low MOQ may include higher setup cost, higher fabric loss, or less efficient packing; compare landed cost, not only ex-factory price |
| Packing method | Flat bulk pack for cost control; individual polybag or paper band only when presentation or surface protection is needed | Importer, distributor, DTC, and retail-ready programs | Overpacking increases cube and freight; loose packing increases scuffing, creases, and count errors |
Buyer checklist before sampling
- Start with the bottle, not the bag: define bottle type, maximum diameter, total height, shoulder height, neck or cap clearance, and target loaded weight. Do not price from a generic wine-bag photo.
- State canvas weight in both oz and gsm where possible. Example: 12 oz canvas is approximately 407 gsm. Ask whether the stated weight is greige, finished, or post-wash.
- Set finished measurements with tolerances: total height, body width, gusset or base depth, opening width, handle drop, handle width, and logo placement from top edge and seam.
- Choose the structure early: open top, drawstring, tie closure, snap, divider, lining, base board, or reinforced bottom. Each option changes labor time, unit price, and lead time.
- Specify handle construction: webbing width, handle drop, stitch pattern, thread color, bar-tack or box-stitch reinforcement, and the minimum load test required for approval.
- Lock decoration details before sampling: method, number of print colors, Pantone or approved color reference, print size, live area, seam clearance, and placement tolerance.
- Ask whether the quote includes screen setup, artwork conversion, sample fee, bulk fabric, trims, inner packing, export cartons, carton marks, labels, hangtags, and barcode stickers.
- Request a pre-production sample made with the confirmed bulk fabric lot, final logo, final handle, final insert, and final packing method before bulk sewing is released.
- Require a bottle-fit test during sample approval and inspection: insert the bottle, lift by handles, stand the loaded carrier, remove the bottle, and check for seam stress or print distortion.
- Confirm carton packing before purchase order: units per carton, folded dimensions, master carton size, gross weight, carton burst strength if specified, mixed-SKU rules, and carton label format.
Factory quote questions to send
- Which exact bottle profile is your pattern based on, and what maximum bottle diameter and height will the approved size accept without seam strain?
- What canvas weight is included in the quote in oz and gsm, and is that fabric weight measured before dyeing, after finishing, or after washing/pre-shrinking?
- What fabric tolerance will you hold, such as ±5% GSM, and what shrinkage range should we expect if the canvas is washed, dyed, or pre-shrunk?
- What finished-size tolerances can you hold for body width, total height, base depth, opening width, and handle drop? Please quote tolerances in millimeters.
- What handle material, handle width, stitch pattern, thread specification, and reinforcement method are included in the price? Is bar tack or box-x stitching included?
- What load test do you recommend for this carrier, and can you test each approval sample with a loaded bottle or a stated test weight such as 3 kg or 5 kg?
- Is the decoration quoted as screen print, heat transfer, embroidery, woven label, patch, or a combination? How many colors, locations, and setup charges are included?
- What artwork placement tolerance will you hold in bulk production, for example ±3 mm to ±5 mm from the approved position?
- What is the MOQ per fabric color, per logo design, per print color count, and per packing configuration? Are price breaks available at 500, 1,000, 2,500, and 5,000 pcs?
- What is included in the sample fee: pattern development, one blank sample, one printed sample, freight, artwork proof, or revisions? Is any part credited after bulk order confirmation?
Quality-control points to confirm
- Fabric weight is checked against the approved specification in oz/gsm, with the agreed tolerance applied. A common commercial tolerance is ±5%, but the purchase order should state the exact range.
- Fabric shade and hand feel match the approved sample under consistent lighting. If exact color is important, define the fabric color reference and acceptable lot variation before dyeing or cutting.
- Finished dimensions are measured on a flat carrier: total height, body width, gusset/base depth, opening width, handle drop, handle width, and logo placement. Critical fit dimensions should be held tighter than non-critical decorative dimensions.
- Bottle-fit test is performed with the intended bottle profile. The bottle should load smoothly, stand without excessive lean, lift without visible seam stress, and be removable without forcing.
- Handle attachment is reinforced with the approved stitch method. No skipped stitches, loose bar tacks, broken thread, needle cuts, or weak corners are acceptable at load-bearing zones.
- A practical load test is defined before production. For example, suspend the carrier with the intended bottle weight or a stated test load for a set time, then check handle seams and body seams for tearing or distortion.
- Print is centered within the approved placement tolerance, with clean edges, no smearing, no pinholes beyond the agreed visual standard, no heavy ink bleed, and acceptable color match to the approved reference.
- Heat transfer, if used, is checked for adhesion on textured canvas, edge lifting, cracking after folding, and gloss inconsistency. Do not approve transfer production from a digital mockup only.
- Embroidery or patch branding, if used, is checked for puckering, loose thread, backing exposure, needle damage, and consistent placement on the front panel.
- Seams are straight and secure, with consistent stitch density. Open seams, broken stitches, raw-edge fraying outside the approved finish, and severe puckering should be major or critical defects depending on location.