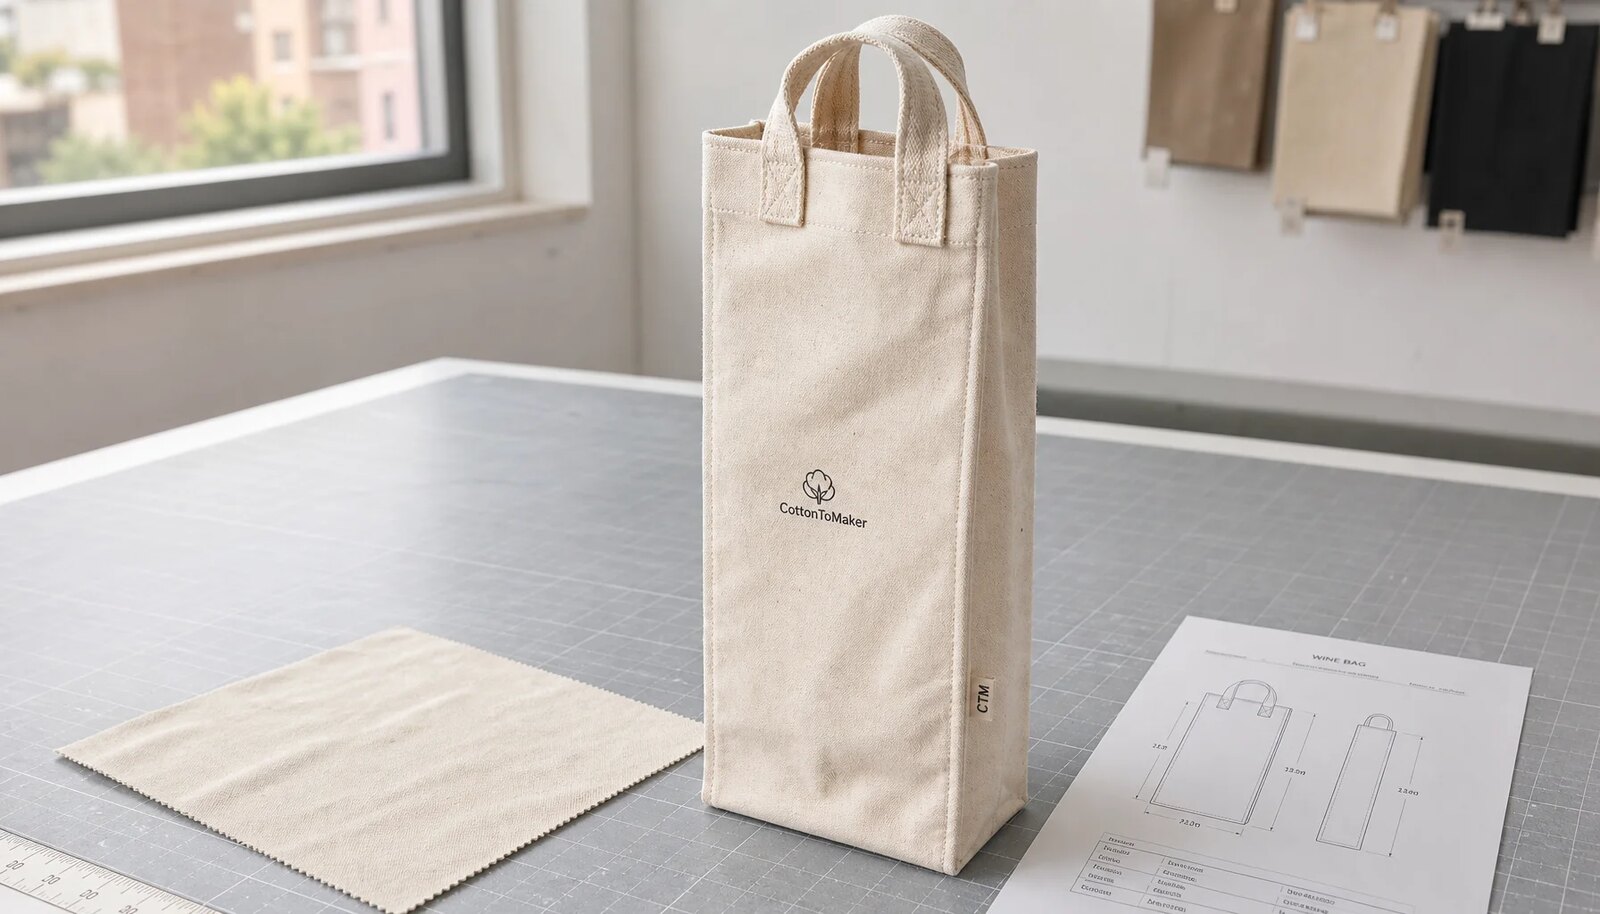
Start With The Bottle, Then Choose The Canvas
A canvas wine carrier is not just a branded sleeve. In a corporate gift program, it has to carry weight, look intentional in the recipient's hand, survive packing, and present the bottle without making the logo panel fight the shape of the glass. Fabric weight matters, but it is only useful after the bottle and use case are known.
Begin with the exact bottle format. A standard 750 ml Bordeaux bottle is usually easier to fit than a wider Burgundy or champagne bottle. Spirits bottles can be taller, heavier, square-shouldered, or irregular. A carrier that looks tidy while empty may pull at the handle bases once a filled bottle is inside. That is where many soft-goods quotes go wrong: the supplier prices a standard wine bag, while the buyer is actually shipping a heavier or wider bottle.
The distribution route changes the right specification too. A bag handed out at a tasting table has a different job from one assembled into a premium gift box by a warehouse team. A reusable executive gift may justify 12 oz canvas, lining, a woven label, and stricter carton handling. A short-use event handout may be better served by a simpler 8 oz or 10 oz build with stronger attention on handles and print consistency.
- Record bottle height, maximum body diameter, shoulder width, base diameter, and filled weight before requesting prices.
- Source to the largest and heaviest bottle when the program includes mixed bottle styles.
- Confirm whether the bag ships empty, ships loaded, sits inside a gift box, or is packed by a third-party warehouse.
- Decide whether the business goal is low unit cost, premium presentation, reuse, retail-style display, or durability.
- Require a loaded sample check before bulk cutting because flat measurements do not prove bottle fit.
What 8 Oz To 14 Oz Canvas Means In Practice
Most corporate canvas wine carriers fall between 8 oz and 14 oz canvas. As a working conversion, 8 oz is about 270 gsm, 10 oz is about 340 gsm, 12 oz is about 407 gsm, and 14 oz is about 475 gsm. Those numbers are useful when comparing quotes across suppliers, but they should not be treated as the whole specification. Two fabrics with the same nominal weight can feel different because yarn size, weave density, finishing, dyeing, washing, coating, and calendaring all affect hand feel.
Ask whether the quoted weight is greige, dyed, washed, coated, laminated, or finished fabric weight. Procurement teams often compare an 11 oz finished cloth against a 12 oz greige claim and assume they are looking at the same thing. They are not. The number on the quote should connect to the fabric that will actually be cut and sewn into the carrier.
Natural canvas, black canvas, and custom dyed canvas can also behave differently. Shade, shrinkage, surface texture, and ink behavior may vary by finish. For repeat annual gifting, keep the approved swatch with the buying file and ask the supplier to match both measured weight and hand feel as closely as commercially practical. A written spec is stronger when it is tied to a physical reference.
- 8 oz / about 270 gsm: suitable for budget-led, short-use, one-bottle promotional programs.
- 10 oz / about 340 gsm: a practical default for mainstream one-bottle corporate gifting.
- 12 oz / about 407 gsm: a stronger premium baseline for structure, reuse, and higher-value gifts.
- 14 oz / about 475 gsm: best for heavy-duty, luxury, or two-bottle builds where structure is part of the brief.
- Compare finished GSM and approved swatches, not only catalogue labels such as medium canvas or heavy canvas.
Choosing The Right Weight For The Program
An 8 oz canvas carrier can be perfectly reasonable when the job is simple: one standard bottle, short carrying time, limited budget, and a straightforward logo. It is easier to fold, usually lighter to ship, and often faster to sew. The trade-off is body. The bottle outline can show more clearly, the bag may slouch on a table, and dense artwork can feel stiff against the softer cloth. If 8 oz is chosen, handle construction and gusset depth deserve extra scrutiny.
For many B2B programs, 10 oz is the sensible starting point. It usually gives enough structure for a one-bottle carrier without pushing the order into a premium cost bracket. It works well for employee appreciation gifts, client holiday drops, conference giveaways, and branded tasting kits. With a clean pattern, accurate gusset, and reinforced handles, 10 oz can look professional without feeling overbuilt.
Move to 12 oz when the bag itself needs to feel like a reusable product. The extra body helps the carrier stand better, supports patches and woven labels more cleanly, and suits executive or retail-adjacent gifting. A 14 oz carrier should be an intentional choice, not an automatic upgrade. It can feel substantial and durable, but it also creates thicker seams, bulkier cartons, slower sewing, and higher landed weight.
- Use 8 oz when budget, folding, and short-term promotional use matter more than structure.
- Use 10 oz when the goal is a reliable one-bottle carrier with balanced cost and presentation.
- Use 12 oz when the gift should feel more premium, reusable, or retail-ready.
- Use 14 oz for heavy bottles, two-bottle formats, or luxury programs where tactile weight is worth the cost.
- Do not use heavier fabric to hide weak engineering; narrow gussets, shallow seam allowance, and poor handle stitching can still fail.
Fit Specs Buyers Should Lock Before Quoting
Finished dimensions are where wine carrier projects quietly drift. A supplier may quote a standard bag size that fits a typical wine bottle, yet the actual program may use champagne, a broad-shouldered Burgundy bottle, a tall spirits bottle, or a boxed bottle. The RFQ should state finished width, height, gusset depth, bottom width, usable opening width, handle drop, and print-safe area.
Usable opening width deserves its own line in the spec. A flat bag can appear wide enough, but the top hem, binding, handle attachment, or lining can reduce the space available for loading. That matters when warehouse teams need to insert hundreds or thousands of bottles quickly. Tight openings slow assembly, strain seams, and can scuff printed panels.
Write tolerances into the PO instead of leaving them to habit. For many sewn cotton wine bags, a practical tolerance may be around +/- 5 mm on smaller measurements and +/- 10 mm on height or handle drop, depending on the design and factory capability. The functional measurements need the most control. A slightly taller bag may be acceptable; a narrower gusset, short divider, or tight opening can create real failures.
- Specify finished width, height, gusset depth, bottom width, opening width, handle drop, and print-safe area.
- For champagne and spirits bottles, measure the widest shoulder area instead of relying only on base diameter.
- For two-bottle carriers, lock divider height, divider attachment, bottle spacing, and bottom support.
- Ask the supplier to confirm the decoration area after seam allowance, gusset folds, top finishing, handles, and bottle bulge are considered.
- Approve loaded photos from the front, side, top opening, and bottom before bulk production.
Construction Choices That Carry The Load
Fabric weight is only one part of strength. A well-built 10 oz carrier can outperform a poorly engineered 12 oz version if the handle, gusset, bottom corners, and stitch density are better controlled. Ask the factory to describe the build in concrete terms: seam allowance, stitch type, stitch density, top-edge finish, bottom construction, handle material, and reinforcement method.
Handle bases are the main stress points. Common reinforcement options include bar tacks, box stitching, cross stitching, extra fabric patches, folded self-fabric handles, and webbing handles inserted into seams. None of these terms should live only in the quote. The sample must show the exact reinforcement that will be used in bulk, in the same position, with the same thread and stitch density.
Lining, top binding, dividers, and base boards all affect performance and price. Lining gives a cleaner interior, especially on darker canvas or premium gifts, but it adds cutting time and can twist if not controlled. A bound top edge can look neat, though it may make the opening less flexible. Dividers help two-bottle carriers keep their shape, but only when the divider height and attachment seam are tested with loaded bottles.
- State whether the carrier is unlined or lined, open-top or closed, hemmed or bound, flat-bottomed or gusseted.
- Define handle material, handle width, handle drop, seam allowance, and reinforcement stitch type.
- Inspect handle bases, side seams, bottom corners, gusset turns, and top edge finishing on the production sample.
- Use base boards only after checking folding, packing, board thickness, board fit, and carton pressure risk.
- For two-bottle bags, test the divider with both intended bottles loaded at the same time.
Branding Methods By Canvas Weight
Screen printing is usually the most efficient decoration method for volume corporate wine carriers, especially when the logo is one or two solid colors. It is also easier to inspect consistently than many complex decoration methods. Still, canvas is textured. Ink edges will not look like ink on coated paper, and fine type can lose sharpness. A strike-off should be made on the same fabric weight and color planned for production.
Heat transfer can help with multi-color artwork or fine detail, but it changes the surface feel and must be tested for adhesion, edge behavior, and flexibility on the chosen canvas. Embroidery, woven labels, and stitched patches make the carrier feel more like a finished product than a disposable giveaway. The fabric must support the method. Dense embroidery can pucker lighter panels, while 12 oz canvas is usually more forgiving for stitched branding.
Decoration placement should be built from the final pattern, not a flat rectangle in a presentation deck. Seam allowance, gusset folds, handle placement, top binding, and the bottle's shape all reduce the safe logo area. The PO should include artwork size, color reference, placement from top edge or center line, and acceptable position tolerance. For premium orders, the buyer should approve the decorated sample while loaded, because the bottle can change how the front panel reads.
- Use screen print for simple corporate logos, solid colors, and high-volume inspection consistency.
- Use woven labels or patches when the brief calls for subtle, product-like branding.
- Use embroidery only after checking pucker, backing, thread color, stitch density, and panel stability.
- Keep artwork away from gusset folds, handle stitching, top binding, and high-stress seams.
- Define print position tolerance, color tolerance, curing requirements, and rub resistance checks before production.
Quote Variables That Change The Real Price
Two canvas wine carrier quotes can look similar on the surface and still describe different products. Fabric weight, finished dimensions, fabric width, cutting yield, lining, handle material, divider, base board, print setup, label MOQ, packaging, carton strength, and inspection support all move the price. A low unit cost is not useful if it excludes the items needed for a gift-ready shipment.
Minimum order quantity is often driven by materials, not just sewing capacity. A natural 10 oz unlined carrier with one-color screen print may be easier to source at a lower MOQ than a custom dyed 12 oz lined carrier with a woven label, divider, base board, and special pack-out. Custom webbing, labels, dyed fabric, cord, snaps, insert cards, and printed paper packaging may each carry separate minimums.
For clean B2B comparison, request tiered pricing at practical breaks such as 500, 1000, 3000, 5000, and 10000 pieces. Ask the supplier to separate sample cost, screen or setup charges, decoration charges, trim charges, individual packing, carton data, inland delivery terms, and inspection support. The clearer the quote, the fewer surprises when finance compares suppliers or when the order repeats next year.
- Normalize every quote to the same fabric weight, finished dimensions, handle spec, construction, decoration, and packing method.
- Separate stock materials from custom dyed fabric, lining, labels, webbing, cords, closures, and base boards.
- Ask whether screens, artwork adjustment, sample freight, carton marks, individual packing, and insert placement are included.
- Compare landed impact, not only ex-factory unit price, because heavier canvas and bulkier cartons affect freight and storage.
- Put the same assumptions into the PO, approved sample record, and inspection checklist.
Sample Approval Before Bulk Cutting
A useful pre-production sample proves the whole carrier, not just the logo. It should use the intended finished canvas weight or a clearly approved equivalent, the final construction, correct handle reinforcement, selected decoration method, approved trims, and planned packing method. A flat artwork proof helps with color and placement, but it does not prove fit, standing shape, carrying comfort, or seam behavior.
Test the sample with the real bottle whenever possible. If the bottle cannot be sent to the factory, provide height, body diameter, shoulder width, base diameter, and filled weight, then ask the supplier to use a matched dummy. For two-bottle carriers, both bottles need to be loaded together. The divider, bottom support, and handle stress points cannot be judged from an empty sample.
Keep the approval record boringly specific. Photograph the approved sample from the front, back, side, bottom, top opening, loaded state, and packed state. Record finished fabric weight, main dimensions, handle drop, decoration size, decoration position, label placement, stitch details, packing method, carton count, and tolerances. For annual programs, keep one approved sample with procurement and one with the supplier so reorders have a physical reference.
- Do not approve bulk cutting from a photo of a similar bag or from a flat logo proof alone.
- Ask the sample room to label any substituted fabric, trim, or construction detail before review.
- Approve fit, standing shape, handle comfort, decoration placement, inside finish, and packed condition together.
- Request a revised sample when changes affect fabric weight, dimensions, lining, divider, handle construction, or decoration method.
- Tie sample approval to a date, version number, swatch, artwork file, measurement sheet, and written tolerance list.
Quality Control For Giftable Shipments
Quality control should protect both function and presentation. A corporate wine carrier must hold the bottle securely, look consistent across the order, feel clean in hand, and arrive ready for staging or assembly. Sewing inspection alone is not enough if the shipment has shade variation, odor, stains, crushed panels, warped boards, or logo placement drift.
Start inspection against the approved sample and PO. Check finished fabric weight and shade, measure the carrier, inspect seams and handle bases, review top-edge finish, verify label placement, and load test with the intended bottle or a matched dummy. Pull cartons from different parts of the shipment so folding damage, carton compression, and lot-to-lot variation are more likely to be found before release.
For load testing, lift the loaded carrier by the handles, hold it briefly, gently swing it, set it down, and recheck the handle bases and side seams. For print inspection, check opacity, edge clarity, registration, curing, cracking, rubbing, and placement on the finished canvas. For lined or divided bags, inspect the inside carefully. Loose threads, twisted lining, crooked dividers, and exposed seam allowance all reduce perceived quality when the recipient opens the bag.
- Check finished fabric weight and hand feel against the approved swatch before mass sewing progresses too far.
- Measure width, height, gusset, opening width, bottom width, handle drop, divider height, and board fit within agreed tolerances.
- Reject serious skipped stitches, broken threads, loose handles, distorted openings, stains, oil marks, odor, and print misalignment.
- Confirm loaded standing shape so the bottle does not lean sharply, twist, bulge at the shoulder, or stress the seams.
- Inspect several cartons for folding damage, compression, carton count accuracy, individual packing consistency, and carton marks.
Packing, Transit, And Warehouse Handling
Packing is part of the product specification. A simple 8 oz unlined carrier may pack flat with little issue. A 12 oz or 14 oz lined carrier with a base board, patch, or divider can crease, hold carton pressure, or require more space. If the carrier is going into a premium gift set, the front panel should arrive smooth enough for staging without extra steaming or sorting.
Individual polybags protect against dirt and carton abrasion, but some companies prefer paper wrap, tissue, belly bands, or reduced-plastic packing. The right answer depends on the buyer's sustainability policy, warehouse route, moisture risk, and whether the bags will be touched by multiple teams before the recipient sees them. Hang tags, barcode labels, insert cards, and carton marks should be specified early because they affect assembly speed and error rates.
Ask for carton dimensions, pieces per carton, gross weight, net weight, and CBM before approving the order. This data helps procurement estimate freight, storage, event allocation, and fulfillment labor. For large corporate programs, carton quantities should match the downstream pick plan where possible, not only the factory's easiest carton size.
- Define the folding method and confirm it does not crease the logo panel, warp base boards, or distort handles.
- Specify individual packing: none, polybag, paper wrap, tissue, belly band, insert card, barcode label, or customer-provided packaging.
- Request carton count, carton dimensions, gross weight, net weight, and CBM during the quote stage.
- Confirm carton marks, SKU labels, country-of-origin marking, and warehouse routing labels if required.
- Review a packed sample or packed-carton photos for premium orders before final pack-out approval.
Specification comparison for buyers
| Spec decision | Recommended option | When it fits | Buyer risk to check |
|---|---|---|---|
| 8 oz / about 270 gsm canvas | Promotional-grade unlined carrier with simple direct print | Budget-sensitive tasting events, internal staff gifts, short-use handouts, and lightweight standard wine bottles | Lower body, more visible bottle outline, higher slouch risk, and handle seams that need load testing rather than visual approval only |
| 10 oz / about 340 gsm canvas | Balanced one-bottle carrier for mainstream corporate gifting | Employee appreciation, client holiday drops, conference gifts, and standard 750 ml wine formats | Two mills may label different finished cloth as 10 oz; require actual finished GSM, hand sample, and dimension tolerance |
| 12 oz / about 407 gsm canvas | Preferred premium baseline, often with reinforcement or lining | Executive gifts, retail-style kits, annual client programs, champagne formats, and reusable presentation bags | Higher sewing cost, thicker seam turns, bulkier cartons, and possible shade variation across fabric rolls |
| 14 oz / about 475 gsm canvas | Heavy structured carrier for durability-led gifting | Luxury bottles, heavier spirits, two-bottle carriers, boxed sets, and gift programs where tactile weight is part of the brief | Larger landed weight, slower sewing output, harder folding, thicker needle requirement, and increased risk of bulky corners |
| Unlined construction | Lowest material use and fastest sewing path | High-volume one-bottle gifting where interior finish is not a selling point | Inside seams, loose threads, and seam allowance quality remain visible when the recipient opens the bag |
| Lined construction | Cleaner interior and more premium hand feel | VIP gifts, darker dyed canvas, branded insert cards, or programs where the bag may be reused | Adds fabric, cutting, sewing time, and tolerance risk if lining twists or pulls the opening out of shape |
| Sewn divider and base board | Best control for two-bottle presentation | Wine pairing sets, champagne plus accessory kits, and heavier bottle combinations | Divider height, attachment seam, board thickness, board fit, and bottle spacing must be tested with actual filled bottle weights |
| Screen print on finished panels | Most efficient for simple corporate logos at volume | One- or two-color marks, natural canvas, black canvas, and repeatable inspection needs | Ink opacity, curing, rub resistance, and print position tolerance must be approved on the final canvas texture |
| Woven label, patch, or embroidery | More product-like branding for premium gifts | Executive gifting, retail-adjacent programs, understated branding, and annual repeat orders | Light canvas can pucker; confirm backing, stitch density, placement, label MOQ, and whether the panel distorts after attachment |
Buyer checklist before sampling
- Define the exact bottle format before sourcing: 750 ml Bordeaux, Burgundy, champagne, spirits, boxed bottle, two-bottle set, or mixed assortment.
- Measure bottle height, maximum body diameter, shoulder width, base diameter, and filled weight; do not rely on nominal bottle volume only.
- State canvas weight in both oz/sq yd and gsm, and ask whether the number is greige, dyed, washed, coated, laminated, or finished fabric weight.
- Request fabric composition, weave type, yarn count if available, color standard, and acceptable fabric weight tolerance by roll or lot.
- Lock finished bag dimensions: width, height, gusset depth, bottom width, usable opening width, handle drop, and print-safe area.
- Specify dimensional tolerances in the PO, such as +/- 5 mm for small dimensions and +/- 10 mm for height or handle drop when appropriate for the design.
- Choose construction details: unlined, lined, bound top edge, open top, drawstring, flap, divider, base board, self-fabric handle, webbing handle, or reinforced patch.
- Define handle reinforcement clearly: bar tack, box stitch, cross stitch, double layer, inserted webbing, or folded self-fabric handle seam.
- Ask for a pre-production sample made in the intended finished canvas weight and construction, not only a flat print proof or photo of a similar bag.
- Approve fit with the actual bottle or a dimensionally matched dummy with the same filled weight before allowing bulk cutting.
Factory quote questions to send
- What is the finished canvas weight in oz/sq yd and gsm, and is the measurement taken before or after dyeing, washing, coating, calendaring, or lamination?
- What fabric weight tolerance do you control by roll or lot, and how will you report it if the bulk fabric is outside the approved range?
- What is the fabric composition, weave, color reference, shrinkage expectation, and whether the fabric is stock, made-to-order, or custom dyed?
- Which bottle dimensions and filled weight did you use to make the pattern, and can you test our bottle or a dimensionally matched dummy before sample approval?
- What finished bag dimensions are included in the quote, including width, height, gusset, opening width, bottom width, handle drop, and divider height if applicable?
- What construction is quoted: unlined, lined, bound top, hemmed top, open-top, drawstring, flap, base board, divider, webbing handles, or self-fabric handles?
- How are handle stress points reinforced, and can you show the stitch type, stitch density, seam allowance, and reinforcement placement on the sample?
- Which decoration method is included, how many colors and placements are included, and what are the setup charges for screens, transfers, labels, patches, or embroidery?
- What is the maximum safe decoration area after seam allowance, gusset fold, top edge finish, handle placement, and bottle bulge are considered?
- What print position tolerance, color tolerance, curing requirement, rub resistance check, and inspection standard do you recommend for this canvas texture?
Quality-control points to confirm
- Verify finished fabric weight with a practical sampling plan across rolls, not only from one cutting swatch, and compare to the approved sample hand feel.
- Check shade under consistent lighting and against the approved fabric swatch, especially for natural cotton, black canvas, and custom dyed lots.
- Measure finished width, height, gusset, opening width, bottom width, handle drop, divider height, and board fit against the PO tolerances and approved sample.
- Inspect seam allowance, stitch density, skipped stitches, broken stitches, loose threads, top-edge finish, bottom corners, gusset turns, and divider attachment.
- Load-test with the intended bottle or matched dummy; lift, hold, gently swing, set down, and recheck handle bases and side seams for strain.
- Confirm the carrier stands upright with the loaded bottle and does not twist, lean sharply, bulge at the shoulder, or create pressure points at the seams.
- Review print opacity, edge sharpness, curing, registration, color, placement, and rub resistance on the finished canvas, not on paper proof only.
- Check woven labels, patches, embroidery, hang tags, and insert cards for spelling, placement, orientation, thread color, and attachment strength.
- Inspect lining for twisting, exposed seams, trapped threads, shade transfer, and opening distortion; inspect dividers for height and straightness.
- Reject units with strong chemical odor, mildew odor, oil marks, stains, fabric holes, heavy slubs in the logo area, crushed panels, or warped base boards.