Why the retail insert matters for a canvas tote
A retail pack insert is not just a piece of paper inside a canvas tote bag. It is the part of the package that tells the shopper what the bag is, what it is made from, how to care for it, and why the price makes sense. For procurement teams, the insert is also one of the easiest places to lose control of cost, because the bag may be quoted cleanly while the insert is treated as an afterthought. Once the pack has to look retail-ready, that afterthought becomes a real line item with artwork, print, fold, and packing labor.
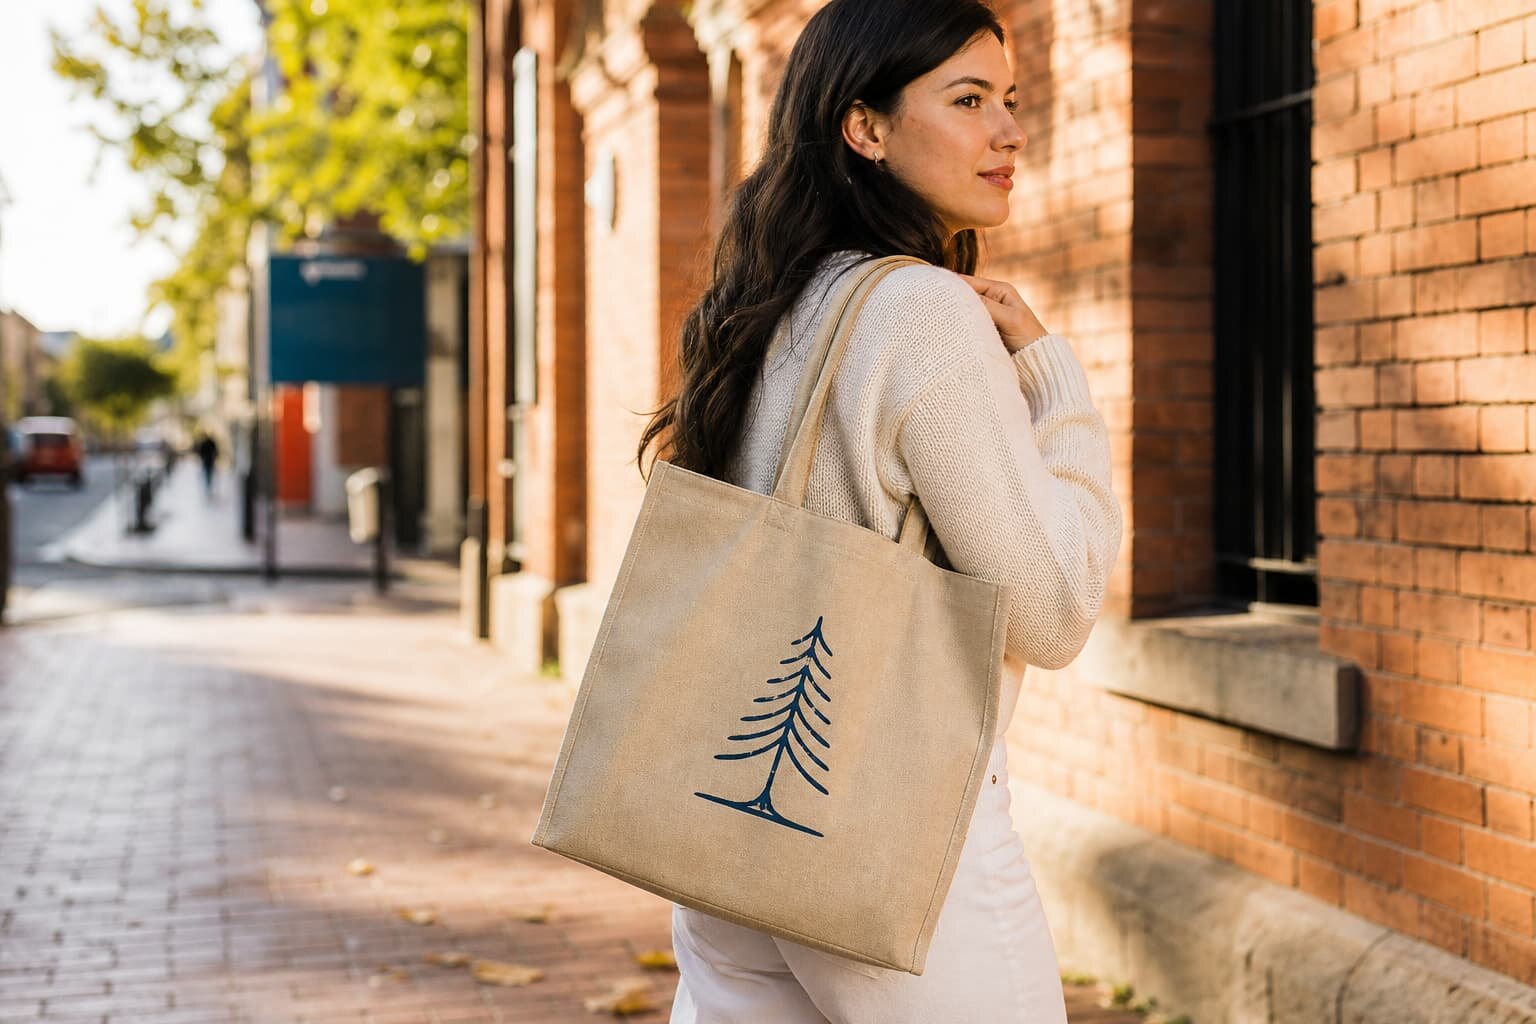
Canvas tote bags create a specific packaging problem because they are soft, compressible, and sensitive to shape. A thin promotional tote and a heavier structured tote do not behave the same way in a retail pack, even if the printed artwork is identical. If the insert is too weak, too large, or too glossy, it can wrinkle, curl, or push the bag out of shape. If it is too small or too generic, it fails to justify shelf presentation. The buyer's first job is to define what the insert must accomplish before asking for a quote.
- Treat the insert as a functional pack component, not decorative filler.
- Define whether the insert must carry compliance, branding, barcode, or all three.
- Use the same approval standard for the insert as for the tote body and print.
Start with the channel, not the artwork
The right insert depends on where the tote will be sold. A bookstore, museum shop, supermarket, gift chain, and e-commerce warehouse all care about different things. A shelf-facing retail channel often needs a clean insert that communicates brand, SKU, barcode, and care copy in one glance. An e-commerce pack may care more about fast pick-and-pack, scannability, and keeping the bag flat. If you begin with artwork before you know the channel, you will usually redesign the insert later, after time and money have already been spent.
The tote specification matters just as much. As a practical working range, many buyers pair 8 oz canvas with 250-300 gsm insert stock, 10 oz canvas with 300-350 gsm stock, and heavier 12 oz canvas with either a sturdy 300-350 gsm card or a simpler belly band if the pack needs to stay light. That is not a fixed rule, but it is a useful starting point. If the bag includes a zipper, gusset, pocket, or lining, the folded pack becomes bulkier and the insert needs to respect that shape instead of fighting it.
- Ask the factory for the final folded bag size before drawing the insert.
- Separate retail shelf requirements from warehouse packing requirements.
- Do not reuse one insert spec across very different tote constructions without checking fit.
Choose the insert format that matches the job
The best insert format depends on how much information it must carry and how it will be handled on the line. A folded card works well when the buyer needs care instructions, origin, fiber content, and barcode data in a compact format. A belly band gives the pack a more premium retail look and can help hold the folded tote in shape. A hang tag is useful for display, but it may be the wrong choice if the bag will spend most of its life in a polybag or carton. A simple sticker label can be enough when the goal is only SKU control or barcode placement.
Paper choice matters as much as format. Uncoated or matte card is usually safer for canvas totes because it looks natural, resists glare, and is less likely to scuff against fabric. Coated card can look sharper, but it may fingerprint or slide more easily inside the pack. For humid routes or rough handling, a synthetic label or a higher-stability stock may be better than a fancy paper that warps. Buyers should think in terms of packing behavior, not just shelf appearance.
- Use 250-300 gsm for simple packs, then move up only when the shelf presentation justifies it.
- Match the finish to handling: matte for low glare, coated only when the pack stays clean in transit.
- Keep the insert format simple if factory packing labor is already tight.
Print the right information in the right order
A good insert is read in seconds. That means the content hierarchy has to be deliberate. The shopper should see the brand first, then the product identity, then the core buying facts such as size, fabric weight, care instructions, and any claim that affects purchase confidence. For canvas tote bags, buyers often need to communicate the fabric weight in oz or gsm, the material composition, the print method used on the bag, and the country of origin if required by the channel. If there is a barcode, it should be placed where line staff can scan it without turning the pack into a puzzle.
The print method for the insert is usually different from the tote itself. The tote may use screen print for bold logos, heat transfer for smaller runs, embroidery for premium items, or a woven side label for brand identification. The insert often uses offset or digital print on card stock, so the color result will not match the fabric exactly. That is normal, but the buyer should still approve against a physical sample. Keep QR codes short and stable, and do not overload the insert with too many claims, because cramped copy is one of the fastest ways to create retail rejection.
- Specify the order of information before the factory starts artwork.
- Keep barcode quiet zones and QR routing under buyer control.
- Set a minimum font size that remains readable after folding.
Lock fit, fold, and pack-out before bulk starts
Canvas tote bags do not fold like rigid packaging. The folded size changes with fabric weight, washing, ironing, gusset depth, handle length, and whether the bag is lined or unlined. A light 8 oz tote may fold neatly into a compact pack, while a 12 oz structured bag may need more space and a different fold path to avoid hard creases. That is why the insert should be designed against the final folded bag, not the open bag dimensions on the spec sheet. The wrong insert size can force the pack to bulge or create marks on the canvas that look like damage at retail.
The pack-out sequence also needs to be fixed early. Some buyers want the insert inside the bag, some want it outside under a belly band, and some want a mix of both for branding and compliance. If the bag ships in a polybag, the insert must fit without catching the film or punching the seal. If the insert is used as the visible retail face, ask for a pack photo from the factory and check whether the bag lies flat, whether the logo is visible, and whether the barcode is accessible to the warehouse. A clear pack-out instruction saves more rework than a last-minute artwork correction.
- Measure the actual folded pack, not just the open tote dimensions.
- Confirm whether the insert sits inside the bag, outside the bag, or under a band.
- Test the pack inside the final polybag size before bulk approval.
Build the quote so hidden labor shows up
Insert pricing can look simple until the factory separates the costs. There may be a setup charge for artwork, a die-cut charge, a print-run cost, folding labor, assembly labor, and a packing charge if the insert must be matched to the tote. MOQ logic is often driven by sheet yield or print setup, not by the bag quantity alone. That means a buyer who asks only for a tote quote may miss the fact that the insert needs a different run quantity, different waste allowance, or different carton plan. A clean RFQ makes those differences visible before commercial negotiation starts.
The quote should show the data that procurement needs to compare suppliers fairly. Ask for insert size, stock weight, print sides, color count, coating, finishing, and whether the unit price includes hand folding or bag-insert assembly. Ask for sampling fees, expected waste percentage, and overrun or underrun tolerance. If the supplier cannot say whether the pack insert is shipped loose or packed into the tote on the line, the quote is incomplete. The goal is not to force the lowest number; it is to expose where the labor and risk are hiding.
- Compare quotes only after the suppliers answer the same spec questions.
- Request separate line items for setup, print, folding, and assembly.
- Check whether MOQ is tied to one artwork, one language, or one carton plan.
Approve a physical sample, not just a PDF
Artwork approval is not the same as pack approval. A PDF may show the design, but only a physical sample proves whether the paper weight feels right, whether the fold holds, and whether the insert damages the tote fabric. For natural canvas especially, the wrong card can leave a visible line, press the weave, or rub off dust onto a light-colored bag. Ask for a preproduction sample made with the actual tote body, real insert stock, and final folding sequence. If the supplier sends a loose paper sample with no bag, that is only a color check, not a pack check.
The sample also needs to prove line speed. If workers have to fold the insert twice, rotate it to face a certain way, or align it by eye against the bag logo, bulk production will drift. Check whether the barcode scans as intended, whether the QR code reaches the correct landing page, and whether the sample can be packed without bulging the polybag. The best sample is boring in the right way: it looks normal, packs quickly, and leaves no doubt about how the bulk line should run.
- Approve the physical sample with the real tote, not a standalone insert.
- Check color, fold, barcode, QR, and fit in one review.
- Time the packing step if the supplier plans to assemble on the line.
Set acceptance criteria before the factory ships
Quality control for a tote-and-insert pack should start before packing, not after cartons are sealed. The factory should check paper thickness, cut accuracy, fold position, print registration, and any adhesive or string attachment before the pack enters the final carton. If the tote has embroidery, a coated logo, or a soft printed surface, the insert must not shed dust or leave pressure marks. For buyers, the key is to turn a vague expectation like clean and neat into measurable rules the factory can inspect against on the floor.
Good acceptance criteria are specific. Define dimension tolerance, print tolerance, scan quality, carton count, and the exact pack configuration. If the insert can be oriented only one way, say so. If the bag and insert must match by SKU, say so. If a carton must contain one artwork version only, say so. When the buyer does not define the rejection rule, the factory will use its own standard, and that standard is rarely the same as the retail buyer's.
- Write a measurable tolerance for insert size and fold position.
- Define what counts as a defect: curl, scuff, stain, mixed SKU, or unreadable barcode.
- Require first-off inspection and carton photo evidence before release.
Avoid the mistakes that add cost without adding value
The most common mistake is designing the insert before the bag spec is frozen. Canvas tote bags change as handle length, gusset depth, or shrinkage changes, and that can make a previously approved insert too tight or too loose. Another common mistake is trying to use one insert for both retail and e-commerce without checking how the pack will be handled. A shelf-ready pack and a warehouse-ready pack do not always need the same structure. Buyers also overspend when they choose a premium finish simply because it looks good in a render, then discover that the finish fingerprints, scratches, or slows down the line.
Copy overload is the other silent cost driver. Brands often try to fit marketing claims, legal copy, care instructions, QR codes, barcodes, and origin data onto one small card. The result is a crowded insert that is hard to read and hard to print cleanly. A better approach is to divide the content by job: the shopper sees the purchase message, while the warehouse sees the scan data. That separation is one of the easiest ways to make the pack look more expensive without increasing the risk of a late-stage redesign.
- Freeze the tote spec before finalizing the insert dieline.
- Do not use a premium coating unless the handling and shelf gains are real.
- Keep legal, retail, and warehouse content organized by function.
Use a clean RFQ workflow from bag to carton
A strong RFQ gives the factory enough detail to quote the real job, not an assumption. State the tote construction, canvas weight in oz or gsm, color, bag print method, folded size, insert purpose, insert dimensions, stock weight, print sides, languages, pack format, carton quantity, and target retail channel. Include a photo of the current pack if you already have one, plus a marked-up drawing of where the insert should sit. When the supplier can see the bag, the fold, and the pack sequence, the quote is usually cleaner and the sample process is faster.
It also helps to ask for two options, not one. For example, request a standard uncoated card version and a premium belly band version, both quoted against the same tote spec. That makes the tradeoff visible: which version gives the better retail look, which one is easier to pack, and which one is less risky on lead time. If the supplier cannot explain why one option costs more in labor or waste, the buyer probably does not have a complete comparison yet.
- Ask for bag, insert, and assembly as separate or clearly grouped quote lines.
- Include a pack photo or rough sketch in the RFQ.
- Request a backup insert option so procurement can compare value, not only price.
Specification comparison for buyers
| Spec decision | Recommended option | When it fits | Buyer risk to check |
|---|---|---|---|
| Insert format | Folded 300 gsm card | Retail shelf packs that need care copy, barcode, and brand story in one piece | Too many folds can slow packing and crush soft tote corners |
| Paper stock | 250-300 gsm uncoated or matte card | Most natural-canvas totes and price-sensitive programs | Gloss can scuff; thin stock may curl inside a soft bag |
| Premium display | 300-350 gsm card or belly band | Higher-margin totes sold with visible shelf presentation | Adds labor, so confirm assembly is included in the quote |
| Compliance data | Simple insert with barcode, SKU, and care copy | Chain-store or multi-SKU programs | Barcode placement and quiet zone must be approved before print |
| Attachment method | Loose inside bag or under a belly band | Depends on channel, pack speed, and whether the bag is retail-ready | Adhesive labels and string tags can damage delicate finishes |
Buyer checklist before sampling
- Freeze the tote size, fabric GSM, handle length, and fold method before approving the insert dieline.
- Define the insert job first: compliance, barcode, care instructions, branding, shelf display, or all of the above.
- Confirm insert size, paper stock, print colors, coating, and any folding or gluing steps.
- Approve a physical sample with the actual tote fabric, not artwork alone.
- Check barcode scan quality, QR destination, and language versions on the sample.
- Ask for separate pricing for bag, insert, and pack assembly so labor is visible.
- Lock carton pack quantity, overrun tolerance, and outer carton marks in writing.
- Keep one backup artwork version in case the retail buyer changes copy late in the cycle.
Factory quote questions to send
- What tote size, canvas GSM, and fold method did you use when building the insert quote?
- Is the insert priced as loose, pre-folded, or assembled into the bag and polybag?
- What paper stock, coating, and finishing are included in the offer?
- What is the MOQ by artwork version, language set, or carton configuration?
- Which setup costs are included for die cutting, plates, or color changes?
- What sample will you send before bulk approval, and is it a real production stock sample?
- What overrun or underrun percentage do you allow for the insert and the packed tote?
- Can you provide pack photos and carton marks before shipment confirmation?
Quality-control points to confirm
- Insert dimensions and fold positions match the approved dieline within agreed tolerance.
- Print registration, barcode grade, and QR destination are correct on the physical sample.
- Paper, label stock, or coating shows no curl, scuff, residue, or ink transfer.
- The insert does not stain, distort, or press a permanent crease into the canvas bag.
- Bag SKU, insert artwork version, and language set are paired correctly.
- Pack quantity per polybag or carton matches the PO and packing spec.
- Outer carton labels, shipping marks, and retail identifiers match buyer requirements.
- First-off and random carton inspections are documented with photos before release.