Why material selection matters more for ecommerce totes
A canvas tote bag for ecommerce brands has to perform in more places than a simple giveaway bag. It has to look good in product photos, survive warehouse handling, arrive without ugly creases, carry the intended product load, and represent the brand when customers reuse it in public. Material selection is the first decision that affects all of those outcomes. If the fabric is too light, the tote may photograph limp and feel disposable. If it is too heavy, it may raise unit cost, freight weight, sewing difficulty, and crease risk without adding enough customer value.
This is why a practical canvas tote bag for ecommerce brands material selection guide should begin with procurement tradeoffs, not fabric names. Buyers are often shown similar-looking samples described as cotton canvas, natural canvas, duck canvas, recycled canvas, or heavyweight canvas. Those names are not enough to compare suppliers. You need to know the finished fabric weight, weave density, finish, handle construction, decoration method, packing method, and acceptable quality level. Two factories can quote the same bag size and still be hundreds or thousands of dollars apart because one is quoting a lighter cloth, lower stitch density, looser print tolerance, or simpler packing.
For B2B buyers, the goal is not to buy the heaviest possible canvas. The goal is to define the lowest-risk specification that supports the commercial purpose of the bag. A tote used as a free insert with a skincare order does not need the same structure as a paid merchandise tote for a fashion brand. A tote used for books, glass jars, or beverage products needs more attention to handle reinforcement and seam strength than one used for apparel. The better you define the use case, the easier it is to stop suppliers from making assumptions that later become quality disputes.
- Material choice affects unit price, print quality, sewing speed, carton weight, and customer perception.
- Finished fabric weight is more useful than a generic canvas label when comparing quotes.
- A strong specification should connect fabric, decoration, construction, packing, and QC into one buying standard.
- The right tote is rarely the cheapest or heaviest option; it is the material that supports the use case at the target landed cost.
Define the buying use case before choosing cloth
Start by writing a one-sentence commercial role for the tote. Is it packaging, merchandise, a loyalty gift, a marketplace promo, an event handout, or a product bundle component? This sounds basic, but it prevents a common sourcing problem: comparing bags that are technically similar but commercially different. A tote that will be sold for margin needs stronger perceived value, cleaner finishing, and more consistent presentation. A tote that ships free with orders may need to fold compactly, keep freight low, and carry the brand mark cleanly without feeling overbuilt.
For ecommerce, also define where the bag appears in the customer journey. If it is shown on the product page, the fabric must look stable under photography and should not have distracting slubs, stains, or waviness across the front panel. If it is used inside an unboxing experience, the fold, crease behavior, and interior finish become more important. If it is bundled with heavy products, handle attachment and bottom seam strength matter more than a soft hand feel. If it is a recurring subscription component, repeatability matters: the second and third production lots should match the first closely enough that customers do not notice a downgrade.
The budget should be expressed as a landed cost target, not only a factory unit price. Fabric weight changes carton weight. Bag stiffness changes folded volume. Individual polybags, tissue, hangtags, or retail bands add labor and packing material. A factory can reduce unit price by quoting lighter cloth, fewer stitches, or a simpler fold, but the total economics may become worse if the bag looks cheap, creates returns, or misses the brand standard. Procurement should ask, 'What material and construction will hold the brand promise at the lowest total risk?'
- For promotional inserts, prioritize foldability, simple decoration, and controlled unit cost.
- For resale merchandise, prioritize hand feel, structure, clean interior finishing, and repeatable color.
- For heavy product bundles, prioritize handle reinforcement, seam strength, and load testing.
- For subscription or reorder programs, prioritize stable fabric supply and shade consistency over unusual one-off finishes.
Understand canvas weight, GSM, weave, and finish
Canvas weight is usually quoted in ounces, but the number can be confusing because suppliers may refer to raw fabric, finished fabric, or a market shorthand. GSM, or grams per square meter, helps compare fabrics more precisely, especially across different mills. As a rough working reference, 8 oz canvas is often around 270 GSM, 10 oz around 340 GSM, 12 oz around 400 GSM, 14 oz around 475 GSM, and 16 oz around 540 GSM. These are not perfect conversions because finishing changes the result, but they give buyers a way to challenge vague quotes.
Weight alone does not define quality. A 12 oz canvas with a tight, even plain weave may print better and feel more premium than a heavier canvas with coarse yarns and uneven slubs. Weave density, yarn consistency, and surface finishing affect how ink sits on the fabric, how seams behave under tension, and how the bag looks on camera. For logo-heavy ecommerce bags, a smoother and more consistent face can matter more than moving from 12 oz to 14 oz. For rustic or natural-positioned brands, some texture may be desirable, but it should be controlled texture rather than random defects.
Finishing is another cost and performance driver. Natural unbleached canvas may have cottonseed flecks and slight shade variation. Bleached canvas gives a cleaner base for bright prints but can feel less natural. Dyed canvas creates stronger brand color options, yet it requires lab dips, shade approval, and lot control. Washed or pre-shrunk canvas can improve softness and stability but may add lead time and cost. Coatings can improve surface smoothness or stiffness but may affect hand feel, print adhesion, and sustainability claims. Ask suppliers to name each finish included in the quote so you are not comparing unfinished fabric to washed or dyed fabric as if they were equivalent.
- Ask for both oz and GSM, and specify whether the value is measured before or after finishing.
- Do not approve based on weight alone; review weave evenness, yarn consistency, and surface texture.
- Natural canvas may vary more in shade and flecking than bleached or dyed canvas.
- Dyed and washed fabrics need stronger sample control because shade, shrinkage, and hand feel can shift between lots.
Match fabric weight to ecommerce order types
For most ecommerce brand orders, 12 oz canvas is a practical starting point. It usually gives enough body for a clean front panel, works with common screen printing, and feels more substantial than a thin promo bag without moving into heavy-duty territory. This is why many brands use 12 oz canvas for mid-tier retail totes, customer gifts, and branded packaging that may be photographed. It is not automatically the best choice, but it is often the most efficient point from which to compare lighter and heavier options.
Use 8 oz to 10 oz canvas when the bag is primarily promotional, price-sensitive, or needs to fold very flat. These weights can be appropriate for high-volume campaigns, lightweight apparel orders, event inserts, or giveaways where the bag is a branded carrier rather than a paid product. The tradeoff is that lighter cloth may show wrinkles, seam puckering, print show-through, or distortion at the handles. If the artwork has large ink coverage, request a print strike-off because thin canvas can absorb ink unevenly or feel stiff where the print sits.
Use 14 oz to 16 oz canvas when the tote itself contributes to the product value. Heavier fabric can make sense for premium merchandise, bookstore-style bags, outdoor lifestyle brands, or orders expected to carry heavier goods. The buyer should quote this carefully. Heavier canvas can require stronger needles, slower sewing, more thread, stronger reinforcement, and more careful packing. It may also increase carton gross weight and freight cost. If the order is going into ecommerce fulfillment, test how the bag looks after being folded and compressed for at least a day. A premium fabric that arrives with hard crease lines can undermine the intended upgrade.
- 8 oz to 10 oz: lower cost, lighter freight, easier folding, higher risk of flimsy appearance.
- 12 oz: balanced structure, print compatibility, and perceived quality for many ecommerce programs.
- 14 oz to 16 oz: stronger premium feel, higher sewing and freight cost, more attention needed to packing and crease control.
- Above 16 oz: quote only for specific heavy-duty or premium use cases because the added cost is rarely neutral.
Choose decoration after reviewing the fabric
Decoration should be selected after the fabric is chosen, not before. The same logo can behave differently on rough natural canvas, smooth bleached canvas, dyed black canvas, and heavy washed canvas. Screen printing is often the best fit for simple logos, limited colors, and medium to large production runs. It gives strong opacity and good cost control when artwork is clean. The cost drivers are color count, print size, screen setup, number of placements, ink type, and curing requirements. A one-color front print is very different from a two-sided multi-color print with tight registration.
Heat transfer and digital printing can help when artwork is complex, colorful, or ordered in smaller runs. They can reduce setup complexity for short quantities, but the buyer must check hand feel, edge quality, cracking, and wash or rub performance. Transfers on canvas can look too plastic if the film area is large. Digital print can struggle with opacity on darker canvas unless the process includes a white base or special pretreatment. Both methods should be tested on the exact fabric, not on a supplier's nearest available sample.
Embroidery, woven patches, sewn labels, and leather or faux-leather patches are useful when the brand wants a tactile or premium marker. They also change cost logic. Embroidery is priced by stitch count and can pucker lighter fabrics. Woven patches need edge finishing and attachment labor. Labels are economical but placement must be consistent. For ecommerce product pages, decoration consistency is critical: a logo shifted by 8 mm may not seem major in a factory, but it can look sloppy when customers compare photos or when bags are stacked in fulfillment.
- For screen print, specify Pantone target, ink type, print area, number of colors, placement, and curing standard.
- For transfer or digital print, test cracking, edge feel, opacity, and rub resistance on the actual canvas.
- For embroidery, confirm stitch count, backing, thread color, and whether the fabric can handle the density without puckering.
- For patches and labels, define placement tolerance, edge finish, attachment stitch, and whether they are included in the base unit price.
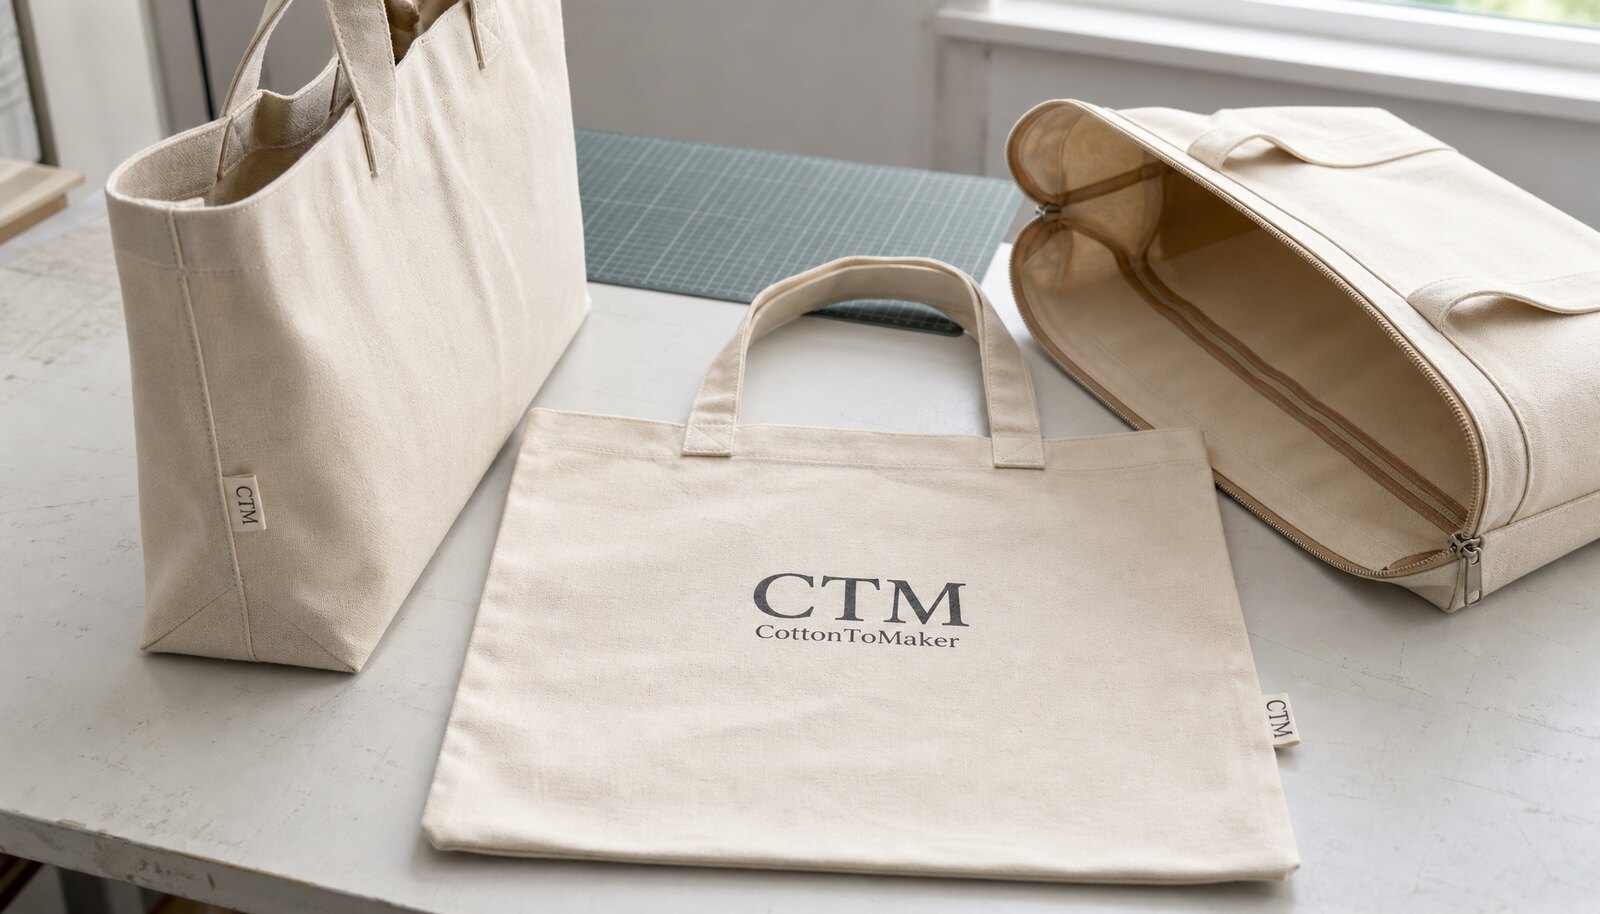
Construction details that separate strong totes from weak ones
A tote bag can use good canvas and still fail if construction is weak. The highest-risk areas are handle attachment points, top hem, side seams, bottom corners, and gussets. These areas carry stress when customers load the bag, swing it over a shoulder, or pull it from a packed carton. For most ecommerce tote orders, handles should be reinforced with X-box stitching, bar-tacks, or another approved method. The reinforcement should be visible on the sample and consistent across bulk production.
Handle specifications need more detail than many buyers include. Define handle drop, handle width, handle material, and reinforcement size. A short handle may look neat in photos but fail as a shoulder tote. A narrow handle can feel uncomfortable with heavier products. Self-fabric handles usually look more integrated, while cotton webbing can improve strength and manufacturing consistency. If the tote carries heavy items, ask for a loaded hang test and set a pass/fail requirement before production starts.
The interior finish should match the price tier. Budget promotional bags may use overlocked seams if the stitching is clean and the thread is trimmed. Retail or premium bags often need bound seams, a piped top edge, French seams, or lining. These details raise labor cost but improve perceived quality when customers look inside the bag. Bottom gussets should be symmetrical, and corners should not twist after pressing. A bag that cannot stand, fold, or hang as expected may create problems for photography, packing, and actual use even if the material spec looks correct.
- Specify handle drop, width, material, reinforcement method, and alignment tolerance.
- Ask for stitch density by seam type; many canvas totes use about 7 to 10 stitches per inch, but the factory should confirm the correct standard for the fabric.
- Require no skipped stitches, open seams, needle cuts, loose reinforcement, or broken thread at stress points.
- Match interior finishing to the channel: clean overlock for value programs, bound or finished seams for retail and premium totes.
Compare supplier quotes without hidden assumptions
Canvas tote quotes can be misleading when they only show a unit price. One supplier may assume 10 oz fabric while another assumes 12 oz. One may include screen setup and reinforced handles while another excludes setup charges and uses simpler stitching. One may quote individual polybags and export cartons while another quotes bulk packing. Without a detailed specification, the lower price may simply be a lower-grade bag.
A strong quote should separate the main cost drivers: fabric, cutting and sewing, decoration, labels or trims, closure hardware if any, packing, sample charges, setup charges, inspection, and freight assumptions. Ask suppliers to show price breaks at realistic quantities, not only the minimum and a very high volume. For example, if your first order may be 1,000 pieces but reorders may be 3,000, request both. This helps you see whether the factory is efficient at your likely scale.
Also clarify what is fixed after approval. Some suppliers quote before fabric booking and then revise once the fabric mill confirms availability. Others may quote a base canvas and later charge extra for tighter color control, special packing, or a second artwork position. This does not always mean the supplier is acting badly; it often means the buyer did not define enough detail. Procurement should make the quote conditional on the approved specification, then update the purchase order to match the signed sample exactly.
- Compare quotes only after fabric weight, composition, weave, decoration, construction, and packing are aligned.
- Ask whether screens, embroidery files, patches, labels, cartons, and sample fees are included or billed separately.
- Request quantity breaks that match your forecasted reorder behavior.
- Do not approve a purchase order that says only 'canvas tote bag' without attaching a detailed spec sheet or approved sample reference.
MOQ, sampling, and lead time decisions
MOQ usually comes from material purchasing, dyeing minimums, decoration setup, and sewing line efficiency. A natural canvas tote with one-color screen print may have a lower MOQ than a dyed canvas tote with zipper, lining, embroidery, and individual retail packing. Custom-dyed fabric, recycled or certified materials, and unusual trims can push minimums higher because the factory must meet mill or accessory supplier requirements. If your brand needs a low first order, keep the first version simple and choose standard materials that the factory can source reliably.
Sampling should be staged. A fabric swatch confirms material direction. A lab dip confirms dyed color when applicable. A print strike-off confirms ink, placement, color, opacity, and hand feel. A sewn prototype confirms size, handle drop, construction, and finishing. A pre-production sample should combine all approved elements using bulk-intended materials. For higher-risk orders, ask to see the packed sample or a carton packing photo before mass packing. The sample process may feel slow, but it is cheaper than discovering that the production tote folds badly, prints poorly, or fails at the handle.
Lead time should be broken into steps. Fabric booking, dyeing, printing, cutting, sewing, trimming, inspection, packing, and export each have separate risks. Decoration can become the critical path when artwork needs color separation or when multi-position printing requires drying time between passes. Dyed fabric can become the critical path if lab dips are rejected. Closures, snaps, zippers, and labels can delay production if they are not ordered early. A realistic supplier will tell you which step controls the schedule and what approvals must be completed before the clock starts.
- For low MOQ orders, choose standard natural canvas, simple handles, open top, and one-position decoration.
- Use staged samples for fabric, decoration, construction, and packing rather than relying on one generic showroom sample.
- Ask whether bulk lead time starts after deposit, artwork approval, sample approval, or raw material confirmation.
- For repeat programs, ask whether the supplier can reserve fabric, repeat the same mill source, and maintain shade records.
Packing and logistics affect landed quality
Packing is part of material selection because different fabrics fold and recover differently. Lighter canvas can fold compactly but may wrinkle. Medium-weight canvas usually balances foldability and structure. Heavy canvas may hold shape well but can develop strong crease memory when compressed. For ecommerce brands, this matters because the tote may go directly into fulfillment or arrive at a warehouse where staff will not have time to steam or reshape each unit.
Ask for packing details in the quote: folding direction, units per inner pack, individual polybag or no polybag, paper band or hangtag, carton dimensions, carton gross weight, and carton board strength. If sustainability is part of the brand promise, clarify whether individual polybags are necessary for protection or whether paper bands, bulk inner bags, or carton liners can work. The right answer depends on the destination, humidity risk, channel rules, and how clean the tote must stay before customer delivery.
Carton compression should be tested before shipment when the bag is premium or heavily folded. Request a packed carton photo and, for important orders, ask the supplier to open one carton after 24 hours of compression and photograph the units. This simple check can reveal hard creases, ink sticking, transfer marks, and distorted handles. Also confirm carton count accuracy. A shortage or mixed packing count can create receiving problems that are expensive to fix after goods reach the warehouse.
- Quote carton dimensions and gross weight before estimating freight or landed cost.
- Confirm whether individual packing is required by your fulfillment channel or only assumed by the factory.
- Check folded presentation after compression, especially for 14 oz and heavier canvas.
- Require carton marks, SKU labels, artwork version labels, and packing counts that match your receiving system.
Acceptance criteria and QC thresholds to write into the PO
Quality control should be measurable enough that both buyer and factory can make the same decision on a production unit. Start with an approved pre-production sample, then define tolerances for the features that matter most. Finished dimensions should be measured after pressing and after the bag has relaxed, not at the cut-panel stage. For many tote orders, buyers set tolerances such as plus or minus 5 mm for handle width or print placement and plus or minus 10 mm for overall body height or width, though tighter or looser tolerances may be appropriate depending on the design.
Handle strength needs a clear pass/fail test. For general ecommerce totes, ask the factory what load they recommend based on material and construction, then set a test that reflects real customer use. A simple short-duration loaded hang test at the expected carry weight plus a reasonable margin is better than no test at all. For bags expected to carry heavier goods, buyers often request test checks around 8 kg to 10 kg, but the exact number should be tied to the product use case and confirmed with the supplier. Failure should include handle tearing, stitch breakage, top hem deformation, seam opening, or visible fabric damage.
Print QC should include placement, color, opacity, edge sharpness, registration, curing, cracking, and rub-off. A dry rub test with a white cloth can catch under-cured ink or poor adhesion. A damp rub may be needed if customers are likely to use the tote outdoors or near wet products. For embroidery, inspect puckering, thread breaks, backing show-through, and placement. For dyed fabric, compare shade against the approved swatch under consistent lighting. For packing QC, open random cartons and check fold consistency, unit count, carton damage, and whether the front panel has avoidable compression marks.
Finally, define rejection thresholds. Major defects should include wrong material, wrong size outside tolerance, incorrect artwork, broken handles, open seams, severe stains, severe shade variation, print transfer, and incorrect packing count. Minor defects may include small thread ends, slight slub variation within approved fabric character, or very small print specks outside the main logo area. If you use third-party inspection, align the checklist with an AQL plan and your own brand-critical issues. A generic inspection checklist will not protect a tote order unless it reflects the actual risks of canvas, decoration, construction, and packing.
- Use an approved pre-production sample as the physical standard for bulk inspection.
- Set tolerances for size, handle drop, print placement, shade, stitch quality, and packing condition.
- Define load-test weight and failure conditions before bulk sewing begins.
- Classify major and minor defects so inspection decisions do not depend on opinion at the loading dock.
Specification comparison for buyers
| Spec decision | Recommended option | When it fits | Buyer risk to check |
|---|---|---|---|
| Fabric weight reference | 8 oz to 10 oz, 12 oz, 14 oz, or 16 oz canvas; ask for finished GSM as well as oz | Use oz for common canvas quoting and GSM for more precise comparison across mills; rough conversion is 8 oz about 270 GSM, 10 oz about 340 GSM, 12 oz about 400 GSM, 14 oz about 475 GSM, and 16 oz about 540 GSM | Confirm whether the supplier means raw fabric, finished fabric, or finished bag weight. Do not compare quotes until the measurement point is the same. |
| Body fabric for most ecommerce brands | 12 oz natural cotton canvas with a tight plain weave and stable finishing | Retail-ready brand totes, subscription bundles, merch drops, and product packaging that needs structure without excessive freight weight | Check that the fabric does not collapse in front-view photography, distort at side seams, or show yarn slubs that interrupt the artwork. |
| Lower-cost promotional option | 8 oz to 10 oz cotton canvas or cotton-blend canvas | High-volume giveaway bags, event inserts, seasonal campaigns, and orders where fold-flat packing and unit cost matter most | Thin fabric may show seam puckering, handle stress marks, ink show-through, and a less substantial hand feel in customer photos. |
| Premium material option | 14 oz to 16 oz canvas, tighter weave, clean inner binding, reinforced handles | Paid merchandise, loyalty gifts, retail add-ons, or bags expected to carry heavier products repeatedly | Heavier canvas raises fabric cost, sewing difficulty, needle damage risk, carton weight, and crease memory if packed too tightly. |
| Weave and yarn expectation | Plain weave canvas with consistent yarn size, even tension, and minimal broken yarns or contamination | Most logo-print totes and simple ecommerce packaging bags | Ask for fabric close-up photos and swatches. Reject obvious slubs, oil marks, shade streaks, or weave bars in visible front panels. |
| Decoration selection | Screen print for simple art; heat transfer or digital for short-run full color; embroidery, woven patch, or label for premium texture | Choose based on artwork complexity, order size, fabric roughness, and the desired hand feel | Cost changes by color count, screen setup, print area, placement count, stitch count, patch size, backing, and rejection rate after decoration. |
| Handle construction | Self-fabric or cotton webbing handles with X-box stitching or bar-tack reinforcement | Most ecommerce brand totes that must survive repeated carry use and still look clean in photos | Require matching handle length on both sides, reinforcement at stress points, no skipped stitches, and no tearing after a loaded hang test. |
| Interior finish | Bound seams, overlocked seams with clean thread trimming, or piped top edge depending on price tier | Bound seams for premium or resale bags; neat overlock for budget-sensitive promotional totes | Raw seams can fray, shed lint into products, and look unfinished when customers photograph or inspect the inside. |
| Closure and add-ons | Open top for standard tote; snap, magnetic button, zipper, pocket, or lining only when the use case justifies it | Open top works for most retail and packaging uses; zipper or snap works for travel, gifting, or higher perceived value | Each add-on changes MOQ, labor time, QC points, metal detector requirements if relevant, and bulk lead time. Quote add-ons separately. |
Buyer checklist before sampling
- Define the business role of the tote: promotional insert, retail merchandise, product bundle bag, subscription packaging, event giveaway, or loyalty gift.
- Confirm finished bag dimensions, gusset depth if any, handle drop, handle width, seam allowance, top hem depth, and decoration placement before asking for final pricing.
- Ask whether the quoted canvas weight is raw fabric weight, finished fabric weight, or finished bag weight, and request both oz and GSM where possible.
- Request a fabric swatch from the intended bulk cloth, not a generic showroom swatch from a previous order.
- Specify fiber content clearly: 100% cotton, recycled cotton blend, cotton-poly blend, organic cotton, or another certified material if required by your channel.
- Confirm weave appearance, surface smoothness, yarn consistency, shade target, and whether the fabric is washed, pre-shrunk, dyed, bleached, or coated.
- Match fabric weight to use case: 8 oz to 10 oz for light promotional use, 12 oz for balanced ecommerce retail use, and 14 oz to 16 oz for premium or heavier-duty bags.
- State artwork file type, Pantone or brand color targets, print size, print position, color count, and whether the print is one-sided, two-sided, or repeated on panels.
- Ask for decoration cost by method and by position so screen setup, transfer setup, embroidery stitch count, patch cost, and label application are not hidden in one blended price.
- Require handle reinforcement details, including X-box size or bar-tack count, thread type, stitch density, and whether handles are self-fabric or webbing.
Factory quote questions to send
- What is the finished fabric weight in GSM and oz after dyeing, washing, coating, or finishing, and how will you verify it before cutting?
- Is the quoted fabric 100% cotton, recycled cotton, organic cotton, cotton-poly blend, or another composition, and can you provide documentation if certification is required?
- What weave, yarn size or yarn count reference, and fabric density are you quoting, and can you send a close-up photo plus a physical swatch from the intended bulk material?
- Is the canvas natural, bleached, dyed, washed, enzyme-washed, pre-shrunk, or coated, and how much shade or shrinkage variation do you allow between lots?
- What are the exact finished bag dimensions, gusset, handle drop, handle width, seam allowance, top hem depth, and tolerance you have included in the quote?
- What print or decoration method is included, how many colors and positions are included, and what is the setup cost per color, screen, transfer, embroidery file, patch, or label?
- What is your standard print placement tolerance, registration tolerance for multi-color artwork, and color tolerance against Pantone, lab dip, or approved strike-off?
- What stitch count per inch, seam structure, thread type, needle size, and reinforcement method will be used at handles, top hem, side seams, bottom corners, and gusset seams?
- What load test do you perform on handle attachment, what test weight and duration do you use, and what counts as a failed unit?
- What inner finish is included: raw edge, overlock, bound seam, French seam, piping, lining, or another construction?
Quality-control points to confirm
- Measure finished bag width, height, gusset, handle drop, handle width, top hem, and print placement after pressing and packing simulation, not only after cutting.
- Set typical finished size tolerance before production, such as plus or minus 5 mm for small dimensions and plus or minus 10 mm for larger body dimensions, unless the design requires tighter control.
- Check fabric weight with cut swatches from bulk fabric and compare against the approved finished GSM or oz target within the agreed tolerance.
- Inspect visible panels for stains, oil marks, weaving bars, broken yarns, heavy slubs, holes, shade panels, odor, and fabric contamination.
- Check stitch density at key seams, commonly targeting about 7 to 10 stitches per inch for many canvas tote constructions unless the factory proposes a different validated standard.
- Inspect handle attachment for X-box or bar-tack consistency, missed reinforcement, loose thread, needle cuts, skipped stitches, and unequal handle drop between left and right sides.
- Perform a loaded hang test on production samples at the expected use weight plus a margin agreed in the spec, then check for seam opening, handle tearing, stitch breakage, and top hem distortion.
- For heavier retail totes, consider testing at 8 kg to 10 kg for a short-duration hang check if the bag is expected to carry books, bottles, or multiple products; set the exact requirement in writing.
- Rub the print with a dry white cloth and, where relevant, a slightly damp cloth after curing to check transfer, smearing, poor curing, or surface cracking.
- Check print registration, edge sharpness, opacity, color match, ink penetration, pinholes, ghosting, and cracking after folding along the planned packing line.