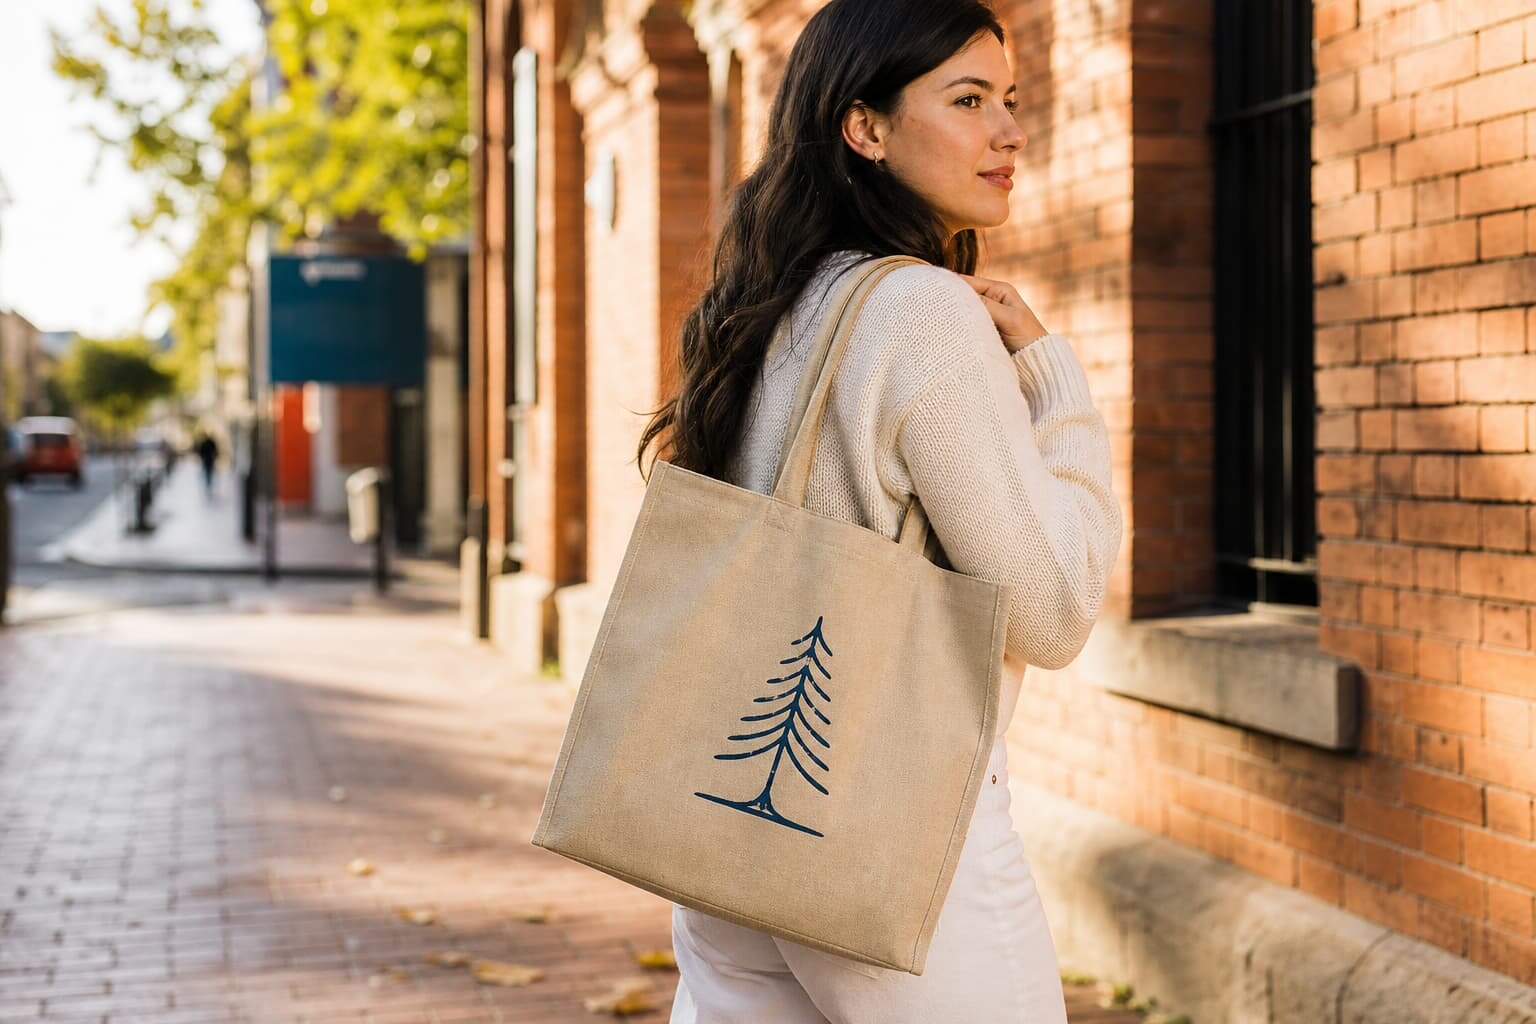
Why Handle Seams Decide Whether a Tote Bag Feels Retail-Ready
For a canvas tote bag, the handle seam is not a small sewing detail. It is the connection between the buyer's promised use and the factory's actual construction. A tote may look correct in a front photo, but if the handle seam is weak, uneven, or placed through the wrong fabric layer, the bag can fail during trade show use, retail checkout, welcome-kit packing, or daily commuting. Procurement teams often discover this too late because quotes compare fabric weight and print size while the handle attachment is described only as standard.
Brand teams should treat the handle seam as a specification item, not a factory preference. The right seam affects load capacity, appearance, sample approval, packing behavior, and even logo placement. A supplier quoting a plain rectangular stitch on 8 oz fabric is not offering the same product as a supplier quoting a box-X stitch through a double-fold hem on 12 oz canvas. If both quotes are judged only by unit price, the cheaper bag can become expensive after claims, repacking, or brand complaints.
- A strong-looking thick fabric does not guarantee strong handle attachment.
- A neat front panel photo does not show whether handle ends are secured inside the top hem.
- A cheap quote may use fewer stitches, lighter thread, narrower webbing, or a simpler seam.
- A sealed sample should include close-up photos of the handle seam, not only the full bag.
Start the RFQ With the Real Carrying Load
The first buying question is not fabric color or logo size. It is what the bag will actually carry. A promotional tote holding a brochure and a pen can use a different handle seam than a retail tote carrying boxed cosmetics, books, glass bottles, or folded apparel. Importers and distributors should ask the brand team for the expected content weight before sending the RFQ. Without that information, factories will quote their default construction, and each supplier's default may be different.
Use a practical load description instead of a vague phrase such as durable. For example, state that the bag must carry two A4 catalogs and a 500 ml bottle at an event, or that it will be sold as a reusable retail tote for books and everyday goods. This helps the factory select fabric weight, handle width, seam type, and thread. It also helps the buyer reject a sample that looks attractive but feels unsafe when lifted with real contents.
- Light event use: usually brochures, flyers, small gifts, and low repeat handling.
- Retail sale use: repeated carrying, heavier contents, and higher appearance expectations.
- Grocery or wine use: concentrated weight and more pressure on handle attachment points.
- Corporate gifting: moderate load but higher requirement for clean stitching and print alignment.
- Distributor stock programs: broad use cases, so construction should be safer than the cheapest event tote.
Choose Fabric Weight Before Debating Stitch Pattern
Handle seams only perform as well as the fabric layers they grip. For most branded canvas tote bags, 10 oz to 12 oz cotton canvas is a practical starting range. Lighter 6 oz to 8 oz cotton may work for economy campaigns, but it gives less holding power around stress points and can pucker more easily when reinforced stitching is added. Heavier 14 oz or 16 oz canvas may be suitable for premium retail bags, but it can raise sewing difficulty, sample cost, carton weight, and freight cost.
Buyers should request fabric weight in both oz and GSM where possible, and should clarify whether the number refers to greige fabric, finished fabric, dyed fabric, or washed fabric. A small difference in fabric weight can change how the handle seam sits. A 12 oz canvas with a stable weave can hold a box-X stitch cleanly. A loose, lighter canvas may distort around the same seam and show puckering after pressing or packing.
- 6 oz to 8 oz: budget promotional totes, light loads, lower structure.
- 10 oz: common branded tote range when cost and strength must balance.
- 12 oz: stronger handfeel for retail, books, gifts, and repeated use.
- 14 oz and above: premium look, higher sewing resistance, higher shipping weight.
- Ask for fabric construction and finishing, not only color and weight.
Compare Handle Materials and Attachment Methods Together
A handle is not just a strip of fabric. Self-fabric canvas handles, cotton webbing handles, and contrast webbing handles behave differently during sewing and carrying. Self-fabric handles match the body and look simple, but their thickness depends on folding and may vary if the cutting or pressing is not controlled. Cotton webbing handles are often cleaner and stable, but the color match and shrinkage need checking. Wider handles distribute pressure better in the hand and at the seam, but they also require enough top hem space.
The attachment method should be named clearly in the RFQ. A box stitch means a rectangular reinforcement. A box-X stitch adds diagonal stitching inside the box and is common when the buyer wants stronger visual and functional reinforcement. Bar tacks can be useful, but only if the machine setting, thread, and fabric layers are suitable. Some totes insert handle ends into a double-fold top hem, which hides raw ends and improves the finish. Others stitch the handle onto the surface, which may be cheaper but can look less finished and may expose stress earlier.
- Self-fabric handles: best when the brand wants one fabric appearance and a natural canvas look.
- Cotton webbing handles: best when clean edges, consistent width, and stable sewing are important.
- Box stitch: acceptable for many medium-load totes if stitch density and back-tacking are controlled.
- Box-X stitch: stronger visual signal and better load distribution when properly sewn.
- Inserted handle ends: cleaner top hem and lower risk of exposed raw edges.
Protect the Logo by Planning Around the Seam Zone
Print problems often start with poor coordination between artwork and sewing. If the logo sits too close to the top hem, handle stitch, or folded area, the factory may need to sew through ink, press over thick print, or adjust placement during production. That can lead to needle marks, cracked ink, uneven edges, or a logo that appears lower than expected. For canvas tote bags, the safest print zone usually leaves enough clearance from the top hem and handle attachment points.
Screen printing is still one of the most common choices for cotton canvas totes because it works well for simple brand logos and solid colors. Heat transfer may suit detailed artwork or small runs, but buyers must check feel, adhesion, and edge behavior on textured canvas. Embroidery can look premium but adds thread tension and may not be suitable near folded seam layers. Whatever the print method, approve the print together with the seam construction on the same sample, not as separate decisions.
- Keep artwork clear of handle stitch boxes unless the factory confirms the process is safe.
- For screen print, check ink coverage on textured canvas and whether the logo cracks when folded.
- For heat transfer, check adhesion on canvas texture and heat marks near the top hem.
- For embroidery, check backing, puckering, and whether the bag panel remains flat.
- Ask the factory to mark the printable area on the dieline before final artwork approval.
Use MOQ Logic Instead of Chasing the Lowest Minimum
MOQ for a canvas tote bag is driven by more than the number of bags. Fabric dyeing, handle material, screen setup, cutting efficiency, sewing line setup, and packing method all affect the minimum. A natural canvas tote with one-color screen print and standard cotton webbing may have a lower practical MOQ than a custom-dyed 12 oz canvas tote with contrast handles and special reinforcement. If a supplier offers a very low MOQ, ask what has been simplified to make it possible.
Brand teams should separate sample MOQ, production MOQ, and economical MOQ. A factory may accept a small production run, but the unit cost can rise because fabric purchasing, print setup, and line changeover are spread across fewer units. For distributors, it may be better to standardize the body fabric and handle seam across several customer artworks. This keeps the construction consistent and makes quote comparison easier, while still allowing logo customization.
- Lower MOQ is easier with natural canvas, stock fabric, standard webbing, and simple screen print.
- Higher MOQ may apply to custom dyeing, custom webbing color, heavy canvas, or special packing.
- A very low MOQ can mean digital print, stock fabric limitation, or less flexible seam construction.
- Ask whether the MOQ changes if the handle seam is upgraded from simple stitch to box-X.
- For annual programs, quote several quantity tiers instead of only one order quantity.
Sample Checks That Reveal Weak Handle Seams
A pre-production sample should be handled like a small inspection, not just a photo approval. Fill the bag with the expected contents or a similar weight and lift it repeatedly. Look at the handle base before and after lifting. The fabric should not tear, the stitches should not open, and the handle should not twist sharply where it enters the seam. If the bag will carry books or bottles, test with concentrated weight rather than only soft garments.
Measure the sample and photograph the details that matter. Record handle length, handle width, top hem height, stitch box size, stitch density, and distance from handle seam to logo. Turn the bag inside out if the construction allows it, and inspect raw edges, thread tails, and back-tacking. A supplier can copy a sealed sample more accurately when the buyer has documented these points. If the sample looks good only from the front, the buyer has not approved enough information.
- Check handle length on both sides; uneven handles are common when cutting or sewing is rushed.
- Look for skipped stitches or loose thread at the top corners of the box stitch.
- Confirm the handle end is captured by enough fabric layers, not barely attached to the surface.
- Test the bag with realistic load before approving print placement and bulk production.
- Keep the approved sample unwashed unless washing is part of the required product specification.
Quote Data Buyers Need to Compare Suppliers Fairly
A useful canvas tote quotation should show the construction behind the price. If one supplier lists only canvas tote bag with logo and another lists fabric weight, handle type, seam method, print method, packing, sample fee, and lead time, the second quote is easier to evaluate even if it is not the cheapest. Procurement teams should request the same data from each factory so the comparison is about real product value, not missing information.
Ask for price breaks using the same specification at different quantities. Also ask what changes if the buyer adjusts the fabric weight, handle material, or print method. This gives the brand team a clear cost map. Sometimes moving from 12 oz to 10 oz canvas saves cost with acceptable performance. In other cases, saving a few cents by removing the reinforced handle seam creates too much claim risk. The point is not to buy the heaviest bag. The point is to buy the right construction for the intended use.
- Fabric: weight, composition, finish, color method, and whether fabric is stock or custom.
- Handle: material, width, length, color, fold type, and attachment method.
- Print: method, number of colors, print size, position, setup cost, and artwork requirements.
- Packing: individual polybag or bulk pack, carton quantity, carton size, and gross weight.
- Commercial terms: MOQ, sample lead time, bulk lead time, payment terms, and quote validity.
Packing and Lead Time Can Damage a Good Seam Decision
Even a well-made handle seam can arrive looking poor if packing is not controlled. Canvas totes are often bulk packed to reduce cost, but tight folding can create sharp creases at the handle base and top hem. If the handle is thick or the print is near the fold, pressure during ocean transit can mark the fabric or distort the seam. Retail programs may need cleaner folding, tissue, individual bags, or smaller carton quantities. Promotional orders may accept bulk packing, but the buyer should still define how handles are folded.
Lead time should include artwork approval, sample making, sample review, material preparation, cutting, printing, sewing, inspection, and packing. The handle seam affects the sewing stage because reinforced seams take more time than simple stitches and may require more experienced operators. If the schedule is tight, do not approve a complex seam and premium packing without confirming capacity. A realistic lead time is better than a fast promise that forces rushed stitching.
- Define whether bags are flat packed, folded once, or packed with handles tucked inside.
- Ask for carton quantity and carton size before approving final packing.
- Avoid packing that places heavy pressure directly on raised handle seams or thick print.
- Confirm whether inspection happens before or after final folding and carton sealing.
- Build time for pre-production sample approval, especially when handle construction is customized.
Acceptance Criteria for Bulk Production
Before bulk production starts, set acceptance criteria that a merchandiser, inspector, and factory line leader can all understand. Do not write only good stitching or strong handle. Define visible and measurable points: handle length tolerance, stitch box size, no skipped stitches, no open seams, no loose back-tack, no fabric tearing around the attachment point, and no logo contact with the seam unless approved. These criteria reduce argument if defects appear during final inspection.
For larger orders, ask the factory to check the first finished pieces from the line before continuing. This line release step is especially useful when the bag has custom handle length, heavy canvas, or print close to the seam area. If the first pieces show puckering or uneven attachment, the factory can adjust machine tension, operator handling, or folding before thousands of bags are completed. A small delay at the line start is cheaper than sorting finished cartons.
- Handle seam must match the approved sample in stitch pattern and position.
- No broken stitches, skipped stitches, loose thread loops, or unsecured handle ends.
- Handle length should stay within the buyer-approved tolerance on both sides.
- Fabric around the seam should not tear, distort, or show excessive puckering.
- Logo placement should remain clear of seam interference unless approved in writing.
- Cartons should protect handle shape and prevent staining, crushing, or moisture exposure.
Specification comparison for buyers
| Spec decision | Recommended option | When it fits | Buyer risk to check |
|---|---|---|---|
| Handle attachment | Box-X stitch or reinforced box stitch | Retail totes, event bags with catalog inserts, grocery-style reuse bags | Check stitch density, corner back-tacking, and whether the X stitch is decorative or load-bearing |
| Fabric weight | 10 oz to 12 oz cotton canvas for most branded totes | Promotional, retail, museum shop, and corporate gifting programs | Confirm finished GSM or oz before washing; suppliers may quote lighter fabric using a heavier-sounding description |
| Handle webbing | Self-fabric canvas handle or cotton webbing, 2.5 cm to 3.8 cm wide | Self-fabric for color match, webbing for cleaner sewing and stronger repeated use | Check shrinkage difference between body fabric and handle material after wash or steam pressing |
| Top hem construction | Double-fold top hem with handle ends inserted and secured | Most open-top canvas tote bags where the handle must sit flat and not expose raw edges | Ask whether handle ends are hidden inside the hem or only stitched onto the surface |
| Print method near handle area | Screen print or heat transfer kept clear of high-stress seam zones | Logos placed on front panel below handle seam line | Avoid thick ink crossing fold lines where cracking, needle drag, or uneven pressing can appear |
| Inspection method | Sample load test plus inline seam check before full packing | Orders where bags carry bottles, books, cosmetics, or retail merchandise | Do not rely only on final visual inspection; seam weakness is easier to catch during sewing |
Buyer checklist before sampling
- Define the real carrying load: paper inserts, bottles, apparel, cosmetics, groceries, or retail merchandise.
- Specify fabric by weight and construction, such as 10 oz cotton canvas or 12 oz canvas, not only by the word canvas.
- Confirm handle length, width, material, and whether the handle is self-fabric, cotton webbing, or contrast webbing.
- Require a clear handle seam type: box stitch, box-X, reinforced bar tack, or top-hem inserted handle.
- Ask for stitch density, thread type, and back-tacking method on the handle attachment area.
- Keep print artwork away from top hem and handle seam zones unless the factory confirms sewing will not damage the print.
- Review pre-production samples with weight inside the bag, not only on a flat table.
- Check carton packing so handles are not crushed, twisted, or sharply folded for long transit.
- Compare quotes using the same seam construction, fabric weight, print method, packing, and inspection assumptions.
- Seal one approved sample and keep photos of the handle seam, inside hem, stitch count, and stress points.
Factory quote questions to send
- What fabric weight are you quoting in oz and GSM, and is it greige, dyed, washed, or finished weight?
- Is the handle self-fabric canvas, cotton webbing, or another material, and what is the width and thickness?
- How exactly will the handle be attached: box stitch, box-X, bar tack, inserted into the top hem, or another method?
- What stitch density and thread specification will be used on the handle seam area?
- Can you provide close-up photos of previous bulk handle seams made with the same construction?
- What is the MOQ for this seam construction, fabric weight, print method, and handle material combination?
- Does the quoted price include pre-production sample, screen setup, packing, carton marking, and export carton quality?
- Where will the logo be positioned relative to the handle seam and top hem, and is there any sewing risk through printed areas?
- What sample lead time and bulk lead time apply after artwork approval and deposit, and what can extend the schedule?
- What inline and final QC checks will be used for handle strength, seam appearance, and packing condition?
Quality-control points to confirm
- Measure finished fabric weight or confirm supplier fabric record against approved sample.
- Check handle length from top edge to grip point on both sides of the same bag.
- Inspect whether handle ends are fully secured inside the top hem or only surface-stitched.
- Count stitches per inch or per centimeter on the handle seam and compare with approved sample.
- Pull-test handles manually with realistic load before bulk packing starts.
- Check for skipped stitches, loose thread tails, broken needle marks, and puckering around reinforced seams.
- Verify print position does not enter the handle stitch area unless approved on the sealed sample.
- Open several cartons after packing to confirm handles are not twisted, creased, or stained.
- Compare bulk bags to the sealed sample under normal light, including front, back, inside hem, and side seams.
- Record any handle seam defect by photo before deciding whether repair, sorting, or replacement is needed.