1. Build the inspection plan before the RFQ, not after production
For corporate canvas tote bags, many quality problems are created at the quotation stage. If the request only says “canvas tote bag with logo,” suppliers can quote very different products while appearing to meet the same brief. One factory may price an 8 oz natural canvas bag with basic row stitching and bulk packing, while another may price a 10 oz bag with box-X handle reinforcement, better carton quality, and printed carton marks. The unit prices are not directly comparable because the technical product is different.
A stronger RFQ turns inspection expectations into measurable specifications. Procurement should define the intended use, expected contents, brand visibility, target handfeel, logo method, packing needs, and delivery deadline before requesting prices. This is especially important for corporate orders tied to fixed events, employee onboarding, retail launches, or distributor campaigns, where a late rejection can create more cost than the bag itself.
The goal of this canvas tote bag for corporate buyers quality inspection guide is not to make every tote over-engineered. A one-day conference giveaway does not need the same fabric and finishing as a premium retail tote. The goal is to make the selected standard clear enough that the supplier, buyer, inspector, warehouse, and brand team are judging the same product.
- State the use case: event giveaway, employee kit, retail resale, gift packaging, distributor stock, or internal office merchandise.
- State the expected contents: documents, catalogs, apparel, bottles, laptops accessories, product samples, or mixed promotional items.
- State the desired appearance: natural cotton look, dyed brand color, premium heavy canvas, washed casual finish, or low-cost promotional finish.
- State the commercial risk: fixed event date, retailer compliance, urgent replenishment, strict brand color, or high-volume low-cost campaign.
- Attach artwork, target size, packing requirements, and destination requirements before asking factories to confirm price and lead time.
2. Fabric weight, finish, and shade are the first inspection checkpoints
Canvas quality is often judged by handfeel, but procurement teams need numbers. Common corporate tote fabrics are around 8 oz, 10 oz, and 12 oz canvas. In GSM terms, these often sit around 230-250 GSM, 280-300 GSM, and 340-360 GSM, depending on weave, yarn, finishing, and supplier conversion practice. Because ounce descriptions can be used loosely, buyers should request both oz and GSM and should set an agreed tolerance for bulk production.
A 10 oz canvas is often a practical starting point for corporate use because it feels more substantial than thin calico while still printing well and keeping freight weight manageable. A 12 oz canvas can be a better fit for retail resale, premium employee kits, or heavier contents, but it increases unit cost and carton gross weight. An 8 oz fabric may be suitable for lightweight giveaways where price is the main driver, but the buyer should consciously approve the lighter handfeel and lower load expectation.
The finish also matters. Natural unbleached canvas has cotton specks and shade variation that may be acceptable or even desired. Bleached fabric gives a cleaner background but can change handfeel. Dyed fabric can support brand colors but requires shade approval and may add lead time. Washed canvas can feel softer and more premium but may create more size variation and creasing. If the buyer does not define finish, the supplier may choose whatever fabric is available.
- Ask for fabric weight in both oz and GSM, plus a realistic bulk tolerance.
- Confirm natural, bleached, dyed, washed, organic, recycled, or conventional cotton status.
- Keep a fabric cutting from the approved sample for comparison during inline and final inspection.
- Inspect shade variation between panels, handles, pockets, and different production lots.
- Check fabric for stains, oil marks, holes, mildew, heavy slubs, strong odor, and excessive creasing.
- Remember that heavier canvas affects sewing requirements, carton weight, freight cost, and warehouse handling.
3. Construction details determine durability more than photos do
Two tote bags can look similar in a product photo but perform very differently in use. Important construction details include handle material, handle width, handle drop, top hem depth, seam allowance, bottom construction, gusset shape, reinforcement stitching, thread strength, and stitch density. These details should be included in the specification sheet rather than left to the supplier’s default method.
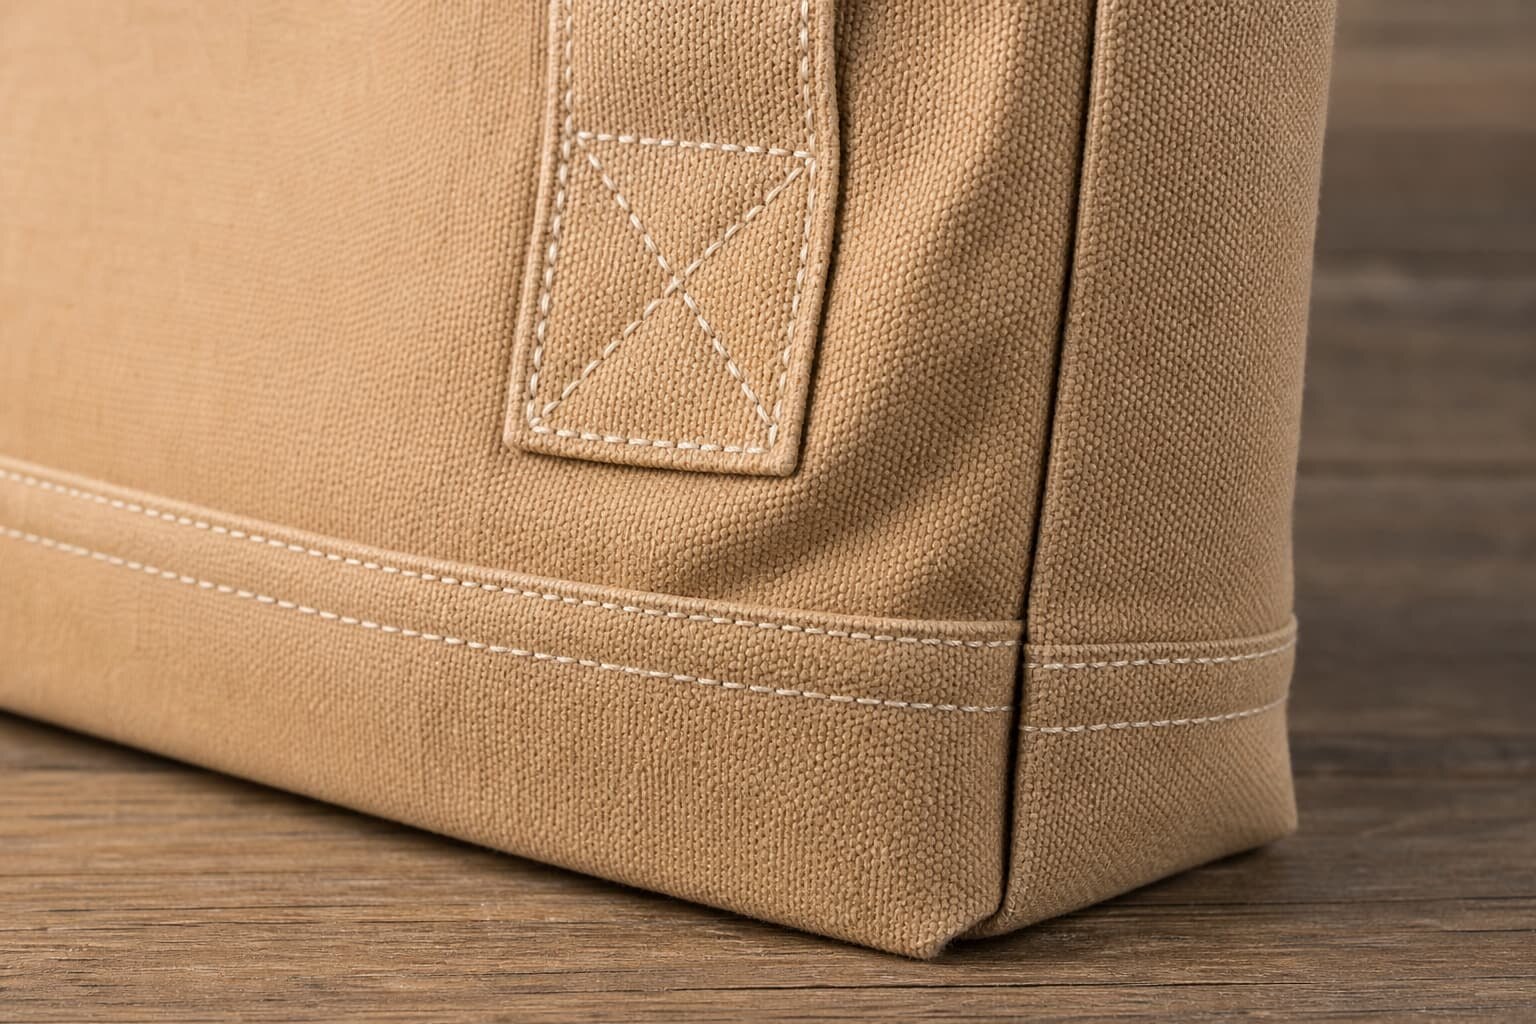
Handle failure is one of the most visible defects in corporate tote orders. It may happen after distribution, when employees, visitors, or customers are already using the bag. For basic lightweight campaigns, a simple handle may be acceptable. For welcome kits, catalogs, bottles, or retail resale, buyers should request stronger reinforcement such as a box stitch, box-X stitch, or bartack where suitable for the design. The selected reinforcement should be photographed, measured, and approved in the pre-production sample.
Construction also changes inspection workload. Zipper totes require zipper function checks, puller strength checks, alignment checks, and top opening shape checks. Pocket totes require pocket placement and seam strength checks. Lined totes require lining attachment checks and may hide internal seam defects if inspection is not careful. If these features are added after the initial quote, buyers should expect changes in cost, MOQ, lead time, and quality-control points.
- For open totes, check top hem, side seams, bottom seam, bottom corners, handle attachment, and inside seam cleanliness.
- For gusset totes, check that side and bottom gussets are even, not twisted, and consistent across sampled pieces.
- For zipper totes, check zipper gauge, tape alignment, end stops, slider movement, puller strength, and whether the opening lies flat.
- For pocket totes, check pocket size, position, seam security, and whether the pocket distorts the front logo panel.
- For lined totes, check lining fit, seam allowance, turning quality, and whether the lining twists or bunches during normal handling.
- Set stitch density expectations or compare directly against the approved sample when exact stitches per inch are not specified.
4. Logo printing inspection must match the production method
The logo is often the most important acceptance point for a corporate tote. A bag with acceptable fabric but a crooked, dull, cracked, or incorrectly colored logo may still be unusable for the campaign. The most common method for simple corporate logos is screen printing. It is suitable for solid artwork, one to three colors, and repeat orders. Inspection should cover color, opacity, edge sharpness, registration between colors, curing, rub resistance, print size, and position.
Print position should be controlled with measurements, not only mockups. A specification such as “centered on front panel” is not enough when a brand team expects consistency. Define the distance from the top edge, side seams, or panel centerline and set a tolerance. For example, a buyer may allow a few millimeters of variation on logo position for a standard tote, while a premium retail product may require tighter control.
Full-color artwork, gradients, or small runs with many colors may use heat transfer, DTF, or digital printing. These can be appropriate, but the buyer should approve the actual surface feel and durability. Transfers may feel stiff or show edges. Poorly cured or low-quality transfers may crack when folded. Digital printing can look muted on natural canvas because the fabric color influences the printed shade. A print method should not be accepted only because it looks bright in a digital mockup.
- Provide vector artwork when possible, with final logo width and height in millimeters.
- Confirm one-side or two-side printing, print colors, print method, and maximum print area included in the quote.
- Use Pantone references for solid colors, but compare bulk against the approved physical sample under consistent lighting.
- Measure logo position from fixed reference points such as top hem and side seams.
- Run a simple rub check with a clean white cloth to identify obvious ink transfer or curing problems.
- Fold the printed area lightly on sample pieces to check for cracking, edge lifting, or excessive stiffness.
- Confirm screen charges, film charges, artwork adjustment charges, and repeat-order screen storage rules.
5. Treat the pre-production sample as the control standard
A pre-production sample is not just a sales tool. It is the reference standard for bulk production and final inspection. If the sample uses substitute fabric, a different print method, a different handle construction, or a simplified packing method, it cannot fully control the order. Corporate buyers should request that the approved sample match the intended bulk production as closely as possible: same fabric weight, fabric color, construction, print technique, logo size, label, accessories, folding, and packing.
Approving only from photos is risky when handfeel, fabric thickness, logo color, odor, and stitching quality matter. Photos can hide thin fabric, uneven thread tension, poor ink curing, chemical smell, mildew, and minor stains. If timing makes physical sample approval difficult, buyers can request structured video evidence, but they should still understand the limitation. For repeat programs, keeping a signed physical sample in the buyer’s office and one at the factory reduces future disputes.
The sample approval record should be specific. Instead of simply writing “sample approved,” record approved measurements, fabric weight, logo size, logo placement, handle drop, packing method, and any acceptable deviations. If the sample has a minor point that must be corrected in bulk, write it clearly. Otherwise, the factory may treat the sample defect as approved.
- Measure sample width, height, gusset, handle drop, handle width, print size, and print position.
- Compare fabric handfeel and weight against the target or previous approved reference.
- Wear or handle the sample as the end user would, especially if shoulder carry is expected.
- Check whether the logo cracks, transfers, or changes appearance when the fabric is gently folded or rubbed.
- Smell the sample for chemical odor, mildew, or dirty storage odor.
- Sign, date, photograph, and label the approved sample, then reference it in the purchase order.
- List any required sample corrections before mass production begins.
6. Define defect classification and AQL before goods are packed
Final inspection is only effective when buyer and factory agree what counts as a defect. For canvas tote bags, defects can be functional, visual, brand-related, or packing-related. A small loose thread inside the bag may be minor. A broken handle stitch, wrong logo, heavy stain on the front panel, or incorrect carton quantity is usually major. Mold, sharp contamination, unsafe accessories, or a strong chemical odor may be critical because they can affect safety, usability, or shipment acceptance.
Many corporate buyers use AQL sampling for final random inspection. A common starting point for general consumer goods inspection is general inspection level II with AQL critical 0, major 2.5, and minor 4.0. This is not a universal rule; premium retail orders, first-time factories, strict brand programs, or previous quality issues may require tighter levels. The important point is that AQL and defect definitions must be agreed before production, not negotiated after a shipment fails.
An example decision flow is useful. If critical defects are found, shipment should normally be rejected or placed on hold for investigation. If major defects exceed the agreed AQL, the lot should be rejected, reworked, or sorted before reinspection. If minor defects exceed the limit but do not affect brand presentation, the buyer may decide between rework, concession, or acceptance depending on the event deadline and commercial agreement. The purchase order should state who pays for reinspection when defects are caused by factory workmanship.
- Critical defects: mold, sharp metal contamination, unsafe accessory, strong chemical odor, wrong logo, or handle failure under light load.
- Major defects: wrong fabric weight, wrong dimensions beyond tolerance, crooked logo, heavy stain, open seam, skipped handle stitches, failed zipper, wrong packing, or barcode error.
- Minor defects: small loose thread, slight removable crease, minor stitch waviness, or small non-prominent slub within the approved visual standard.
- Example AQL starting point: critical 0, major 2.5, minor 4.0 under general inspection level II, adjusted to buyer risk.
- Set measurement tolerances such as body dimensions, handle drop, gusset, logo placement, and carton quantity before inspection.
- Require rework photos and reinspection for rejected lots before shipment release.
7. Use inline inspection to catch problems while they are still fixable
Inline inspection is especially valuable for printed canvas tote bags because many defects become expensive after sewing and packing. If logo position is wrong on printed panels, if ink is under-cured, or if the first fabric lot is the wrong weight, the cost of correction increases quickly once thousands of bags are completed. An inline check after the first 5-10% of production helps buyers stop problems before the full lot is affected.
Inline inspection does not always require a full third-party report, although that may be useful for first orders or high-risk deadlines. At minimum, the factory should send structured evidence at agreed milestones: first bulk fabric, first printed panels, first sewn bags, and first packed cartons. The buyer should request measurements in the photo or video, not only beauty shots. A measuring tape, scale, approved sample, and close-up of stitching are more useful than a distant picture of finished bags.
If inline evidence shows a major mismatch, the buyer should pause production and decide quickly. Continuing production while debating a wrong shade, wrong handle length, or wrong logo size can turn a manageable correction into a full-lot dispute. The inspection workflow should make clear who in the buyer’s team can approve, reject, or request adjustment during production.
- First fabric check: fabric weight method, shade comparison, fabric surface, roll or lot identification if available.
- First print check: logo size, position, color comparison, opacity, registration, rub test, and curing status.
- First sewing check: handle reinforcement, stitch density, seam allowance, top hem, bottom seam, and inside finish.
- First packing check: folding method, pieces per inner pack or carton, carton mark, barcode label, carton size, and gross weight.
- Escalate immediately if fabric weight, logo color, handle construction, or packing method differs from the approved sample.
- Keep inline approval records because they help resolve disputes if final inspection later finds repeat issues.
8. Final random inspection workflow for corporate tote orders
A practical final inspection workflow gives procurement a consistent way to release or hold shipments. The inspection should be scheduled when production is complete and most goods are packed, but before cartons are sealed beyond access or loaded for shipment. Inspectors need enough finished goods available to draw random samples from different cartons, sizes, colors, or artwork versions. If the factory presents only selected cartons, the result is less reliable.
The workflow usually starts with quantity verification. The inspector checks purchase order quantity, packed quantity, carton count, assortment, and carton markings. Next comes random sample selection according to the agreed sampling plan. The inspector then checks workmanship, measurements, fabric, print, function, packing, and any special buyer tests. Findings are classified as critical, major, or minor and compared against the accepted limits.
For example, a buyer may inspect a 5,000-piece order under a chosen AQL plan and draw samples according to the inspection table used by the inspection company. Within those samples, every piece should receive a visual and workmanship check, while a subset may receive detailed measurements, print rub checks, and load-bearing spot tests. The exact sample size depends on the selected standard and lot size, so it should be confirmed in the inspection booking. The key is not the specific table alone; it is the combination of random selection, pre-agreed defect definitions, and a clear acceptance decision.
- Book inspection when production is complete, packed, and accessible, but before shipment release.
- Verify order quantity, carton quantity, SKU or artwork versions, and carton marks first.
- Select samples randomly from multiple cartons, not only from cartons chosen by the factory.
- Check visual appearance, stitching, dimensions, fabric surface, print quality, function, and packing against approved sample and PO.
- Use the agreed AQL or written defect limits to decide pass, fail, hold for rework, or accept with concession.
- Document defects with photos, quantity found, defect classification, carton source, and recommended corrective action.
- Do not release balance payment or shipment until inspection status, rework needs, and shipping schedule are clear.
9. Packing, carton, pallet, and receiving requirements prevent downstream claims
Packing is often treated as a minor detail, but it affects freight cost, warehouse receiving, event distribution, carton damage, and customer complaints. Canvas totes can be bulk packed, individually polybagged, paper banded, folded with hangtags, or packed for retail display. Each method changes labor cost, carton volume, plastic use, and inspection requirements. If packing is not specified in the RFQ, the supplier may quote the cheapest bulk pack and add charges later for barcode labels, hangtags, custom carton marks, or palletization.
For corporate distribution, bulk packing 50-100 pieces per export carton may be enough if the bags will be unpacked at a warehouse or event venue. For retail or multi-location distribution, individual packaging, barcode labels, carton assortment marks, and SKU separation may be required. Folding method matters because hard fold lines across the logo can affect presentation. Natural cotton canvas also needs moisture protection during storage, loading, and transit because cartons exposed to humidity may lead to odor, staining, or mold risk.
Carton quality should be inspected, not assumed. Buyers should define carton dimensions, pieces per carton, maximum gross weight, carton ply or strength expectation, sealing method, and carton marks. A practical maximum gross weight for manual warehouse handling is often around 15-18 kg, but buyers should follow their own warehouse safety rules. If cartons are palletized, confirm pallet size, stacking pattern, stretch wrap, corner protection if needed, pallet label position, and whether pallets must be fumigated or compliant with destination rules.
- Confirm folding method and whether fold lines are allowed across the printed logo.
- Confirm inner packing: bulk pack, individual polybag, paper band, tissue, hangtag, barcode sticker, or retailer-specific label.
- Set carton quantity, carton dimensions, and maximum gross weight before production.
- Check export carton strength, sealing tape, moisture protection, and whether cartons are clean and undamaged.
- Require carton marks with PO number, SKU, item description, quantity, carton number, gross/net weight, destination, and country-of-origin marking if needed.
- Confirm barcode readability and label placement if warehouse scanning is required.
- Define palletization requirements including pallet size, cartons per layer, total height, stretch wrap, pallet labels, and no-overhang rules.
- Ask your receiving warehouse whether they need advance shipment notices, carton-level labels, packing lists, or special routing instructions.
10. Close the order with a procurement and QC wrap-up
A strong canvas tote procurement process ends with a documented release decision, not just a shipment date. Before approving balance payment or shipment release, the buyer should review the final inspection result, any failed points, corrective action evidence, carton count, shipping schedule, and required documents. If the order is tied to an event, the team should also confirm the latest acceptable delivery date and whether there is enough time for rework, reinspection, customs, and local delivery.
The best way to reduce future risk is to keep a complete order file. Save the RFQ, supplier quote, purchase order, approved artwork, approved sample photos, measurement record, inline inspection evidence, final inspection report, packing list, carton label design, and shipment documents. For repeat corporate programs, this file becomes the standard for the next order and makes supplier comparison easier.
Corporate buyers do not need to make every canvas tote bag complex. They need to define the right level of quality for the use case and make that level inspectable. Clear fabric specifications, construction details, print controls, AQL levels, packing requirements, and release rules help prevent hidden downgrades and last-minute disputes. When the product is simple, the process should be even clearer because small omissions can change the final bag significantly.
- Compare supplier quotes line by line against the same specification sheet, not just unit price.
- Approve samples with written measurement and construction notes, not only images.
- Use inline checks for fabric, print, sewing, and first packing before the full lot is finished.
- Use final random inspection with agreed defect classification and AQL or written acceptance limits.
- Hold shipment for critical defects or major defects above the agreed limit until rework and reinspection are complete.
- Review carton marks, packing list, shipping documents, and warehouse receiving requirements before cargo leaves the factory.
- After delivery, record any warehouse or end-user complaints so the next order can improve the specification.
Specification comparison for buyers
| Spec decision | Recommended option | When it fits | Buyer risk to check |
|---|---|---|---|
| Fabric weight | 10 oz / about 280-300 GSM canvas for standard corporate campaigns | Good balance of handfeel, printability, durability, carton weight, and cost for conferences, employee kits, and office merchandise | Some suppliers describe lighter fabric as 10 oz; request both oz and GSM, tolerance, and a fabric cutting or GSM check against the approved sample |
| Premium fabric option | 12 oz / about 340-360 GSM canvas | Retail resale, executive welcome kits, heavier catalogs, bottles, tech accessories, or premium brand presentation | Heavier fabric increases sewing difficulty, unit cost, carton gross weight, and may require stronger needles, thread, and handle reinforcement |
| Budget fabric option | 8 oz / about 230-250 GSM canvas | Short-term events, lightweight document bags, low-cost promotional giveaways, or high-volume distribution where handfeel is less critical | Can feel thin, crease more, show ink strike-through, and perform poorly under heavier loads unless the buyer approves the lighter standard |
| Handle construction | Self-fabric or cotton webbing handles with box or box-X reinforcement | Most corporate totes that must carry documents, apparel, brochures, or light merchandise without handle complaints | Check handle width, drop length, stitch density, reinforcement size, thread tension, and whether handle placement is symmetrical |
| Seam construction | Clean top hem, secure side seams, reinforced bottom/gusset stress points | Open-top totes, grocery-style totes, and conference bags where repeated handling is expected | Loose seam allowance, skipped stitches, weak bottom corners, or twisted gussets can cause failure even if fabric weight is acceptable |
| Printing method | Screen printing for solid 1-3 color logos | Corporate logos, sponsor marks, event branding, and repeat orders with stable artwork | Confirm Pantone target, ink opacity, curing, rub resistance, logo size, print position tolerance, and whether screen charges are included |
| Printing method for full color | Heat transfer, DTF, or digital print after sample approval on actual canvas | Gradients, photos, small runs, many colors, or artwork with fine detail | Transfers may feel stiff, crack, or lift at edges; digital print can look muted on natural canvas; require fold, rub, and visual checks |
| Inspection timing | Inline inspection after first 5-10% plus final random inspection before shipment | Best for logo orders, fixed event dates, or first-time suppliers where late rework is expensive | Only doing final inspection may discover wrong fabric, print placement, or packing after most goods are already completed |
| Sampling plan | General inspection level II with AQL such as critical 0, major 2.5, minor 4.0 for many corporate orders | Common starting point for final random inspection when the buyer has no internal standard | AQL must be agreed before production; stricter retail or premium orders may need lower limits, special tests, or 100% sorting of visible logo defects |
Buyer checklist before sampling
- Write a one-page specification sheet with bag width, height, gusset, handle length, handle width, seam type, print size, packing method, and measurement tolerance.
- Specify canvas by both oz and GSM, fabric color, finish, shrinkage expectation if relevant, and whether cotton is conventional, organic, recycled, bleached, dyed, washed, or natural unbleached.
- Define the real use case: one-day giveaway, employee welcome kit, retail resale, conference document bag, gift packaging, or distributor stock.
- Approve a physical pre-production sample made with the intended bulk fabric, construction, print method, logo size, label, and packing method whenever timing allows.
- Keep the approved sample sealed, signed, dated, and referenced in the purchase order so production and inspection teams use the same standard.
- Check stitching for skipped stitches, broken threads, open seams, loose thread ends, uneven handle attachment, seam puckering, needle holes, and weak bottom corners.
- Confirm handle reinforcement type, stitch density, handle drop length, handle placement symmetry, and expected load-bearing requirement based on actual contents.
- Confirm artwork file format, Pantone or CMYK reference, print size, print position, print side, curing method, acceptable color tolerance, and whether a print rub test is required.
- Inspect fabric under normal white light for stains, oil marks, dirt, holes, heavy slubs, shade variation, mildew, chemical odor, excessive creasing, and inconsistent fabric handfeel.
- Define defect classification and AQL before production, for example critical 0, major 2.5, minor 4.0, or a stricter internal standard for retail presentation.
Factory quote questions to send
- What exact canvas weight are you quoting in oz and GSM, and what tolerance should we expect in bulk production?
- Is the canvas natural, greige, bleached, dyed, washed, organic, recycled, or conventional cotton, and can you supply fabric details for the purchase order?
- What bag width, height, gusset, handle length, handle width, top hem depth, and measurement tolerance are included in this quote?
- What handle material and reinforcement are included: self-fabric, cotton webbing, box stitch, box-X stitch, bartack, or another construction?
- Which print method is included, how many colors are quoted, what is the maximum print area, and are screen or setup charges included?
- How do you control logo color and position in bulk production, and what print position tolerance do you recommend for this style?
- What MOQ applies separately to bag style, fabric color, logo version, print method, and packing method?
- Can you make a pre-production sample using bulk fabric and the actual bulk print process before mass production starts?
- What is the sample lead time, bulk production lead time, and exact trigger date for the timeline: deposit, artwork approval, fabric arrival, or sample approval?
- Do you print in-house or subcontract printing, dyeing, washing, sewing, zipper insertion, labeling, or packing?
Quality-control points to confirm
- Fabric GSM or oz verification against the approved sample and quoted specification, using a consistent cutting and weighing method where possible.
- Bag measurement check for width, height, gusset, handle drop, handle width, top hem depth, logo size, and logo position.
- Stitch density and reinforcement inspection at handles, top hem, side seams, bottom corners, gusset points, pockets, zipper ends, and stress areas.
- Thread quality check for broken stitches, skipped stitches, loose tension, thread color mismatch, unsecured thread ends, and seam puckering.
- Print color, opacity, position, artwork size, ink coverage, curing, rub resistance, edge sharpness, registration, and print surface feel.
- Fabric surface check for stains, oil marks, dirt, holes, heavy slubs, shade variation, mildew, chemical odor, excessive wrinkles, and needle damage.
- Function check if zipper, snap, pocket, lining, inside label, hangtag, barcode label, or accessory is included.
- Load-bearing spot test suitable for intended use, such as a defined weight for a defined time, with results compared to the approved requirement.
- Color shade comparison between bulk bags, approved sample, fabric lots, handles, labels, and printed logo under consistent light.
- Packing quantity count, folding method, inner packing, polybag or paper band confirmation, carton strength, carton sealing, carton mark, barcode, and pallet check.