Why Contrast-Handle Quotes Go Wrong
Most contrast-handle tote quotes fail for the same reason: the buyer asks for a generic canvas tote bag and the factory prices a different product than the one the buyer actually wants. A contrast handle changes more than appearance. It can change dyeing, cutting, sewing sequence, thread choice, carton packing, and sometimes the MOQ if the handle color is not a stock shade. If the RFQ leaves any of that open, suppliers will fill the gaps with their own assumptions, and you will compare quotes that are not truly comparable.
The worksheet should solve one problem first: force every supplier to price the same bag build, the same handle color logic, and the same packing scope. When that happens, the quote becomes useful for commercial comparison instead of just a rough number. For procurement teams, the worksheet is not paperwork for its own sake. It is the tool that stops late-stage surprises such as color mismatch, handle shrinkage, weak stitching, or a surprise surcharge for a second print pass.
- Contrast handles affect color sourcing, not just decoration.
- A vague RFQ usually produces hidden assumptions in sewing and packing.
- The worksheet should make all suppliers quote the same spec scope.
Start With the Base Tote Build
Before you talk about the contrast handle, lock the base tote structure. State the finished size, gusset depth, body fabric weight, and whether the bag is lined or unlined. For a standard retail or promotional tote, buyers often start around 8 oz to 12 oz cotton canvas, roughly 272 to 407 GSM, because that range gives enough body without turning the bag into a rigid box. If the bag must stand up in store displays, lean toward the heavier end. If it is a foldable giveaway bag, a lighter canvas may be acceptable, but only if your print and handle spec still hold up in use.
You also need to define the body color and whether bleaching, enzyme wash, or natural ecru is acceptable. Many quote disputes begin when one supplier prices a fully dyed canvas and another prices an undyed natural body. Those may look similar in photos but behave differently in printing and shade control. Add your target use case too: retail, events, corporate gifts, or grocery carry. That context tells the factory how much reinforcement and finishing it should price into the bag.
- State finished size in centimeters and inches if your vendors work across regions.
- Specify canvas GSM or ounce weight, not only a marketing term like heavy canvas.
- Say whether the tote must keep its shape or fold flat for distribution.
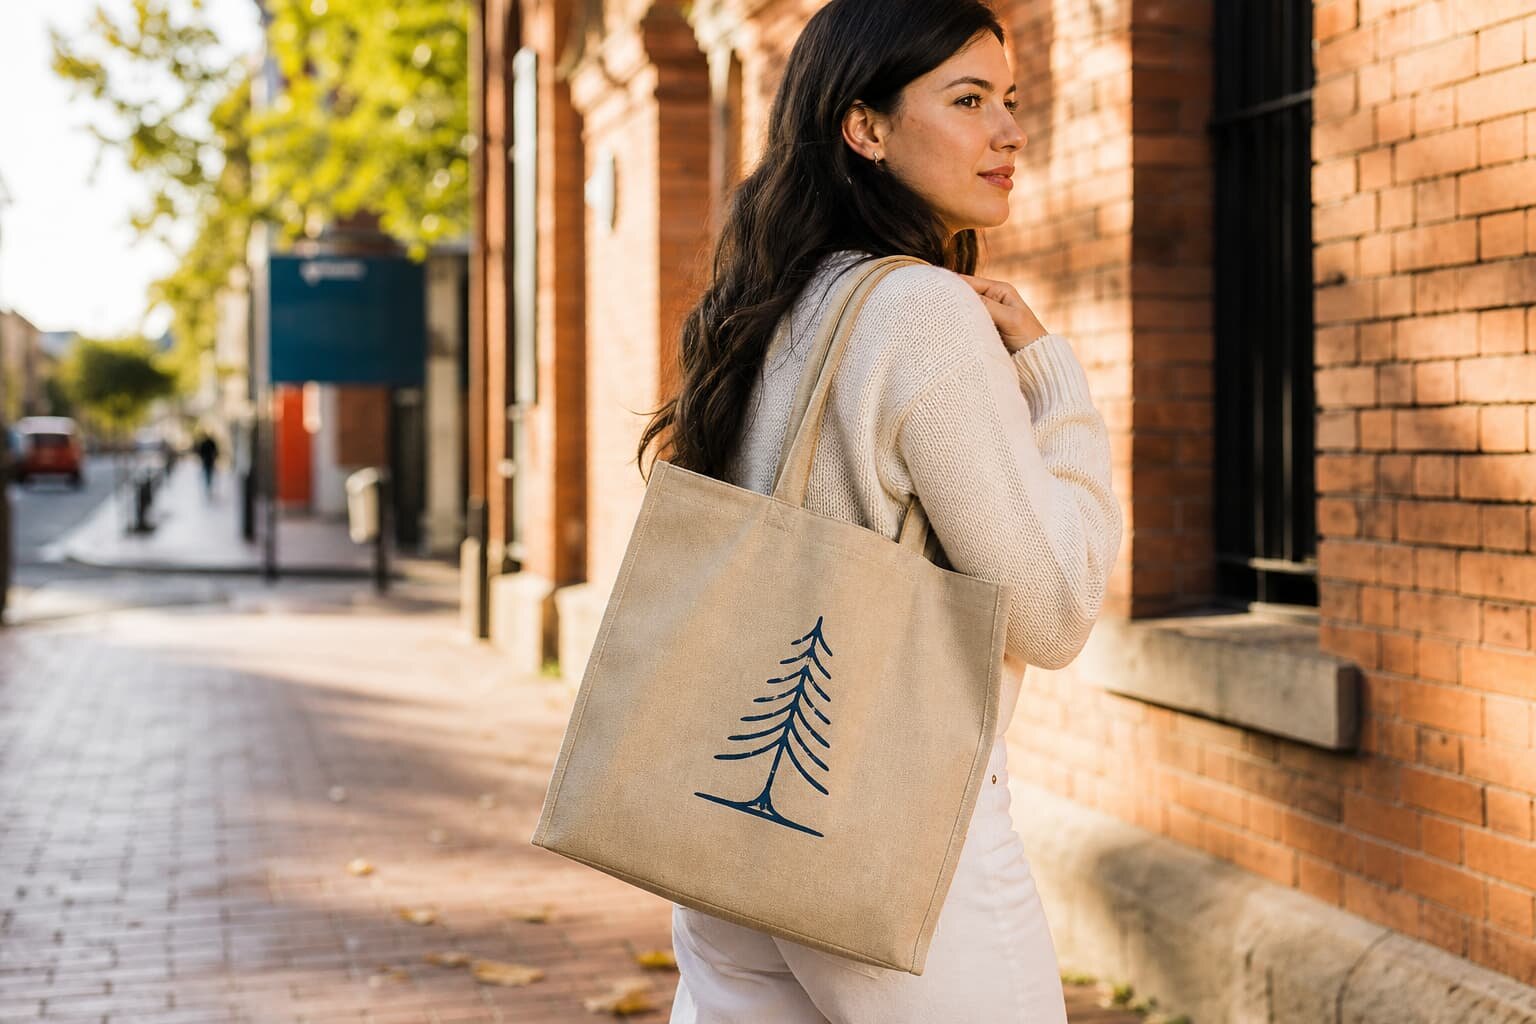
Define the Contrast Handle in Factory Language
The handle is where many contrast orders drift. Say whether the handles are self-fabric canvas, cotton webbing, dyed tape, or a separate binding material. Then define the color reference. A useful RFQ line reads better when it says: contrast navy handle, approximate Pantone reference, confirmed by physical swatch, acceptable delta only after sample approval. That is far more usable than saying blue handle, which leaves too much room for interpretation.
Handle size matters just as much as handle color. For an everyday tote, a finished width of 2.5 to 3 cm often balances comfort and sewing cost. Heavier retail bags or bags meant to carry samples may need wider handles and longer drop length. Ask the factory to quote the attachment style too: simple top stitch, box-X, bar tack, or folded reinforcement. A contrast handle looks deliberate only when the join is clean and symmetrical. If the stitching is crooked or the handle twists after sewing, the bag will look lower grade even if the body fabric is good.
- Name the handle material and color reference separately.
- Set finished width, length, and drop before quote comparison.
- Ask which reinforcement stitch the factory will use at the join.
Choose the Print Method for the Fabric Weight
Do not choose the print method by habit. Match it to the canvas weight, logo detail, and required finish. Screen print is usually the first option for simple brand marks on medium or heavy canvas because it gives a clean, stable result and scales well at volume. Embroidery can work for premium programs, but it adds cost and can pucker lighter canvas. Heat transfer is useful for complex art or short runs, yet it can feel less integrated on textured canvas and may become a wear issue if the bag is heavily folded.
The worksheet should identify the print location, print size, number of colors, and whether the art crosses a seam or lands near the bottom gusset. That is where production risk lives. A bold logo on the center body is easier than a wide graphic that wraps over a seam or sits close to the handle. If you want to compare quotes accurately, ask suppliers to quote the same print method and the same number of colors, then list alternates separately. Otherwise the lowest price may simply be the quote with the cheapest decoration method, not the quote with the right result.
- Use one primary print method for the base quote.
- List alternates only as separate line items.
- Check whether the artwork position intersects seams, folds, or top stitching.
Turn the RFQ Into a Quote Worksheet
A good worksheet reads like a production brief, not a marketing note. The key data fields should include finished dimensions, canvas GSM, handle width and drop, contrast handle color reference, decoration method, logo size, packing spec, carton count, sample stage, and target lead time. If you use a spreadsheet, keep each line item visible and leave no free-text ambiguity around what is included in the unit price. You want the factory to fill in the gaps, not invent them.
It also helps to separate mandatory specs from alternates. For example, the buyer may require natural canvas with navy contrast handles and screen print as the base quote, then ask for optional embroidered logo pricing and a second colorway as alternates. That structure lets procurement compare like for like. It also makes supplier feedback easier to read, because you can see whether a factory is strong on standard production or only competitive when it cuts corners on decoration or packing.
- Make every quote line visible: body, handle, print, packing, sample, and lead time.
- Keep mandatory specs separate from alternates.
- Use one worksheet for every supplier so the comparison is clean.
Read MOQ, Sampling, and Lead Time Together
MOQ should never be read in isolation. On contrast-handle totes, MOQ can shift with the handle color, print complexity, or packing requirement. A supplier may be comfortable with a low body MOQ but ask for a higher minimum if the contrast handle uses a fresh dye lot or a special webbing. That is normal. What matters is whether the supplier explains the break point clearly. If the quote says MOQ 3,000 but the handle color is only economical at 5,000, you need that explained before you build your budget.
Sampling should also be mapped in sequence. Ask what the factory will show at each stage: material confirmation, stitched pre-production sample, print sample, and packed sample if necessary. Lead time should be split the same way. A good quote makes clear how long sample approval takes, how long bulk production takes after approval, and what may extend the schedule if the contrast color needs a new dye run or if art approval is late. Buyers lose time when they treat all these steps as one vague promise.
- Ask MOQ by colorway, print version, and packing scope.
- Request sample stages in order, not one generic sample promise.
- Separate lead time for approval, production, and dispatch planning.
Compare Total Cost, Not Just Unit Price
A contrast-handle tote quote often looks cheap until you compare what is actually included. One supplier may price the bag body and print but leave out the handle color surcharge, individual polybags, carton labels, or sewing reinforcement. Another supplier may quote a higher unit price but include everything the retail program needs. That is why the worksheet should force each supplier to state inclusions and exclusions line by line. Procurement teams need a landed-cost view, not a headline price that hides expensive add-ons later.
The best way to compare is to read the quote in the same order as the production flow. Start with material, then cutting, then handle construction, then decoration, then packing, then carton specification, then sample charge or sample credit rules. If you do that, you can spot where one factory is saving money. Sometimes the saving is legitimate, such as using stock canvas or a standard handle width. Other times it is a risk, such as thin seam allowances or a simpler packing method that will not survive retail distribution.
- Compare inclusions before comparing unit prices.
- Read the quote in production order so hidden omissions are easy to spot.
- Watch for low prices that depend on thinner material or weaker packing.
Use Acceptance Criteria on the Sample
A sample is only useful if the buyer knows what to accept. For a contrast-handle canvas tote, the sample check should cover body size, handle color match, handle symmetry, seam quality, print clarity, and packing presentation. If the bag is meant for retail or branded distribution, the sample should also show whether the tote folds neatly and whether the contrast handles remain crisp after folding. A sample that looks good on a table but arrives crumpled in a carton is not a real approval.
Build the acceptance criteria into the worksheet before the sample is sent. That way the factory can see what matters most. If the handle color is the hero feature, make color match and clean stitching the top acceptance points. If the logo is the hero, make print registration and surface coverage the priority. Buyers reduce disputes when they approve against a written target instead of relying on memory or a photo thread. A good sample file includes actual measurements, notes on deviations, and any agreed tolerance range.
- Approve against written measurements and visual targets.
- Check the sample in both folded and open form.
- Record deviations before the bulk order is released.
Packing, Carton, and Retail Readiness
Packing is not an afterthought on a contrast-handle tote because the handles are visually important and can crease or pick up lint during transit. State whether each bag needs an individual polybag, paper insert, barcode sticker, or retail hangtag. If the bag is going to a distributor or store shelf, the fold method matters too. A neat fold keeps the contrast handles aligned and makes the product look premium when opened. A sloppy fold can twist the handles and create a false impression of poor sewing.
Carton spec should also be in the quote worksheet. Ask for carton count, carton dimensions, gross weight target, and whether master cartons will be printed or only labeled. This matters for freight planning and warehouse intake. If you are comparing two quotes, the bag can look cheaper per piece while the carton density is much worse, which raises shipping cost. A good factory quote tells you how the packed bag will ship, not only how the empty bag is sewn.
- Specify polybag, insert card, barcode, and hangtag needs up front.
- Define the fold method so contrast handles arrive neat.
- Ask for carton count and carton dimensions with the quote.
Avoid the Common Buyer Mistakes
The most common mistake is asking for contrast handles without naming the color reference or material source. The second is quoting the tote before the print method is fixed. The third is comparing MOQ without seeing whether the MOQ changes by colorway or packing. All three mistakes create the same result: quotes that look comparable but are not. The buyer then wastes time reconciling revised numbers after the factory has already invested in sample work or material planning.
Another frequent mistake is over-specifying the wrong thing and under-specifying the right thing. For example, a buyer may spend time on a generic statement like premium quality while leaving the handle reinforcement method open. Production does not build premium; it builds the line items you specify. If you want a bag that feels commercial and durable, focus on measurable controls: GSM, handle width, stitch type, print method, fold spec, and carton pack. That is what gives you repeatable quality across orders.
- Do not leave handle color or material to interpretation.
- Lock the print method before comparing pricing.
- Specify measurable production controls instead of vague quality language.
Specification comparison for buyers
| Spec decision | Recommended option | When it fits | Buyer risk to check |
|---|---|---|---|
| Canvas body weight | 10 oz to 12 oz cotton canvas, about 340 to 407 GSM | Retail tote, trade show bag, or branded carry bag that must hold shape | Too light can feel flimsy; too heavy can raise cost and reduce folding ease |
| Handle construction | Contrast self-fabric handles with box-X or reinforced bar-tack stitching | Everyday carry and higher perceived value without changing the bag family | Check stitch density, seam allowance, and load-test expectations at the handle join |
| Handle width | 2.5 to 4 cm finished width | 2.5 to 3 cm for standard promo bags; wider for heavier fills | Narrow handles can cut into the shoulder; wide handles may distort the tote opening |
| Print method | Screen print for simple logos, heat transfer only when needed, embroidery for premium positioning | Plain artwork on medium-to-heavy canvas with a stable print zone | Check registration, ink bleed, hand feel, and whether the print sits across seams or folds |
| Packing spec | Bulk fold with size-controlled polybag and master carton count | High-volume import orders where cube efficiency matters | Loose folding can create shape issues; overpacking can crease contrast handles and print |
| Sample approval point | Pre-production sample plus stitched trim, print, and packing reference | Any order with contrast color matching or retail presentation requirements | Do not approve only on photos; confirm actual handle color, seam quality, and carton mark details |
Buyer checklist before sampling
- Confirm finished tote size, body fabric GSM, and whether shrinkage allowance is included in the quoted dimensions.
- Specify the contrast handle color by Pantone, fabric swatch, or factory standard reference, not by a casual color name.
- State handle width, handle length, stitch pattern, and reinforcement method at the attachment points.
- Choose one print method for the quotation stage and note any second method only as an alternate line item.
- Ask for a sample stage that includes material, print, stitching, and packing, not just a loose fabric swatch.
- Request MOQ by colorway, print version, and carton configuration so you can see where the quote changes.
- Check whether quoted packing includes individual polybag, insert card, barcode sticker, and carton marks.
- Confirm lead time separately for sample, material approval, production, and ocean or forwarder handoff.
Factory quote questions to send
- What exact canvas weight, weave count, and finished GSM are you quoting for the body and handles?
- Is the contrast handle made from self-fabric, webbing, or dyed tape, and what color tolerance can you hold?
- What is the handle reinforcement method at the top seam, and do you test the load at the seam or only the strap itself?
- Which print method is included in the quoted unit price, and what is the extra cost for a second color or print location?
- Does your MOQ change by handle color, print color, or packaging requirement?
- What sample will you send before bulk, and which details are approved on that sample versus still open?
- What packing materials are included, and how many pieces per master carton are you quoting?
- What lead time applies after sample approval, and what could extend it if the contrast color needs a fresh dye lot?
Quality-control points to confirm
- Measure finished body size, handle length, and handle drop on every pre-production sample.
- Check body and handle color against the approved reference under natural light and standard warehouse light.
- Inspect the handle join for stitch spacing, back-tack quality, and skipped stitches at both stress points.
- Rub-test the printed area and check for cracking, smearing, or ink penetration on the reverse side.
- Confirm seam allowance, corner shape, and bag symmetry so the tote hangs evenly with contrast handles aligned.
- Verify carton pack count, polybag thickness, barcode placement, and any retail insert or hangtag requirement.
- Pull a load sample to see whether the handle stretch or seam opening appears before the target usage level.
- Open random cartons from different pallet positions to check color consistency, folding method, and dust or scuff marks.