Start with the use case, not the bag
Most weak quotes for canvas retail merchandise bags for retail chains and event giveaway planning start with the wrong brief. The buyer asks for a tote, but the factory is left to guess whether the bag is for a checkout counter, a promotional handout, a merchandise display, or a distribution center. Those are different jobs. A bag meant to move light flyers through a launch event can be simple and inexpensive. A bag intended to sit on store shelves or be reused by customers needs better structure, cleaner seams, and tighter color control. If that decision is not fixed first, every later quote becomes harder to compare.
Procurement teams should define the expected contents, the target lifespan, and the level of visual finish before they ask for pricing. If the bag is only carrying brochures and a small sample kit, cost and speed dominate. If the bag is part of a retail brand experience, the decision shifts toward print quality, fabric hand feel, and carton presentation. The more clearly you describe the channel, the less likely the supplier is to pad the quote with unnecessary features or omit a detail that later becomes a change order.
- Retail shelf use: cleaner finish, tighter stitch control, better carton presentation.
- Event giveaway: simpler build, faster production, lower unit cost.
- Distribution-center issue: exact inner packs, stable carton count, easy receiving.
Choose fabric and construction as a system
For most programs, 10 oz to 12 oz canvas is the practical range. Ten-ounce fabric works when the bag mainly holds flyers, apparel, or lighter merchandise and when freight cube matters. Twelve-ounce canvas gives a more substantial feel and usually reads better in retail environments. If the bag needs to be reused, carry heavier items, or feel more premium in hand, 14 oz is the safer call. That move increases cost, but it often reduces complaints about drooping, wrinkling, and weak perceived value.
Do not specify the bag only by its finished dimensions. The weave, finish, and cut method affect how the bag behaves far more than a catalog size does. Ask whether the cloth is greige, bleached, dyed, or washed before cutting. Ask for GSM and, if the supplier uses oz language, get the conversion range in writing. If you are comparing suppliers across regions, require the same fabric state and the same finished construction. Otherwise one quote can look cheaper simply because it is built on lighter or less finished cloth.
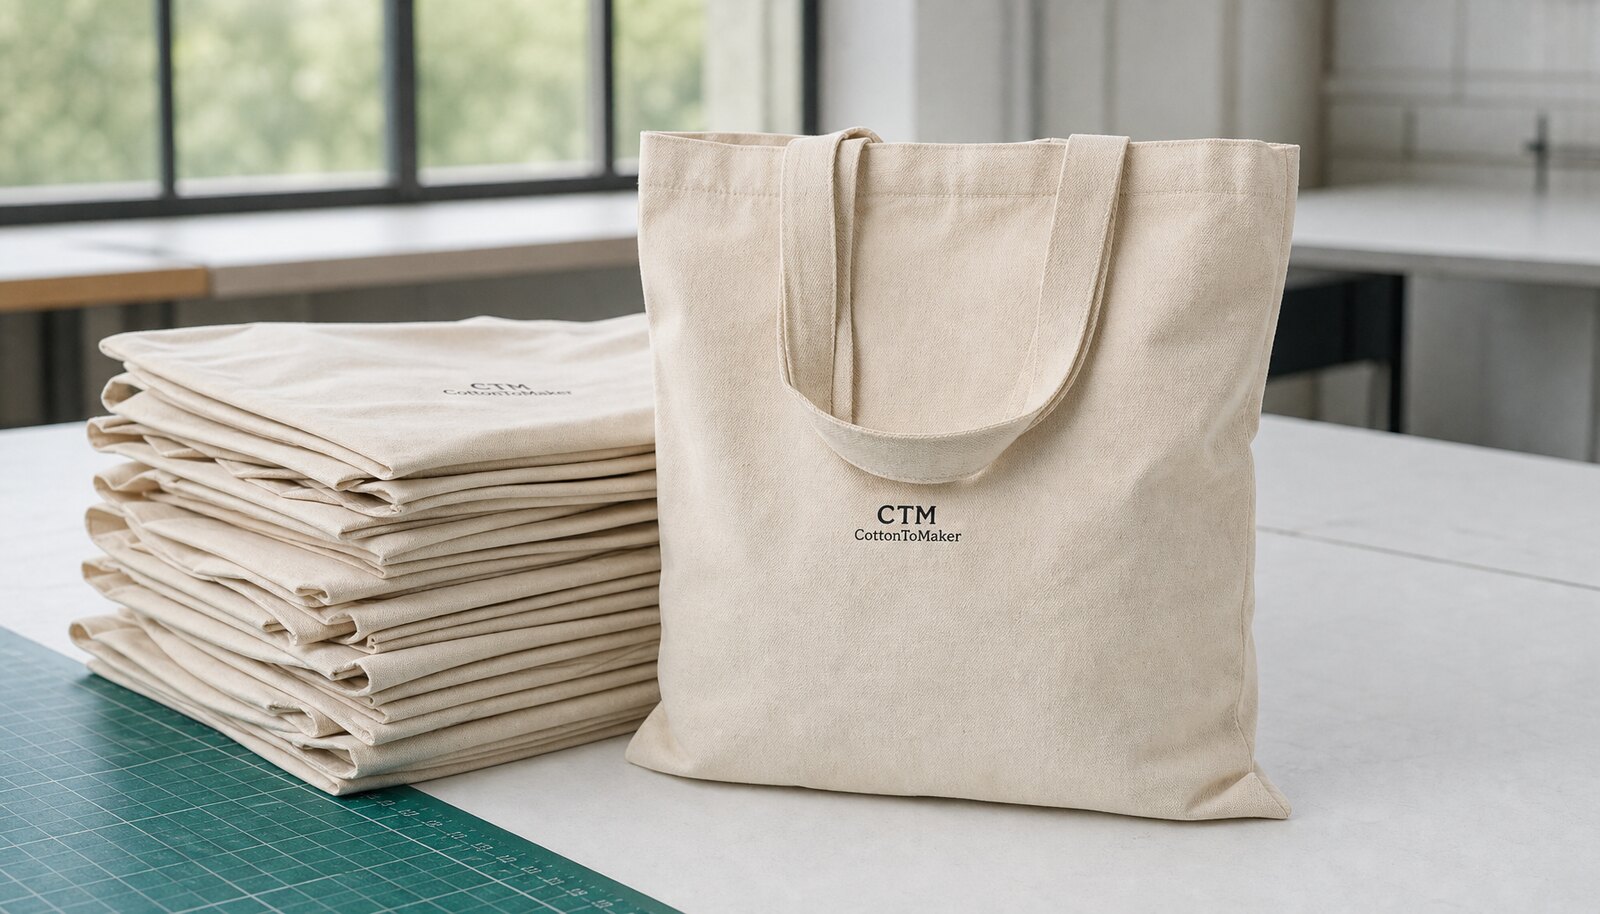
- Flat tote: best for flyers, lightweight promo kits, and lowest cube.
- Gusseted tote: better for boxed goods, apparel, and a stronger retail look.
- Reinforced handles: worth the extra sewing time when the bag will be reused or carry weight.
Use the comparison table to reject weak options early
The main value of a buyer-facing comparison is not to rank every feature; it is to show which choices materially change cost, risk, and performance. Fabric weight, bag structure, handle reinforcement, print method, and packing format all affect the final landed cost. A bag can be technically acceptable and still be the wrong choice if it inflates freight, creates inspection risk, or forces a poor decoration method. That is why the table above separates cost impact from defect risk and reject conditions.
A useful rule is to reject any quote that hides the hard tradeoff. If a supplier will not name the dye lot strategy, the print method, the carton dimensions, or the inspection standard, you do not have a quote yet. You have a placeholder. For a chain program, that is not enough. The earlier you eliminate ambiguous offers, the less likely you are to spend time on samples that cannot be produced at scale.
- Compare the same fabric state, same print method, and same packing method across all offers.
- Treat setup, sample, and freight assumptions as part of the price, not as side notes.
- Reject any proposal that cannot explain where the quality risk sits.
Decoration should follow artwork complexity, not habit
Screen print is still the most practical choice for most canvas retail merchandise bags because it balances unit cost, durability, and repeatability. It is especially strong for one- and two-color logos on natural canvas. Once the order reaches a few thousand pieces, screen setup becomes easier to amortize and the print usually holds up better than many alternatives. But screen print is only a good answer when the artwork is suited to it. Fine serif type, hairline rules, gradients, and detailed corner art can break down on textured canvas unless the supplier has strong process control.
Heat transfer has a place, but it should be chosen deliberately. It works better for short runs or complex graphics, and it lets you move faster when there is not enough volume to justify full screen setup. The tradeoff is feel and durability. On canvas, a transfer can sit on the surface more obviously than screen ink, and it may age differently after folding or abrasion. Woven labels, sewn patches, or a discreet side label are often the better answer when the brand wants a more retail-like product and less of a promotional look.
If the artwork is borderline, test it on the actual fabric before production. A PDF proof tells you almost nothing about line closure, ink opacity, or how the bag will look after folding. Ask for a strike-off or printed panel on the exact canvas that will be used in bulk. If the supplier says the artwork is 'simple enough,' that is not evidence. Physical approval is the only reliable check.
- Screen print: best for repeat orders, simple logos, and good cost control.
- Heat transfer: useful for short runs or detailed graphics, but test rub and fold behavior.
- Woven label or patch: better when the goal is a more retail product and less promo feel.
Know where suppliers differ by region and capability
Supplier geography matters, but not in a simplistic way. The right region depends on the mix of textile capability, print complexity, speed, and documentation you need. Coastal Chinese factories are often strong when you need multiple decoration options, stable sewing capacity, and a broad range of bag constructions. Many buyers also use China when they need a large supply base and can support a clear spec and routine QC. The key is not the country name; it is whether the factory can show fabric traceability, lot control, and a production record that matches your order size.
Indian and Pakistani textile ecosystems can be strong when the program leans toward heavier cotton canvas, woven materials, or natural-fiber positioning. For these routes, verify finishing consistency and dimensional control carefully, because the fabric and sewn output can vary by mill and by production batch. Vietnam, Cambodia, and Bangladesh are often relevant when you want sewn goods capacity and a stable basic tote program, but the supplier you choose still needs to prove print quality and carton discipline. Nearshore suppliers in Mexico, Central America, Eastern Europe, or the US can make sense when speed, communication, or replenishment flexibility matters more than the lowest unit price.
The better way to segment suppliers is by what evidence they can produce. Ask for a recent social compliance audit, business license, QC process summary, and a sample of the carton labeling system. If the order will repeat, ask how they reserve fabric lot, how they track print screens, and how they handle reorders six months later. A capable factory should be able to show what prevents drift, not just what they promise when the sample is approved.
- Direct factory: best for stable specs, repeat orders, and tighter cost control.
- Regional converter: useful for speed, mixed SKUs, or staged rollouts.
- Trading company: useful when you need sourcing support, but verify the actual factory and mill behind the quote.
Break the quote into the lines that actually move landed cost
A procurement quote for canvas bags should not be one unit number with a few vague notes underneath. Break the pricing into the pieces that drive the final landed cost: fabric, cutting and sewing, decoration setup, per-color printing, packing, carton labeling, sample fees, and freight terms. That lets you compare suppliers that use different structures without being misled by a low headline price. It also shows which cost elements are one-time and which recur on every reorder.
Setup charges deserve special attention. Screen creation, artwork separation, strike-off production, and color matching can be material on a smaller run. If you expect a reorder, ask whether setup charges can be amortized over a forecasted volume or waived on the second order if the spec does not change. Do the same with freight. Ask for carton dimensions, gross weight, and the shipping term in writing. A bag that is a few cents cheaper at the factory can easily become more expensive once larger cartons, more inner packs, or air freight are added.
Dye lots are another cost and risk point that buyers often leave too vague. If color consistency matters, ask the supplier to reserve the same dye lot for the order and state what happens if the run spans more than one lot. If the supplier cannot control that, ask for the acceptable color tolerance against the approved swatch and make sure it is written into the purchase order. That is more useful than a generic 'sample approval' clause.
- Ask for one-time charges and recurring charges separately.
- Compare EXW and FOB before you compare unit price.
- Lock dye lot, carton size, and packing ratio before final approval.
Use MOQ as a planning tool, not a negotiating slogan
MOQ is usually a signal of how the factory intends to produce the order. A low MOQ can mean stock fabric, standard handles, and a shared production window. A higher MOQ can mean custom fabric sourcing, multiple print screens, or a more formal line setup. For canvas retail programs, 2,000 to 5,000 pieces per color and spec is often a practical range when the build is standard. Smaller orders are possible, but the quote will usually carry more setup overhead or weaker material efficiency.
The most expensive small order is the one that tries to do too much. If you ask for multiple artwork versions, mixed handle types, several colorways, and retail-ready packing on a short run, the supplier either raises the price or substitutes somewhere else. If you are testing a new chain rollout, keep the pilot simple. Use one fabric state, one bag size, one print method, and one pack format. Then validate demand before you add variants. The goal is to learn, not to recreate the final assortment on the first order.
If the supplier offers a very low MOQ, ask what changed operationally to make it possible. Sometimes the answer is stock fabric or a production gap that fits your schedule well. Sometimes it is simply a willingness to take a thinner margin. Those are not the same thing. You need to know whether the low MOQ is repeatable, because reorders are where many programs break down.
- One artwork version is easier to control than multiple regional versions.
- One handle style is cheaper and safer than a mixed handle program.
- Stock fabric can lower MOQ, but it can also constrain color and repeatability.
Sampling should prove production reality, not just design intent
A sample sequence should test the points that fail in bulk. Start with the artwork proof, then move to a physical strike-off or print sample on the actual canvas. After that, approve a pre-production sample that reflects the final size, stitch pattern, handle construction, and packing method. For chain programs, that pre-production sample is the real production gate. It tells you whether the order can be made within tolerance, not whether the art looks good on a screen.
The sample review should be specific. Measure width, height, and gusset. Check handle symmetry and drop. Compare print placement to the approved art board. Fold the bag the way it will be packed and see whether it creases cleanly. If the bag is going to be sold, reused, or opened on a retail floor, look at the hand feel and how the edges finish. These are ordinary checks, but they are the ones that prevent the first bulk shipment from becoming a correction project.
For larger orders, ask for a top-of-production sample or at least a photo of the first cartons coming off the line with the approved swatch visible in frame. That gives you a final chance to stop a spec drift before the entire batch is complete. It is much cheaper to pause early than to sort a full shipment later.
- Approve the print on actual fabric, not on a PDF alone.
- Measure the sample rather than relying on photos.
- Keep one sealed reference sample for later reorders and dispute resolution.
Set the QC plan before the PO goes out
Canvas bags are not complicated, but they are easy to get wrong in boring ways. The most common defects are underweight fabric, crooked print placement, weak handle reinforcement, mixed carton counts, and stains or frayed edges. Those problems are small individually and expensive collectively. A good quality plan turns them into written checkpoints before the factory starts cutting. Do not leave tolerances implied. Agree the acceptable finished size, the logo placement window, and the allowed variation in seam appearance.
The factory should also provide more than a verbal promise of inspection. Ask whether they use an AQL-based final inspection or an internal checkpoint system, and ask for the record format. If the order is going to a distribution center, receiving teams need accurate carton counts and consistent labeling. If the bags are moving to stores, cosmetic defects matter more. Either way, the inspection standard should match the channel. The same bag can pass a simple giveaway test and still fail a retail shelf program.
It is also worth documenting what happens when the batch is not right. Define whether the supplier will rework, replace, or credit the affected quantity, and make sure the rule covers print errors, size errors, count shortages, and visible stains. The more specific the remedy, the less time you spend arguing after the goods are already in transit.
- Check fabric weight, seam finish, and reinforcement before you check carton labels.
- Set a written logo placement tolerance and a finished size tolerance.
- Require lot traceability so later reorders can match the approved reference.
Close the program with a launch checklist and reorder plan
The final step is to make the order repeatable. A procurement program is healthier when the supplier can rerun the same bag six months later without re-litigating the specification. Save the approved swatch, the final artwork file, the sample approval photos, the carton spec, and the inspection plan in one place. On the next PO, issue the same references rather than a fresh description. That reduces ambiguity and keeps the cost structure stable.
If the bag will be reordered across a chain rollout, leave room for one controlled variable at a time. For example, change color or packing, but not both at once. If you need an alternate size for a specific region, call it out as a distinct SKU rather than a silent substitution. This is where many retail programs drift into hidden complexity. A small change that looks harmless in email can trigger a new screen charge, a new dye lot, or a new carton count problem later.
For event programs, use the same discipline even if the order is one-off. The quote should still show the line items, the pack plan should still be checked, and the sample should still be physical. The difference between a clean event giveaway and a messy one is usually not creative. It is specification control.
- Archive the approved swatch, artwork, sample, carton spec, and inspection record together.
- Change one variable at a time on reorders.
- Treat one-off events with the same spec discipline as repeat retail programs.
Specification comparison for buyers
| Spec decision | Recommended option | When it fits | Cost impact | Buyer risk to check |
|---|---|---|---|---|
| Fabric weight | 10 oz to 12 oz canvas for standard retail handouts; 14 oz for heavier reuse or better shelf presence | Use 10 oz for event giveaway programs and light merchandise; use 12 oz when you want a stronger hand feel; use 14 oz for premium retail presentation or heavier contents | Moving from 10 oz to 12 oz usually increases material cost and freight cube; 14 oz can also slow sewing and raise unit cost | Reject if the bag droops under normal fill, feels thin in hand, or fails the target load test |
| Fabric finish and color | Natural, bleached, dyed, or washed canvas with one approved dye lot per run when possible | Natural or bleached is best for fast-turn promotions; dyed or washed finishes fit retail programs that need a more finished look | Dyed and washed options raise lead time, add dye-lot control, and can increase variation risk | Reject if color variation is visible between cartons or if the supplier cannot name the dye lot strategy |
| Bag structure | Flat tote for simple handouts; gusseted tote when volume or shelf appeal matters | Flat bags work for flyers and lightweight giveaways; gussets fit boxed goods, apparel, or retail merchandise | A gusset adds cutting and sewing time and usually increases fabric consumption | Reject if the end use requires upright shape but the bag is quoted as a flat panel only |
| Print method | 1 to 2 color screen print for most programs; heat transfer only for short runs or complex art; woven label for a restrained premium look | Screen print is the default for repeat retail programs; heat transfer is a fallback for low-volume or detailed artwork | Screens have one-time setup cost; heat transfer may cost more per piece on larger runs | Reject if the artwork has fine type or gradients that cannot survive the chosen method on textured canvas |
| Handle construction | Self-fabric handles for low-cost handouts; cotton webbing with box-X or bar-tack reinforcement for heavier use | Self-fabric is fine when unit cost is the main constraint; webbing is better when the bag must carry more weight or feel more durable | Reinforced webbing adds sewing time and cost, but it reduces claim risk | Reject if the handle stitch pattern is weak, inconsistent, or not visible on the sample |
| Packing format | Bulk packed by carton for distribution centers; individual polybag only when store presentation or barcode control is required | Bulk packing is usually best for retail chain replenishment and event logistics | Individual polybagging increases labor, carton count, and cube, which pushes freight cost higher | Reject if the factory proposes retail-level polybagging for a giveaway program without a clear operational reason |
| Supplier route | Direct factory for repeat chain programs; regional converter or trading company for small pilots or mixed SKUs | Direct sourcing works best when the spec is stable and you expect reorders; intermediary routes help when you need consolidation or speed | Direct factory quotes are usually easier to benchmark; intermediary quotes can hide fabric substitution or extra handling fees | Reject if the supplier cannot identify the factory, the mill source, or the sewing line that will make the order |
| Incoterms and freight terms | Compare EXW and FOB first; use DDP only if duties and brokerage are fully transparent | FOB is usually easier for buyers with their own freight forwarder; EXW works if your team controls pickup and export | Freight terms can change the landed cost more than the unit price does, especially on bulky bags | Reject if the quote says 'delivery included' without a named port, carton size, or freight assumption |
| Sample stage | Artwork proof, print strike-off, pre-production sample, then top-of-production check for larger programs | Use this sequence for chain rollouts or any order where a defect would affect multiple stores | The sample fee is small compared with the cost of reprinting or reworking a bulk order | Reject if the supplier offers only a photo sample and will not produce a physical pre-production sample |
Buyer checklist before sampling
- Confirm the real use case: cashier handoff, shelf merchandise, distribution-center issue, or event giveaway.
- Lock the finished size, gusset depth if any, handle length, handle drop, and target load weight before requesting quotes.
- Specify canvas weight, finish, color target, and whether the order must stay within one dye lot.
- Send vector artwork and state print method, print size, print position, and Pantone references.
- Ask for a line-item quote that separates unit price, setup charges, sample fees, packing fees, and freight assumptions.
- Request a physical pre-production sample, not just a digital proof or photo sample.
- Agree carton count, carton dimensions, barcode or label needs, and shipment marks before production starts.
- Write inspection checkpoints into the PO, including stitch quality, print placement, stains, measurements, and count accuracy.
Factory quote questions to send
- What exact fabric GSM, weave density, and finish will you use, and is the fabric stock, greige, bleached, dyed, or washed before cutting?
- Please separate the quote into fabric, cutting and sewing, print setup per color, packing, carton labeling, and any extra handling charges.
- What is the MOQ per color, per artwork version, and per handle type, and what changes if we combine variants in one order?
- Can you quote both bulk packing and individual polybag packing so we can compare distribution-center and store-ready options?
- What sample stages do you provide: artwork proof, strike-off, pre-production sample, and top-of-production sample?
- What is your standard lead time after sample approval, and which steps are most likely to slip if artwork approval is delayed?
- Can you reserve the same dye lot or fabric lot for the full order, and what happens if the production run crosses into a second lot?
- What carton size, inner pack count, gross weight, and pallet or cube assumptions will you use so we can estimate freight accurately?
- Which inspection standard do you follow, and can you share a recent in-line QC report, AQL record, or factory checkpoint plan?
- Can you quote EXW and FOB as separate terms, and list any port, export, or booking charges that are not included?
Quality-control points to confirm
- Finished dimensions should match the approved sample within a written tolerance that fits the bag size and print placement window.
- Fabric weight should match the quoted range, with the approved swatch kept on file so a lighter substitute is easy to spot.
- Handle stitching should be symmetrical, reinforced at the stress points, and consistent across the lot; box-X or bar-tack details should be visible.
- Print placement should stay within the agreed location tolerance, with no smearing, ghosting, or major color drift between cartons.
- Rub and fold checks should confirm that the print does not crack, flake, or transfer excessively when the bag is handled normally.
- Seams should have even allowance, clean corner finishing, and no raw-edge fraying at handle joins or side seams.
- Carton counts should be exact and traceable by lot, with inner-pack counts matching the packing list and PO.
- If the bags are reusable or will carry heavier goods, the sample should pass a simple load or pull test that reflects the real use case.
- Any individual polybagging should be checked for scuffing, suffocation warnings if required, and correct barcode or label placement.
- The factory should keep one approved reference sample, the final artwork proof, and the inspection record together so later reorders do not drift.