Why proofing matters more on messenger bags
Canvas messenger bags for university bookstores look straightforward at first glance. They are not. The decoration usually sits on a flap, and that flap changes shape as the bag is cut, stitched, folded, packed, and eventually displayed. A mark that appears perfectly centered on a PDF can finish low, slightly tilted, too close to a snap, or visually crowded by a strap path.
For procurement buyers, the risk is commercial as much as technical. These bags may carry licensed university marks, mascot art, department names, orientation graphics, alumni-event artwork, or bookstore logos. If color or placement is wrong, the issue can block brand approval, delay receiving, or miss a hard campus date such as move-in, commencement, homecoming, or a retail reset. Rework is rarely simple because logo position is tied to the flap pattern, seam allowance, closure placement, and bulk print setup.
A safer process breaks proofing into four separate approvals. The digital proof confirms layout intent. The fabric strike-off shows ink behavior on the real canvas. The sewn pre-production sample proves the logo still works after construction. The top-of-production check catches drift before the factory has printed all panels, sewn the full lot, or sealed cartons. Skipping one step may save a few days early and cost weeks later.
- Treat print approval as part of product engineering, not as a separate artwork task.
- Approve fabric, print, construction, labels, packing, and carton marks as one retail-ready package.
- Use the digital proof for scale and placement intent; use the strike-off for real color and print edge quality.
- Require a sewn sample when the logo sits on a flap, near closures, or close to binding.
- Keep physical standards for repeat orders: fabric swatch, strike-off, approved sample, and carton packing photo.
Start the RFQ with the finished bag
A strong RFQ starts with the finished messenger bag, not only the school logo. The supplier needs the final width, height, gusset, flap drop, flap shape, strap width, adjustable range, closure type, pocket plan, label requirements, and packing method before quoting. A request for “canvas messenger bag with university logo” leaves too much room for interpretation. One factory may quote a thin stock canvas with a basic strap. Another may assume a heavier fabric, metal hardware, reinforced seams, hangtags, barcode labels, and individual packing.
A practical bookstore size often falls around 14-16 inches wide, 10-12 inches high, and 3-4 inches deep. That range can hold notebooks, folders, tablets, orientation materials, and some small laptops without creating an oversized carton footprint. If the bag will be marketed as laptop-compatible, do not leave that to assumption. Specify the target device size, sleeve dimensions, padding requirement, lining fabric, and closure protection. A simple slip pocket and a padded laptop compartment are different products from a cost, testing, and QC standpoint.
Dimensional tolerances should appear in the RFQ, not only in the final inspection checklist. For cotton canvas bags, plus/minus 0.5 cm on major dimensions is often workable when the pattern and sewing line are stable. Tighter control may be possible, but it usually requires slower handling and more rejects. Strap length also needs a range rather than a single number because the adjustable slider changes the user fit. If students will wear the bag crossbody over winter clothing, say so.
- Finished size example: W 15 in x H 11 in x D 3.5 in with 8 in flap drop.
- Tolerance example: major dimensions plus/minus 0.5 cm unless the supplier agrees to tighter control.
- Strap example: 1.5 in cotton webbing, adjustable from 32 in to 56 in, measured end to end.
- Closure example: two magnetic snaps, Velcro strip, buckle, button loop, zipper under flap, or no closure.
- Retail example: hangtag, UPC/EAN sticker, country-of-origin label, and carton SKU label applied at factory.
Lock canvas weight and shade before print
Canvas weight drives cost, hand feel, shelf structure, sewing difficulty, and print appearance. A 10 oz canvas can lower unit price, but it may collapse more easily on display and show more distortion around a large flap print. A 12 oz finished cotton canvas, about 407 GSM, is a practical standard for many university bookstore messenger bags because it has enough body for the silhouette while staying efficient to sew and pack. A 14 oz canvas, about 475 GSM, feels more premium and durable, but it also increases fabric cost, needle resistance, carton weight, and freight exposure.
Always clarify whether the quoted fabric weight is greige, dyed, washed, laminated, or finished. This detail is easy to miss. A supplier may describe a fabric as 12 oz before finishing, while the buyer expects the finished bag to perform like 12 oz canvas. Ask for both oz and GSM, plus an agreed tolerance such as plus/minus 5% unless the program requires tighter control. For repeat programs, record the approved fabric weight, swatch reference, color standard, finish, and any available fabric supplier or mill reference.
Natural unbleached canvas remains popular for bookstore retail because it has a casual, heritage look. It also contains seed flecks, slubs, and shade variation. Those features are not automatically defects, but they can affect fine logo details or light ink colors. Bleached canvas gives cleaner contrast. Dyed canvas supports school-color collections, yet it brings lab dips, dye-lot MOQ, shade approval, and reorder continuity into the schedule. Approve fabric color before finalizing print color because the ground shade changes how ink is perceived.
- Value program: 10-12 oz canvas, single-layer flap, one-color screen print, basic packing.
- Standard bookstore retail: 12 oz finished canvas, reinforced strap, one or two print colors, barcode-ready packing.
- Premium alumni gift: 14 oz canvas, double-layer flap, metal hardware, inner pocket, upgraded hangtag.
- Natural canvas: approve seed flecks, slubs, and shade range before bulk cutting.
- Dyed canvas: require lab dip, bulk shade approval, dye-lot MOQ, and reorder shade-risk notes.
Choose decoration for the art, not the catalog
Spot-color screen printing is usually the safest decoration method for canvas messenger bags sold through university bookstores. It works well for one to three solid-color marks, school names, bookstore logos, mascot silhouettes, department marks, and event graphics. The buyer should still define print size, color count, Pantone references, registration expectations, and whether the ink hand should be soft, standard, or heavier coverage.
Other decoration methods can be right when the artwork calls for them. Heat transfer can handle gradients, photographs, and full-color art, but it must be tested on the actual canvas. A transfer that looks sharp on smooth fabric may feel too plastic, lift at the edges, or crack across a flap fold. Embroidery can suit small marks or patches, yet large stitched seals may pucker the flap. Woven patches and sewn labels can raise perceived value, but they add separate approvals for thread colors, border shape, patch placement, and attachment stitching.
Artwork needs a manufacturing review before screens or transfers are produced. Tiny reversed text, delicate serif letters, tight mascot outlines, small trademark symbols, and thin rules may fill in or break up on canvas texture. Ask the factory to state the minimum line width, smallest readable text height, and minimum gap for reversed details. If the mark is licensed, any simplification or line-thickening should be cleared by the university, licensing partner, or brand manager. The factory should not make those changes silently.
- Use screen print for solid university names, bookstore marks, department logos, and simple mascot art.
- Use heat transfer only after checking hand feel, edge adhesion, and bend performance on the actual canvas.
- Use woven patch or sewn label when premium presentation is worth extra proofing and sewing cost.
- Avoid tiny reverse text and delicate lines unless a strike-off proves readability.
- Ask for minimum line width, smallest text height, and registration tolerance before approving screens.
Control the proofing sequence
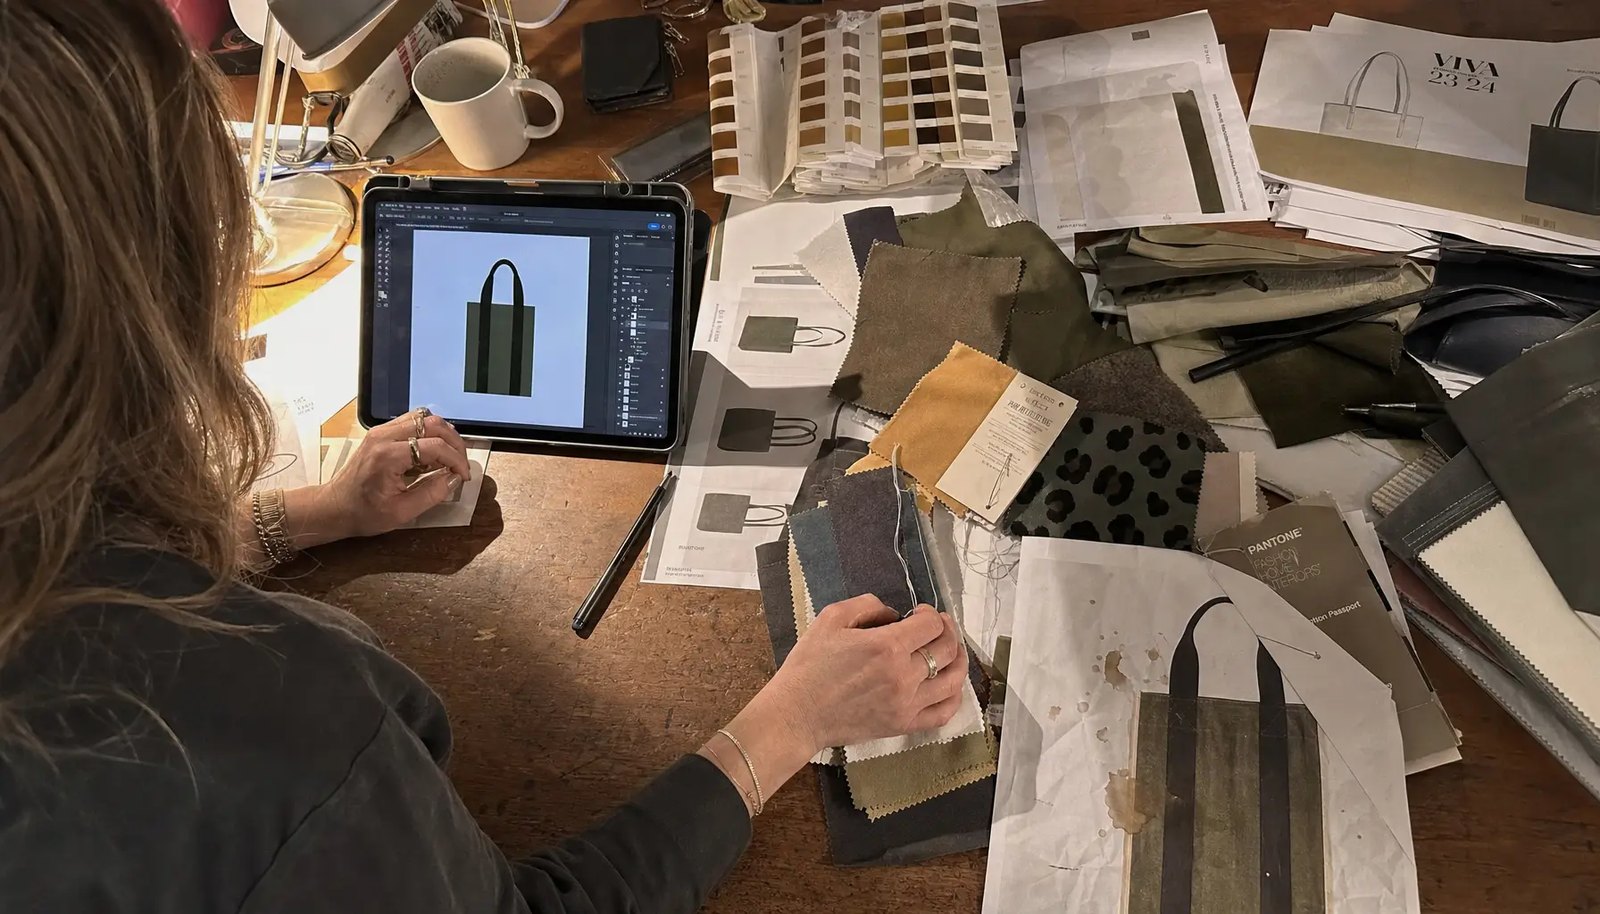
The proofing sequence should be written into the purchase order or approval calendar. Start with a digital proof that shows the logo file name, version date, Pantone references, print dimensions, placement measurements, flap outline, closure position, and non-print zones. This proof is useful, but it is not enough. It cannot prove opacity, curing, surface texture, fabric shade interaction, or the way the flap hangs after sewing.
The fabric strike-off is the first physical test of decoration quality. It should be printed on the same canvas color and finished weight planned for bulk, using the same ink system, mesh or screen setup, and curing method. If the logo is large, request the strike-off at actual size. If that is not practical, include the most difficult details at actual size: mascot outline, reverse lettering, trademark symbol, serif text, or thin rules. Do not approve critical color from a phone photo alone. Lighting, camera settings, and screen brightness can hide real problems.
The sewn pre-production sample is where the full product either comes together or exposes gaps in the spec. It should include final fabric, final print, strap, hardware, reinforcement, pockets, label placement, hangtag, barcode position, carton mark, and packing fold. The top-of-production sample or first bulk piece then confirms that the production line is following the approved standard. For remote approvals, ask for ruler photos from fixed reference points, close-ups of print edges, hardware placement shots, and first-carton packing photos.
- Digital proof: confirms artwork version, scale, orientation, placement, and Pantone intent.
- Strike-off: confirms real ink color, coverage, edge sharpness, opacity, hand feel, and curing.
- Pre-production sample: confirms construction, trim, logo position, labels, and packing fold.
- Top-of-production check: confirms bulk output before all panels are printed or all bags are sewn.
- Final inspection: confirms AQL sampling, measurements, print quality, sewing, labels, packing, and cartons.
Make print acceptance measurable
A useful print proofing checklist turns visual preferences into measurable acceptance criteria. For controlled flap artwork, plus/minus 3 mm placement tolerance is often achievable when printing on cut panels and when sewing is stable. For larger casual body prints, plus/minus 5 mm may be more realistic. If the logo must align tightly with a flap curve, snap, buckle, zipper, or centered wordmark, disclose that before quoting. The supplier may need jigs, slower handling, more inspection, and a higher reject allowance.
Placement should be measured from sewn reference points, not from the edge of a loose panel only. Useful points include the flap top seam, left and right flap edges, lower flap edge, closure centerline, and nearby stitch lines. For multi-color prints, define registration in terms an inspector can use: no visible misalignment that changes the logo shape, creates color shadowing, or reduces text readability. If the mark contains a seal, mascot face, or formal university wordmark, identify the details that matter most.
Color approval belongs on fabric. Pantone references are essential for communication, but coated-paper chips do not predict ink appearance on cotton canvas. Natural canvas can make colors look warmer and less saturated. Dyed canvas can shift them again. If exact university color compliance is required, document whether visual approval under consistent lighting is acceptable or whether a measured color tolerance will be used by a qualified inspector. Either way, bulk should be compared to the approved fabric strike-off, not to a monitor.
- Placement: plus/minus 3 mm for controlled flap artwork; plus/minus 5 mm for larger casual prints unless otherwise agreed.
- Measurement: use sewn flap top seam, side edges, lower edge, and closure centerline as reference points.
- Color: compare bulk to approved fabric strike-off under consistent light, not to a phone photo.
- Coverage: reject obvious pinholes, weak deposit, bleeding, unintended canvas show-through, or excessive ink buildup.
- Durability: require agreed tape-pull, dry-rub, wet-rub, and bend checks after full curing.
- Readability: small text, mascot details, and trademark marks must match the approved strike-off standard.
Ask for an itemized quote
One blended unit price is not enough for a B2B bookstore order. Different suppliers may appear far apart on price because they are not quoting the same bag. One may assume 10 oz stock canvas, plastic adjuster, no inner pocket, one-color print, and bulk carton packing. Another may include 12 oz finished canvas, a metal slider, double-layer flap, reinforced seams, hangtag, barcode sticker, and individual packing. Without itemized assumptions, the lowest price can quietly remove the controls needed for retail readiness.
Ask suppliers to break out the base bag cost, fabric upgrade, print cost, screen or setup charges, strike-off fee, sample fee, hardware upgrade, pocket or lining cost, label application, hangtag, barcode, individual packing, inland freight, carton dimensions, gross weight, net weight, and CBM. This makes negotiation more practical. If the target price is too high, the buyer can decide whether to reduce canvas weight, simplify hardware, remove an interior feature, reduce print colors, or change packing rather than pressuring the factory to cut quality invisibly.
MOQ should also be explained. Natural stock canvas with a standard pattern and one-color screen print may support a smaller bookstore test. Dyed fabric, custom metal hardware, woven labels, complex pockets, and retail packing usually raise MOQ and lead time. A low MOQ is not automatically a red flag, but the buyer should ask what is excluded. Setup fees, sample charges, screen costs, barcode application, inland freight, and courier fees can change the true landed cost.
- Quote base bag, fabric weight, print method, print size, color count, hardware, labels, and packing separately.
- Ask whether screen charges, strike-off fees, sample fees, and courier costs are refundable or credited to bulk.
- Request carton dimensions, pieces per carton, gross weight, net weight, and CBM for landed-cost calculation.
- Confirm MOQ by fabric color, print color count, trim, label program, and packing method.
- Compare suppliers only after product specifications and quote assumptions are aligned.
Inspect sewing, trim, and load points
Print presentation depends on sewing quality. A centered logo still looks wrong if the flap twists, the binding pulls unevenly, or the strap makes the bag lean. The flap should hang flat enough for retail display, and the lower edge should not curl into the artwork. Inspect the sample empty and lightly loaded. Messenger bags change shape when they carry notebooks, folders, tablets, or a small laptop, so shelf appearance alone does not tell the full story.
Stress-bearing areas need defined reinforcement. Strap ends should use box-X stitching, bartacks, or another approved reinforcement method rather than a simple straight seam. Side seams, bottom corners, flap attachment, pocket openings, and closure points should be checked for stitch density, skipped stitches, thread tension, backstitch security, and loose-thread trimming. If the buyer expects the bag to carry heavier books, state a practical use requirement instead of assuming every messenger bag is built for heavy textbook loads.
Hardware choices affect both cost and quality control. Metal sliders and buckles improve perceived value, but they require finish control and may mark the print during packing if they sit against the flap. Plastic adjusters reduce cost and avoid plating variation, although they may feel too basic for premium bookstore retail. Magnetic snaps look clean but can create pressure marks if placed behind the logo. Velcro is economical, yet it can collect lint and change the product feel. Each trim item needs material, size, color, function, and substitution rules in the approved spec.
- Check stitch density, seam straightness, skipped stitches, thread tension, binding, and loose-thread trimming.
- Inspect strap attachments, side seams, bottom corners, flap seam, pockets, and closure points as stress areas.
- Confirm hardware material, size, finish, function, and approved-substitute rules before bulk production.
- Check whether snaps, buckles, sliders, or zipper pulls can press into or abrade the printed logo.
- Review the bag empty and lightly loaded to confirm flap alignment and shelf presentation.
Plan labels and packing early
University bookstore orders can fail operationally even when the bag itself is well made. Labels and carton marks are often the reason. If bags ship directly to a campus store, distributor, event-kit packer, or 3PL, the receiving team may require UPC/EAN labels, SKU stickers, PO numbers, carton sequence numbers, destination marks, or routing-guide information. The factory needs those files and instructions before packing starts, not after cartons are sealed.
Packing should protect the printed flap. A sharp fold across the logo can leave pressure lines, especially on heavier ink deposits. Hardware should not sit directly against the decorated area. If bags are individually polybagged, confirm applicable suffocation warning requirements and make sure the barcode remains scannable. If the buyer wants reduced-plastic packing, test paper bands, tissue, or master polybags against dirt, moisture, abrasion, and warehouse handling. Natural canvas shows stains quickly, so minimal packing should be chosen deliberately.
The carton plan affects landed cost and product condition. Overpacking may reduce carton count, but it can also crush flaps, crease prints, and slow receiving. Request pieces per carton, carton dimensions, gross weight, net weight, and CBM before production. Set a maximum carton gross weight that campus or warehouse staff can handle safely. During inspection, require the inspector to open packed cartons and check real packing, not only loose samples staged on a table.
- Approve fold direction and confirm no sharp crease crosses the printed logo.
- Separate hardware from the print with tissue, fold position, or controlled strap placement where needed.
- Define individual polybag, paper band, tissue wrap, master polybag, or bulk carton packing in the RFQ.
- Require barcode placement, hangtag attachment method, country-of-origin marking, SKU label, and carton marks.
- Set carton quantity, maximum gross weight, dimensions, and CBM before shipment booking.
Build the calendar backward
Lead time starts after the supplier has complete specifications, artwork, approvals, and payment terms. Before production can run smoothly, the factory may need artwork review, lab dips, fabric strike-offs, sample sewing, courier transit, buyer review, material purchasing, cutting, printing, curing, sewing, trimming, inline inspection, final inspection, packing, booking, and export documents. Dyed fabric, custom labels, metal hardware, and woven patches can easily become the critical path.
University bookstore demand is usually tied to fixed dates: orientation, move-in, commencement, homecoming, alumni weekends, department events, and seasonal retail resets. Missing the date can make an otherwise acceptable order commercially weak. Work backward from the required in-store date and include time for licensing review, sample transit, buyer approval, final inspection, freight, customs, and campus receiving. If air freight may be used as a contingency, estimate carton volume early because messenger bags are bulkier than flat promotional items.
Repeat orders should be faster only when the buyer keeps good records. Store the approved artwork file, Pantone references, fabric swatch, strike-off, pre-production sample notes, pattern dimensions, hardware specification, label files, carton plan, and inspection report. Before reordering, confirm whether the same fabric, ink system, hardware, and pattern are still available. If any component changes, ask for a confirmation strike-off, trim photo, or limited sample before bulk release.
- Start the production calendar from final approval milestones, not from the first inquiry email.
- Reserve review time for bookstore buyers, licensing teams, and campus brand managers.
- Use first bulk-piece photos to catch drift before all panels are printed or sewn.
- Confirm freight mode early because canvas messenger bag cartons can be volume-sensitive.
- Maintain approved standards so repeat orders do not restart proofing from zero.
Specification comparison for buyers
| Spec decision | Recommended option | When it fits | Buyer risk to check |
|---|---|---|---|
| Body fabric weight | 12 oz / about 407 GSM finished cotton canvas for standard bookstore retail; 14 oz / about 475 GSM for premium alumni, orientation, or gift programs | 12 oz gives enough structure for a messenger silhouette while keeping sewing, carton weight, and retail price practical; 14 oz creates a firmer hand for heavier daily use | Some quotes use 10 oz / about 339 GSM canvas or quote greige weight instead of finished weight; require finished GSM tolerance, fabric swatch, and finished bag weight target |
| Canvas finish and color | Natural unbleached canvas for heritage styling; bleached canvas for cleaner contrast; dyed canvas for school-color programs; washed canvas only when a softer look is intentionally approved | Natural canvas suits dark one-color marks; bleached canvas supports brighter artwork; dyed canvas helps build coordinated bookstore collections | Natural seed flecks, slubs, and shade bands need an approved acceptable range; dyed lots require lab dips, shade tolerance, and dye-lot continuity for reorders |
| Flap construction | Single-layer flap with bound or folded edge for value programs; double-layer flap with interlining or facing for premium structure and a flatter print surface | Single layer controls cost and weight; double layer helps the flap hang flatter and can reduce distortion when displayed on shelf | A loose printed panel can look correct while the sewn flap shifts; approve the logo on a sewn pre-production sample and measure from fixed sewn reference points |
| Print method | Spot-color screen print for most bookstore marks; heat transfer for gradients or photo art; woven patch or sewn label for premium branding; embroidery only for smaller marks where puckering is acceptable | Screen print is usually best for 1-3 color university names, bookstore logos, mascot silhouettes, department marks, and event graphics | Pantone colors shift on cotton canvas; require a strike-off on the same fabric color, weight, ink system, mesh/cure process, and print size planned for production |
| Artwork placement | Measured placement on the flap, typically centered horizontally and controlled from top seam, side edges, lower flap edge, and closure centerline | Works for licensed marks, retail shelf visibility, and consistent presentation across cartons and repeat orders | Visual-only placement approval leads to low, tilted, or hardware-conflicted logos; specify plus/minus 3 mm for controlled flap prints or plus/minus 5 mm for larger casual prints |
| Strap and hardware | 1.25-1.5 in cotton webbing strap with adjustable range defined; metal slider for premium orders or plastic adjuster for budget programs; reinforced box-X or bartack stitching at strap ends | Cotton webbing matches the canvas look; metal hardware improves perceived value; plastic hardware lowers cost and avoids plating variation | Quotes often omit strap length, hardware material, plating color, pull strength, and substitute rules; define all trims before comparing unit prices |
| MOQ logic | MOQ based on stock fabric availability, dyeing, cut-panel efficiency, print setup, trim sourcing, labeling, and packing requirements | Natural stock canvas with one-color print can support smaller bookstore tests; dyed fabric, custom hardware, and complex labels usually require higher commitment | A low MOQ may exclude setup, screens, sample fees, barcode application, or inland freight; request itemized costs and the assumptions behind the MOQ |
| Interior features | Open main compartment for value retail; slip pocket, zipper pocket, pen pocket, or padded sleeve for premium retail price points | Open construction reduces cost and QC risk; pockets improve utility for students carrying tablets, notebooks, chargers, or small laptops | Pocket dimensions, lining, zipper grade, stitch location, and laptop fit must be included in the spec; otherwise the supplier may use a generic pattern |
| Labels and retail readiness | Factory-applied hangtag, UPC/EAN barcode, SKU sticker, care label, country-of-origin label, carton label, and licensing label where required | Useful when shipping directly to campus stores, distributors, event-kit packers, or 3PL receiving docks | Wrong barcode placement, missing COO label, unapproved trademark label, or incorrect carton marks can delay receiving even when the bag itself passes product QC |
Buyer checklist before sampling
- Define finished bag dimensions with tolerances: width, height, gusset depth, flap width, flap drop, flap curve or square shape, strap width, strap adjustable range, closure position, and pocket dimensions.
- Specify canvas as finished fabric weight in both oz and GSM, with an acceptable tolerance such as plus/minus 5% unless a tighter range is agreed; state whether weight is greige, dyed, washed, laminated, or finished.
- State fabric composition, weave, color standard, finish, and acceptable surface character, including seed flecks, slubs, shade bands, neps, and minor natural cotton variation.
- Attach vector artwork and include Pantone references, actual print size, number of colors, minimum line width, smallest text height, registration requirement, and licensed-artwork restrictions.
- Require a fabric print strike-off on the same canvas color, same finished weight, same ink type, same mesh/screen setup, and same curing method intended for bulk production.
- Approve one sewn pre-production sample with correct canvas, logo, flap geometry, strap, hardware, reinforcement stitching, pockets, labels, hangtag, barcode location, carton mark, and packing fold.
- Set measurable placement tolerance, commonly plus/minus 3 mm for controlled flap artwork and plus/minus 5 mm for larger body artwork, measured from sewn reference points rather than loose panels only.
- Define sewing requirements: seam allowance, stitch density target, thread color, edge binding, bartack or box-X reinforcement, backstitch security, loose-thread trimming, and unacceptable skipped stitches.
- Confirm all retail compliance items: university licensing label, trademark notice, UPC/EAN barcode, retail price ticket, country-of-origin label, care label, fiber content label if applicable, and carton routing guide.
- Specify packing: fold direction, printed-surface protection, individual polybag or paper band, desiccant if needed, units per inner pack, units per export carton, carton mark format, and maximum carton gross weight.
Factory quote questions to send
- What exact finished canvas weight is quoted in oz and GSM, and what tolerance will you control at incoming fabric inspection? Please state whether the value is greige, dyed, washed, or finished weight.
- Is the canvas stock fabric or made to order? If dyed, what are the fabric MOQ, dye-lot MOQ, lab-dip lead time, shade tolerance, and process for approving bulk shade before cutting?
- What finished bag dimensions are included in the quote, and what dimensional tolerance will you guarantee after sewing for width, height, gusset, flap drop, and strap length range?
- Will the logo be printed on cut panels before sewing or on the finished flap after assembly? What placement tolerance, registration tolerance, and surface-flatness risks apply to the quoted method?
- Which print method is quoted, how many colors are included, what maximum print size is assumed, and are screen charges, setup charges, strike-off charges, and re-screen charges listed separately?
- Can you provide a strike-off on the same canvas color, same fabric weight, same ink system, same screen mesh, and same curing process planned for bulk production?
- What minimum line width, smallest readable text height, and minimum gap between reversed details do you recommend for this canvas texture and print method?
- What ink system is quoted for cotton canvas, and what curing, tape-pull, dry-rub, wet-rub, and bend-check standards can you support before packing?
- What sample types are included: fabric swatch, lab dip, print strike-off, proto sample, salesman sample, pre-production sample, or top-of-production sample? What is the lead time and cost for each?
- What stitching reinforcement is included at strap joints, flap stress points, side seams, bottom corners, pocket corners, and closure points? Please specify bartack count, box-X stitch, seam type, or other method.
Quality-control points to confirm
- Verify fabric weight by cutting and weighing a measured swatch from each fabric lot, converting to GSM, and comparing against the agreed finished-weight tolerance.
- Check canvas shade against the approved swatch or lab dip under consistent lighting; separate natural cotton character from defects by documenting acceptable seed flecks, slubs, and shade variation.
- Inspect fabric defects before cutting, including oil marks, stains, holes, weaving lines, heavy neps, yarn contamination, shade panels, and visible flaws that would land on the flap or front body.
- Confirm print color against the approved fabric strike-off, not against a monitor, phone photo, or coated-paper Pantone chip alone.
- Measure print placement from sewn reference points: flap top seam, left and right flap edges, lower flap edge, closure centerline, and any hardware that visually affects the logo.
- Inspect print edge sharpness on canvas texture, including mascot outlines, serif letters, fine rules, reverse text, trademark symbols, and small bookstore or department names.
- Check print coverage for pinholes, weak ink deposit, bleeding, excessive ink build, rough hand feel, canvas show-through, inconsistent opacity, and curing variation across the artwork.
- Perform agreed print adhesion and durability checks after curing, such as tape pull, dry rub, light wet rub, and bend/fold checks suitable for cotton canvas ink.
- Measure finished bag size after sewing: width, height, gusset, flap drop, flap symmetry, strap width, strap adjustable range, closure alignment, and pocket dimensions.
- Inspect stitch density, seam straightness, skipped stitches, thread tension, backstitch security, loose threads, edge binding, and reinforcement at strap attachments, side seams, bottom corners, flap seams, and pocket openings.