Why print proofing matters on canvas messenger bags
Canvas messenger bags look simple from a distance, which is exactly why proofing gets rushed. On a supplier sample table, the logo may look clean and centered, but once the bag is sewn, folded, packed, and shipped, the same logo can read differently. Texture changes how ink sits. Seams shift how a panel hangs. A strap or pocket can pull the eye away from the artwork. For tech startups buying bags for onboarding kits, events, field sales, or retail resale, those small differences affect how polished the whole program feels.
Proofing is not just about approving a graphic. It is a control step that ties together the fabric, the construction, the decoration method, and the packing format. If you approve a mockup without checking how the print behaves on real canvas, you are only approving intent, not output. Procurement teams should treat the proof as a production gate, because that is where avoidable defects are cheapest to catch.
This matters even more when the order has more than one stakeholder. Marketing wants the logo to look sharp. Operations wants predictable receiving and carton counts. Finance wants a quote that does not balloon after setup fees, packing changes, or remake risk are added. A disciplined proof process gives each group the same reference before the factory cuts a single panel.
A usable proof package should answer four questions without guesswork: can the factory reproduce the logo at the required size, can the bag construction hold that placement after sewing, can the chosen print method survive normal handling, and can the shipment be received in the format your warehouse expects. If any of those is vague, the quote is not ready for a purchase order.
- Use the proof to confirm size, placement, ink coverage, and fabric behavior.
- Treat one accepted sample as the reference for all bulk cartons.
- Separate logo approval from bag construction approval so defects are easier to isolate.
- Make the proof review measurable enough that a second supplier could reproduce it.
Start with the right canvas spec, not the logo file
A canvas messenger bag quote should start with the bag, not the artwork. Fabric weight drives structure, print behavior, and price more than many buyers expect. For most tech-startup programs, 12oz to 16oz finished canvas is the practical range. Lighter fabric can work for conference handouts and low-load kits. Heavier fabric is usually a better fit when the bag needs to carry a laptop, charger, notebook, adapter kit, or other daily-use items. If the bag includes a gusset, zipper top, flap, or reinforced strap anchors, the stronger end of that range is often worth the extra cost.
Do not accept a vague canvas description. Ask the supplier whether the weight is finished weight or greige weight, because the answer changes what you are actually buying. Ask how the cloth is dyed, whether there is a lining, and whether the bag panels are cut before or after decoration. Those details affect shrink behavior, print consistency, and whether different panels in the order will match in shade. A quote that hides those variables usually creates confusion later in sample approval.
The spec sheet should read like a production instruction. Include finished dimensions, canvas weight, lining material if any, strap width, closure type, pocket count, reinforcement points, and any hardware used. It also helps to define where the measurements are taken. For example, write bag width at the top opening, bag height from base to opening, gusset depth at the widest point, strap length at the shortest adjustment, and print area in millimeters. That removes ambiguity when the supplier measures a sample differently from your team.
If you expect to compare multiple suppliers, make the spec sheet precise enough that every quote can be normalized. A bag with the same logo can still be a different product if one supplier uses thinner canvas, narrower webbing, or a shorter strap drop. Procurement should compare like for like before looking at price.
- 12oz canvas: lighter promotional use, lower freight weight, but more visible seam impression.
- 14oz canvas: balanced option for mixed retail and corporate use.
- 16oz canvas: better structure, better for heavy inserts, and usually more forgiving in premium print presentation.
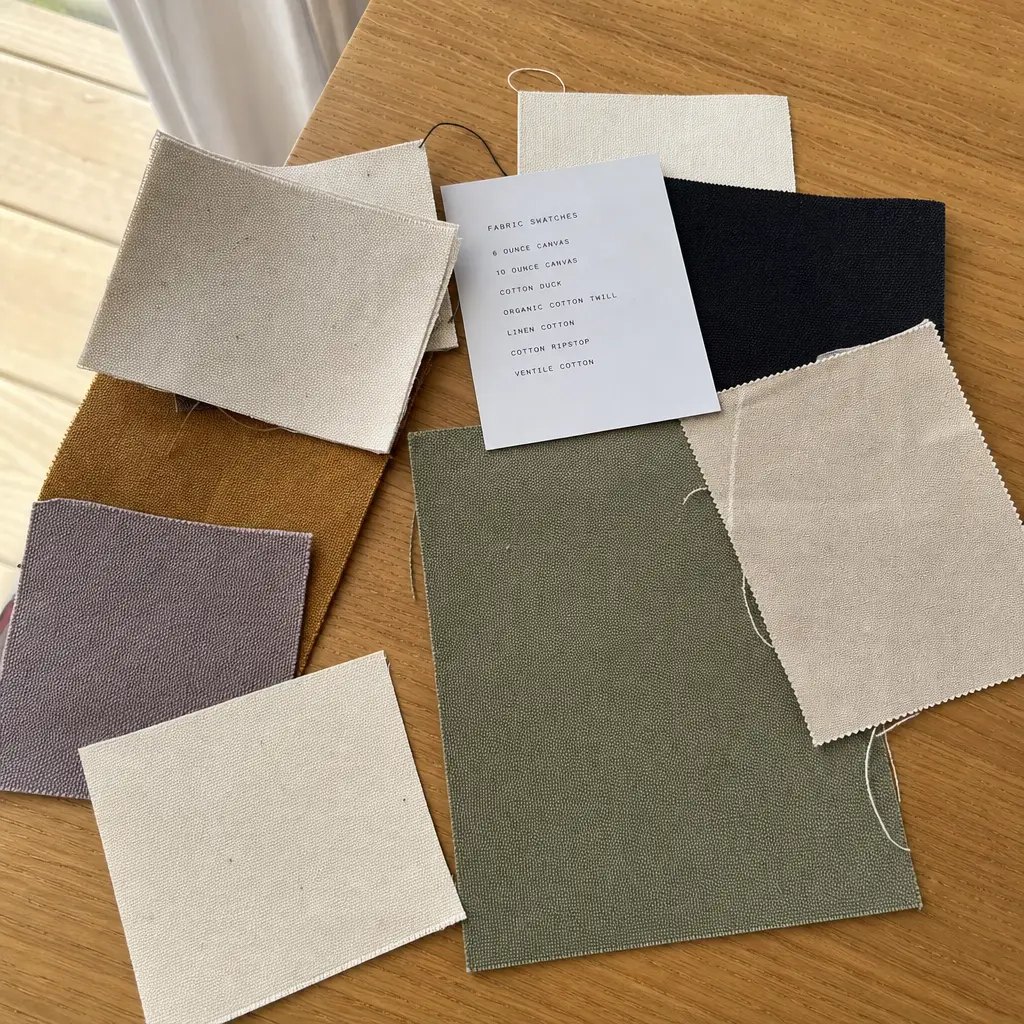
- Ask for a fabric swatch before approving color or print method.
Choose the print method by artwork complexity and order size
Screen print remains the most dependable method for many canvas messenger bag programs. It is durable, legible, and cost-effective when the logo uses one to three solid colors. That said, the buyer still needs to ask what ink is used, how it is cured, and whether the print is applied before or after the bag is sewn. On textured canvas, those details affect ink coverage, line sharpness, and how the print holds up on fold lines.
Transfer methods can make sense when the order is small, the artwork is complex, or the timeline is short. They are useful for gradients, fine text, or color-rich logos that would be costly to separate into screens. The tradeoff is that the buyer should verify rub resistance, edge lift, and fold durability on the actual canvas, not just a digital proof. A flat artwork file cannot show how a transfer reacts after the bag has been folded into a carton or carried against other items.
Embroidery and woven patches belong in a different buying conversation. They create a more premium feel and can help the bag stand out in a crowded merch program, but they also change the sample process and the construction risk. Dense embroidery can distort lighter canvas if the panel is not stabilized properly. A woven patch needs clean placement and a consistent trim lot. If the supplier recommends either method, ask when it is applied and whether the factory has to adjust the panel layout to support it.
A useful quote should state the maximum printable area, the minimum readable text size, and the narrowest line width the chosen method can hold. Those limits are not the same for every factory, and they should never be implied. They should be written down so procurement can compare suppliers on the same basis and avoid surprises after artwork handoff.
- Screen print: best for solid logos, repeat orders, and stable unit economics.
- Heat transfer: useful for detailed art, smaller MOQ, or color-heavy graphics.
- Embroidery or patch: best for premium brand positioning, but confirm fabric support and stitch density.
- Ask for a rub or fold test if the bag will be handled often.
Use MOQ logic to filter quotes that look cheap
A low unit price is not always a good quote. In canvas messenger bag sourcing, MOQ is often where the true cost structure hides. Ask the supplier to separate MOQ by style, bag color, logo color count, and packing variant. A quote that looks attractive at first glance may require a larger run per print color, add separate setup fees for each placement, or push the order into a simplified fabric option once the bulk order starts.
For startup buyers, the right MOQ is the one that supports the launch plan, not the smallest number a salesperson can offer. If the program needs one color for internal teams and another for event giveaways, the quote should show the real cost of those splits. If the design includes a woven label, patch, or special hang tag, the supplier should show the cost of that add-on separately so you can see how the program scales.
Be careful with decoration-driven MOQ pressure. A simple one-color screen print can sometimes make a pilot order viable, while embroidery or multi-color transfer may be better only once the program has proven demand. That does not mean you should always choose the cheapest method. It means the quote should show the tradeoffs clearly enough that the buyer can judge whether the first run is a test, a channel launch, or a larger replenishment order.
Also ask about reorders. Can the factory hold the screen, artwork file, pattern, or trim spec for the next round? Do repeat orders reduce setup charges? Those questions matter if the startup plans seasonal campaigns, conference restocks, or partner distribution. A procurement team that asks them early can avoid rebuilding the same proof package twice.
If a supplier offers an unusually low MOQ, ask what changes when you go from sample to bulk. Sometimes the low MOQ comes with a weaker fabric grade, a looser packing standard, or a higher per-unit setup cost. That may be acceptable for a pilot, but it should be explicit before the purchase order is issued.
- Ask for MOQ by style, color, logo color count, and packaging variant.
- Check whether setup costs are refundable on repeat orders.
- Treat any quote without a clear MOQ matrix as incomplete.
- Compare the cost of a small pilot order against the cost of a normalized bulk run.
What a useful supplier comparison actually looks like
A good supplier comparison is a sourcing matrix, not a pile of quotes. To compare canvas messenger bags fairly, every vendor should be quoting the same target spec: the same canvas weight, the same bag dimensions, the same print method, the same placement, and the same packing format. If one supplier includes individual polybags and another quotes bulk packing, the unit prices are not directly comparable. Normalize first, then compare.
The comparison should also capture proofing behavior. How fast does the supplier answer artwork questions? Do they provide annotated proofs with measurement points, or only a polished product photo? Can they explain why a logo needs to move because of a seam, pocket, or gusset? Those responses reveal whether the supplier is working from production reality or simply relaying messages between departments.
Procurement should also compare accountability. Who signs off the sample? Who owns the color standard? Who is responsible if the bulk shipment drifts from the approved sample? If the vendor is a trading layer rather than a direct factory, ask who actually controls cutting, printing, sewing, and packing. That matters when the order needs a quick correction or a remake decision.
A fair comparison should include the same acceptance criteria for each supplier. If one quote includes tighter placement tolerance or a specific daylight inspection step, write that difference down. A quote can be cheaper because it omits the controls that keep the order stable. The lowest line item is not always the lowest risk.
- Use one reference sample across all suppliers if possible.
- Ask each seller to quote the same fabric weight, print method, and packing spec.
- Compare revision speed during proofing, not only final unit price.
- Document who owns approvals, remakes, and late changes.
Supplier route comparison for tech-startup bag programs
When comparing supplier routes, use five questions: who controls the fabric, who prints the logo, who sews the bag, who packs the cartons, and who answers when the sample fails. A factory that owns all five steps usually has fewer handoffs and a cleaner proof trail. A trading company can still be the right choice if it can show direct visibility into the factory and a disciplined sample process, but the buyer should ask for that clarity instead of assuming it.
The proof path should be easy to describe in order. Does the artwork go first to a screen plate, a digital strike-off, or a physical sample? Is the print applied on cut panels or on finished bags? Is the sample measured before or after final sewing? Those answers tell you where distortion can enter the process and how much time the supplier needs to correct it.
For tech startups, route selection often comes down to speed versus control. If the bags are for an internal summit, simple packing and a fast sample loop may matter most. If they are for retail or partner distribution, repeatability, carton consistency, and cleaner finishing usually matter more. The supplier route should fit the business purpose, not the other way around.
Ask for the same proof package from every vendor: one annotated quotation, one artwork proof, one pre-production sample, and one packing sheet. If a supplier cannot provide those pieces clearly, that is a warning sign. It means bulk communication may be harder than the quote suggests.
On messenger bags, post-sewing inspection matters. A logo can look centered on a flat cut panel and still drift after the gusset, seam, or pocket is attached. A route that checks the finished bag is usually safer than one that checks only components.
- Define the measurable checks around strap pull, buckle function, flap alignment, pocket zipper cycle, lining seam check, hardware corrosion, and carton rub review.
- Add tolerance ranges only where the buyer truly cares, and ask for photos that show the measurement point, not just a finished product overview.
- For procurement decisions, the inspection note should say who checks, when they check, and what evidence is required.
- Photos without measurements are often not enough for remote approval.
Proofing questions that expose hidden production issues
The best proofing questions are practical. Ask where the logo sits relative to the seam, whether the print is applied before or after assembly, and how the supplier controls registration on textured canvas. If the answer is vague, the bulk order is exposed to shift, bleed, or uneven placement. The same logic applies to strap length, flap alignment, zipper track length, and pocket symmetry.
It also helps to ask about line-side controls. How does the factory check that the front and back panels are cut to the same template? How are print positions measured on the first and last piece of a run? What happens if the logo looks centered on the cut panel but shifts after the seam is sewn? Those questions show whether the supplier understands how stitching affects decoration placement.
Repeatability matters as much as the first sample. If the first proof looks good, ask what happens on the second or third pull. That is where weak artwork interpretation, under-cured ink, or inconsistent cutting often shows up. If the supplier cannot reproduce the same result twice, bulk consistency is at risk.
Do not skip functional proofing. A messenger bag can look fine and still fail in use if the strap is too short, the flap does not close cleanly, or the zipper catches the lining. Ask the factory to test fit the actual contents you expect to carry, such as a 13-inch laptop sleeve, charger, notebook, or demo folder. That is a more useful approval step than judging the sample by eye alone.
If the logo sits close to a seam or pocket edge, request the minimum safe distance in millimeters and show it on an annotated layout. A small shift can change how the brand reads on the finished bag, especially when the canvas is textured and the bag is filled.
- Confirm whether print is on cut panels or on the finished bag.
- Verify position tolerance in millimeters, not just 'centered'.
- Approve color against Pantone or a physical standard under daylight.
- Ask for a repeat sample or second strike-off if the first result is borderline.
Set acceptance criteria before the sample leaves the factory
A sample only works if the acceptance criteria are set before it is made. The buyer should define the approved fabric weight, logo position, stitch line, bag measurements, and packing format before the pre-production sample starts. Otherwise, the supplier may think it is following one standard while the buyer expects another. That gap creates disputes later, especially when the bulk order arrives and both sides point to a different version of the spec.
Use measurable approval points. For example, require print placement within a stated tolerance from the seam or top edge, no visible cracking on fold lines, and strap anchors that survive a simple pull test aligned to the bag's intended use. Those are practical standards the factory can actually produce to and the buyer can verify on receipt.
The approval record should include photos, a signed measurement sheet, and the approved color reference. If the supplier revises artwork, keep version control tight so everyone knows which file was approved. Even a small change, such as a logo enlarged by a few millimeters, can affect how the print sits on the panel after sewing.
For teams with several stakeholders, split the approval into three parts: artwork, sample, and packing. Marketing may approve the graphic while operations needs to verify carton counts, label format, and warehouse handling. Separating those approvals makes the sign-off process clearer and reduces the risk that one team assumes another already checked the spec.
When possible, put the tolerance into the PO or spec sheet rather than relying on email. A line such as 'print placement ±5 mm from centerline, bag size ±10 mm, strap length ±15 mm' gives the supplier a production target and gives the buyer a fair inspection benchmark.
- Measurement sheet signed off with the sample.
- Color standard confirmed under neutral light.
- Bulk start blocked until the signed reference is returned.
- Keep version numbers on artwork, sample photos, and packing sheets.
Packing and carton data can change your quote more than expected
Packing affects cost, container utilization, and claims handling. A bag packed loose in bulk is cheaper than an individually polybagged unit, but retail buyers often need a cleaner receiving standard. Once you add a polybag, insert card, barcode label, or carton mark, the quote can move more than expected. That is why the packing spec should be part of proofing, not an afterthought.
Ask for carton dimensions, gross weight, and pieces per carton early. Those numbers affect freight planning and warehouse receiving. If the supplier cannot give them until the end of the sample stage, your landed cost calculation will be unstable and the schedule may slip when final packing is introduced too late. If palletization, master cartons, or export marks matter, those should be listed in the quote request too.
Packing also affects damage risk. If straps are folded too tightly, hardware can imprint the canvas. If cartons are overfilled, bags may arrive creased or crushed. If mixed lots are packed together, a warehouse may reject the shipment because the cartons do not support clean put-away. The proof package should show how the bags are folded, bundled, and boxed so the buyer can decide whether the packing is fit for purpose.
For startup programs shipping to offices, event venues, or distributors, ask whether the supplier can separate SKUs by carton, label each carton clearly, and keep piece counts consistent. That reduces inbound sorting work and lowers the chance of receiving disputes.
If the program uses retail hang tags or barcode labels, include those specs in the proofing round. Bag artwork, carton marks, and packing labels are often approved separately, but the factory still needs one source of truth before it prints anything final.
- Confirm whether bags are folded the same way in each carton.
- Request carton marks that match the PO and SKU structure.
- Check whether individual polybags increase cycle time or labor charges.
- Ask for carton dimensions and gross weight before freight booking.
Lead time risk usually hides in proof revisions and trim sourcing
A quoted lead time only means something if it includes artwork proofing, sample revision, trim sourcing, and packing preparation. Canvas messenger bags often include body fabric, lining, zipper, webbing, labels, and print consumables. If any one of those parts comes from a separate source, the schedule can stretch even when sewing capacity is ready. The weakest link is often not the sewing line; it is the component that was never fully confirmed during proofing.
Procurement teams should ask where the critical path sits. If the logo needs a custom woven label or a specific zipper color, that component can become the real bottleneck. A useful quote separates sample lead time from bulk lead time and explains what happens if artwork changes after approval. It should also say whether an in-stock trim can be substituted or whether the factory needs a new purchase order for the accessory.
Lead time also depends on buyer-side discipline. Slow responses to sample photos, late color changes, or last-minute barcode edits all add days. Set an internal approval SLA so the factory is not waiting on a decision while materials sit idle. A fast supplier cannot compensate for a delayed sign-off loop.
If timing is critical, ask for a production calendar with milestones: artwork approval, strike-off or sample approval, bulk fabric readiness, sewing start, packing start, and final inspection. That gives the startup a real schedule rather than a single promised ship date that may hide risks.
Ask the supplier to state the longest single component lead time in the program. That answer often reveals the true schedule risk faster than the headline ship date does.
- Distinguish sample calendar days from bulk calendar days.
- Confirm whether trim color matching adds sourcing delay.
- Avoid artwork changes after pre-production sample sign-off.
- Ask for a milestone schedule, not only one promised ship date.
Specification comparison for buyers
| Spec decision | Recommended option | When it fits | Buyer risk to check |
|---|---|---|---|
| Fabric weight | 12oz to 16oz finished canvas, quoted in gsm or oz with stated tolerance | Use 12oz for lighter promo kits, 14oz for balanced everyday carry, and 16oz when the bag holds laptops, chargers, or demo gear | Ask whether the quote uses finished fabric weight or greige weight; a mismatch changes hand-feel, shrink behavior, and print result |
| Print method | Screen print for simple logos, heat transfer or digital transfer for short runs, embroidery or woven patch for premium branding | Screen print fits one to three spot colors; transfers suit small MOQs or gradients; embroidery and patches suit a tactile premium look | Artwork detail, rub resistance, and edge sharpness can fail if the method does not match the design |
| MOQ route | Single-style bulk order with one colorway, one decoration method, and one packing spec | Best for repeatable SKUs and clean reorder planning | Low MOQ quotes can hide setup fees, color surcharges, packing upgrades, or fabric substitutions |
| Supplier type | Factory with in-house cutting, printing, sewing, and packing | Best when proof control, lead time, and sample accountability matter | Trading layers can slow revisions and blur responsibility if print defects appear |
| Closure and trim | Zipper top or flap with reinforced strap anchors and matched trim lot | Useful for laptops, field sales bags, and event kits | Weak zipper tape, loose stitching, or poor bar-tack placement can cause early failure |
| Artwork file standard | Vector logo with Pantone references, placement drawing, and final size in mm | Best for repeat orders and multi-supplier comparison | Raster files, missing bleed, or unapproved font substitution can shift the final result |
| Packing spec | Individual polybag or bulk pack confirmed in writing, with carton count and carton mark plan | Fits export shipments and retail receiving requirements | Wrong piece count, missing labels, or oversized cartons create inbound disputes |
| Approval stage | Signed pre-production sample with measured print placement and shade reference | Essential before mass sewing and printing starts | Skipping final sign-off often leads to bulk rejects that are expensive to reverse |
Buyer checklist before sampling
- Confirm the bag size, canvas weight, strap length, closure style, and lining spec before artwork is released.
- Request the print method, ink or transfer type, number of colors, print position, and maximum print area in writing on the quote.
- Ask the supplier to confirm whether canvas weight is finished weight or greige weight, and what tolerance they hold.
- Approve one pre-production sample with color, placement, stitch, and packing reference marks before bulk starts.
- Lock the packing spec: polybag or bulk pack, insert card, carton count, carton label format, and master carton marks.
- Ask for fabric swatches and a stitched sample if the bag uses heavy load points, hardware, or multi-color decoration.
- Compare landed cost, not only unit price, including sample fee, plate or setup charges, packing upgrades, and freight assumptions.
- Request an inspection checklist that names measurement tolerances, daylight color review, carton sampling method, and remake criteria.
Factory quote questions to send
- What exact canvas weight are you quoting, and is it finished fabric weight or greige weight?
- What tolerance do you hold for canvas weight, bag size, print placement, and stitch alignment?
- Which print method is included in the base quote, and what are the setup charges per color, placement, or size change?
- What is the minimum order quantity by style, color, logo color count, and packaging variant?
- Can you share the sample approval process, including whether we will receive a strike-off, pre-production sample, or only a digital proof?
- At what stage is the logo printed: on cut panels, on finished bags, or before final sewing?
- How do you control registration on textured canvas, and what is the allowed shift in mm?
- What is the standard lead time after sample approval, and which steps can extend it?
- How do you pack the bags for export carton load, and can you share carton dimensions, gross weight, and pieces per carton?
- What extra cost applies if we change logo size, add a woven label, request individual polybagging, or add retail hang tags?
Quality-control points to confirm
- Fabric weight matches the approved GSM or oz target within the supplier’s stated tolerance.
- Canvas weave, hand-feel, and base color match the approved fabric swatch or signed sample.
- Print color, density, registration, and edge sharpness match the signed sample under daylight or D65-style neutral light.
- Logo placement stays within the agreed positional tolerance across front, back, and side panels.
- Stitching is even, seams are secure, and strap anchors are reinforced with no loose thread clusters.
- Bag opening, zipper action, flap closure, and panel shape remain usable after a simple load and shake test.
- Hardware, lining, and binding are consistent across cartons and do not show mixed trim lots.
- Packing count per carton matches the PO, with clear outer marks and no mixed-lot packing.
- Final bulk shade variation stays inside the agreed lot range across panels and batches.
- Carton marks, SKU labels, and packing inserts match the approved packing sheet and shipper instructions.