Start with what the proof must control
For corporate gifting, a print proof is a purchasing document, not a pretty preview. It tells the supplier what must be repeated across the bulk order: the bag construction, the usable logo area, the decoration process, the color target, the placement method, and the packing presentation. If those details are missing, the approval can be interpreted too loosely by production, QC, or a subcontracted decorator.
Canvas messenger bags deserve tighter proofing than flat items because the logo sits on a sewn product. The flap may curve after assembly. A gusset can pull the front panel slightly out of square. A pocket seam may make the visual center different from the geometric center. Buckles, snaps, zipper pulls, and strap anchors can crowd a logo that looked fine in a rectangular PDF.
Before any bulk work starts, define what approval means. One proof may approve artwork only. Another may approve color and decoration but not final packing. A pre-production sample may control everything, including fabric, trim, label, stitching, folding, and carton marks. Write this down so no one has to guess later.
- Record proof version, artwork file name, approval date, approver name, logo dimensions, and placement reference points.
- Tie the proof to the final messenger bag specification, not a generic sales mockup or blank outline.
- State whether approval controls artwork only, decoration only, construction only, packing only, or full production.
- Keep a signed master sample when practical, or a dated photo set with ruler shots and close-ups.
- Require re-approval if the supplier changes fabric, trim, hardware, print method, print position, or packing.
Lock the bag before approving the logo
The bag body sets the limits for clean decoration. A procurement-ready specification should name the canvas weight in GSM and ounces, fiber composition, weave, fabric color, lining, closure type, hardware finish, reinforcement points, and finished dimensions. Common references include about 8 oz canvas at roughly 270 to 280 GSM for lighter promotional use, about 10 oz at roughly 340 to 350 GSM for many corporate messenger bags, and about 12 oz at roughly 400 GSM for a heavier hand feel. Actual conversions vary by mill and finish, so the supplier should confirm the fabric it will purchase.
A logo should not be approved against an unfinished design. If the flap changes from straight to curved, if the pocket is raised, if the buckle strap widens, or if lining adds bulk at the edge, the approved placement may no longer look right. A shift of 5 mm may be invisible on a large plain flap and very obvious when a small logo is centered between two buckles.
Use millimeters, not adjectives. Ask for finished width, finished height, gusset depth, flap height at center and side, front pocket height, seam allowance, strap anchor location, buckle position, and the maximum safe print zone. If the logo is printed on cut panels before sewing, the proof must allow for seam allowance, fabric shrinkage, panel orientation, and any movement during sewing.
- Specify canvas GSM or ounce weight, composition, weave, color, lining, and expected shrinkage.
- Confirm finished dimensions for the bag body, flap, gusset, pocket, strap, handle, buckle, zipper, snap, and label position.
- Map a safe print zone that avoids seams, folds, rivets, snaps, zippers, buckles, heavy topstitching, and strap paths.
- Request both flat panel measurements and finished bag measurements when decoration happens before sewing.
- Require proof updates when fabric weight, flap shape, hardware, closure, lining, pocket layout, or label location changes.
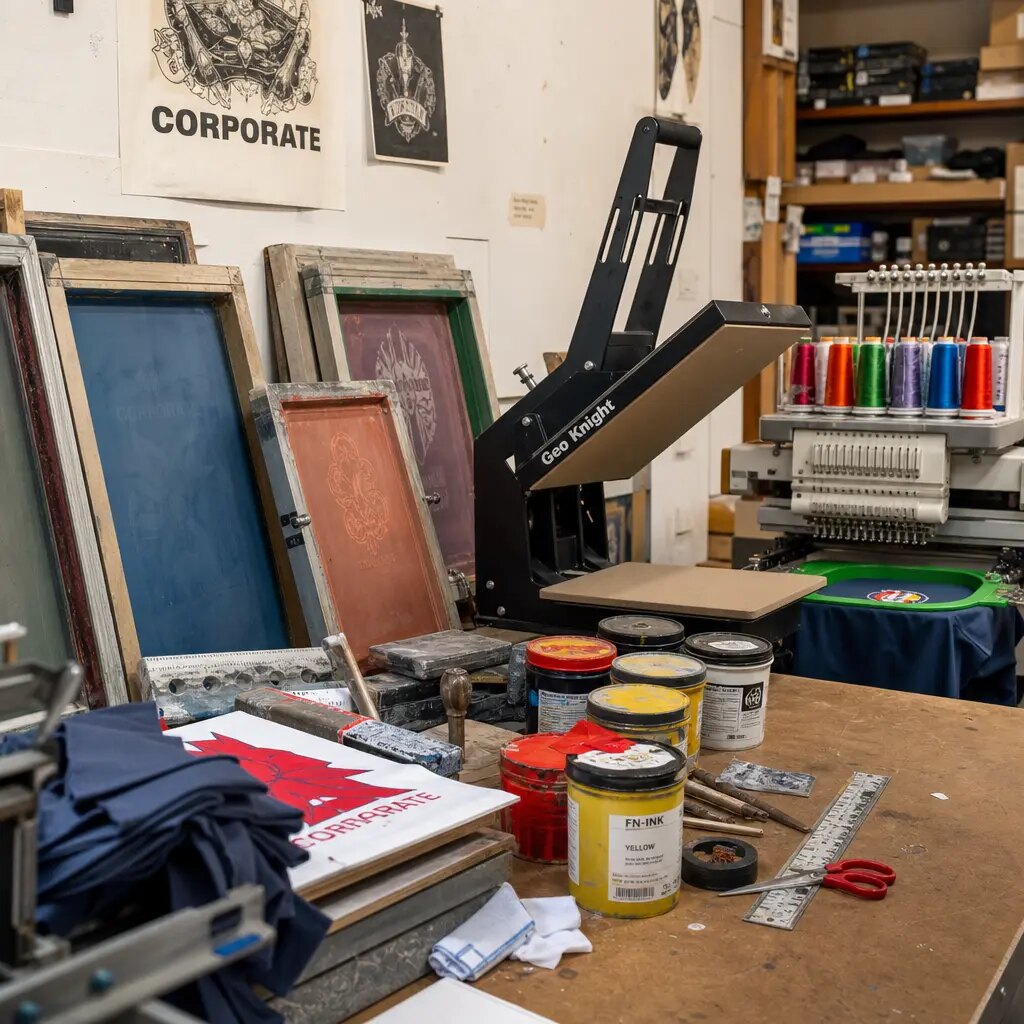
Choose the decoration method on purpose
Screen printing is often the practical choice for canvas messenger bags with simple spot-color logos. It can give strong opacity on cotton canvas and becomes efficient once screens are made. The proof should state ink type, number of colors, screen count, logo width and height, color reference, curing method, and whether an underbase is required on dark canvas. Fine reversed text and tight multi-color registration need review before approval, not after the first production run.
Heat transfer can reproduce more detail and color variation, but it changes the QC conversation. Buyers should approve hand feel, edge finish, gloss level, adhesion, abrasion behavior, and fold performance. A transfer may look sharp in a photo yet feel too plastic on matte canvas, or lift at the edge if the flap is folded tightly in packing.
Embroidery, woven patches, silicone labels, leatherette labels, and side tabs can make a gift feel more permanent. They also add their own tolerances. Embroidery can pucker lighter fabric and close up small lettering. Patches need clean edges, straight attachment, correct thread, and no lifting corners. The right method is not the fanciest method. It is the one that repeats the brand mark cleanly on the chosen bag at the required quantity.
- Use screen print for simple spot-color logos, bold marks, repeat orders, and larger flat decoration areas.
- Use heat transfer for detailed or full-color artwork after testing gloss, edge lift, cracking, rubbing, folding, and hand feel.
- Use embroidery only when lettering is large enough and the canvas can handle stitch tension without puckering.
- Use woven patches, silicone labels, leatherette labels, or side tabs when controlled branding matters more than a large front print.
- Reject quotes that say only custom logo without naming the decoration method, setup needs, and sample standard.
Build the proof file like a production spec
A strong proof file should be useful to a production supervisor, a decorator, and a QC inspector. Include the bag image or technical drawing, final artwork file name, logo width and height in millimeters, placement from fixed reference points, decoration method, color references, print area limits, and tolerance. A lifestyle mockup can help internal stakeholders picture the gift, but it should not be the only production reference.
Placement must be measured from stable points. For a flap print, measure from the top flap edge, flap center line, or side seam. For a pocket print, measure from the pocket seam or pocket top edge. For a side label, specify label size, fold type, material, seam insertion point, and visible height after sewing. If the instruction says centered, define the center: full bag width, front panel width, flap width, or the space between straps.
Color needs the same discipline. Pantone references are useful, but canvas texture, fabric shade, ink opacity, and curing can change the final appearance. Embroidery should reference a thread card or approved thread number. Transfers should reference the approved film and finish. Patches should define base material, edge type, backing, and thread. If a close commercial match is acceptable, record that before inspection.
- Include final artwork filename, version, logo dimensions, decoration method, color references, and proof approval date.
- Measure placement from fixed edges, seams, pocket lines, flap lines, center lines, or strap positions.
- State separate tolerances for placement, color, finished size, stitching, decoration defects, and packing count.
- Attach a print-zone drawing showing seams, fold lines, closures, hardware, and no-print areas.
- Use ruler photos when remote approval replaces a signed physical sample.
Compare supplier quotes on the same basis
A one-line quote for printed canvas messenger bags is rarely enough for B2B buying. It hides the choices that affect quality, schedule, and landed cost. Ask suppliers to separate the bag body, decoration, setup, artwork checking, sample rounds, screens, plates, embroidery digitizing, transfer films, patch tooling, labels, inner packing, export cartons, inspection, and freight data.
Artwork choices can change pricing quickly. A one-color screen print has different setup and inspection needs than a three-color print with tight registration. Embroidery depends on stitch count, backing, thread changes, and machine time. A woven patch may have its own MOQ. A second logo location can change both unit cost and production time. To compare fairly, every supplier should quote the same logo size, location, method, color count, packing, and inspection expectation.
Freight assumptions belong in the RFQ, not at the end of production. Messenger bags can be bulky when packed flat and can crease when folded too tightly. One supplier may quote a low unit price while assuming 40 pieces per carton with a hard fold through the flap. Another may quote a higher unit price but protect the decoration better. Ask for carton dimensions, gross weight, net weight, pieces per carton, individual packing, and carton marks.
- Require line items for bag body, decoration, setup, sampling, labels, inner packing, export cartons, inspection, and optional revisions.
- Ask how many artwork revisions, strike-offs, pre-production samples, and approval photos are included.
- Request price breaks by quantity, canvas weight, color count, logo position, decoration method, and packing format.
- Confirm whether Pantone matching, screens, digitizing, transfer films, patch tooling, and sample freight are included.
- Collect carton size, carton weight, units per carton, packing method, and pallet assumptions for landed-cost modeling.
Use a sample sequence that answers real questions
Good sampling is not bureaucracy. It prevents expensive uncertainty. A practical flow is digital artwork proof, material confirmation, decoration strike-off, pre-production sample, first-piece production approval, and final inspection. Each stage has a job. The digital proof checks placement logic. Material confirmation checks canvas, lining, webbing, hardware, and label. The strike-off shows how the logo behaves on the real canvas. The pre-production sample proves the complete bag and packing method.
Do not skip the strike-off when the logo has fine detail, white ink, dark canvas, multiple colors, heat transfer, embroidery, or a custom patch. Canvas is textured and absorbent, so small letters can fill in, edges can soften, and ink opacity can change with fabric shade. A logo that looks crisp on screen may lose readability on a coarse weave.
Approval notes should be exact. If the approved logo is 110 mm wide and sits 45 mm below the top flap edge, record those numbers. If the sample uses substitute hardware, temporary lining, or non-final packing, approve only the parts it represents. When marketing, events, procurement, and an end client all review the sample, send the factory one consolidated revision list.
- Approve fabric and trim before approving artwork when canvas shade or hardware position affects the logo.
- Require a strike-off or decoration sample on actual production canvas for important brand marks.
- Approve one pre-production sample using final fabric, trim, hardware, decoration, label, folding, and packing.
- Mark any temporary or substitute sample component so it does not become the bulk standard by accident.
- Centralize approval notes so the supplier works from one final instruction set.
Set QC tolerances before production starts
Quality control should be defined before cutting and printing. For canvas messenger bags, inspection should cover decoration placement, color, opacity, curing, adhesion, embroidery tension, patch attachment, stitching, dimensions, cleanliness, packing count, and carton labeling. Phrases such as good quality or same as sample are useful only when supported by measurable checks.
For many front-panel or flap logos, a placement tolerance of 3 to 5 mm from approved reference points is a practical starting point when the construction is stable. Some handmade or heavy canvas styles may need a wider tolerance. Small logos centered between buckles or straps may need tighter control. Finished bag dimensions also need tolerances because sewing, pressing, and fabric relaxation can change how the logo appears.
Inspection should happen during production and at final packing. In-line checks catch repeated defects early: first printed panel, ink curing before stacking, panel orientation before sewing, seam distortion near the decoration, and strap reinforcement before the lining is closed. Final inspection checks the complete gift: clean surface, centered logo, no cracked print at folds, no loose threads, no scuffed hardware, correct label, correct count, and packing that protects the decorated face.
- Measure logo placement from the top flap edge, side seam, pocket seam, bag center line, or another fixed point.
- Check color under daylight or D65 viewing conditions against the approved Pantone, thread card, transfer proof, or master sample.
- Reject tacky ink, transfer edge lift, cracking, smears, pinholes, unwanted shine, and obvious registration errors.
- Inspect embroidery for puckering, broken stitches, poor trimming, backing exposure, and unreadable small lettering.
- Inspect strap anchors, flap seams, gusset joins, pocket openings, zipper ends, and load-bearing stitching.
- Check carton count, carton marks, barcode labels, packing slips, SKU references, and purchase order numbers before release.
Proof packing as part of the gift
Packing is part of the recipient experience. A messenger bag may pass decoration inspection and still arrive with a hard crease through the logo, buckle marks on the flap, scuffed hardware, or distorted corners. Flaps, straps, buckles, zipper pulls, gussets, and padded panels all create pressure points in transit.
Decide how the bag should look when it is handed out. Some programs can use a simple folded polybag. Others need tissue, light stuffing, a hangtag, a gift card, a barcode label, or kit packing with other items. For a conference, onboarding program, sales meeting, or executive event, the front face should look ready to present without heavy smoothing or trimming.
Packing also changes freight cost and damage risk. Flat packing protects the decoration better but increases carton volume. Tight folding reduces volume but can create permanent creases. Hardware should be placed away from the decorated area or separated with tissue. For long transit or humid routes, ask whether desiccant, moisture control, or ventilation is needed. Approve a packed sample or packing photo set before the factory packs the full order.
- Specify whether each bag is flat-packed, folded, lightly stuffed, tissue-wrapped, polybagged, boxed, or kitted.
- Keep buckles, snaps, zipper pulls, strap hardware, and inserts from pressing directly against the logo area.
- Approve fold lines, logo orientation, inner pack material, carton quantity, carton dimensions, carton strength, and carton marks.
- Require photos of the folded bag, individual pack, carton label, carton mark, carton fill level, and purchase order reference.
- Define who applies hangtags, barcode labels, gift cards, regional labels, compliance labels, or kit inserts.
- Reject packing that creates a hard fold through the logo or places abrasive hardware against the decorated face.
Manage lead time through approval gates
A promised ship date is not enough for a corporate gifting order. The schedule should show approval gates: artwork proof, material confirmation, strike-off, pre-production sample, material purchase, cutting, printing, curing, sewing, finishing, in-line inspection, final inspection, packing, and dispatch. Each gate needs an owner and a due date.
Sampling often controls the timeline. Screens, transfer films, embroidery digitizing, patch tooling, custom labels, and custom-dyed fabric can add time before a meaningful sample exists. If the first strike-off fails color or detail, another round may be needed. Build at least one revision round into the plan when artwork is new, detailed, multi-color, or brand-critical.
Understand the production sequence because it affects risk. Printing cut panels before sewing gives a flatter surface, but the factory must control seam allowance and panel orientation. Printing finished bags avoids some sewing-related movement, but it must deal with seams, pockets, buckles, and uneven surfaces. Rushed curing can cause smearing or transfer marks after packing. Ask which steps cannot be compressed without raising defect risk.
- Request a dated milestone schedule instead of only an estimated ready date.
- Identify which buyer approvals stop production and which supplier tasks can run in parallel.
- Build review time for procurement, marketing, brand, legal, compliance, event, or end-client stakeholders.
- Confirm curing, drying, pressing, trimming, final inspection, and packing time as separate schedule items.
- Leave buffer for sample freight, export documents, freight booking, customs clearance, carton relabeling, and final count reconciliation.
Run a final release check before shipment
Before shipment, compare the finished order against the approved proof standard. Do not rely only on a few flattering photos. Request a structured photo set and inspection summary: full front, full back, inside view, strap anchors, hardware, logo close-up, seam close-up, label, packed bag, carton interior, carton exterior, carton mark, and barcode label if used.
For larger or higher-risk orders, consider third-party inspection or a buyer-defined AQL plan. The right inspection level depends on order value, deadline sensitivity, brand risk, and supplier history. Even without a formal AQL plan, the supplier should state sample size, defects found, corrective action, and whether re-inspection occurred. Defect definitions should be agreed in advance so the factory knows what is critical, major, or minor for this order.
Release also includes commercial reconciliation. Carton count must match the purchase order and packing list. SKU labels, destination labels, carton marks, and barcodes should be readable and placed correctly. If bags are split across regions, branches, or events, the distribution list should match the packed cartons. This final check is not glamorous, but it is where many avoidable delivery problems are caught.
- Compare final production against the signed sample or dated approval photo set before approving shipment.
- Request photos of finished bags, logo close-ups, seams, labels, packed units, carton marks, and carton labels.
- Review inspection results for placement, color, curing, adhesion, stitching, cleanliness, dimensions, packing, and count accuracy.
- Confirm corrective action for any reworked, replaced, or segregated units before release.
- Reconcile carton quantity, units per carton, purchase order number, SKU, destination, barcode labels, and packing list.
Specification comparison for buyers
| Sourcing route | Best fit | Proofing control to require | Commercial risk to clarify |
|---|---|---|---|
| Direct bag factory with in-house printing | Repeat corporate gifting programs, stable logo artwork, medium to large quantities, and buyers wanting fewer production handoffs | Confirm the same site controls fabric receiving, cutting, printing, curing, sewing, in-line inspection, final inspection, and export packing | Ask whether pricing includes screens, strike-offs, first-piece approval, reprint responsibility, inspection photos, and any approved rework |
| Bag factory using an outsourced decorator | Complex logos, specialty inks, heat transfers, embroidery, woven patches, silicone labels, leatherette labels, or side tabs | Require one written approval standard for both the sewing factory and decorator, including placement tolerance after final assembly | Clarify who pays if decorated panels pass the decorator but finished bags fail because the logo sits too close to a seam, buckle, fold, or strap path |
| Trading company coordinating production | Multi-SKU gift sets, buyers needing one commercial contact, documentation support, language support, or regional sourcing consolidation | Ask for the actual production factory, decoration location, inspection party, sample source, and whether the bulk supplier made the approved sample | A polished sales sample may not represent bulk production unless fabric, trim, decoration, packing, and production site are locked in writing |
| Local decorator branding imported blank bags | Rush deadlines, domestic kitting, small batches, variable names, branch-level distribution, or event-specific inserts | Inspect blank bag flatness, canvas shade, printable area, flap creases, seam bulk, and hardware position before artwork approval | Second handling can add scuffs, wrinkles, fold marks, and placement variation unless blanks are packed for decoration |
| Stock blank bag plus print-on-demand branding | Small internal events, low-MOQ programs, and orders where speed matters more than custom construction control | Approve the exact stock lot, not only a website photo, and check actual flap size, printable panel, canvas color, label position, and pocket layout | Stock inventory can vary by batch; shade, dimensions, strap hardware, and panel shape may change between sample and reorder |
| Workshop or low-MOQ maker | Premium small batches, board samples, executive gifts, pilot programs, and design validation before a larger tender | Require proof that the workshop can repeat stitch density, strap reinforcement, canvas shade, print curing, and packing at the order quantity | A strong hand sample may not scale without clear tolerances, production fixtures, and in-line checks |
| Vertically integrated exporter | Formal procurement programs, annual reorders, private-label bags, and buyers needing quote stability across fabric, sewing, decoration, packing, and export | Verify that quoted GSM, fabric composition, hardware, label, print method, carton format, and inspection level match the pre-production sample | Avoid approving a showroom sample unless the exporter identifies every substitute material and confirms the bulk version |
| Sample specialist before production factory | Board approval, premium presentation samples, identity refreshes, or artwork exploration before final sourcing | Use the sample only as a visual reference until the production factory makes its own strike-off and pre-production sample | Do not let one supplier's sample become the production standard for another supplier unless every material and process is re-proofed |
| Factory bag plus separate local kitting partner | Corporate gift kits containing notebooks, cards, tech items, apparel, or regional inserts | Define who owns final count accuracy, barcode labels, insert placement, carton relabeling, damage responsibility, and pack-out approval | Kitting can damage prints or distort flaps if hardware, straps, and inserts are pressed against the decorated face |
Buyer checklist before sampling
- Confirm canvas weight in GSM and ounces, fabric composition, weave, dye or natural color, shrinkage allowance, lining type, and reinforcement points before artwork approval.
- Request finished measurements in millimeters for bag width, height, gusset, flap, front pocket, strap width, strap drop, buckle position, seam allowance, and usable print area.
- Lock the decoration method, ink or thread type, number of colors, logo dimensions, artwork file version, print position, and placement reference points from fixed seams or edges.
- Approve a strike-off, printed swatch, embroidery sample, transfer sample, or patch sample on the actual production canvas, not only a digital mockup.
- Match the proof to the final bag construction, including flap curve, pocket layout, zipper pull, webbing width, buckle position, lining, label, strap anchor, and closure type.
- Set measurable tolerances, such as logo placement within 3 to 5 mm where construction allows, finished dimensions within the agreed millimeter tolerance, and color checked against a named standard.
- Ask for neutral-light photos of the full bag, print close-up, seam close-up, strap anchors, inside label, packed fold, inner pack, carton label, and carton mark before shipment.
- Keep one signed master sample where possible, or a dated approval photo set that states whether it controls color, placement, construction, packing, or all four.
- Require quote lines for bag body, decoration setup, screens or plates, embroidery digitizing, transfer films, patches, labels, sample rounds, artwork revisions, packing materials, cartons, inspection, and freight data.
- Define folding method, individual packing, moisture protection, carton quantity, carton board strength, carton marks, barcode label position, and purchase order references before bulk packing starts.
Factory quote questions to send
- What is the exact canvas GSM and ounce weight, fabric composition, weave type, dye method, color standard, shrinkage expectation, and whether the bag is unlined, partially lined, or fully lined?
- What are the finished bag width, height, gusset depth, flap dimensions, pocket layout, strap width, strap drop, buckle position, seam allowance, and usable print area in millimeters?
- Which decoration method will you use, how many colors are included, and what ink, transfer film, embroidery thread, woven patch, silicone label, leatherette label, or side tab material is specified?
- Will the logo be decorated on cut panels before sewing, on the finished bag after sewing, or by a separate decoration partner?
- Is the quote inclusive of artwork checking, screens, plates, embroidery digitizing, transfer films, patch tooling, strike-offs, sample freight, and normal revision rounds, or are these separate charges?
- What is the MOQ by bag construction and by decoration method, and does MOQ change for darker canvas, more logo colors, tighter registration, finer detail, custom labels, or custom-dyed fabric?
- Can you provide a decoration strike-off on the actual canvas and a pre-production sample using final fabric, trim, lining, label, decoration, folding, and packing?
- What placement tolerance, color standard, stitch standard, finished-size tolerance, cleanliness standard, and packing count tolerance will your QC team use for final inspection?
- Can you share photos from the actual production order showing fabric rolls, cut panels, first-piece print approval, sewing details, logo close-up, reinforcement stitching, folded pack, inner pack, export carton, and carton mark?
- What are the individual packing material, inner pack quantity, units per export carton, carton dimensions, gross weight, net weight, carton marks, barcode labels, pallet assumptions, and container loading assumptions?
Quality-control points to confirm
- Measure print placement from fixed reference points such as top flap edge, side seam, pocket seam, strap center line, or bag center line, with an agreed tolerance, commonly 3 to 5 mm for front logos when the construction supports it.
- Check color against the approved Pantone reference, thread card, transfer proof, fabric swatch, or signed physical sample under daylight or D65 viewing conditions, and record whether a close commercial match is acceptable.
- Confirm ink is fully cured with no tackiness, transfer marks, cracking on the first fold, edge lifting, smears, visible pinholes in solid areas, unwanted gloss, or ink buildup in heavy weave valleys.
- Check logo edges for sharpness appropriate to the artwork, with no obvious bleeding into the canvas weave, broken fine strokes, filled counters, crooked baselines, or multi-color misregistration.
- Inspect embroidery for puckering, loose threads, thread breaks, poor trimming, backing exposure, distorted small letters, and stitch tension that pulls the canvas panel out of shape.
- Inspect patches and labels for straight attachment, clean edges, correct thread color, no lifting corners, no adhesive bleed, and placement within the approved tolerance.
- Check strap anchors, flap seams, gusset joins, pocket openings, zipper ends, closure points, and load-bearing seams for skipped stitches, broken stitches, thread nests, loose threads, and seam distortion near the decorated area.
- Confirm finished dimensions after sewing, pressing, and packing, because shrinkage, seam allowance, and pressing can change the visual position of the logo.
- Make sure the logo does not cross a seam, zipper, rivet, snap, buckle, topstitch, flap fold, or heavy canvas layer unless the approved sample explicitly shows that interaction.
- Check canvas surface cleanliness for oil marks, water stains, chalk lines, adhesive residue, lint buildup, dark handling marks, dye spots, or shade panels that look mismatched in a set.