Why print proofing matters more on messenger bags than flat totes
A canvas messenger bag looks simple on a craft fair table, but it has more production risk than a flat tote. The print usually sits on a flap that is cut, folded, stitched, pressed, and sometimes closed with snaps or Velcro. Each of those operations can shift the artwork or create a crease through the logo. If the buyer approves only a digital layout, the bulk order can still arrive with a print that looks slightly low, off-center, or too close to the flap seam.
For craft fairs, the bag is often sold as merchandise, used by vendor staff, or bundled with handmade products. Buyers need a clean front-facing logo and a construction that survives repeated handling in crowded booths. The print proofing checklist should therefore cover fabric behavior, artwork scale, print method, sewing sequence, packing compression, and inspection thresholds. This is not just a design approval step; it is a production control step.
- Messenger bag flaps introduce curved edges, seam allowances, closures, and folding pressure.
- Natural canvas has slubs and color variation that affect ink appearance.
- Bulk printing before sewing gives a flatter print surface but requires tighter cutting control.
- Printing after sewing reduces cutting shift but may limit print area and raise defect risk near seams.
Start the RFQ with the finished bag, not just the artwork
A reliable quote begins with the finished product specification. Many RFQs for craft fair messenger bags include a logo and a target price but leave out the finished size, fabric weight, strap construction, closure, lining, and packing. Suppliers then quote different products under the same name. One quote may be for a lightweight promotional shoulder bag, while another may include heavier canvas, metal hardware, and reinforced stitching. The unit prices cannot be compared fairly.
For craft fair retail, common messenger bag sizes range from small souvenir formats around 25 x 20 cm to larger notebook or tablet formats around 35 x 28 cm. Add gusset depth if the bag needs volume. A flat envelope-style messenger bag costs less and packs tighter, but it carries less and can look thin on display. A 6-10 cm gusset increases fabric use, sewing time, and carton volume, but it makes the product more useful for shoppers and artists.
- Include finished width, height, gusset, flap depth, and strap width.
- Define whether the bag is lined or unlined; lining changes cost and sewing time.
- State pocket dimensions if buyers expect a phone, sketchbook, notebook, or tablet to fit.
- List closure type and location because closures affect print placement and reinforcement.
- Add target use: retail resale, event staff, gift-with-purchase, or distributor stock.
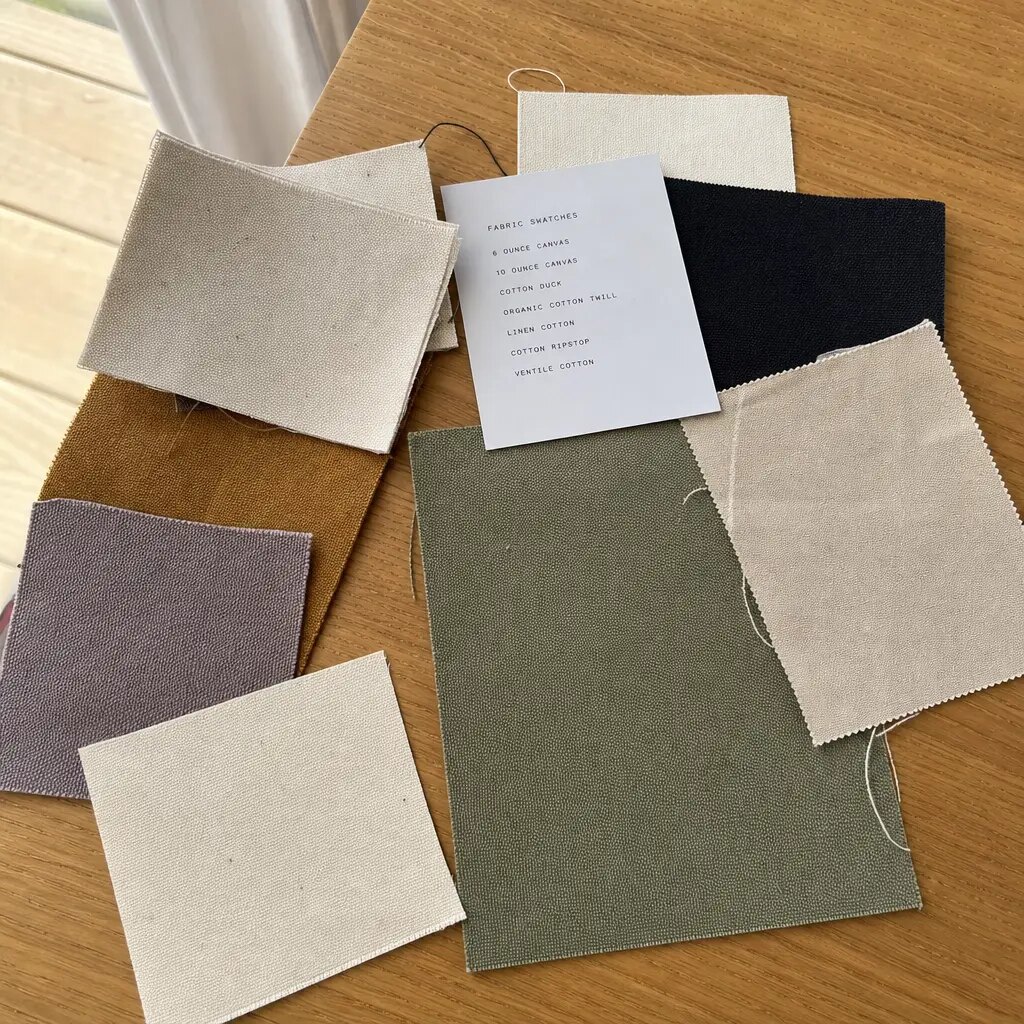
Choose canvas weight and finish before approving color
Canvas weight is one of the biggest cost and quality drivers. For custom canvas messenger bags, 10 oz to 16 oz cotton canvas is typical. Around 10 oz, the bag is lighter and cheaper but less structured. Around 12 oz, about 400 GSM depending on weave and finish, is a practical middle point for craft fair merchandise. Around 14-16 oz, the bag feels premium but may need stronger needles, more careful folding, and a higher freight budget.
Natural canvas is popular for craft fairs because it matches handmade and eco-focused retail displays, but it is not a pure white print base. Black, dark green, burgundy, or navy ink usually looks stable. Pale yellow, light gray, beige, and some pastel tones can shift because the fabric color shows through. Dyed canvas improves brand matching but introduces minimum dye lot logic and possible color variation between production batches. If color matters, approve ink on the real bulk fabric.
- 10 oz canvas: budget-friendly, softer body, suitable for light event giveaways.
- 12 oz canvas: good retail balance, holds shape better, commonly used for printed messenger bags.
- 14-16 oz canvas: more premium hand feel, higher sewing and freight cost, better for higher retail pricing.
- Washed canvas: softer vintage look but print edges may appear less sharp.
- Bleached canvas: cleaner print base but may show dirt more easily during handling and packing.
Match the print method to the artwork and order structure
Screen printing is usually the best method for bold craft fair logos, one-color event artwork, and simple brand marks. It gives a strong solid print and efficient unit cost at bulk quantities. The cost depends on print size, number of colors, ink type, setup screens, and whether printing is done on cut panels or assembled bags. For a large front flap logo, screen printing on flat cut fabric before sewing often gives a cleaner result.
DTF transfer, heat transfer, and embroidery can be useful, but they should not be selected only because a digital picture looks attractive. DTF can handle multi-color illustrations and small mixed design batches, which is helpful for artist merchandise. However, the buyer must approve hand feel, edge finish, heat mark, and durability on canvas. Embroidery gives a premium appearance but can pucker lighter canvas and may not suit detailed illustrated artwork. For craft fairs, the print method should support both retail appearance and predictable reordering.
- Screen print: best for solid artwork, repeat orders, and larger MOQs.
- Water-based ink: softer hand feel, may look more muted on natural canvas.
- Plastisol or rubber ink: stronger surface color, heavier hand feel, may need curing control.
- DTF transfer: good for complex artwork and lower design quantities, but test heat mark and wash behavior.
- Embroidery: premium texture, better for small logos than large filled artwork.
Use a physical strike-off to approve what the customer will actually see
A paper proof confirms layout, spelling, and approximate color. It does not prove how ink behaves on canvas. A fabric strike-off is the minimum proof for printed canvas messenger bags when brand color, illustration detail, or resale quality matters. The strike-off should use the selected fabric weight and color, the intended ink system, and the actual print size or a representative print area. Approving a digital mockup alone is a common cause of disappointment.
The strike-off should be reviewed for color, coverage, sharpness, pinholes, ink bleeding, and hand feel. On natural canvas, small slubs may interrupt fine lines. On darker dyed canvas, underbase ink may be required for bright colors, which increases cost and can make the print feel thicker. If the design includes fine text, set a minimum line width and letter height after testing. A craft fair customer may read the print at close distance, so small defects are more visible than on general promotional bags.
- Approve the strike-off under daylight or a consistent light box, not mixed warehouse lighting.
- Keep one signed strike-off with the buyer and one at the factory.
- Mark acceptable and unacceptable defects directly on the approval sheet.
- For fine text, avoid lines below the factory’s proven screen limit on canvas.
- For multi-color prints, review registration tolerance on fabric, not only on paper.
Control print placement before cutting and sewing
On messenger bags, print placement is not only a graphic design issue. The logo must remain centered after the flap is folded, stitched, and attached to the bag body. If the print is applied to cut panels before sewing, the factory needs accurate cutting marks, print jigs, and a clear reference point. If the print is applied after sewing, the printer must manage uneven seams, flap thickness, hardware, and limited machine access.
The RFQ should state the print size and its distance from finished edges, not only show a visual centered logo. For example, a buyer can specify a 180 mm wide logo centered on the front flap, with the top of the logo 70 mm below the finished flap top edge and at least 30 mm from side stitching. A normal placement tolerance may be plus or minus 5 mm, but this must be agreed before production. Wider tolerance may be acceptable for rustic craft styling; premium retail needs tighter control.
- Define the finished flap edge as the reference point, not the raw cut edge.
- Reserve a safe margin from stitch lines, snaps, Velcro, and flap corners.
- Use a placement drawing with dimensions, arrows, and artwork size.
- Specify whether artwork can rotate with the flap angle or must align to the bag body.
- Reject bulk production if the pre-production sample shows print distortion after sewing.
Understand MOQ logic when craft fair designs are split
Craft fair programs often need several artwork versions: one for the main brand, one for a seasonal market, one for an artist collaboration, and one for distributor stock. The problem is that the factory’s MOQ may apply to fabric color, bag construction, print setup, or each individual design. A total order of 1,000 bags split into ten designs is not the same as 1,000 bags with one print. Setup time, screen cleaning, print registration, sorting, and packing all increase.
A practical RFQ separates the base bag MOQ from the print design MOQ. If the same natural canvas bag is used across several prints, the factory may cut and sew the full quantity together, then print or pack by design. This can reduce fabric waste and sewing cost. But each screen print design still needs setup and may have a minimum economical run. For DTF transfers, artwork splitting is easier, but the transfer cost per unit is usually higher. Buyers should compare the total landed cost, not only the lowest unit price on the first design.
- Base bag MOQ: quantity needed for efficient fabric purchasing, cutting, and sewing.
- Print MOQ: minimum units per artwork for efficient setup and color control.
- Color MOQ: dyed fabric or non-stock canvas may require a separate minimum.
- Packing split: cartons must show correct design codes for distributor receiving.
- Reorder plan: repeat artwork should keep the same print method, fabric, and placement file.
Sample approval should represent bulk production, not a showroom prototype
A good sample process protects both buyer and factory. First, a construction sample may be made to confirm size, strap, pocket, and general look. This sample can use available fabric if timing is tight, but it should not be treated as the final approval for print color or hand feel. The pre-production sample should use bulk fabric, final artwork, selected ink, final closure, final stitching method, and intended packing. That is the sample the factory can reproduce.
For messenger bags, sample review should include practical handling. Load the bag with a notebook or similar expected item. Open and close the flap multiple times. Check whether the strap twists, whether the snap pulls fabric, whether the flap covers the bag evenly, and whether the print creases when folded. If the bag will be sold on craft fair tables, also check how it looks folded in a polybag, stacked flat, and hanging from the strap.
- Measure finished sample dimensions against the spec sheet.
- Photograph the print position with a ruler before approving.
- Check stitch density, bartack position, loose threads, and seam allowance.
- Review hardware finish for scratches, plating marks, and sharp edges.
- Approve packing method using the printed sample, not an unprinted blank.
Set QC thresholds that inspectors and factories can apply
Quality control should not depend on vague comments such as “good printing” or “clean sewing.” The buyer should define measurable acceptance criteria. For printed canvas messenger bags, typical inspection points include fabric stains, shade variation, print color, print registration, print placement, ink adhesion, broken stitches, uneven flap shape, strap strength, hardware function, packing accuracy, and carton condition. The approved sample and strike-off are the reference standards.
For bulk orders, an AQL inspection can be arranged before shipment. The sampling level depends on the buyer’s risk tolerance and order value. Critical defects include unsafe hardware, broken strap attachment, wrong artwork, wrong logo color, and serious contamination. Major defects include visible print misplacement, obvious stains, skipped stitches at stress points, non-functioning closures, and incorrect packing. Minor defects include small loose threads or very slight canvas slubs within the approved fabric standard.
- Print placement tolerance: define in millimeters from finished flap edges.
- Color standard: use approved strike-off or Pantone target on actual fabric.
- Adhesion test: include tape pull, dry rub, or reasonable handling simulation.
- Strap strength: test reinforced joints with a declared load suitable for intended use.
- Packing inspection: verify design mix, barcode, hangtag, carton mark, and quantity per carton.
Plan packing so the print arrives retail-ready
Packing affects the final appearance of canvas messenger bags more than many buyers expect. If the front flap is folded sharply through the printed logo, the ink can show pressure marks or the fabric can hold a crease. If natural canvas is packed without protection, dust and carton fibers can mark the surface. If the bags are over-compressed to reduce freight volume, the flap and strap may arrive twisted or wrinkled. Good packing balances freight efficiency with display condition.
For craft fairs and retail distribution, buyers commonly use one bag per recyclable polybag, glassine-style paper bag, or paper band depending on market requirements. Hangtags, barcode stickers, silica gel policy, and warning labels should be stated in the RFQ. Master carton quantity should keep weight manageable, often around 25-40 pieces depending on size and fabric weight. Request carton dimensions and gross weight during quotation because a slightly cheaper heavy canvas bag can become more expensive after freight and storage are included.
- Avoid folding the printed flap directly across the logo when possible.
- Use tissue or a paper sheet if dark hardware may rub against light canvas.
- Specify carton ply strength if the shipment will be stacked for ocean freight.
- Require inner assortment labels when multiple artwork designs ship together.
- Approve a packed sample or packing photo before final mass packing.
Specification comparison for buyers
| Spec decision | Recommended option | When it fits | Buyer risk to check |
|---|---|---|---|
| Canvas weight | 12 oz cotton canvas, about 400 GSM, for standard craft fair messenger bags | Good balance of structure, print surface, and freight weight for retail tables and pop-up events | Below 10 oz may look soft after packing; above 16 oz raises sewing difficulty and carton weight |
| Bag construction | Single large compartment with flap, inner slip pocket, and adjustable webbing strap | Works for artist merchandise, vendor staff bags, notebooks, tablets, and small purchases | Unspecified pocket size often causes tablet fit complaints; include finished pocket dimensions in the RFQ |
| Print position | Front flap print centered with 25-35 mm safe margin from seams and flap edge | Most visible when displayed hanging or stacked on craft fair tables | Artwork too close to flap curve or stitching can distort during sewing and pressing |
| Print method | Screen print for solid logos up to 3-4 spot colors | Best for MOQ orders with bold brand marks, event art, or shop logos | Pantone matching changes on natural canvas; approve a fabric strike-off, not only a paper proof |
| Fine artwork option | DTF heat transfer only for small runs or multi-color illustration with gradients | Useful for artist editions or mixed designs where screen setup cost is not efficient | Hand feel, wash resistance, and heat mark on canvas must be approved before bulk |
| Closure | Metal snap or Velcro under flap, selected by retail positioning | Snap gives cleaner retail look; Velcro is lower cost and easy for event staff use | Velcro can catch thread and fabric lint; metal snap needs reinforcement patch to avoid tearing |
| Packing method | One bag folded flat in recyclable polybag or paper band, 25-40 pcs per export carton | Protects light canvas from dust during ocean or truck shipment and keeps retail units clean | Over-compression creates flap creases across the printed logo; request folded sample photo before shipment |
| Approval sample | Pre-production sample using bulk fabric, bulk thread, actual print ink, and final hardware | Required before committing to craft fair launch dates or distributor stock | Prototype made from available fabric can hide shrinkage, color, and print adhesion differences |
Buyer checklist before sampling
- Define finished bag size in width x height x gusset, not only approximate capacity.
- State canvas weight in oz and GSM, and whether natural, dyed, bleached, or washed canvas is required.
- Send vector artwork with Pantone references and a separate placement drawing showing print size and distance from seams.
- Specify whether the logo prints before sewing or after sewing, because this changes alignment tolerance and cost.
- Approve a fabric strike-off for natural canvas if brand color matching matters.
- List hardware material, color, and reinforcement requirements for snap, buckle, slider, and D-ring positions.
- Confirm strap width, adjustable length range, and whether shoulder pad is needed.
- Set acceptable print placement tolerance, commonly plus or minus 5 mm for messenger bag flap prints.
- Define packing: individual bag, paper band, hangtag, master carton quantity, carton marks, and pallet needs.
- Require carton drop, rubbing, print adhesion, seam strength, and final AQL inspection before shipment.
Factory quote questions to send
- What canvas weight and GSM are included in your quote, and is the fabric greige, dyed, washed, or finished after weaving?
- Is the quoted price based on screen print, DTF transfer, embroidery, or another method, and how many print colors or artwork positions are included?
- Will the front flap be printed before sewing or after assembly, and what placement tolerance can your line hold in bulk production?
- What is the MOQ per bag color and per print design, and what surcharge applies if we split one order across several craft fair artwork versions?
- Can the pre-production sample use bulk fabric, bulk ink, final hardware, and the approved packing method?
- What sample lead time, bulk production lead time, and transit buffer should be planned after artwork and deposit approval?
- What seam reinforcement is included at strap joints, flap corners, and closure points?
- What packing is included in the unit price, and what are the estimated carton dimensions, gross weight, and pieces per carton?
- Which QC tests will you perform on print adhesion, color, seam strength, strap pull, and metal hardware before shipment?
- Please separate tooling, screen setup, sample, packaging, inland freight, and export document costs from the unit price.
Quality-control points to confirm
- Canvas weight tolerance should be agreed before production, for example plus or minus 5% against the approved bulk fabric.
- Finished bag measurement tolerance should normally be within plus or minus 5 mm for small dimensions and plus or minus 10 mm for overall width or height.
- Print placement on the flap should stay within the approved tolerance, commonly plus or minus 5 mm from the centerline and top reference point.
- Print color must be judged on the approved canvas fabric under consistent light, not only against a digital screen or paper printout.
- Screen print adhesion should pass a reasonable tape test and dry rub test before packing.
- Strap joint stitching should include bartack, box stitch, or equivalent reinforcement suitable for the declared load.
- Closure points need reinforcement backing if using metal snaps or magnetic closures on medium-weight canvas.
- Cartons should not be overfilled; the printed flap should not be sharply creased through the logo area.
- Random inspection should include print defects, stain marks, loose threads, needle holes, hardware function, and packing accuracy.
- Keep one signed approval sample at the factory and one with the buyer or inspection team for final comparison.