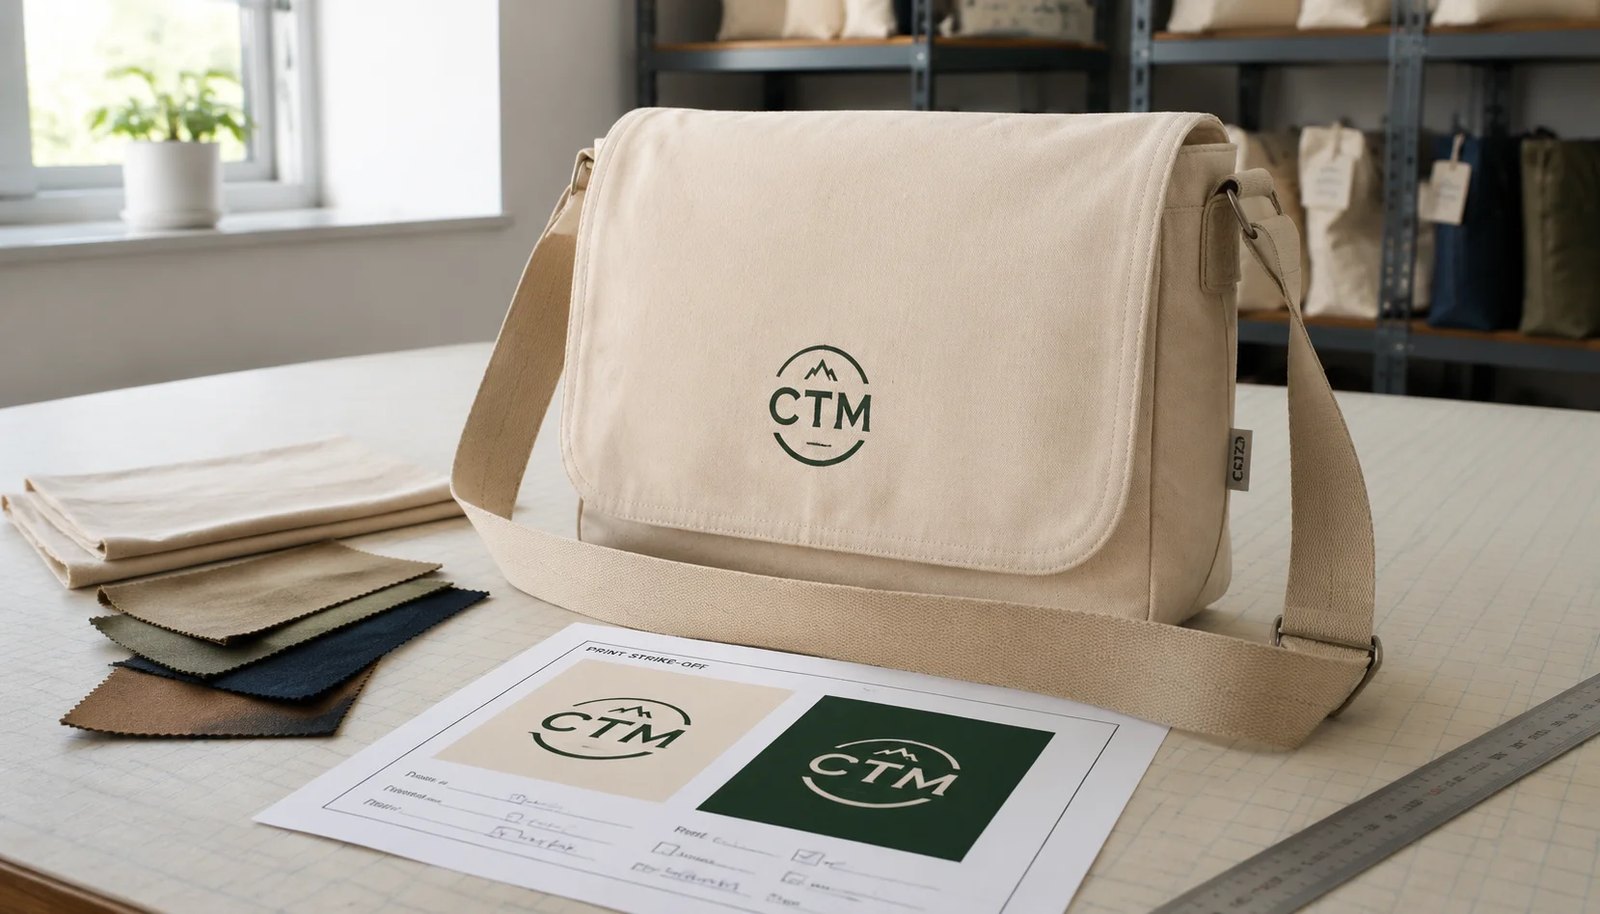
Why print proofing matters for natural grocer bag programs
Canvas messenger bags for natural grocers carry more brand weight than a basic giveaway tote. They may be used for loyalty rewards, refill-store shopping, staff issue, vendor kits, farm-market merchandise, gift-with-purchase programs, or in-store resale. In each case, the buyer is approving a reusable branded product that customers and store teams will handle at close range. A fuzzy logo, crooked flap print, or mismatched canvas shade will be noticed faster than it would on a short-life promo item.
Messenger bags also create more production variables than flat totes. The front logo often sits on a flap, and that flap has to curve, fold, close over the bag body, and align with hardware. Gussets, strap tabs, magnets, zippers, topstitching, and seam bulk all affect how the printed face looks after assembly. A logo can be perfectly centered on a flat artwork file and still look slightly high, low, or off-axis when the finished bag is closed.
Natural grocery branding tends to make these issues more visible. Many stores use quiet typography, botanical line art, muted dark inks, low-contrast natural palettes, or simple icons. That style looks strong when the print is controlled, but it leaves little visual noise to hide registration drift, line fill-in, or panel skew. A practical print proofing checklist gives procurement, marketing, and the factory the same standard before bulk work begins.
- Treat the front flap as the main brand presentation area, not just another print panel
- Use measurable tolerances instead of words such as centered, neat, or acceptable
- Review the bag closed and filled lightly, because that is closer to how customers see it
- Connect artwork approval with fabric, construction, hardware, and packing decisions
Start with the bag specification, then approve the artwork
A clean print proof starts with a fixed bag spec. If the body size, flap depth, strap position, or closure is still changing, the artwork approval is not stable. On a messenger bag, small construction changes can move the usable print area. A deeper flap may shift the logo lower. A magnetic snap may force a no-print zone. A wider gusset can change how the bag hangs and how the flap sits when closed.
For many natural grocer programs, 12 oz to 14 oz cotton canvas, roughly 340 to 400 GSM finished weight, is a practical commercial range. It gives the bag enough body for repeat use and enough surface stability for a front print. Lighter 8 oz to 10 oz canvas can work for cost-driven event bags, but it wrinkles more, sags more under load, and may distort around the print after sewing. Very heavy canvas above 16 oz, or about 450 GSM, can feel premium but adds seam bulk, stiffens the flap, increases cutting difficulty, and raises freight weight.
Dimensions should be written as finished measurements in millimeters. Include body width, body height, gusset depth, flap depth, webbing width, and adjustable strap range. If the bag is lined, has bound internal seams, includes a zipper under the flap, or uses a double-layer flap, show those choices in the RFQ. Otherwise suppliers may quote different constructions while appearing to quote the same product.
- Put finished width x height x gusset, flap depth, and strap range on the spec sheet
- Clarify whether measurements are taken flat, closed, or lightly filled
- Quote lining, zipper pockets, and upgraded hardware as separate options when budgets are still open
- Do not approve final artwork while flap shape, closure type, or strap attachment points are unresolved
Control canvas color before it controls the print result
Natural canvas is a strong fit for many organic, refill, farm-market, and low-waste grocery programs, but it is not one universal shade. Depending on yarn source, processing, and finishing, one natural canvas can look creamy while another looks oatmeal or slightly grey. Cottonseed specks may also appear. They are often part of the natural canvas look, but they should be accepted deliberately, not argued about during final inspection.
If shade consistency matters across stores or repeat orders, ask for a physical fabric cutting before bulk. For dyed canvas, request a lab dip or approved color swatch and confirm whether the supplier is using stock dyed fabric or booking a fresh dye lot. Dyed black, olive, forest, or earthy brown can make a messenger bag feel more retail-ready, but it usually adds more color-control work and may affect MOQ and lead time.
The base color also changes print behavior. A dark dyed canvas may need an underbase, double print pass, or different ink system for a cream or white logo to look solid. A low-contrast ink on natural canvas may look refined, but only if the buyer approves the real strike-off under good light. Photos and monitor views are useful for discussion, not for final color control.
- Approve natural canvas with a real cutting, not only a supplier photo
- State whether cottonseed specks, slubs, and minor natural shade variation are acceptable
- For dyed fabric, confirm stock availability, lab dip approval, and dye-lot control
- Check white or light logos on dark canvas for opacity before bulk printing
Match the print method to the logo and the flap
Screen print is usually the best first choice for canvas messenger bags with simple store logos, one-color campaign graphics, or two-color front flap branding. It is cost-efficient at bulk quantities, works well with solid artwork, and gives the direct-to-fabric look many natural grocer brands prefer. It also avoids the glossy patch effect that some transfers create on textured cotton canvas.
Still, screen print has limits. Coarse canvas can swallow fine lines, close small letter counters, and make delicate botanical details look heavier than intended. Buyers should ask the supplier to confirm minimum line width, minimum text height, and minimum negative space for the selected canvas and screen setup. Text below about 3 mm high, hairline leaf drawings, and tightly spaced lettering should be tested before approval.
Digital print or transfer methods may be useful for gradients, many colors, or detailed art, but they need careful testing on messenger bags. The flap flexes every time the user opens and closes the bag. Transfer films can crack or lift at fold zones, and digital print may lose opacity on rough or dark bases. The right decision is not simply about color count; it is about artwork detail, fabric texture, logo position, hand feel, and how the bag will be used.
- Use screen print for most solid 1-color and 2-color grocery logos
- Test fine botanical artwork before approving bulk screens
- Ask whether dark canvas needs an underbase or double pass for light ink
- Avoid transfer or digital routes on flap fold zones unless a physical sample proves they perform
Build a proof around finished-bag reference points
A useful proof does more than place a logo on a clean front-view mockup. It should show print width and height in millimeters, distance from finished edges, relation to topstitching, and no-print zones around folds, snaps, straps, seams, and decorative tabs. If the front flap is the main logo area, review the proof with the flap closed. That is the view most customers and store teams will actually see.
Reference points matter. Many factories prefer to print on cut panels before sewing because it is cleaner and more efficient. That can produce better print quality than printing on assembled bags, but sewing and turning can shift the final visual position slightly. If the buyer measures from finished edges and the factory works from cut-panel marks, the two sides may believe they approved different things.
For procurement, the safest approach is to define both the production method and the inspection method. State whether printing happens on flat panels or finished bags. Then state where final placement is measured: from the finished flap edge, finished side seam, topstitch line, or another approved point. Mark hardware locations clearly, especially magnets, because thickness behind the print area can show through or distort the logo face.
- Show the logo size in mm, not only as a percentage of the bag front
- Define placement from finished reference points whenever the finished appearance is the priority
- Mark no-print zones around snaps, folds, straps, seam allowances, and topstitching
- Review the closed-bag view before signing off on final placement
Use a sample sequence that answers the right questions
A digital proof, strike-off, pre-production sample, and sealed sample are not the same approval. Each one answers a different question. The digital proof checks artwork size, basic location, and spelling. It does not prove ink color, opacity, texture, or flap behavior. The strike-off shows the real ink on the real production canvas. The pre-production sample, often called a PPS, shows how fabric, print, stitching, hardware, and packing work together.
For a new canvas messenger bag program, the practical sequence is fabric cutting or lab dip first, then print strike-off, then PPS, then sealed sample. The fabric cutting confirms the base. The strike-off confirms logo color and print behavior. The PPS confirms the finished construction and closed-bag appearance. The sealed sample gives both buyer and factory a physical reference for bulk production and inspection.
Buyers should also define what triggers re-approval. If the fabric lot changes materially, if a substitute ink system is used, if hardware moves, if the logo size changes, or if production switches from panel printing to finished-bag printing, the original approval may no longer be enough. Put that rule in writing before the order is released.
- Use digital proofs for layout, not final color approval
- Require strike-offs on actual production canvas for new artwork, dark bases, or fine details
- Approve a PPS with correct hardware, closure, strap, lining, and print position
- Keep a sealed sample with both buyer and factory for bulk QC reference
Compare quotes by the assumptions behind the unit price
Two FOB prices for canvas messenger bags can look close while covering very different products. One supplier may assume stock natural canvas, one print color, unlined construction, standard webbing, and bulk carton packing. Another may include custom-dyed fabric, heavier webbing, a zipper under the flap, tighter print control, lining, individual polybags, or stronger cartons. Without the assumptions, the number is not enough.
Ask suppliers to separate one-time charges from recurring unit costs. Screen charges, sample fees, lab dips, custom labels, testing, and upgraded carton requirements should be visible. This matters when comparing a pilot order with a repeat order. A supplier with a slightly higher first quote may become more competitive on reorders if setup charges are already absorbed, while a low unit price may hide poor packing density or excluded testing costs.
It is also useful to request two commercial routes. A trial route might use stock natural canvas and a 1-color screen print to reduce MOQ and lead-time risk. A repeat route might use a custom dyed body, more structured lining, second print color, or retail packaging. This helps procurement show marketing what each upgrade does to MOQ, timeline, and landed cost before the brief expands.
- Ask what fabric, hardware, lining, print colors, and packing are included in the base quote
- Separate sample fees, screen charges, testing, and label costs from the recurring unit price
- Confirm MOQ by fabric color, bag size, print design, and hardware choice
- Request trial-order and repeat-order options if the program may scale
Write QC standards that inspectors can actually apply
Quality standards for printed canvas messenger bags should be practical and measurable. Textured canvas will not look like coated paper. Natural cotton may have specks. Small edge texture can be normal. The buyer's job is to define what is commercially acceptable at the intended viewing distance and what should be rejected because it harms brand presentation or function.
Print QC should cover color match, placement tolerance, opacity, line fill-in, broken edges, pinholes, smudges, registration, curing, and rub resistance. For standard canvas bag work, many buyers use about ±5 mm placement tolerance from agreed finished reference points, unless the factory has confirmed a tighter capability. Construction QC should cover flap symmetry, panel alignment, strap anchors, bartacks, D-rings, zipper ends, magnetic snap alignment, seam security, and loose threads.
Defect classification should be agreed before bulk inspection. Missing bartacks, open seams, detached hardware, severe logo misplacement, ink transfer, and incorrect carton marks should not be treated as minor cosmetic issues. Give the inspector the approved strike-off, sealed sample, placement drawing, packing instructions, and PO breakdown. The more objective the reference set, the fewer subjective arguments happen at shipment release.
- Define critical, major, and minor defects before production starts
- Measure print placement from the same reference points shown on the approved proof
- Check the logo with the bag closed, not only with the panel laid flat
- Include packed-carton inspection because compression can create defects that loose samples do not show
Treat packing as part of print protection
A good print can fail in transit if the packing is too aggressive. Messenger bags are not flat totes. The flap, gusset, webbing, D-rings, magnets, and zipper pulls create pressure points when cartons are stacked. If bags are compressed tightly, the main logo area can crease. Hardware can emboss nearby fabric. Printed faces can rub against each other, especially in warm or humid conditions.
Packing should match the sales channel. For event distribution or internal staff issue, bulk carton packing may be enough if the stack method protects the flap. For retail-ready programs, individual polybags, tissue interleaving, insert boards, or simple paper protection may be justified. These choices add cost and cube, but they can prevent scuffed prints and improve shelf presentation.
Agree on packing during quoting, not after the bags are sewn. Carton quantity, carton size, gross-weight limit, board grade, polybag use, interleaving, and shipping marks all affect cost and receiving accuracy. Ask the factory to show a packed-carton photo or sample pack-out when the order has a sensitive flap print or a strict retail presentation requirement.
- Avoid folding the flap sharply through the main logo zone
- Use interleaving or inserts when print rubbing, offset, or hardware pressure is likely
- Set carton gross-weight limits that match warehouse handling rules
- Confirm PO number, item code, color, size, pack count, and destination marks before loading
Manage lead time by approval gates, not one headline date
Lead-time problems usually come from approvals and materials, not sewing alone. Fabric booking, dyeing, print strike-off, hardware confirmation, PPS review, bulk printing, sewing, packing, and export release all sit on the timeline. If the buyer takes five days to approve a strike-off, the factory may not start full printing during that gap. That delay then pushes sewing and packing.
Natural grocer bag programs are often tied to store openings, Earth Month campaigns, loyalty launches, or seasonal merchandising. A generic 35-day or 45-day lead time is not enough for that kind of calendar pressure. Procurement should ask for a milestone schedule and identify which approvals need same-day or next-day response from the brand team.
Also ask what the quoted lead time assumes. Stock natural canvas is usually faster than custom dyeing. Standard magnetic snaps are easier to schedule than special hardware. A 1-color logo normally moves faster than a detailed multi-color print that needs more review. Clear milestone tracking helps buyers see whether a supplier is giving a realistic schedule or just a broad promise.
- Break the schedule into material booking, strike-off, PPS, bulk print, sewing, packing, and ex-factory date
- Confirm whether lead time starts from PO, deposit, artwork receipt, or final sample approval
- Identify internal approval owners before strike-offs and PPS samples arrive
- Keep carton marks, labels, and packing instructions ready before production reaches the packing stage
Specification comparison for buyers
| Spec decision | Recommended option | When it fits | Buyer risk to check |
|---|---|---|---|
| Canvas weight | 12 oz to 14 oz canvas, about 340 to 400 GSM finished weight | Best for grocery loyalty programs, staff issue bags, farm-market merchandise, and repeat-use carry where moderate structure is needed | Below about 10 oz or 280 to 300 GSM can wrinkle heavily, print less cleanly, and sag under load; above 16 oz or about 450 GSM increases seam bulk, flap stiffness, cutting difficulty, and freight weight |
| Fabric color base | Stock natural canvas for eco-forward programs; dyed black, olive, or earthy tones for premium branded retail | Natural works for organic, refill, and low-ink branding; dyed fabric fits stronger shelf presentation and repeat seasonal programs | Natural shade can vary by lot; dyed goods need color approval. Request fabric cutting approval and specify acceptable color difference method or visual standard before bulk |
| Print method for logo | Pantone-matched screen print for solid marks; transfer or digital only for complex artwork after testing | Screen print suits simple store logos, loyalty campaign marks, and front flap branding on textured canvas | Fine strokes can fill in on coarse weave; transfer films can crack at fold zones; digital print may lose opacity on rough canvas or dark dyed bases |
| Print placement | Front flap center or lower-right flap panel, with placement tolerance clearly stated from finished edges | Good for store visibility while avoiding seam lines, flap bends, magnetic snap positions, and decorative strap overlap | If placement is referenced from cut panels instead of finished dimensions, the logo may look off-center after sewing. Require production reference points and no-print zones |
| Closure hardware | Hidden magnetic snap plus decorative strap, or zipper top under flap if document security matters | Magnets keep access easy for retail and staff use; zipper under flap suits admin papers, tablets, and small valuables | Magnet thickness can show through print area; poor alignment causes flap skew; zipper wave can affect front-panel shape and logo visual balance |
| Inner structure | Unlined self-fabric body with bound internal seams for value orders; lightweight cotton lining only if needed | Unlined construction fits promotions and better landed cost; lined bags suit premium resale or staff kits | Lining adds sewing time, additional shrink and tolerance variables, and can affect panel stability during printing if outer and inner layers behave differently |
| MOQ route | Use stock canvas colors and 1-color print for lower MOQ; custom dyed body and multi-color print for repeat programs | Useful when testing one region first, then scaling to chain-wide rollout | Trial orders may be produced partly manually or from mixed stock lots. Confirm whether first run uses the same fabric source, print line, and QC standard as future repeats |
| Packing style | Bulk export carton packing with shape-preserving stack method; individual polybag only if channel requires clean retail presentation | Most distributor, event, and grocery promo orders do not need retail polybagging | Over-compression can crease flap logos and cause print offset rubbing; too many units per carton can deform gussets and strain webbing attachments in transit |
Buyer checklist before sampling
- State finished bag width x height x gusset in mm, flap depth in mm, and strap adjustable range in mm; do not rely on reference photos alone
- Specify fabric as cotton canvas with finished weight in GSM or oz, and note whether tolerance is measured per production lot; many buyers work to about ±5 percent unless contract states otherwise
- Clarify whether canvas is natural, bleached, or dyed, and whether cottonseed specks are acceptable; approve a physical cutting if natural shade consistency matters
- Provide vector artwork with Pantone references, print size in mm, print location from finished edges, and any no-print zones around seams, folds, snaps, or straps
- Define smallest text height, minimum line width, and minimum negative space for artwork so the factory can confirm whether screen print is viable on the selected weave
- State whether approval requires digital proof, physical strike-off on actual bulk fabric, pre-production sample, and sealed reference sample before bulk starts
- Clarify whether printing will be done on flat cut panels or assembled bags; panel printing usually gives better placement and print quality but must account for sewing shift afterward
- List closure type, hardware finish, webbing width, pocket count, labels, and whether any hardware is not allowed directly behind the print area
- Define packing method, carton quantity, carton gross-weight limit, carton size limit if relevant for your warehouse, and whether interleaving, insert boards, or polybags are required to protect prints
- Request production lead time by stage: sample review, material booking, strike-off, PPS, bulk printing, sewing, packing, and ex-factory date
Factory quote questions to send
- What exact canvas are you quoting: fiber content, weave type, yarn count if available, finished weight in GSM or oz, and whether the quoted weight is before or after washing or finishing?
- Is the body fabric from stock greige/natural inventory or newly booked material, and will one PO be cut from one lot or possibly multiple lots?
- Which print method are you quoting for this logo on this canvas, and what minimum line width and text height do you recommend to avoid fill-in or broken edges?
- Will printing be done on cut panels or finished bags, and what bulk placement tolerance can you hold measured from the finished flap edge or side seams?
- How many print colors, screens, and print locations are included in the quote, and what cost changes if one Pantone, size, or location changes after strike-off approval?
- Can you provide a strike-off on the exact production canvas using the actual ink system, not substitute fabric, paper proof, or a smoother stock swatch?
- What is the MOQ by fabric color, print design, and size, and which parts of the MOQ are driven by fabric dyeing, screen setup, or hardware sourcing?
- What are your standard classifications for critical, major, and minor defects on printed canvas bags, especially for color match, print placement, open seams, bartacks, and hardware misalignment?
- What packaging assumptions are included in the quoted price: pieces per carton, polybag yes or no, interleaving, carton board grade, and any carton gross-weight target?
- Which costs are excluded from unit price: sample fee, mold or screen charges, label set, testing, palletization, export carton upgrade, or destination-specific marks?
Quality-control points to confirm
- Verify bulk canvas finished weight against approved standard within the agreed tolerance, commonly around ±5 percent unless a tighter contract term was negotiated
- Check canvas shade consistency by lot before printing, especially on natural fabric; visible lot mix on one PO should be flagged before the full print run proceeds
- Confirm print color against approved strike-off under daylight-equivalent lighting such as D65 or equivalent viewing conditions, not warehouse yellow light only
- Measure print placement from the agreed finished reference points with the approved tolerance; ±5 mm is common for standard canvas bag work, while tighter tolerances should only be requested if the factory confirmed capability
- Inspect small text, fine outlines, and botanical line art for fill-in, pinholes, sawtooth edges, weak opacity, and excessive ink spread caused by coarse texture or over-deposit
- Perform dry and light damp rub checks after curing to identify crocking, under-cure, flaking, or ink transfer onto adjacent fabric or packing materials
- Check flap symmetry and panel alignment so the printed logo remains visually centered when the bag is closed, not just when a panel is measured flat
- Review bartacks, strap anchors, D-ring fixation, zipper ends, and magnetic snap alignment because distortion in these areas can change how the printed front presents at retail
- Open random packed cartons to see whether compression, hardware pressure, or flap folding has created permanent logo creases, offset marks, or abrasion
- Confirm carton marks, PO numbers, color and size breakdown, pack count, and destination labeling before loading to avoid receiving errors and mixed-carton disputes