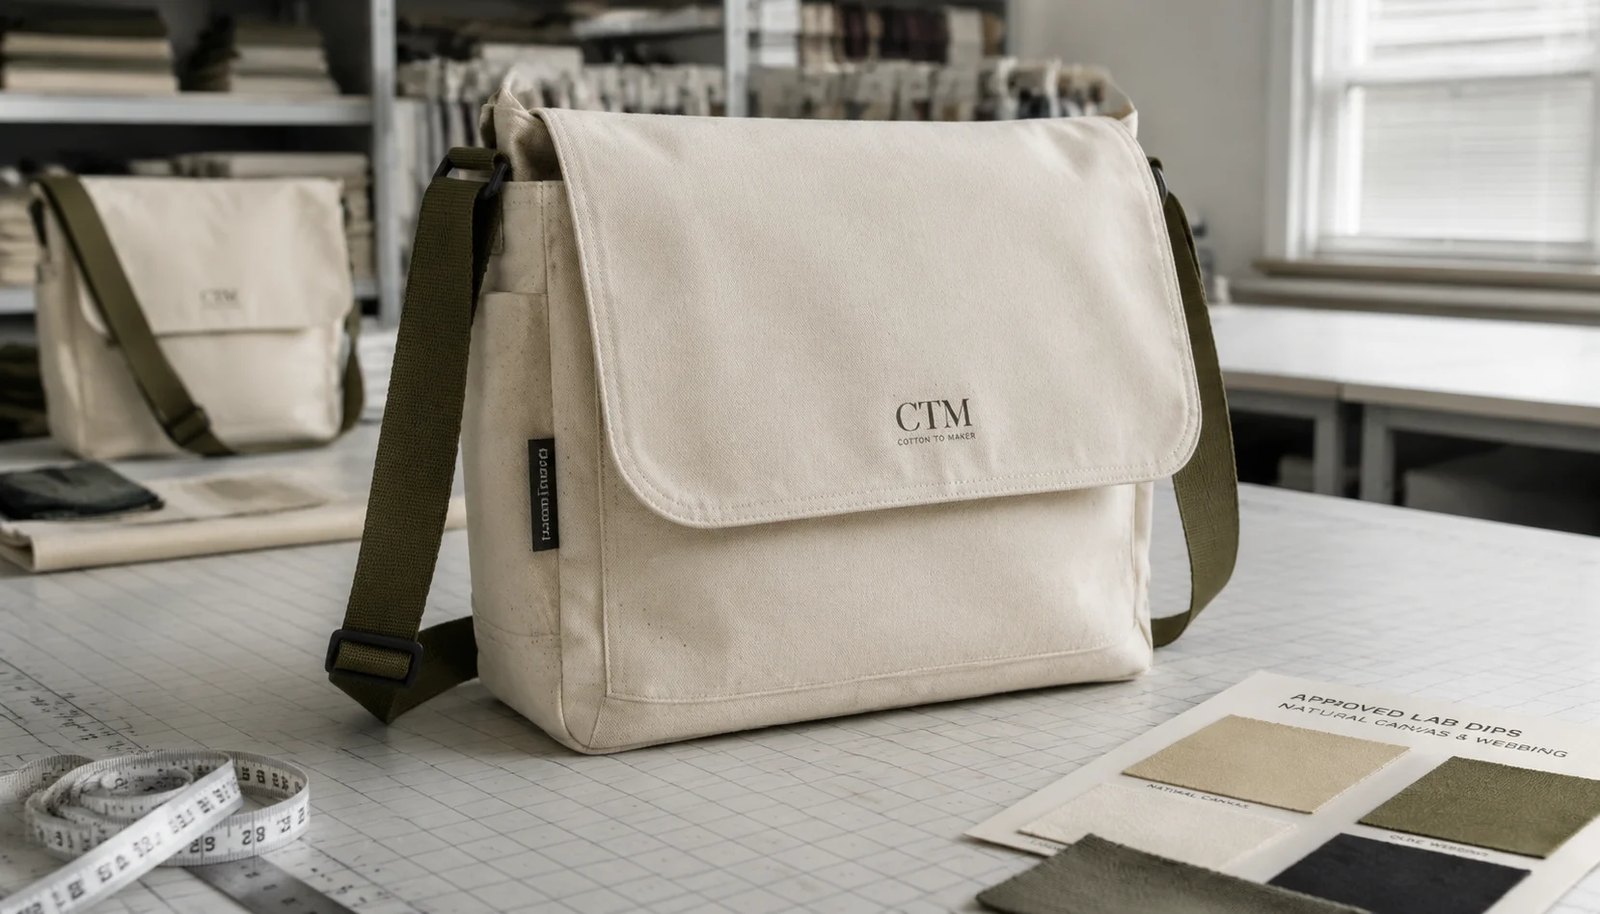
Why logo placement is the real buying issue on canvas messenger bags
For natural grocers, a messenger bag usually works harder than a basic tote. It may be used by store teams, sold as branded merchandise, bundled in loyalty promotions, or issued for local outreach. In all of those uses, the logo needs to remain visible when the bag is worn across the body, stacked on shelf, or packed inside a carton. That is why logo placement matters more on messenger bags than on flat grocery totes: the flap, gusset, strap path, and pocket seams all compete with the branding area.
Most sourcing problems start when buyers approve artwork on a flat digital layout but do not tie the logo location to the final sewn construction. A logo that looks centered on a pattern can shift visually once the flap folds over, a magnetic snap is added, or the strap pulls the body downward. Good RFQs define the branding area in relation to finished seams and hardware, not just bag width and height. This one detail reduces repeat sampling, print disputes, and quote noise from different factories.
- Messenger bags present three common branding zones: front flap, front body below flap, and side seam label
- The flap gives strongest brand visibility but also the highest risk of placement drift
- The front body works when the flap is plain or partially open in use
- Side labels are low cost and useful as secondary branding for retail presentation
Choose the bag structure before choosing the logo position
Logo placement should follow structure, not the other way around. A simple single-compartment canvas messenger bag with a plain flap behaves very differently from one with front pockets, piping, contrast trim, or a curved flap edge. If the bag has an external pocket under the flap, that seam line often shortens the usable print area. If the flap has a curve, the visual center may not be the geometric center. These are small pattern issues, but they directly affect whether a printed logo looks deliberate or off-center.
For natural-grocer programs, the safest construction is usually a rectangular flap with a separate panel, clean edge turn, and enough flat surface to hold the logo without crossing seams. If the buyer wants a more premium look, a lined or lightly interfaced flap keeps the branding panel smoother. That adds some material cost, but it improves print presentation and lowers the chance of wrinkling after packing.
- Best print-friendly flap: rectangular or shallow curve with clean topstitch
- Higher-risk flap: deep curve, multiple stitched layers, or hardware near center
- Useful construction note in RFQ: final logo must remain centered when flap is closed on a filled bag
- If a front pocket seam is required, show the exact distance between the seam and the logo baseline
Fabric weight and surface finish affect print clarity more than many quotes show
Canvas messenger bags usually quote in ounces, but buyers compare more accurately with GSM. For this product, 10 oz canvas is often too soft for a clean flap logo unless the flap is lined. Around 12 oz, roughly 340 GSM, is the practical middle ground for promotional and retail-ready uses. It gives enough body for better print appearance without pushing freight and sewing cost too high. For more structured bags, 14 to 16 oz, around 390 to 450 GSM, produces a better face for branding, especially on larger flap prints.
Surface finish matters too. A loose natural canvas can be attractive, but coarse texture blurs fine details. If the logo includes thin lines, small lettering, or a compact icon, the buyer should not judge only from artwork. The factory should show a print strike-off on the actual canvas quality. A softer enzyme-washed bag can feel premium, but washing changes panel dimensions and may shift the print hand feel. For brand-critical work, many buyers approve unwashed or lightly finished canvas first, then test any wash separately.
- Entry promotional grade: 280-300 GSM if cost leads and the logo is bold
- Balanced commercial grade: about 340 GSM for daily-use messenger bags
- Retail-strong structure: 390-450 GSM for cleaner flap presentation
- If using recycled cotton blend canvas, request actual print sample because specking changes logo edge sharpness
Print method selection should be based on artwork tolerance, not only unit price
Screen printing remains the default for simple logos on canvas messenger bags because setup cost is manageable and unit cost drops well at volume. It suits one-color and two-color natural grocer branding, especially on natural or dyed canvas. But buyers often overestimate how much detail screen print can carry on textured fabric. Fine serifs, tiny subtext, or reverse-out details can fill in on a 340 GSM coarse weave. If the front logo is the main retail-facing brand asset, a failed cheap print is more expensive than a slightly higher setup charge for a better method.
Transfer-based methods can preserve detail on short runs or multi-color artwork, especially if the logo sits on the flap panel before assembly. Embroidery can work for compact marks, but it is not always ideal on medium-weight canvas because thread pull can distort the flap and create a raised branding area that folds poorly in cartons. For a clean natural-grocer look, the most common commercial path is still water-based screen print on a stable flap panel, with woven side label as backup branding.
- Screen print: best for solid shapes and medium to large orders
- Heat or digital transfer: better for detail, short runs, and color complexity
- Embroidery: good for small marks, but test puckering and backside finishing
- Debossed patch or sewn label: useful if the front branding should be understated rather than highly visible
Write logo placement specs the factory can actually produce
A common RFQ mistake is stating only 'center logo on flap' with an artwork file attached. Production teams need a measurable standard. The placement should reference the finished flap width, the top fold line, and the lower stitched edge. If the flap closes over a magnetic snap, include the snap centerline and the no-print margin around it. This makes the pattern room, print room, and sewing line work from the same target. Without this, each department may center the logo differently.
It also helps to define visual acceptance, not only dimensions. For example, if the flap has rounded corners, the logo may be dimensionally centered but still look too low after folding. Good approval notes include a photo of the closed bag and indicate what matters most: center alignment when laid flat, or center appearance when packed and worn. Buyers dealing with multiple suppliers get cleaner quote comparisons when this spec is in the first RFQ round.
- Reference placement from finished seams, not cut-panel size
- State logo size in millimeters and allowable tolerance
- Mark no-print zones around snaps, pockets, seams, and fold lines
- If there is both front print and side label, show priority: which branding element must be exact if seam variation occurs
- Typical commercial tolerance for logo position: plus or minus 5 mm on medium bags
MOQ and cost logic: where logo placement starts changing the quote
Logo placement on a messenger bag is not just an artwork choice; it changes the manufacturing route. Printing on the cut flap panel before sewing often gives better alignment, but it adds handling and WIP control. Printing after assembly can be cheaper in some factories, but it may reduce placement accuracy because seams and flap bulk interfere with screen contact. That is why two quotes with the same bag dimensions can differ noticeably once branding method and placement are fixed.
MOQ matters because setup costs are spread across the order. For many custom messenger bag projects, 500 pieces per colorway is around the lower workable point if the buyer needs custom fabric, logo print, labels, and export packing. At 1000 pieces and above, the unit cost usually becomes more stable because wastage, screen setup, and carton efficiency improve. At very low MOQs, some suppliers quietly simplify the construction, downgrade labels, or substitute stock canvas shades. Procurement teams should compare quotes on the same process basis, not only FOB price.
- Typical cost drivers: canvas GSM, flap lining, print setup, strap quality, labels, packing, and order quantity
- Pre-sew panel printing usually improves placement but can add process cost
- Small run orders may carry screen setup and custom label charges separately
- Price breaks are often meaningful at 500, 1000, 3000, and 5000 pieces
- If comparing quotes, separate one-time setup charges from recurring unit cost
Sample approval should include branding performance, not just bag shape
A fit sample only confirms size and silhouette. For messenger bags with visible logo placement, buyers should expect at least a print strike-off and one pre-production sample using final fabric and final branding method. The strike-off shows whether the line thickness holds, whether the ink sinks too much into the canvas, and whether the chosen color stays clean on natural fabric. The pre-production sample then confirms how the logo sits after sewing, topstitching, and flap folding.
Natural grocer programs often involve muted colors and eco-looking materials, which makes print contrast more sensitive than on bright synthetic bags. A green logo that looks fine on a screen may read weak on warm natural canvas. During approval, inspect both flat and hanging views. A flap can wrinkle slightly at the fold and make a centered logo appear tilted. This is exactly the type of issue that should be solved in sampling, not tolerated in bulk and argued later during inspection.
- Approve a physical print strike-off on the actual canvas quality
- Review the pre-production sample with the bag closed, filled lightly, and photographed front-on
- Test readability of any small text from normal shelf or wearing distance
- For dark webbing and light canvas combinations, inspect whether strap staining or rub transfer affects the print area
- If multiple colorways are ordered, approve one standard placement map for all to prevent drift between runs
QC thresholds for logo placement, stitching, and presentation
Inspection standards should reflect the fact that logo errors are usually more commercially damaging than minor internal seam cosmetics. A bag can be structurally sound and still fail retail presentation if the flap logo is visibly crooked. Procurement teams should classify major defects around print quality, orientation, and placement. This is especially important when using external inspectors or when different suppliers quote under similar specs but apply different tolerance standards in production.
Besides branding accuracy, inspect how the bag hangs. A messenger bag with uneven strap attachment can twist the front panel, making even a correctly printed logo look misaligned. Stitching density, bartack balance, and flap topstitch consistency all affect visual alignment. For acceptance, combine measured tolerance with practical visual standards under normal viewing distance. If the logo reads off-center at first glance, the technical explanation will not help after the goods reach stores or distributors.
- Major defect examples: visibly crooked logo, wrong logo color, unreadable text, reversed side label
- Minor defect examples: slight natural slub away from logo area, light interior thread tail
- Check flap topstitch distance consistency because uneven edges alter the apparent logo center
- Inspect loaded hanging position on random samples, not only flat tabletop presentation
- Use an agreed AQL plan and add a specific logo-placement measurement sheet to the inspection file
Packing and carton planning can protect or damage the printed flap
Packing is often treated as a shipping topic, but with messenger bags it is also a print-protection topic. The flap is usually the most visible branding surface and the easiest area to crease or abrade in transit. If bags are packed too tightly, the printed flap can rub against webbing hardware, snaps, or neighboring seams. On dark straps, friction can leave marks on natural canvas. These are not dramatic defects in the factory, but they become obvious when cartons are opened for store allocation.
A practical export plan uses carton counts matched to GSM and bag size rather than one standard packout for every item. Medium canvas messenger bags often load at 20 to 40 pieces per carton, depending on gusset, strap packing style, and whether inserts are used. If the logo area is sensitive, light tissue, a flap insert, or careful folding direction may be justified. Buyers should weigh the small packing cost against lower risk of presentation claims and rework at destination.
- State whether individual polybag is required, optional, or prohibited for sustainability policy reasons
- Fold bags so the printed flap is not pressed directly against metal hardware
- Limit carton compression on heavier 390-450 GSM bags to reduce hard flap creasing
- Request estimated carton dimensions and gross weight before PO approval
- If retail allocation requires barcode stickers, define sticker location away from visible branding panels
Lead time risk usually comes from approvals and color coordination, not sewing time
Canvas messenger bags are rarely delayed because the sewing itself is difficult. Delays more often come from artwork approval, print strike-off revision, webbing color matching, label development, and sample signoff. When the front flap carries the main logo, any revision to position or print density can ripple through the schedule because the factory may need to remake screens, reprint cut panels, or hold sewing while waiting for approval. This is why early technical alignment shortens actual calendar time better than pressuring the supplier for unrealistic production promises.
Buyers importing for seasonal promotions should build the timeline backward from the in-warehouse date, not ex-factory date. Include time for sample transit, approval lag, possible strike-off correction, mass production, pre-shipment inspection, and ocean or air freight buffer. If the project uses multiple colorways, request whether they will print in one batch or separate runs. Mixed-run scheduling can cause slight placement or color variation if controls are not locked at the first approved standard.
- Typical sequence: artwork approval, material color confirmation, print strike-off, PP sample, bulk production, inspection, shipment
- Logo position changes after PP approval often create the biggest avoidable delay
- Peak seasons can lengthen print queue even when sewing capacity looks open
- If using nominated inspection, book tentatively before bulk finishes to avoid calendar gaps
- One approved golden sample should stay on site for line reference during production
Specification comparison for buyers
| Spec decision | Recommended option | When it fits | Buyer risk to check |
|---|---|---|---|
| Base fabric weight | 12 oz canvas, about 340 GSM | Best balance for daily grocery-related promo use, holds print shape better than light cotton | Some suppliers quote 12 oz before washing or use loose weave fabric that feels lighter in hand |
| Premium structure upgrade | 14-16 oz canvas, about 390-450 GSM | Useful when the logo sits on a flap and the bag needs cleaner presentation at retail | Heavier fabric increases freight, can distort if flap edge is not topstitched with proper seam allowance |
| Main logo position | Centered on front flap, 25-40 mm above flap edge | Best visibility when the bag is worn crossbody or displayed folded | Placement can drift on angled flaps unless the print file references stitching line, not panel cut size |
| Secondary branding | Woven side label on outer seam | Good for subtle brand presence when the front print must stay minimal | Label can be hidden by side gusset fold or inserted upside down if not shown clearly on artwork pack |
| Print method for simple 1-2 color logo | Silk screen with water-based ink | Most cost-effective for medium and large runs on natural cotton canvas | Ink spread on coarse canvas can soften small text below 3 mm stroke width |
| Print method for detailed artwork | Heat transfer or digital transfer on flap panel before sewing | Suitable for finer lines, gradients, or short runs where screen setup is expensive | Transfer hand feel may look less natural; heat application area can become glossy on untreated canvas |
| Bag construction for logo stability | Separate flap panel with interfacing or lining | Helps keep logo area flatter and improves print registration | Interfacing quality varies; too stiff can crack at fold, too soft gives wrinkled print surface |
| MOQ logic | 500-1000 pcs per colorway for custom print and structure | Typical level where screen setup, custom label, and carton efficiency become workable | Very low MOQs often push suppliers to substitute stock fabric, simplify pockets, or merge approval steps |
| Export packing | Individual polybag optional, 20-40 pcs per export carton based on size and GSM | Works for wholesale, distributor, and retail replenishment programs | Over-compressed cartons can crease printed flap area and leave rub marks on dark webbing |
Buyer checklist before sampling
- Define the exact logo location from the sewn edge or flap seam, not only from the raw panel size
- State fabric weight in GSM and fiber content, for example 340 GSM 100% cotton canvas, to avoid loose ounce-based substitution
- Specify whether the logo is printed on the cut panel before sewing or on the finished bag after assembly
- Include maximum and minimum logo dimensions and any no-print zones near seams, snaps, magnetic closures, or pocket openings
- Match the print method to artwork detail: screen print for bold simple logos, transfer or embroidery only when the artwork justifies the extra cost
- Require a pre-production sample with final fabric, final strap color, and actual branding method, not a blank fit sample
- Approve acceptable print tolerance, such as placement within plus or minus 5 mm and color within the signed print strike-off
- List strap width, strap attachment style, and reinforcement stitching because logo appearance suffers if the bag body sags under load
- Define packing orientation if logo must face front when the retailer opens the carton
- Request carton dimensions, gross weight, and units per carton early for landed-cost planning and warehouse slotting
Factory quote questions to send
- Is the quoted fabric weight measured finished or greige, and what is the accepted GSM tolerance in bulk production?
- Will the logo be printed before cutting, after cutting, or on the sewn bag, and which method gives the best placement accuracy for this flap shape?
- What is the minimum readable line thickness and text size for this print method on this canvas texture?
- Does the flap include lining or interfacing to keep the logo panel flat, and if yes, what material is used?
- What MOQ applies to each logo colorway, and how does the unit price change at 500, 1000, and 3000 pieces?
- Are setup charges included for screens, transfer films, woven labels, and custom webbing colors, or billed separately?
- What sample stages are available: digital mockup, material swatch, printed strike-off, pre-production sample, and production sample from the line?
- How many pieces per carton are planned, what carton size is estimated, and will flap inserts or tissue be used to reduce print creasing?
- What AQL level is used for logo placement and print defects, and what defect examples are considered major versus minor?
- What is the standard lead time for lab dips, sample approval, bulk production, and ex-factory date during peak season?
Quality-control points to confirm
- Logo placement on flap or body must be within approved tolerance, commonly plus or minus 5 mm horizontally and vertically
- Printed color should match approved strike-off under agreed lighting; obvious shade drift across production lots is rejectable
- No broken print, pinholes, ghosting, heavy smudging, or ink contamination on adjacent panels
- Small text and fine lines must remain legible after print curing and light rubbing test
- Canvas should meet approved GSM tolerance and weave appearance; slubs can be natural but must not cut through key logo areas
- Flap edge topstitching should run evenly without puckering that bends or wrinkles the printed logo area
- Strap attachment bartacks must be balanced left and right; bag should hang straight when loaded
- Magnetic snap or closure position must not interfere with centered logo alignment on the flap
- Woven side labels must be inserted on the correct seam side, with readable orientation and secure stitch-in
- Cartons should protect the printed surface from transfer marks, moisture, and crush creases during transit