Start With the Date the Bags Must Be Usable
A coffee roaster rarely buys canvas messenger bags just to have bags. There is usually a business moment attached: a seasonal coffee release, a wholesale account opening, a subscription pack-out, a staff rollout, a trade show, a roastery tour program, or a retail merchandise drop. The date that matters is not the sewing completion date. It is the day the bags are usable at the warehouse, fulfillment center, cafe, or event venue.
That distinction changes the calendar. Work backward from the usable date and add time for receiving, carton count, spot inspection, barcode checks, photography, store allocation, kitting, and domestic delivery. Then add customs clearance, international transit, shipment booking, final inspection, packing, finishing, sewing, decoration, cutting, trim readiness, fabric readiness, sampling, and internal approval. One quoted phrase such as 45 days can hide five or six separate clocks.
The common schedule problem is not always a dramatic factory delay. More often, the calendar gets nicked a little at a time: two days waiting on logo placement, three days for a patch proof, a week for webbing, a late barcode file, then a missed freight booking. A useful canvas messenger bags lead time planning guide for coffee roasters should make those small waits visible before they become launch problems.
- Set the in-hand date at the location where the bag becomes usable, not only the public launch date.
- Reserve time after delivery for receiving count, spot inspection, kitting, photography, subscription packing, or cafe allocation.
- Ask each supplier to quote sample lead time, bulk production lead time, packing time, booking time, and transit assumptions separately.
- Assign internal approval owners for product spec, artwork, finance, packing, inspection, and final sample signoff.
Translate Roaster Use Into a Real Bag Spec
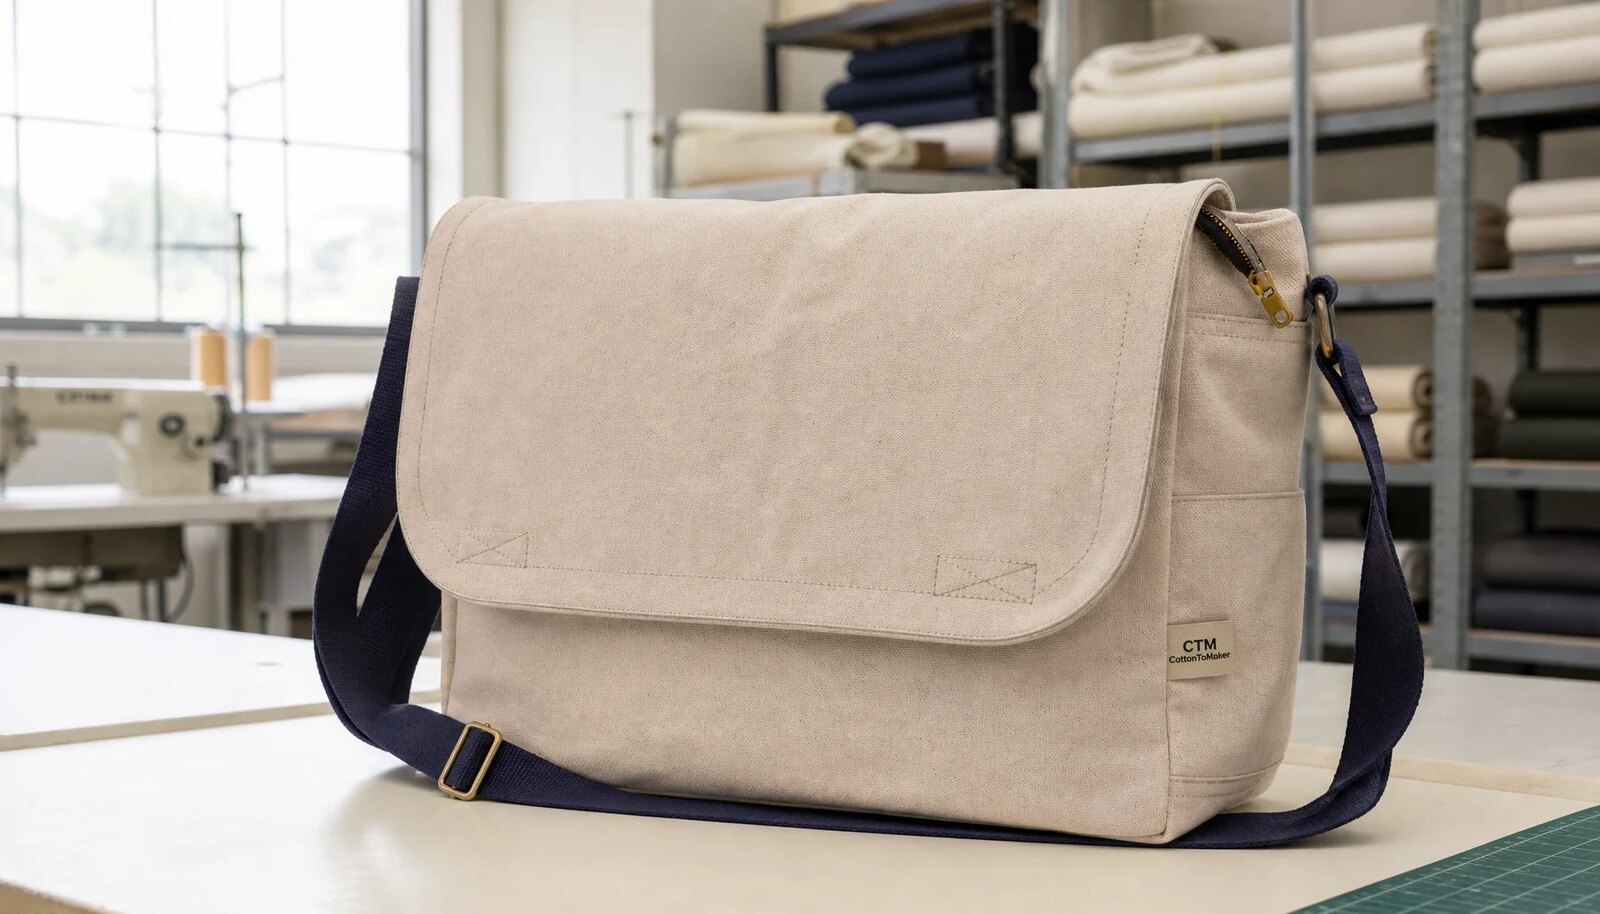
The right messenger bag specification depends on what the bag has to carry and how it will be judged. A staff bag for cupping notebooks, route sheets, tablets, tools, or cafe supplies needs stronger reinforcement than a lightweight event giveaway. A retail SKU needs consistent shape, clean finishing, and packing that supports shelf or online presentation. A subscription add-on may need to fold into an outer shipper without crushing coffee bags. A wholesale welcome kit may need room for sample packs, brew guides, pricing sheets, and account documents.
Procurement should define the bag around real contents before requesting final prices. State the finished width, height, gusset, flap depth, strap width, adjustable strap length range, pocket count, pocket openings, closure method, lining, laptop sleeve if needed, and reinforcement points. If the request says 12 oz, 14 oz, or 16 oz canvas, also ask for approximate GSM. Ounce conventions are not always used consistently across markets, and finish can change the final feel.
During sampling, load the bag with the actual items it is expected to carry. Two retail coffee bags, a brew guide, a water bottle, and a tablet behave differently from a stack of event leaflets. The flap should close without twisting. Pockets should remain usable. The strap should adjust to the intended wearer range. These practical checks prevent a familiar sourcing argument: the bag is technically made to spec, but it does not work well in real use.
- List intended contents by size and approximate weight before finalizing pattern dimensions.
- Specify finished dimensions and strap range in measurable terms, not only as small, medium, or large.
- Use physical samples to test loaded shape, closure alignment, pocket access, strap comfort, and fold behavior.
- Choose fabric weight, lining, and reinforcement based on use case rather than unit price alone.
Make Fabric and Trim Comparable Before You Compare Prices
Two quotes can look close while describing very different canvas messenger bags. One supplier may assume stock 10 oz canvas. Another may price 14 oz dyed canvas with lining. A third may include custom webbing, antique brass hardware, a woven patch, and individual barcoded packing. The buyer sees three unit prices, but the factories are not pricing the same product.
A clean RFQ names the material system. Fabric details should include composition, weight, color, finish, shrinkage expectation, and approved reference. A stock undyed canvas can be fast. Custom dyed canvas can add material lead time. Washed canvas may improve hand feel, but it can affect shade variation, shrinkage, and finished size. Coated or water-resistant finishes may change print adhesion and the way the bag feels in hand.
Trim deserves the same attention. Strap webbing width, webbing material, zipper gauge, zipper tape color, puller style, snap or magnetic closure, buckle or slider material, thread color, woven label, patch type, and hangtag should be specified before price comparison. Small components often create hidden lead time because they come from separate vendors. A black plastic adjuster may be available now; an antique brass metal slider or custom woven side label may need its own MOQ and approval cycle.
- Ask whether canvas, lining, webbing, zipper, snaps, buckles, labels, and patches are stock or sourced after deposit.
- Require the supplier to state actual fabric weight in oz and GSM where possible.
- Approve a color swatch and hand-feel reference before bulk material is purchased.
- Include trim specifications in the RFQ so the factory does not default to cheaper, unavailable, or slower substitutes.
Choose Decoration That Suits Both Canvas and Calendar
Decoration often drives the schedule on branded messenger bags. A one-color screen print on the flap or body panel can be efficient when the artwork is bold, flat, and not too close to seams. Multi-color screen printing needs registration control, curing time, and a first-article check before panels move into sewing. Embroidery can feel more premium, but small text can close up on textured canvas and high stitch counts add cost and time. Woven, printed, or leather-look patches can solve some artwork problems, but they create another component to develop and approve.
Give the factory vector artwork, logo dimensions, Pantone or thread references, placement from fixed construction points, and acceptable tolerance. Placement should be measured from a seam, flap edge, pocket edge, or centerline. Centered on front sounds clear in a meeting, then becomes fuzzy once flap depth, pocket layout, gusset shape, and stitching lines enter production. For many bag programs, plus/minus 5 mm may be a practical starting point for print or patch placement, but the factory should confirm what is realistic for the pattern.
Artwork also needs to be checked against the surface. Coarse cotton canvas does not behave like coated paper. Fine strokes around 0.3-0.5 mm, very small text, gradients, distressed marks, and tight multi-color registration may not reproduce cleanly. Ask the factory for minimum line width and minimum readable text height for the chosen method. The pre-production sample should confirm appearance, curing, rub resistance, patch security, and whether the decoration stays clean after folding and packing.
- Use screen print for bold limited-color logos when speed and cost control matter.
- Use embroidery or patches when texture and perceived value justify the added approval step.
- Measure decoration placement from fixed seams or edges and define acceptable tolerance.
- Review first bulk decorated panels before the full sewing run continues.
Build the RFQ So Quotes Do Not Drift
A strong RFQ forces every supplier to price the same item. Include the dimension sheet, fabric specification, lining, trim, hardware, pocket layout, closure, decoration method, artwork files, quantity by SKU, packing requirement, inspection expectations, destination, incoterm, payment term, and target in-hand date. Without that detail, a low price may simply mean thinner fabric, simpler trim, excluded setup charges, loose packing, or a longer schedule.
Break quantity down by SKU. An order of 1,000 pieces may sound simple until it becomes two body colors, two strap colors, two patch types, and two packing formats. The factory may treat those as separate material lots or decoration setups. That can change MOQ, price, production flow, and inspection lots. For a first run, the safest calendar usually comes from limiting the assortment: one size, one body color, one strap color, one decoration placement, and one packing method.
The RFQ also has to ask what starts the clock. Some suppliers count bulk lead time from deposit receipt. Others count from PO confirmation, final artwork approval, material approval, signed pre-production sample approval, or arrival of custom trim. A quote stating 35 working days is incomplete unless it says 35 working days from which event. This matters when a roaster is reserving subscription packing time, scheduling retail photography, or booking trade-show freight.
- Send the same specification pack to each supplier and require written confirmation of assumptions.
- Separate sample fees, setup fees, patch fees, screen charges, packing costs, inspection costs, and freight assumptions.
- Ask for MOQ by body color, strap color, lining, hardware finish, decoration method, patch type, and packing type.
- Do not approve a PO until lead time start point and milestone dates are defined.
Use Sampling as a Production Risk Filter
Sampling should do more than create a nice photo for an internal approval email. It should test whether the bag can be manufactured consistently and used as intended. A development sample can confirm pattern, scale, pockets, strap range, flap depth, and general construction. It may use available fabric or substitute trim if the supplier clearly labels what is temporary. The pre-production sample should use final canvas, final trim, final decoration, final label or patch, and final packing method.
Common sample issues are practical and easy to miss on a flat image. The strap drop may not fit the target wearer. The flap may block the front pocket. A zipper may catch under the flap. The logo may sit too close to a seam. A patch may lift at the corners. A gusset may collapse when loaded. Each comment should become a measurable correction. Instead of saying the logo is too low, state the required distance from the flap edge. Instead of saying the strap feels short, state the target adjustable length range.
Physical approval is especially important for retail merchandise and staff-use bags. Photos cannot reliably confirm fabric hand feel, odor, zipper movement, print curing, seam strength, strap comfort, or loaded shape. Once approved, the signed pre-production sample should become the reference for bulk production and inspection. Keep one sample with the factory and one with the buyer or inspection team, so disputes can be checked against the same reference.
- Separate development sample approval from final pre-production sample approval.
- Review the sample empty, loaded, worn, folded, and packed.
- Write comments with measurements, tolerances, and pass-or-fail criteria.
- Keep signed reference samples for production and final inspection.
Turn Lead Time Into Dated Milestones
A realistic schedule breaks the order into stages: material approval, fabric purchase or allocation, trim sourcing, cutting, decoration, first-article review, sewing, inline inspection, finishing, repair, final random inspection, packing, carton marking, shipment booking, export handling, transit, customs, and domestic delivery. Some steps can overlap. Others cannot. Cutting cannot start without approved fabric. Sewing cannot run efficiently if labels, zippers, buckles, or patches are missing. Final packing cannot close if barcodes and carton marks arrive late.
Ask the supplier for dates, not just duration. The schedule should show when fabric is ready, when trim is ready, when cutting begins, when first decorated panels are checked, when sewing starts, when inline inspection happens, when final inspection is planned, and when goods are available for booking. This gives procurement a chance to intervene early. A missing trim item in week two is a manageable problem. Discovering it after sewing should have started is not.
Rush options need honest tradeoff review. Overtime can reduce sewing days, but it may raise defect risk if repair and inspection time are squeezed. Air freight can rescue a launch while damaging the landed margin. A two-wave plan can work well: send a small launch quantity by air or courier and the balance by the normal route. That plan should be designed before packing so carton labels, inspection lots, commercial documents, and warehouse expectations match the split.
- Ask for dated milestones from material readiness through shipment booking.
- Track first decorated panels before all panels move into sewing.
- Build buffer for material delays, sample revision, decoration repair, packing correction, and freight booking.
- Consider split shipments only after confirming carton separation, inspection lots, and landed-cost impact.
Set QC Tolerances Before Bulk Cutting
Quality control works best when the factory knows the acceptance standard before production starts. Define size tolerance, strap tolerance, flap alignment tolerance, print or patch placement tolerance, stitch density expectation, reinforcement locations, hardware function, odor limits, and packing rules. Same as sample is useful language, but it is not enough. The approved sample needs a written tolerance sheet beside it.
Practical tolerances depend on the pattern and fabric. Start by asking the factory to state its normal standard. For many sewn bag programs, finished width and height may be controlled around plus/minus 1 cm, strap length around plus/minus 1-2 cm, and decoration placement around plus/minus 5 mm when construction allows. These figures should not be copied blindly into every order. A small logo near a flap edge may need tighter visual control than an internal pocket opening.
An AQL inspection plan can organize final random inspection, often using buyer-selected levels such as 2.5 for major defects and 4.0 for minor defects where appropriate. AQL does not replace product-specific defect definitions. For a branded coffee roaster bag, a broken zipper, weak strap join, wrong barcode, severe odor, wrong logo color, or missing hangtag can be major because it blocks sale or use. Small loose threads or minor cosmetic variation may be acceptable if they sit within the agreed standard.
- Approve written tolerances for finished size, strap range, flap alignment, stitch density, and decoration placement.
- Classify defects before inspection: critical, major, minor, and acceptable variation.
- Inspect stress points including strap joins, pocket corners, zipper ends, flap corners, and handle joins.
- Use the signed sample, tolerance sheet, and packing spec together as the inspection standard.
Inspect Materials, Construction, Decoration, and Function
A complete inspection plan looks beyond final appearance. Incoming or pre-cut checks should verify fabric weight, color, hand feel, surface defects, shade variation, odor, and moisture condition. If the fabric is washed, coated, dyed, or pre-shrunk, confirm that finished dimensions still match the approved sample and tolerance sheet. Cotton canvas can vary by lot, and shade variation becomes obvious when body panels and flap panels are cut from inconsistent material.
Construction checks should measure finished width, height, gusset, flap depth, strap width, adjustable strap range, pocket openings, and any laptop sleeve or divider. Inspect seam allowance, seam alignment, skipped stitches, broken stitches, puckering, needle damage, loose threads, raw edge control, lining attachment, and internal seam cleanup. Bartacks should be secure and correctly placed at load-bearing points. The loaded bag should close cleanly and should not twist excessively at the strap joins.
Decoration and function checks protect the brand in everyday use. For screen print, verify size, position, opacity, edge sharpness, color, curing, dry rub, and wet rub where relevant. For embroidery and patches, verify spelling, thread color, stitch density, edge finish, and corner security. Test zipper motion, puller strength, snap or magnetic closure hold, buckle movement, and strap adjuster grip. A buyer may forgive a small thread trim issue; a customer notices a slipping adjuster immediately.
- Check material before cutting and first decorated panels before sewing the full batch.
- Measure finished goods against the tolerance sheet, not only against visual judgment.
- Test closures, zippers, strap adjusters, and loaded-bag usability during inspection.
- Document defects with photos, measurements, quantity affected, and required corrective action.
Pack for Retail, Subscription, Freight, and Receiving
Packing decisions can change lead time, landed cost, and warehouse workload. A retail merchandise bag may need individual polybags, paper bands, hangtags, barcode labels, price stickers, and SKU-specific carton marks. A subscription add-on may need a fold method that fits the fulfillment carton without crushing the flap or permanently creasing the strap. A staff-issue bag may be bulk packed, but it still needs clean presentation, accurate counts, and protection from dust and moisture.
Approve carton planning before the final production week. Confirm units per carton, carton dimensions, gross weight, net weight, carton marks, SKU separation, pallet rules, and whether cartons need desiccants or liners. Overpacked cartons can deform structured flaps and leave strap creases. Underfilled cartons raise freight cost and allow movement during transit. Mixed-SKU cartons may save space, but they can create receiving errors if barcode and carton mark rules are vague.
Moisture control matters for cotton canvas, especially on sea freight or humid routes. Ask how finished goods are stored, whether cartons are kept off damp floors, whether printing or washing has fully dried before packing, and how desiccants are placed. A rushed pack-out immediately after decoration can create odor, blocking, or transfer issues. Clear packing rules protect the product and prevent repacking delays at the point in the schedule when nobody has spare time.
- Approve fold method, individual packing, barcode, hangtag, carton quantity, and carton marks before final production week.
- Confirm carton dimensions, weights, CBM, pallet requirements, and SKU separation before shipment booking.
- Use moisture protection suitable for the route and season, especially for sea freight.
- Check packing accuracy during final inspection, not after cartons arrive at the warehouse.
Specification comparison for buyers
| Planning decision | Concrete B2B specification to request | Typical timing impact | Buyer risk to control |
|---|---|---|---|
| Supplier route | Direct factory handling cutting, sewing, finishing, packing, and at least coordinating decoration under one production schedule | Usually clearer milestone control; fewer handoffs during sample correction, first-article review, and inspection follow-up | Verify which steps are truly in-house. Outsourced screen print, embroidery, washing, dyeing, or packing can add 3-10 working days if not scheduled early |
| Supplier route | Trading company managing several product categories with named factories and a shared production calendar | Can simplify multi-item merchandise programs, especially when bags ship with aprons, totes, pouches, or drinkware | Require factory-level answers on material availability, sample ownership, corrective action, inspection access, and who approves production changes |
| Urgent route | Stock blank messenger bag plus local decoration | Can work for near-term cafe openings, conferences, or seasonal events when custom fabric, trim, and pattern work are not possible | Confirm blank inventory by color and quantity before selling the idea internally. Stock bags limit size, strap length, pocket layout, label location, and decoration area |
| Fabric weight | 12 oz to 16 oz cotton canvas, approximately 400-540 GSM depending on supplier conversion, weave, and finish | Appropriate for many retail-grade messenger bags needing structure, durability, and a substantial hand feel | Ask for actual GSM test result or fabric ticket. Nominal oz can vary by market convention, washing, coating, and finishing |
| Fabric finish | Dyed, pre-shrunk or controlled-shrinkage canvas with approved swatch, color standard, and hand-feel reference | Custom dyeing, washing, coating, or pre-shrinking can add material lead time before cutting begins | Set shrinkage expectations before bulk. Uncontrolled shrinkage can change finished size, flap alignment, strap drop, pocket access, and print placement |
| Construction | Reinforced strap joins, bartacks at stress points, clean internal seams, specified stitch density, and defined seam allowance | More operations can add sewing time but reduce failure risk during staff use, retail returns, and wholesale kit handling | Agree tolerances before production: finished size commonly plus/minus 1 cm, print placement plus/minus 5 mm, strap length plus/minus 1-2 cm where suitable |
| Decoration | Screen print for bold 1-3 color artwork; embroidery or woven patch for premium logo treatment; printed patch for detailed marks | Each method has separate artwork, setup, sample, first-article, and approval steps | Fine text below about 4-5 mm high, thin strokes below about 0.3-0.5 mm, gradients, and tight registration may not reproduce well on coarse canvas |
| MOQ strategy | First run limited to one body color, one strap color, one size, one lining, and one decoration placement | Reduces material staging, setup changes, inspection lots, carton separation, and packing errors | Splitting by colorway, hardware finish, lining, or patch type may trigger separate material minimums and longer component lead times |
| Sample route | Development sample for size and function, then pre-production sample using final fabric, trim, artwork, label, and packing | Adds front-end time but protects bulk production from avoidable rework, quote drift, and launch-day surprises | Define what approval starts bulk production: deposit, PO, artwork approval, material approval, signed pre-production sample, or receipt of custom trim |
Buyer checklist before sampling
- Define the exact business use: retail SKU, cafe staff issue, loyalty reward, subscription add-on, trade-show giveaway, wholesale onboarding kit, or limited seasonal merchandise.
- Set the required in-hand date at the warehouse, fulfillment center, cafe, or event venue, then add receiving, count, inspection, kitting, photography, and allocation time.
- Write the finished bag dimensions: width, height, gusset, flap depth, strap width, adjustable strap length range, pocket openings, laptop sleeve size if needed, and closure position.
- Specify canvas by actual weight in oz and GSM where possible, fabric composition, dye method, finish, shrinkage expectation, color standard, hand feel, and whether lining is required.
- Name all trim: webbing width and material, zipper gauge and tape color, snap or magnetic closure, buckle or slider material, thread color, woven label, hangtag, patch, and hardware finish.
- Provide vector artwork with logo size, color references, decoration method, placement from fixed seams, minimum line width, and acceptable placement tolerance.
- Ask for MOQ separately by body color, strap color, lining color, hardware finish, patch type, decoration method, and packing configuration.
- Request sample timing for development sample, revised sample if needed, pre-production sample, and sample shipping time; do not blend sampling into bulk lead time.
- Confirm what starts the bulk clock: deposit, PO, final artwork approval, material approval, signed sample, or receipt of custom trim.
- Require a dated milestone plan covering material purchase, fabric readiness, trim readiness, cutting, decoration, first-article check, sewing, inline QC, finishing, final inspection, packing, and shipment booking.
Factory quote questions to send
- What exact canvas are you pricing: composition, oz, GSM, yarn or weave description if available, dyed or stock color, washed or unwashed, coated or uncoated, and pre-shrunk or not?
- What are your standard finished-bag tolerances for width, height, gusset, flap depth, strap length, pocket opening, print placement, patch placement, logo size, and flap alignment?
- Which production steps are in your own facility, and which are subcontracted: dyeing, washing, cutting, screen printing, embroidery, patch making, sewing, finishing, inspection, and packing?
- What is the MOQ and price break by body color, lining color, strap color, hardware finish, print method, patch type, and individual packing method?
- Which decoration method is included in the unit price, and what screen charges, digitizing charges, patch mold charges, label setup, sampling fees, or courier charges are separate?
- What artwork formats do you require, and what minimum line width, minimum text height, color-count limit, and registration tolerance do you recommend for this canvas surface?
- How many working days are needed for a development sample, revised sample, pre-production sample, and sample shipment to our approval location?
- What exactly starts bulk lead time: deposit receipt, PO confirmation, final artwork, material approval, signed pre-production sample, or arrival of custom fabric and trim?
- Can you provide a dated production schedule showing material readiness, cutting, first decorated panels, sewing start, inline inspection, finishing, final inspection, packing, and shipment booking?
- How do you test or verify canvas weight, color, shrinkage, print curing, rub resistance, zipper function, snap strength, bartack security, and carton packing accuracy?
Quality-control points to confirm
- Verify fabric weight against the approved oz or GSM specification using a measured swatch or supplier test record, not only visual judgment.
- Compare canvas color, surface texture, hand feel, coating or wash effect, and shade consistency against the approved swatch under consistent lighting.
- Check shrinkage behavior if the fabric is washed, dyed, coated, or likely to be exposed to humidity; confirm the finished dimensions still meet tolerance.
- Measure finished width, height, gusset, flap depth, strap width, adjustable strap length range, pocket openings, and laptop sleeve or insert fit where specified.
- Inspect flap symmetry, flap-to-body alignment, closure position, pocket shape, lining attachment, internal seam finish, and whether the loaded bag closes cleanly.
- Check print size, placement, opacity, edge sharpness, registration, color density, curing, cracking risk, dry rub, and wet rub where relevant to the decoration method.
- For embroidery, woven labels, and patches, check spelling, thread color, stitch density, edge finish, corner lifting, adhesive or stitch security, and alignment from fixed seams.
- Test zipper movement, puller strength, zipper tape stitching, snap or magnetic closure hold, buckle movement, strap adjuster grip, and slider finish.
- Review bartacks and reinforcement at strap joins, flap corners, pocket corners, zipper ends, handle joins, and other load-bearing points.
- Inspect stitch density, seam allowance, skipped stitches, broken stitches, loose threads, needle damage, puckering, raw edge control, and internal thread cleanup.