Start With The Deadline That Actually Controls The Order
A canvas messenger bags lead time planning guide for trade show exhibitors should begin with one blunt question: when do the bags need to be physically usable? That date is often earlier than the public opening day. The controlling deadline may be the advance warehouse close date, a kitting appointment, the distributor receiving window, the booth move-in schedule, or an internal staff kit deadline. If procurement plans from the wrong date, even a well-priced order can arrive too late to matter.
Work backward from the first operational receiving point. A factory completion date is only one milestone. The order still needs final inspection, packing confirmation, export release, freight movement, customs clearance where applicable, inland delivery, receiving, and sometimes redistribution to booth teams or regional sales offices. A supplier saying production takes 30 days is useful only after you know when that 30-day clock starts and what is excluded from it.
The cleanest approach is a backward calendar with named owners. Put the show date, move-in date, advance warehouse deadline, kitting date, and latest acceptable receiving date on the same page. Then add buffers for sample review, material booking, inspection, freight, customs, and warehouse handling. This exposes schedule pressure while there is still time to simplify the bag, change freight mode, or split priority quantities.
- Use the earliest real receiving deadline, not the show opening date, as the planning anchor.
- Confirm whether bulk production lead time starts after deposit, artwork approval, fabric approval, or written pre-production sample approval.
- Add a receiving buffer when goods pass through a kitting center, distributor, event warehouse, or show handler.
- Ask suppliers to quote against the same Incoterm, destination, and required arrival date.
- Keep a separate internal deadline for final artwork, sample approval, carton labels, and freight booking.
Turn Event Use Into A Measurable Bag Specification
Messenger bags used at trade shows are not all serving the same job. A visitor giveaway may need to hold brochures for a few hours. A staff issue bag may carry a tablet, product samples, badge inserts, notebooks, and a water bottle for several days. A sponsor gift may need to look clean enough for repeat use after the event. The specification should begin with that real use, not with a generic description such as standard canvas messenger bag.
Finished measurements matter more than category names. Specify the outside width and height, gusset, flap depth, pocket size, strap width, strap adjustable range, and closure type. If the bag must hold A4 documents, a tablet, a presentation folder, or a printed catalog, include those dimensions in the RFQ. For A4 documents, for example, the internal space needs to exceed 210 by 297 mm once seams, gusset shape, and easy insertion are considered.
This step also keeps quotes comparable. One supplier may assume a flat document bag with a narrow strap. Another may price a gusseted bag with reinforced strap anchors and an inner pocket. Both may call the product a canvas messenger bag, but they are not quoting the same item. A procurement-ready RFQ removes that guesswork before price comparison begins.
- State the expected contents: catalogs, brochures, samples, tablets, notebooks, badge inserts, or staff materials.
- List finished dimensions and tolerances instead of using only size names such as medium or laptop size.
- Confirm whether the bag needs a flat body, bottom gusset, side gusset, inner pocket, front pocket, or zipper pocket.
- Define strap width and adjustable range based on the expected carrying weight.
- Separate visitor giveaway, staff kit, sponsor gift, and resale requirements before requesting pricing.
Choose Canvas Weight, GSM, And Hand Feel With Purpose
Canvas weight influences cost, appearance, sewing difficulty, print behavior, carton weight, and how the bag feels in hand. For many exhibitor programs, 12 oz cotton canvas is a practical starting point because it balances structure, durability, printability, and freight efficiency. A lighter 10 oz canvas may work for document bags. Heavier 14 oz to 16 oz canvas can fit premium programs or heavier-use staff bags, but it can also increase sewing thickness and shipment weight.
Buyers should ask suppliers to provide both ounce weight and approximate GSM. As a working conversion, 10 oz canvas is roughly 339 GSM, 12 oz is roughly 407 GSM, 14 oz is roughly 475 GSM, and 16 oz is roughly 542 GSM. These numbers should not replace a swatch. Finishing, washing, dyeing, coating, and shrinkage can change stiffness, texture, and perceived thickness, so the approved fabric reference is still the control point.
It is also worth asking whether the quoted weight is measured before or after finishing. A greige 12 oz canvas may not feel the same as a finished 12 oz canvas from another mill. If the bag needs to stand neatly at a booth or feel sturdy when loaded, hand feel and construction matter as much as the number printed on the quote sheet.
- Use 10 oz canvas for lighter document-style bags where cost and pack weight matter.
- Use 12 oz canvas as a general starting point for exhibitor giveaways and everyday promotional use.
- Review 14 oz to 16 oz canvas for premium bags, staff kits, or heavier contents.
- Request ounce weight, approximate GSM, and whether the value is before or after dyeing, washing, coating, or finishing.
- Approve a physical swatch and pre-production sample before treating the fabric as final.
Decide The Color Route Before The Schedule Gets Tight
Color can quietly add days or weeks to an order. Natural canvas is usually the simplest route because it avoids lab dip approval and gives the bag a familiar cotton appearance. Stock dyed colors such as black, navy, olive, or grey may also be practical when the supplier has finished fabric available. Custom dyed canvas is different: it adds lab dips, buyer approval, bulk dyeing, shade review, shrinkage checks, and dye lot control before cutting can begin.
This does not mean custom color should be avoided. For brand-led sponsor programs or retail-adjacent merchandise, custom dyeing may be worth the added approval time. The key is to treat it as a schedule item, not a small cosmetic note. The RFQ should ask how many days are needed for lab dip submission, buyer review, bulk dyeing, fabric relaxation, shade inspection, and final release to cutting.
Color also affects decoration choices. Dark canvas may need a different ink setup than natural canvas. White or light ink on black canvas can require extra testing for opacity and edge quality. Natural canvas can show small cotton specks and slubs, which may be acceptable character for cotton fabric but should be separated from stains, dirt, water marks, or shade panels.
- Quote natural canvas, stock dyed black, and stock dyed navy as separate options when timing is uncertain.
- Require lab dips for any custom dyed canvas and define the approval process before issuing the purchase order.
- Ask whether stock fabric is physically available, reserved, or still subject to mill delivery.
- Confirm shade tolerance, shrinkage, and fabric stability before cutting dyed canvas.
- Test print color on the actual canvas color, not only on a digital proof.
Control Features That Change Lead Time And Cost
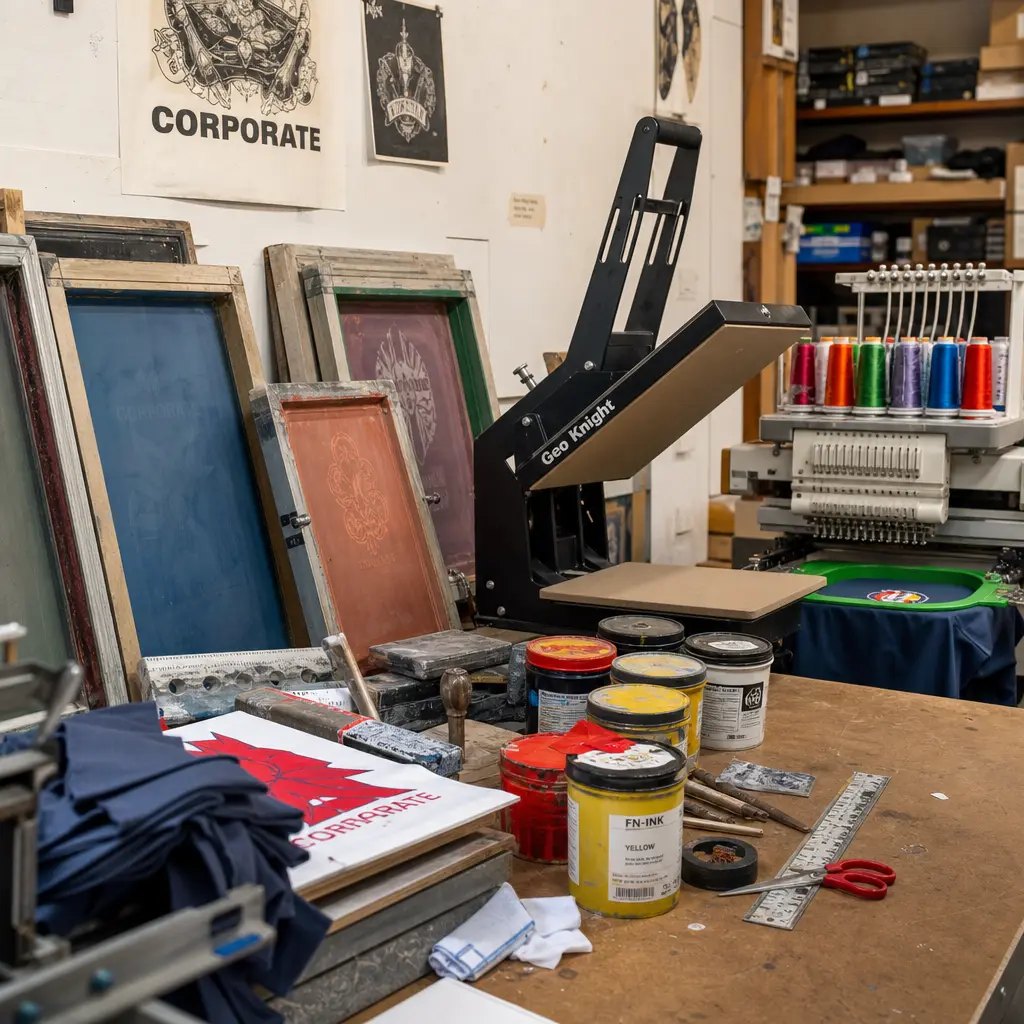
A messenger bag can look simple in a line drawing and still carry a long list of production steps. Zippers, magnetic snaps, metal sliders, custom buckles, lining, padded laptop sleeves, multiple compartments, woven labels, embroidery, hangtags, and special packing all add decisions. None of these features is a problem by itself. The risk appears when they are introduced after the factory has quoted, sampled, or reserved capacity for a simpler product.
For many trade show programs, a controlled specification is enough: a flap messenger shape, main compartment, one inner slip pocket, reinforced strap anchors, adjustable cotton webbing strap, and one visible logo position. That setup gives recipients a useful bag without adding unnecessary trim sourcing. For staff kits or premium sponsor gifts, a zipper under the flap, heavier canvas, lining, or cleaner hardware may be justified, but those choices should be included in the first RFQ and first sample.
Procurement can protect the date by sorting features into required, acceptable alternative, and optional upgrade. If a zipper becomes risky, can Velcro or a magnetic snap work? If embroidery slows the order, would a woven label or screen print still meet the brand goal? These are better conversations before sample approval than during final production.
- Fastest route: natural canvas, one-color screen print, standard strap, simple flap, and minimal trim.
- Moderate route: stock dyed canvas, zipper under flap, inner pocket, woven label, and adjustable strap hardware.
- Longer route: custom dyeing, lining, padded sleeve, embroidery, multiple print positions, or custom hardware.
- Higher coordination risk: several exhibitor logos, mixed bag colors, split packing methods, and multiple destinations.
- Sample any artwork that crosses seams, curves around a flap, or sits near closures, buckles, and fold lines.
Make Sampling A Real Approval Gate
Sampling is where the buyer finds out whether the quote has become the intended product. A digital mockup can show logo position, but it cannot show how a flap hangs, whether a strap is comfortable, how stiff the canvas feels, or how ink settles into the fabric texture. A previous factory sample is useful for judging capability, but it is not the same as a pre-production sample made with the final order materials.
A strong sampling sequence usually starts with fabric swatches or an existing reference sample, then moves to a pre-production sample using final fabric, final trim, final thread, final strap, final closure, final decoration, and proposed packing. If timing is tight, a mock sample in substitute fabric can help confirm pattern and dimensions. Even then, the buyer should not skip approval of the real canvas, real logo method, and real packing approach before bulk production.
The approval record should be precise enough for inspection later. Photograph the front, back, side, base, interior, strap joints, closure, print, label, and folded packing position. Measure width, height, gusset, flap depth, pocket size, strap width, and strap range. Note approved deviations clearly. When inspectors and production teams have the same reference, there is less room for argument near shipment.
- Load the sample with the actual event contents and check whether the shape still works.
- Review strap comfort and strap anchor strength while the bag is loaded, not only while empty.
- Check logo position, ink coverage, print edge quality, and color on the final canvas surface.
- Open and close the bag repeatedly to test Velcro, magnetic snaps, zippers, sliders, and hooks.
- Approve fold direction, tissue or interleaving, carton count, carton marks, and printed-panel protection before packing.
Map Lead Time By Stage, Not By Guess
Reliable planning breaks the order into visible stages. A typical canvas messenger bag program may include RFQ review, artwork cleanup, digital proof, material confirmation, sample production, sample courier, buyer review, deposit confirmation, fabric preparation, trim sourcing, cutting, sewing, decoration, curing, trimming, inline QC, final inspection, packing, export documents, freight booking, customs, inland delivery, and warehouse receiving. The list is long because the process is real.
For a standard natural canvas bag with one-color screen print, the early stages may move quickly if artwork is clean and fabric is available. Custom dyed canvas, special hardware, lining, embroidery, larger quantities, multiple logo versions, or split shipments can stretch the timeline. The factory's quoted lead time should therefore be tied to quantity, material status, and the approval point that starts production.
A stage map also shows which decisions cannot wait. Artwork must be frozen before screens, embroidery files, or woven labels are made. Fabric shade must be approved before dyeing or cutting. Carton dimensions may be needed for freight estimates. Inspection should be scheduled before shipment release, not after the goods are already packed and urgent.
- RFQ stage: specification, quantity breaks, destination, Incoterm, required arrival date, and expected contents.
- Proof stage: vector artwork, Pantone references, logo size, logo position, and decoration method.
- Sample stage: sample making, courier time, buyer review, measurement record, and written approval.
- Bulk stage: material release, cutting, sewing, decoration, curing, trimming, inline QC, and rework.
- Shipment stage: final inspection, packing, carton labels, export documents, freight, customs, and receiving.
Compare Quotes By Event Readiness, Not Unit Price Alone
The lowest unit price is not always the lowest-risk order. A cheaper quote may use lighter canvas, skip reinforcement, omit packing details, exclude labels, or assume a longer delivery path than the event can tolerate. Another supplier may look more expensive but include stronger strap construction, realistic carton planning, inspection time, and clearer export coordination. Procurement needs to compare the whole delivered outcome.
Event readiness means the bags arrive in the right place, in the right cartons, with the right markings, early enough for use, and in condition for immediate distribution. That includes carton count, pieces per carton, gross weight, net weight, CBM, PO number, item code, sponsor name, booth number, show name, advance warehouse labels, and any destination contact details required by the event handler.
Normalize Incoterms before making an internal recommendation. EXW, FOB, CIF, DAP, DDP, courier, and air freight assign cost and responsibility differently. A low EXW price can become less attractive once pickup, export handling, customs, duties, delivery appointment rules, and event receiving requirements are included. For a fixed exhibition date, the quote should be treated as a supply chain proposal, not just a product price.
- Compare the same fabric weight, finished size, pocket, closure, strap, trim, decoration, and packing method.
- Ask each supplier to list what is included and excluded in price, sampling, inspection, packing, and delivery.
- Review production lead time after written pre-production sample approval, not only after deposit.
- Request carton dimensions, total CBM, and estimated carton weight before awarding the order.
- Check whether the schedule includes inspection, possible rework, export documents, and carton labeling.
Plan MOQ, Price Breaks, And Order Splits Early
Minimum order quantity is shaped by more than a factory preference. Fabric roll length, dye lot size, print setup, cutting efficiency, sewing line setup, trim MOQ, label MOQ, carton planning, and export administration can all influence the minimum practical order. A supplier may accept a smaller order, but the unit price may rise because setup work is spread across fewer bags.
Ask for price breaks at realistic quantities using the same specification. Common comparison points include 500, 1,000, 3,000, and 5,000 pieces. These breaks help buyers decide whether to order only for one show or consolidate demand across regional teams, distributors, annual events, or sponsor programs. They can also reveal whether the real constraint is fabric, decoration setup, trim sourcing, or sewing capacity.
Order splits must be visible before award. A 3,000-piece order with one logo, one bag color, one packing method, and one destination is very different from a 3,000-piece order divided into six logos, three bag colors, two packing methods, and four destinations. Every split can add screens, labels, carton marks, packing lists, inspections, and shipment coordination.
- Request price breaks at 500, 1,000, 3,000, and 5,000 pieces for the exact same bag specification.
- List every logo version, bag color, print color, label version, packing method, and receiving address in the RFQ.
- Ask which MOQ is controlling the order: fabric, dye lot, trim, label, print setup, sewing line, or export handling.
- For distributor programs, provide allocation quantities before carton labels and packing lists are created.
- For repeat events, keep the same pattern, fabric, trim, and approved sample where possible to reduce resampling.
Lock Packing, QC Standards, And Change Control Before Shipment
Packing is part of production quality. It affects print transfer, fold marks, carton weight, carton volume, distributor allocation, and booth distribution speed. Bags may be bulk packed, individually polybagged, packed in inner bundles, or protected with tissue over the printed flap. The right method depends on whether the bags will be handed out at a booth, inserted into kits, shipped to multiple exhibitors, or resold.
Printed flaps need special attention. If screen print is packed before it is fully cured, or if straps, buckles, or other printed panels rub under pressure, transfer marks can appear. Buyers should define curing expectations, fold direction, interleaving, tissue protection, and maximum carton weight before packing starts. This is especially important for large solid logos, dark ink on natural canvas, and tightly compressed cartons.
Quality control should focus on defects that affect use and brand presentation: finished dimensions, strap strength, seam quality, flap alignment, pocket placement, closure function, logo position, print adhesion, fabric cleanliness, odor, carton count, and carton labels. Natural cotton canvas may show minor slubs or specks, but oil stains, mold, heavy dirt, water damage, strong odor, broken stitches, and print transfer should be treated differently. After sample approval, change control becomes just as important as inspection. Artwork revisions, fabric substitutions, new trims, late packing changes, delayed deposits, and missing labels can all threaten the show date.
- Approve packing method, pieces per carton, carton dimensions, gross weight, net weight, total CBM, and carton marks before mass packing.
- Set a practical maximum carton weight, often around 15 to 18 kg depending on destination handling rules.
- Use the approved pre-production sample as the inspection standard for fabric, construction, decoration, and packing.
- Reserve final inspection several days before planned shipment release so there is room for correction.
- Keep a documented fallback, such as partial air shipment of priority quantities, if the full order cannot meet the receiving deadline.
Specification comparison for buyers
| Procurement decision | Practical B2B recommendation | Best fit for trade show programs | Lead time or quality risk to verify |
|---|---|---|---|
| Required receiving date | Plan from the advance warehouse, kitting center, distributor dock, or booth move-in deadline, not from the public show opening date | Programs with fixed show dates, sponsor commitments, staff kits, or distributor allocation | A factory production completion date is not an in-hand date; confirm inspection, export release, freight, customs, and final delivery milestones |
| Canvas body weight | Use 12 oz cotton canvas as a common starting point; quote 10 oz for light document bags and 14 oz to 16 oz for premium or heavier-use bags | Brochure bags, visitor giveaways, staff issue bags, and sponsor messenger bags | Ounce weight is often measured before finishing; confirm approximate GSM, finished hand feel, shrinkage, and approved swatch reference |
| Finished dimensions | Specify width, height, gusset, flap depth, pocket size, strap width, and strap adjustable range with tolerances | Orders that must hold catalogs, tablets, notebooks, badge inserts, or product sheets | Vague terms such as medium or laptop size create quote gaps; confirm the actual contents and finished measurement tolerance |
| Construction strength | Require reinforced strap anchors using box stitch, bartack, cross stitch, or an approved equivalent | Bags expected to carry show literature, samples, or staff materials for several hours | Strap joint failure is a high-impact defect; inspect stitching density, thread quality, skipped stitches, and stress points |
| Closure system | Velcro is fast and economical; magnetic snaps look cleaner; zipper under flap improves content security | Velcro for broad giveaways, magnets for cleaner premium bags, zippers for staff kits or higher-value contents | Magnets, zippers, sliders, and hooks add trim sourcing and function checks; test after sewing and carton compression |
| Decoration route | Use one-color screen print for time-sensitive event branding; consider woven labels or embroidery for premium reusable programs | Sponsor logos, distributor branding, staff bags, and reusable promotional merchandise | Canvas texture can reduce edge sharpness; approve a strike-off or pre-production print on the actual canvas color |
| Color route | Use natural canvas or stock dyed colors for shorter schedules; use custom dyed canvas only when brand color control justifies added approval time | Natural canvas for faster sourcing and sustainability messaging; stock black or navy for strong contrast | Custom dyeing requires lab dip approval, bulk shade control, shrinkage review, and dye lot management before cutting |
| Sampling gate | Approve a pre-production sample made with final fabric, final trim, final decoration, and proposed packing | Orders where late rework would miss the show or disrupt distributor commitments | Mock samples can confirm size but may not reveal fabric stiffness, print absorption, trim quality, or packing marks |
| Packing method | Define bulk pack, inner bundles, individual polybags, tissue, interleaving, carton count, and carton marks before production packing | Booth distribution, kitting, resale, multi-exhibitor programs, and advance warehouse shipments | Fresh print can transfer under pressure; approve curing time, fold direction, printed-panel protection, and maximum carton weight |
Buyer checklist before sampling
- Confirm the show opening date, exhibitor move-in date, advance warehouse deadline, kitting date, and latest acceptable receiving date before sending the RFQ.
- State the receiving destination and Incoterm clearly, such as FOB port, DAP warehouse, DDP event warehouse, or courier to office.
- Build the specification around finished bag dimensions: width, height, gusset, flap depth, pocket size, strap width, strap adjustable range, and measurement tolerance.
- List the expected contents, such as catalogs, brochures, tablets, notebooks, water bottles, badge inserts, or staff materials, so the supplier can judge construction strength.
- Choose a fabric route before comparing quotes: 10 oz for light document bags, 12 oz for general exhibitor use, or 14 oz to 16 oz for premium and heavier-use bags.
- State whether the color is natural canvas, stock dyed canvas, or custom dyed canvas, and require lab dip approval for any custom color before bulk cutting.
- Send vector artwork with Pantone references, logo size, logo location, print method preference, and notes on seams, flap curves, pockets, labels, or fold lines near the artwork.
- Separate required features from optional upgrades such as lining, laptop padding, metal buckles, zipper closure, woven labels, hangtags, recycled content claims, or individual polybags.
- Require a pre-production sample made with final fabric, final hardware, final strap, final thread, final decoration method, and the proposed packing method.
- Approve the sample by loading it with real event contents, checking strap comfort, closure function, print appearance, flap alignment, and packing marks.
Factory quote questions to send
- What is the standard production lead time for this exact canvas messenger bag at 500, 1,000, 3,000, and 5,000 pieces after deposit and written pre-production sample approval?
- Is the quoted canvas greige fabric, stock finished fabric, or made-to-order fabric, and what are the approximate ounce weight and GSM before and after finishing?
- What finished measurement tolerances are included for width, height, gusset, flap depth, pocket placement, strap width, and strap length?
- Can you quote natural canvas, stock dyed black, and stock dyed navy as separate options with separate MOQ, price, and lead time notes?
- If custom dyeing is required, how many days are needed for lab dip, buyer approval, bulk dyeing, shrinkage stabilization, shade inspection, and fabric relaxation before cutting?
- What print method do you recommend for our logo size and canvas texture, and how many days are included for screen making, strike-off approval, production printing, curing, and packing?
- Does the quoted price include reinforced strap stitching, inner pocket, zipper or Velcro closure, adjustable strap hardware, woven side label, hangtag, and individual packing if requested?
- Can the pre-production sample be made using final fabric, final thread, final closure, final strap width, final hardware, final decoration, and proposed carton packing?
- What inline and final QC checks do you perform for dimensions, stitching, strap strength, print position, print adhesion, closure function, stains, odor, carton count, and carton marks?
- What happens to lead time and price if we revise logo artwork after sample approval, add a second logo, split the order by exhibitor, change packing, or change the delivery address?
Quality-control points to confirm
- Finished body dimensions should stay within the agreed tolerance, commonly plus or minus 1 cm for width, height, and gusset unless the design requires tighter control.
- Flap depth, pocket opening, pocket placement, and label placement should match the approved sample within agreed tolerances so the bag presents consistently at the booth.
- Shoulder strap length and adjustable range should match the approved sample, with a practical tolerance such as plus or minus 2 cm unless otherwise specified.
- Canvas weight, hand feel, color, weave texture, and stiffness should match the approved swatch and pre-production sample after any dyeing, washing, coating, or finishing.
- Natural canvas may contain minor slubs or small cotton specks, but oil stains, mold marks, heavy dirt, water damage, strong odor, and obvious shade panels should be rejected.
- Shoulder strap anchoring should use reinforced box stitch, bartack, cross stitch, or approved equivalent reinforcement, with no skipped stitches, broken threads, loose thread tails, or weak stress points.
- Stitching should be even enough for brand presentation, with no open seams, severe puckering, twisted panels, exposed raw edges where not intended, or loose lining if lining is specified.
- Flap alignment, side seams, gusset shape, pocket placement, and closure alignment should be visually symmetrical when the bag is empty and when lightly loaded.
- Print position should match approved artwork placement, with agreed tolerance for distance from flap edge, flap centerline, pocket seam, or label location.
- Printed logos should show acceptable edge definition on canvas, no obvious pinholes, no heavy ink bleeding, no unwanted smudging, and no transfer marks after a packing simulation.