Start With the Retail Job, Not the Bag
A canvas messenger bag only looks simple until you try to buy it for retail. The same basic format can be a commuter bag, a fashion accessory, a bookstore carry, a tablet bag, a promotional item, or a low-price add-on at checkout. Those are different products. They need different fabric weights, different reinforcement, different packing, and different expectations on shelf. The first RFQ mistake is sending a sketch and asking for a quote before the buyer has defined what the bag has to do in the store and in the customer’s hands.
Write the commercial job into the brief before you talk about trims. If the bag needs to carry notebooks, a tablet, or a 13-inch laptop, that changes the panel size, strap width, and stress points. If it is a style-led retail SKU, the outside silhouette and logo placement matter more than internal organization. If it is supposed to be a high-volume reorder item, you want a construction that is easy to repeat and easy to inspect. The useful starting point for many retail programs is a single finished size, one closure type, one front-pocket layout, and one approved decoration method. That gives procurement enough control to compare quotes without letting suppliers reinterpret the product around their own factory strengths.
The buyer brief should include the target channel, the expected load, the shelf price band, and the expected sell-through story. A bag designed for a premium independent retailer is not the same as a bag designed for a supermarket seasonal aisle, even if the silhouette is identical. The channel decides what quality signals matter, and those signals should shape the spec from the start.
- Define the channel first: boutique, mass retail, ecommerce, gift, or promotional retail.
- State the expected carry load in plain terms, such as notebooks, tablet, or laptop.
- Set the target retail price before you lock the build, because construction choices drive margin.
Choose the Fabric, Structure, and Handfeel
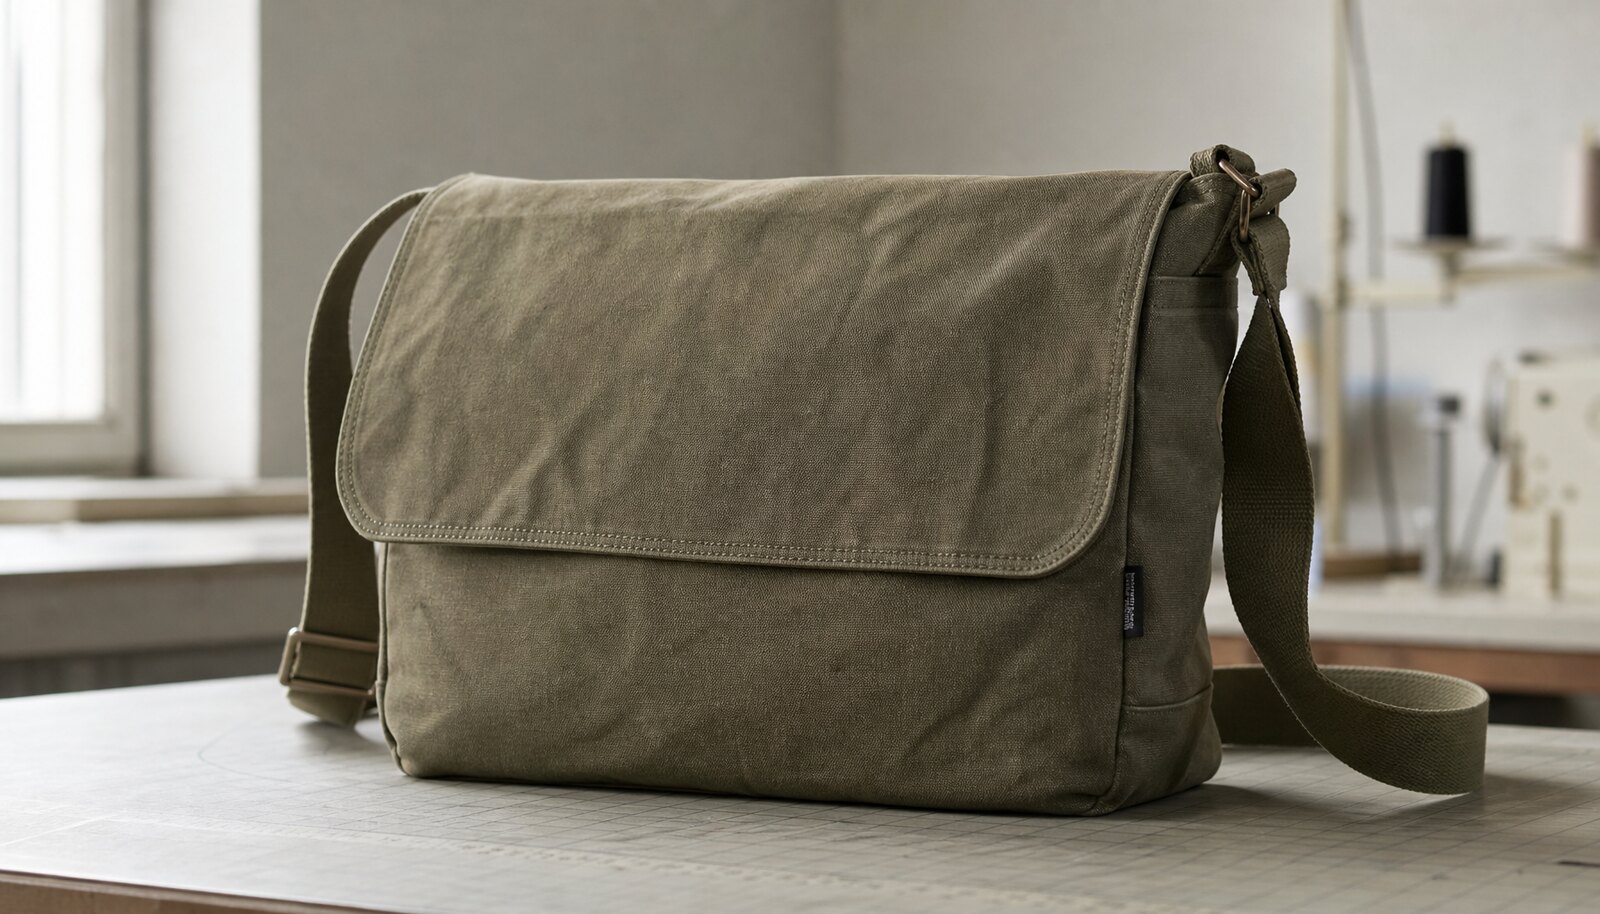
For canvas messenger bags for retail, fabric weight is not just a durability choice. It affects how the bag stands, folds, photographs, and ships. A lighter canvas can feel softer and more fashion-led, but it may collapse on shelf or read as underbuilt if the bag is meant for everyday carry. A heavier canvas gives the bag more body and visual presence, but it also raises cost, adds bulk, and can make the product feel stiff if the rest of the build is not balanced. Buyers should not ask for the heaviest fabric by default. They should ask for the fabric that fits the use case and the retail price.
A practical working range is 10 oz or roughly 340 to 360 GSM for lightweight retail or promotional use, 12 oz or roughly 400 to 420 GSM for a common retail baseline, 14 oz or roughly 470 to 500 GSM for better body and shelf presence, and 16 oz or roughly 550 to 600 GSM when the bag needs a firmer premium feel. Those numbers are not a law; they are a buying shorthand. The real decision is whether the cloth and the structure agree with each other. A 14 oz body with no interfacing can still feel flimsy. A 12 oz body with a stiff lining and a base insert can look much more expensive than the fabric weight alone suggests.
The spec should also say whether the canvas is washed, dyed, printed, or left natural; whether it is pre-shrunk; and whether it needs a lining, interlining, or baseboard. A lined bag gives a cleaner inside finish and usually better perceived quality. An unlined or lightly lined bag can be right when the price point is tight. What matters is that the construction choice is deliberate, not defaulted by the factory.
- 10 oz / 340-360 GSM: lighter fashion use, softer handfeel, lower cost.
- 12 oz / 400-420 GSM: common retail baseline with balanced cost and shape.
- 14 oz / 470-500 GSM: better body and stronger shelf presence.
- 16 oz / 550-600 GSM: firmer premium look when the bag needs a more structured feel.
- Ask whether the cloth is pre-shrunk, washed, dyed, or natural before you approve the sample.
Build the Carry System and Stress Points First
The main body is rarely what fails first. The real weak points on a messenger bag are usually the strap anchors, pocket corners, closure areas, and any place where the bag is repeatedly folded or pulled. Buyers often spend too much time on the front panel graphic and not enough time on the points where the load actually transfers. If those areas are not defined in the spec, factories will often optimize for appearance in the sample and economy in bulk, which is how strap creep, seam distortion, and flap pull-away show up later.
Treat construction details as commercial requirements, not suggestions. The strap should have a defined width, a defined webbing quality, and a defined reinforcement pattern at the bag body. Box-X stitching or dense bartacks are standard ways to distribute load, but the exact choice should be tied to the intended use case and the bag’s visual design. If the bag has a front pocket, specify pocket depth and corner reinforcement so the opening does not sag. If the bag uses a flap, define whether the flap is interfaced and where the closure lands. If you want the bag to sit square on a shelf, add a bottom insert or baseboard rather than hoping the fabric will hold shape by itself.
Do not leave panel sizes vague. Finished dimensions are useful, but cut dimensions and seam allowances are better because they tell the factory what to cut and what to trim away. That matters when the buyer wants repeatability across reorders. Retail programs drift when the supplier works from memory instead of a controlled spec. The more precise the build instructions, the easier it is to keep the same bag intact across seasons.
- Use box-X stitching or dense bartacks at strap anchor points.
- Specify pocket opening reinforcement at the corners, not just pocket size.
- Define flap interfacing and closure placement so the front panel does not warp.
- Call out stitch density on visible seams and stress points.
- Include cut dimensions and seam allowances if you want repeatable reorders.
Choose Branding That Fits the Fabric and the Shelf
Branding on canvas messenger bags should be chosen by artwork, order size, and the retail finish you want. Screen print is usually the most efficient option for simple logos and spot-color artwork, especially when the mark needs clean edges and consistent placement. Woven labels and sewn patches are often better when you want a logo that feels integrated without stressing the canvas surface. Embroidery can look premium on a small mark, but dense stitching on lighter canvas can pucker the panel and distort the silhouette. Heat transfer and digital print are useful when you need more color complexity or a shorter test run, but they need to be checked for handfeel, rub resistance, and long-term appearance.
The key procurement point is not which decoration method is trendy. It is whether the method will still look good after the bag has been folded, handled, stacked, and shipped. A logo that sits too close to a seam, pocket edge, or strap attachment can look fine in a render and wrong in bulk. Measure the placement in millimeters and tie it to the tech pack. If the artwork needs to avoid a seam line, say so plainly. If the label needs to sit a fixed distance from the top edge, write that distance into the approval sheet. The factory should not be left to interpret visual intent from a screenshot.
For retail buyers, decoration is also a cost driver. Screen setup, embroidery heads, patch application, and label sewing all affect the unit price and the reorder friction. If you expect multiple seasonal graphics, it may be smarter to standardize the bag body and change the external label or print panel rather than rebuilding the entire bag for each design. That keeps the product line easier to quote, inspect, and replenish.
- Use screen print for simple logos and better unit economics at scale.
- Use a woven label or patch when you want a cleaner repeatable finish.
- Use embroidery only when the panel structure can handle the stitch density.
- Use heat transfer or digital print for complex art, but check rub resistance and handfeel.
- Lock artwork position with measured coordinates, not a visual reference.
Read the Quote as a Landed-Cost Breakdown
A useful quote should show what the bag is made of and what it takes to get one sellable unit into your warehouse. If the supplier sends a single number, you cannot tell whether the low price comes from thinner canvas, simpler construction, cheaper webbing, fewer reinforcements, stripped-down packing, or a hidden exclusion. For a retail program, that is not enough. The buyer needs a line-by-line view of the body fabric, lining, interfacing, webbing, closures, decoration, labels, packing, and carton allocation so two offers can be compared on the same basis.
The quote should also separate one-time charges from recurring charges. Sample fees, printing screens, embroidery digitizing, color development, and tooling should not be mixed into the piece price if they will not repeat on every order. The same is true for carton tooling, barcode label setup, and compliance paperwork. Once you split those costs out, the true unit economics become easier to see. A supplier with a slightly higher FOB might still win if the quote includes better fabric, cleaner packing, and fewer surprise charges later.
Landed cost matters because freight and import costs can erase a seemingly good FOB. For example, a bag quoted at $3.67 FOB can turn into a much higher delivered cost once you add ocean or air freight, duty, brokerage, inland delivery, and warehousing. The exact math depends on route, origin, and Incoterm, so there is no universal formula. The point is that the cheapest factory quote is not automatically the cheapest retail bag. Procurement should compare the same spec, the same packing format, and the same delivery basis before deciding which offer is real value.
- Ask for separate lines for fabric, labor, decoration, labels, packing, and cartons.
- Split one-time costs from recurring unit costs before you compare suppliers.
- Compare EXW, FOB, CIF, and DDP on the same landed-cost basis.
- Watch for hidden charges tied to art revisions, sample revisions, or split sizes.
- Ask what is excluded, because exclusions are where many retail quotes break down.
Compare Suppliers by Control, Not Just by Price
The source of the quote matters as much as the number on the page. A direct cut-and-sew factory usually gives better control over repeatability and reorders because the same team is cutting, sewing, and adjusting the build. A trading company can be useful when one commercial contact has to coordinate several factories or mixed SKUs, but then the buyer has to be more aggressive about transparency. Who actually sews the bag? Who prints it? Who packs it? Who owns the defect claim? If the supplier cannot answer those questions clearly, the procurement risk is higher than the price suggests.
For canvas messenger bags, similar-product experience is more important than generic bag experience. A factory that mainly makes totes may not be strong on flap alignment, strap geometry, or the balance between structure and foldability that a messenger bag needs. Ask for photos or samples of a similar bag, not just any canvas item. Ask who owns the sample approval process, who buys the trims, and who signs off on the packing spec. If decoration is done off-site, make that explicit. Every extra handoff adds another chance for color drift, label errors, or schedule slippage.
A simple supplier scorecard helps keep the decision grounded. Weight the score toward spec match, landed cost, quality system, packaging capability, and communication speed. That prevents the lowest quote from winning when it is actually the weakest execution plan. If two suppliers are close on price, the better choice is usually the one with cleaner sample control and a more transparent bill of materials.
- Direct factory: best for stable reorders and tighter spec control.
- Trading company: useful for coordination, but verify the real maker and markup.
- Ask for a similar messenger bag, not just a tote or pouch.
- Confirm who owns trimming, decoration, packing, and defect claims.
- Use a scorecard so the lowest headline price does not win by default.
Use Samples as a Control Gate, Not a Courtesy Step
Sample approval should prove that the retail bag can be repeated, not just admired. The first sample tells you whether the factory understands the concept. The pre-production sample tells you whether the concept can be made with final fabric, final trims, final artwork, and final packing. Buyers should not approve a sample because it is close. They should approve it because it is measurable and repeatable. If something is wrong, the reason should be recorded in writing so the production team knows what to fix before bulk starts.
A useful approval sheet combines dimensions, visual placement, and functional checks. For example, you might specify overall width, height, depth, strap drop, pocket position, and logo placement with tolerances in the tech pack. The actual tolerance should match the retailer’s needs and the product’s scale. A small fashion bag may need tighter visual control than a utility bag. The point is to remove ambiguity. If the bag is filled to its intended retail load, the sample should still sit square, close correctly, and keep its shape without twisting or collapsing.
A loaded check is also worth doing at sample stage. For many medium-duty retail messenger bags, a 5 to 8 kg load for a short hang or carry test is a practical internal screen, but the exact load should reflect intended use and the buyer’s own standard. If the bag is supposed to carry laptops, the load expectation should be set accordingly. The goal is not lab theater. The goal is to catch the failure modes that retail customers will find quickly if they make it past sample approval.
- Approve the pre-production sample, not just a visual prototype.
- Use measured tolerances so the factory knows what is acceptable.
- Test the bag at the intended retail load before releasing bulk.
- Freeze artwork and labels before PP approval.
- Record every sample revision so the order does not drift.
Set QC Rules the Factory Can Execute
Quality control for canvas messenger bags should be practical, specific, and tied to visible retail failures. ANSI/ASQ Z1.4 single sampling at General Inspection Level II is a common starting point for buyers that need a documented sampling basis, but it should sit inside a broader control plan. AQL by itself does not tell you whether the strap will hold, whether the print will rub off, or whether the carton packing will crush the product. It only helps you decide whether a batch passes the defined sampling rule. That is why appearance inspection and functional testing both matter.
For defect classification, major defects should include wrong size, weak strap attachment, off-center branding, missing components, and any packing error that breaks the retail presentation. Minor defects are the cosmetic issues that do not change use but still affect shelf quality, such as small thread ends or slight label skew. Critical defects are safety or use failures, including broken hardware, sharp edges, or a strap that cannot safely carry the intended load. If your retailer has its own standard, use that. If not, write the categories into the PO and teach the supplier how they will be judged.
Functional checks should stay close to the real product. Inspect the stitch density on visible seams, the strength of bartacks, the neatness of lining attachment, the alignment of closures, and the packed count. For many programs, a simple loaded test on a finished sample is enough to screen for the obvious failures before production. The exact load, duration, and pass criteria should be defined in the tech pack so the test is repeatable and defensible.
- Use AQL as a sampling rule, not as your only quality check.
- Major defects should focus on fit, function, and retail presentation.
- Critical defects should cover safety and true use failures.
- Check strap anchors, closure alignment, packed count, and seam finish.
- Write the inspection logic into the PO so the supplier is judged against one standard.
Specify Packing, Cartons, and Barcode Placement Early
Packing is where otherwise good canvas messenger bags often lose retail value. A bag can leave sewing in fine condition and still arrive with wrinkled branding, crushed corners, twisted straps, or scuffed hardware if the packing format is vague. The buyer should define the unit packing in the RFQ: whether the bag ships folded or stuffed, whether it uses a polybag, how the strap is positioned, whether a hangtag is required, and where the barcode sits. Retail-ready does not mean the factory decides what looks neat in the carton.
The carton spec should also be explicit. A 5-ply master carton with a defined strength target is a practical baseline for many retail shipments, but the exact board grade should match weight, route, and handling. One SKU per carton is easier to warehouse and easier to verify. Fixed carton counts reduce receiving errors and make repacking less likely. Packed-unit dimensions matter because they drive freight volume more than flat bag size does. If the bag is compressed to save carton space, that compression should not crush the shape or leave permanent fold marks on the canvas.
Channel-specific compliance also matters. Ecommerce may require more internal protection; shelf retail may require cleaner barcode placement and country-of-origin marking. If the bag needs to hang on a peg, the hangtag and hang hole should be planned at the same time as the sewing spec. If the bag goes into a polybag, the bag size and thickness should protect the finish without bloating the carton. These details are small individually, but they are where retail programs either feel managed or feel improvised.
- Specify shelf-ready, ecommerce-ready, or bulk packing in the RFQ.
- Define unit protection, barcode placement, and hangtag rules before sewing starts.
- Use a fixed master carton count and one SKU per carton when possible.
- Ask for packed-unit dimensions so freight and warehouse planning are accurate.
- Make sure packing does not crush the bag shape or the printed surface.
Award the Order and Protect the Reorder Spec
The final award should not go to the lowest quote by default. It should go to the supplier that can reproduce the approved sample, ship on time, and pack the bags in the retail format you asked for. A workable award scorecard should consider spec match, landed cost, QC system, sample quality, packing capability, and communication speed. A slightly higher price can be the better buy if it includes the correct fabric weight, stronger reinforcement, and fewer rework risks. The reverse is also true: a very low quote that omits trim detail or hides packing charges can become expensive once the order is in motion.
When you place the PO, keep the approved sample, signed tech pack, artwork file, carton spec, and inspection criteria tied together. That documentation protects the reorder. Canvas messenger bag programs drift when people rely on memory: the fabric gets lighter, the pocket shifts, the logo shrinks, or the carton count changes and nobody notices until the next receipt. Revision control prevents that drift. If the buyer wants a change, issue a new revision number instead of a loose email note. That small discipline keeps the commercial conversation focused on actual tradeoffs instead of re-litigating the entire product every season.
For repeat programs, ask the supplier what they will keep locked between orders. Ideally it is the mill, the trim SKUs, the decoration method, the packing format, and the inspection standard. If a supplier wants to change one of those items on reorder, the change should be visible and priced, not hidden as a silent substitution. That is the difference between buying a retail bag and constantly rediscovering it.
- Use one scorecard for every supplier so the comparison stays fair.
- Reward quote transparency, not just the lowest headline number.
- Keep the approved sample and signed tech pack tied to the purchase order.
- Control revision numbers for any change in fabric, artwork, trim, or packing.
- Ask what will stay locked on reorders before you award the first order.
Specification comparison for buyers
| Sourcing route | Best retail use | Spec and pricing profile | Buyer risk to check |
|---|---|---|---|
| Direct cut-and-sew factory | Best for controlled retail programs and repeat reorders | Price is driven by fabric weight, lining, strap hardware, decoration, and packing, with better control over panel shape and reinforcement | Confirm the factory actually owns sewing and cutting capacity, not just sampling |
| Stock blank plus decoration | Good for fast tests, seasonal drops, and simple replenishment | Lowest setup burden, but bag quality depends on blank construction and the decoration method you add on top | Check blank consistency, strap reinforcement, and whether the blank matches the approved sample |
| Trading company | Useful when one contact has to coordinate multiple SKUs or factories | Commercial convenience can hide the real maker, margin, or packaging source | Ask for the factory name, markup structure, and who handles defects and schedule slips |
| Integrated factory with cut, sew, print, and pack | Best for retail-ready programs that need fewer handoffs | Often stronger on repeatability because the same team controls sewing, labeling, and packing | Verify that decoration and carton packing are actually in-house, not outsourced |
| Local decorator on imported blanks | Works for rapid trials or domestic replenishment | The unit price can look simple, but the total cost includes blank import, duty, local labor, and domestic freight | Check that the blank bag matches the approved fit, fabric weight, and trim quality |
| Small-batch digital print supplier | Useful for artwork-heavy launches or limited color runs | Setup is easier for complex art, but print handfeel, rub resistance, and repeatability can vary | Verify edge sharpness, color consistency, and whether print sits well on the canvas texture |
| Sustainable-material specialist | Fits programs that depend on recycled or organic material claims | Cost is influenced by certified fabric, documentation, dye lot control, and claim language support | Request proof of fiber content and clear permission for the sustainability wording you plan to use |
Buyer checklist before sampling
- Define the retail use case first: commuter, fashion, bookstore, laptop carry, promotional retail, or gift shop.
- Lock finished dimensions, strap drop, flap style, pocket layout, and closure type before asking for prices.
- Choose one target fabric weight in oz and GSM, then state the tolerance range in the RFQ.
- Select the primary branding method and a backup only if MOQ or art complexity forces a fallback.
- Request a line-by-line quote for fabric, lining, interfacing, webbing, closures, decoration, labels, packing, and cartons.
- Ask for a pre-production sample made from final fabric and final trims before bulk cutting starts.
- Specify retail packing, barcode placement, hangtag rules, and master carton count in the RFQ.
- Set acceptable variance for dimensions, logo placement, stitch quality, shade consistency, and packed count.
- Test one loaded sample for strap strength, seam creep, closure performance, and shape retention before bulk approval.
- Confirm the lead-time clock start point in writing: deposit, artwork approval, sample sign-off, or PO issue.
Factory quote questions to send
- What is the exact fabric weight, weave, yarn count, finish, and tolerance you are quoting?
- Does the price include lining, interfacing, webbing, zipper, magnetic snap, buckle, or other closures?
- Which decoration method is included, how many colors or stitch heads are covered, and what setup charge applies per design?
- What is the MOQ by color, by print, and by size, and how does pricing change if I split them?
- Is the quote based on EXW, FOB, CIF, or DDP, and what is excluded from the number?
- Are hangtags, woven labels, barcode stickers, polybags, and master cartons included or charged separately?
- What is the sample fee, and will it be credited back against the bulk order?
- What is the production lead time after sample approval and deposit, not just after PO issue?
- What QC standard do you use for dimensions, stitching, print alignment, and packing count?
- Can you show a recent production photo, inspection report, or packing image from a similar messenger bag?
Quality-control points to confirm
- Use ANSI/ASQ Z1.4 single sampling at General Inspection Level II unless the retailer specifies a different plan.
- Set AQL 2.5 for major defects, 4.0 for minor defects, and zero tolerance for critical defects, unless your buying standard is stricter.
- Treat AQL as an appearance and count control, not as a substitute for a functional bag test.
- Fabric weight should match the approved swatch or stay within the agreed GSM tolerance.
- Overall dimensions, strap drop, and pocket placement should stay within the dimensional tolerance table in the tech pack.
- Main seams should hold at 8 to 10 stitches per inch, with even tension and no skipped stitches or seam puckering.
- Strap anchors should use box-X stitching or dense bartacks, with no loose thread ends or visible pull-away.
- Use a load test that matches the intended use case; for many retail commuter bags, a 5 to 8 kg hang or carry test for about 30 minutes is a practical internal check.
- Print placement should be centered and consistent, with no ghosting, cracking, misregistration, or ink bleed.
- Hardware, if used, should be secure, aligned, and free of rust, sharp edges, or loose rivets.