Start With the Coffee Carry Job
Canvas messenger bags for coffee roasters are rarely just casual shoulder bags. A roaster may use them for wholesale sample drops, trade show kits, staff carry, cafe retail merchandise, distributor sales visits, or account onboarding packs. Those use cases place different demands on weight capacity, closure security, internal pockets, logo finish, and presentation. A lightweight event giveaway can be acceptable for one weekend. The same construction may fail quickly when loaded with dense coffee samples, catalogs, a bottle, and cupping forms.
Write the RFQ around what the bag must carry. Coffee is compact and heavy for its size, so several 250 g or 500 g sample bags can stress the base, side seams, and strap anchors. If the bag also needs to hold invoices, notebooks, a tablet, or a 13 inch laptop, the buyer should specify usable interior dimensions and the loading path, not only exterior width and height. Retail resale adds another layer: neat lining, consistent logo placement, clean packing, and a bag that still looks good when unpacked.
A strong canvas messenger bags for coffee roasters durability testing checklist begins with practical answers. What goes inside? How often is it opened? Will staff wear it crossbody? Does it need to close when full? Will it sit on a retail wall beside coffee merchandise? Once those details are known, vague terms such as premium canvas and heavy duty stitching can be replaced with measurable requirements.
- Classify the order as retail resale, staff bag, sample kit, distributor tool, trade show bag, event giveaway, or mixed-use program.
- List the heaviest expected contents and convert them into a kilogram test load.
- State document, tablet, or laptop fit requirements, including whether papers must stay flat.
- Define expected use: one event, seasonal promotion, daily staff carry, retail resale, or repeat wholesale program.
- Include durability tests in the RFQ so suppliers price the same standard.
Specify Canvas by Weight and Finish
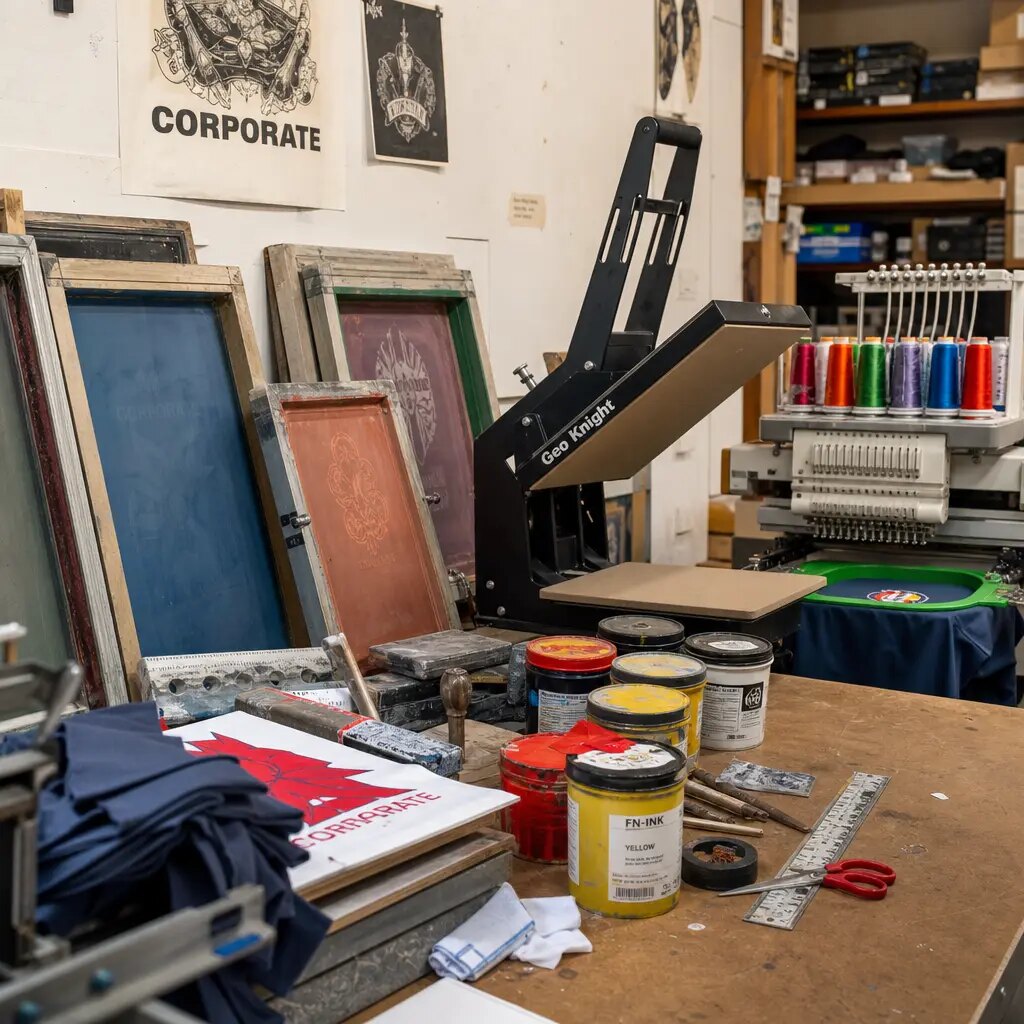
The word canvas is too broad for a purchase order. For many coffee merchandise and staff programs, 16 oz canvas, about 540 gsm, is a practical baseline because it gives the bag body without making it unnecessarily stiff. For heavier sample kits, laptop-adjacent carry, distributor use, or retail resale, 18 oz canvas, about 610 gsm, is often worth considering. It can improve structure and wear resistance at bottom corners, flap edges, gusset folds, and strap anchors.
Ask for both oz and gsm, and clarify whether the stated weight is before or after finishing. Washing, dyeing, pigment finishing, waxing, coating, and calendering can change shrinkage, shade, stiffness, needle marks, seam bulk, print adhesion, and final dimensions. Raw canvas may suit natural coffee branding but show more variation. Washed canvas can feel softer but may lose structure. Pigment-dyed canvas can look distinctive, yet shade control and crocking need review. Waxed or coated canvas may add light moisture resistance but can show creases and require different decoration tests.
Approve fabric physically. A screen image or Pantone reference cannot show texture, hand feel, stiffness, or how ink sits on the surface. For larger or repeat orders, approve a swatch or lab dip before sample making, then approve a pre-production sample from the intended production source. Keep one reference sample sealed for final inspection and reorders.
- State canvas weight in oz and gsm, and whether it is measured before or after finishing.
- Use 16 oz as a common commercial baseline and consider 18 oz for heavier or retail programs.
- Identify the finish: raw, piece-dyed, yarn-dyed, washed, pigment-dyed, waxed, coated, or calendered.
- Ask for expected shrinkage, shade range, and crocking risk for dyed, washed, or pigment finishes.
- Approve fabric by physical swatch and final sample, not only by digital image.
Control Dimensions and Tolerances
A messenger bag can use strong material and still disappoint if the pattern is wrong. For coffee roaster programs, common trouble spots are flap length, gusset depth, zipper opening, pocket placement, and usable interior width. Outside dimensions may look generous while the opening is too narrow for sample packs, cupping forms, or documents. If the bag must hold A4 sheets, letter-size papers, a tablet, or a laptop, specify the usable interior dimension and how the item enters the bag.
Tolerances should be written by feature. Canvas moves during cutting, sewing, finishing, pressing, and packing, so a zero-variation expectation is not realistic. A practical starting point is +/- 10 mm for finished width and height, +/- 5 mm for visible logo placement and key pockets, and +/- 15 mm for adjustable strap length. Laptop fit, zipper access, flap coverage, and retail logo position may need tighter limits.
Test the pre-production sample loaded, not empty. Empty photos often hide a short flap or a closure that only lines up when panels are flat. Once the bag holds coffee samples, catalogs, and tools, magnets may miss, the zipper may strain, and the flap may lift. Approve the pattern only after checking access, closure, comfort, and shape with real contents.
- Specify external dimensions and internal usable dimensions where fit matters.
- Set tolerances for width, height, gusset, flap, strap, pockets, zipper opening, and logo placement.
- Check closure alignment and flap coverage with the bag loaded to the intended weight.
- Confirm pocket depth for cupping forms, invoices, pens, business cards, tablets, or sample bags.
- Record acceptable variation so factory QC and third-party inspection use the same standard.
Reinforce the Real Stress Points
Durability is decided where load concentrates. Strap anchors, side gussets, bottom corners, flap joins, pocket openings, zipper ends, and closure attachments should be specified in the construction sheet. If these details are left open, two suppliers can quote the same basic shape while pricing very different bags. One may include reinforcement patches and dense bar-tacks. Another may rely on short stitch lines through the outer shell.
The strap system deserves special attention. For commercial messenger bags, 38-50 mm webbing is a practical range when the bag may carry sample kits, notebooks, or staff gear. Cotton webbing matches canvas and feels natural. Polyester webbing often offers better dimensional stability and abrasion resistance. Either can work if width, thickness, weave, colorfastness, adjuster grip, and anchor construction are controlled.
Ask for stitch density, thread type, seam allowance, reinforcement method, and bar-tack placement. Too few stitches can allow seam creep; too many can perforate heavy canvas. Inspect these areas after load testing, when weak construction begins to show through elongated holes, broken thread, webbing distortion, or seam movement.
- Map reinforcement at strap anchors, flap joins, side seams, pockets, zipper ends, closure points, and bottom corners.
- Specify 38-50 mm webbing where the bag will carry meaningful weight.
- Define cotton or polyester webbing based on hand feel, abrasion, colorfastness, and stability needs.
- Ask whether reinforcement patches are hidden inside the lining or visible on the exterior.
- Inspect stress points after static and dynamic load checks.
Select Closures and Hardware for Loaded Use
Closure choice should follow the way the bag will be carried. A flap-only messenger bag is quick and simple, but it may not contain loose sample packs, paperwork, or small retail items during crossbody movement. A zipper under the flap adds containment and usually reduces spillage risk. Buckles, hooks, and metal closures can support a workwear look, but they slow access and need cycle testing. Magnetic snaps feel easy in the sample room but may release when the bag is full unless placement and magnet strength are correct.
Hardware also affects weight, packing, and perceived quality. Metal adjusters and buckles can suit premium coffee merchandise, but they may scratch, add weight, and leave pressure marks on canvas during shipment. Plastic hardware can reduce cost and weight, but quality varies. Rivets may help in specific constructions, yet they should not replace proper sewing unless the design is engineered that way.
Tie each hardware choice to an inspection point. For zippers, check smoothness, tooth alignment, puller strength, end stops, tape stitching, and stress at zipper ends. For buckles and hooks, cycle the closure and inspect both the hardware and fabric attachment. For magnetic snaps, load the bag and confirm the flap still finds the snap without distorting the front panel.
- Use a zipper under the flap when containment matters more than fastest access.
- Test magnetic snaps on a loaded bag, including alignment and release resistance.
- Check metal hardware for sharp edges, scratches, plating defects, paint loss, and pressure-mark risk.
- Cycle zippers, buckles, hooks, snaps, rivets, adjusters, and sliders before shipment.
- Define hardware finish, size, color, attachment method, and replacement approval rules.
Match Branding to Canvas Behavior
Coffee roaster artwork often includes small lettering, heritage marks, seasonal graphics, muted palettes, or cafe-location details. Canvas can carry that identity well, but the decoration method must suit the surface. Screen printing works for bold, low-color artwork when ink, mesh, curing, and placement are controlled. It becomes riskier on heavy texture, washed fabric, coated canvas, large solid areas, and fold zones. Request a strike-off on the production canvas, not substitute fabric.
Woven labels, sewn patches, and leather-look patches are often strong choices for long-wear branding. They avoid some ink-cracking issues and can look more permanent for retail merchandise. They still need QC for placement, stitch neatness, edge fraying, colorfastness, patch thickness, and pressure marks from packing. Embroidery can look premium, but dense stitches may pucker canvas, distort small letters, or create rough backing inside the bag.
Judge branding after handling. Rub-test print after curing, bend the decorated area at expected fold points, and inspect high-touch areas such as flap edges, front panels, strap contact zones, and patch corners. State what is acceptable. Slight fabric texture showing through print may be fine for staff use and unacceptable for retail resale.
- Use screen print for bold artwork when adhesion and curing are proven on the final canvas.
- Use woven labels or sewn patches for long-wear branding and repeated handling.
- Test embroidery for puckering, backing roughness, small-letter readability, and edge distortion.
- Set logo placement tolerance, often around +/- 5 mm for visible retail branding.
- Rub-test decoration for transfer, cracking, opacity loss, and abrasion.
Run a Repeatable Durability Checklist
A durability checklist does not need to be complicated, but it must be repeatable. Start with a static load test based on real contents. Load the bag to the agreed kilogram weight, hold it for the agreed time, then inspect strap anchors, seams, base, closure, zipper ends, hardware, and shape recovery. Do not use arbitrary filler if the program is built around coffee sample bags, catalogs, bottles, or staff tools.
Add movement. Messenger bags are lifted, swung onto shoulders, pulled across the body, set down, and opened while loaded. A dynamic strap check should include controlled lifts, pulls in the normal carry direction, and a swing or movement review using an agreed method. The goal is to find anchor weakness, webbing stretch, adjuster slip, seam creep, or uneven load distribution before shipment.
Finish with wear, closure, and appearance checks. Inspect bottom corners, flap edges, gusset folds, and strap contact zones because those areas abrade first. Cycle zippers, buckles, hooks, magnets, snaps, and adjusters. Review decoration after rub testing. At the end, the bag should still close properly, sit reasonably flat, and show no structural seam opening, unsafe hardware, severe shape loss, or unacceptable logo damage.
- Static load: hold the agreed kilogram weight for the specified time and inspect afterward.
- Dynamic strap pull: lift, pull, and swing the loaded bag to expose anchor or adjuster weakness.
- Seam creep: inspect strap anchors, gusset corners, bottom seams, flap joins, pockets, and zipper ends.
- Closure cycling: repeatedly operate zippers, buckles, hooks, magnets, snaps, and adjusters.
- Abrasion review: inspect bottom corners, flap edges, fold areas, and strap contact zones.
- Shape check: confirm the loaded bag still closes, sits flat, and does not twist or expose contents.
Approve Samples Like an Inspection Lot
The pre-production sample is the control point for the bulk order. A showroom sample can prove that the supplier has made a similar bag before, but it may use available fabric, substitute webbing, different hardware, nonproduction thread, or simplified decoration. That does not prove the quoted construction. Require a pre-production sample made with the approved canvas, lining, webbing, hardware, thread, labels, patches, print, reinforcement, dimensions, and packing fold.
Review the sample like a small inspection lot. Measure width, height, gusset, flap length, zipper opening, pocket position, strap range, and logo placement. Weigh the finished bag; it is a simple way to catch later changes in fabric, lining, hardware, or reinforcement. Photograph stress points and interior seams. Load the bag with intended contents, cycle closures, rub-test branding, and check whether the product feels suitable for staff issue or retail sale.
Keep one sealed approval sample and one working sample. The sealed sample becomes the reference for final inspection, claims, and reorders. The working sample can be used by merchandising, sales, QC, and warehouse teams to check practical handling. For repeat programs, the physical reference is valuable because hand feel, shade, trim quality, patch placement, and construction details are hard to capture fully in a spreadsheet.
- Require a production-material sample before written bulk approval.
- Measure dimensions, openings, strap range, pockets, flap, and logo placement during review.
- Weigh the sample to create a control for material and reinforcement changes.
- Load the sample with real contents and confirm closure, comfort, access, and shape.
- Keep a sealed reference sample for final inspection, claims, and reorders.
Compare Quotes and MOQ Variables
A quote is useful only when every supplier prices the same bag. One factory may quote 14 oz unlined canvas, a narrow strap, and a basic one-color print. Another may quote 18 oz canvas, lining, base reinforcement, bar-tacked anchors, zipper under flap, and a sewn patch. Both may call the item a canvas messenger bag, but the buyer risk is completely different. Issue a spec sheet covering fabric, finish, lining, reinforcement, strap system, hardware, branding, packing, testing, and inspection.
Break MOQ down by variable. A supplier may say the minimum is 1,000 pieces, while the practical minimum is 500 per canvas color, 500 per print version, or a separate threshold for custom webbing, lining color, hardware finish, woven labels, or patches. This matters when a roaster wants versions for multiple cafes, seasonal merchandise, distributor partners, or wholesale account kits.
Lead time should also be staged. Ask for sample time, revision time, material booking, dyeing or washing time, cutting, sewing, decoration, in-line inspection, final inspection, packing, and shipment readiness. The longest step may be fabric finishing, custom labels, patch production, hardware sourcing, or sample revisions rather than sewing. Clarify setup fees, wastage allowance, overage policy, inspection responsibility, and carton specifications before comparing landed cost.
- Compare unit prices only after the construction and packing inputs match.
- Request MOQ by color, size, lining, hardware, strap, logo version, patch type, and packing method.
- Ask whether the supplier is the sewing factory, trading company, decorator, or stock-bag reseller.
- Break lead time into sample, revision, sourcing, production, decoration, inspection, packing, and shipment readiness.
- Clarify sample charges, setup fees, wastage, overage policy, inspection cost, and carton specs.
Protect Quality Through Packing and Receiving
Packing is part of quality control. A well-built canvas messenger bag can arrive commercially damaged if the flap is sharply folded, hardware presses into the front panel, cartons are overloaded, or damp fabric is trapped in polybags. Retail-ready orders usually need individual polybags, controlled folding, and sometimes tissue or separators. Bulk-packed staff programs may be simpler, but the carton plan still has to prevent deep creases, zipper impressions, patch marks, distorted gussets, and hardware scratches.
Carton loading should reflect bag thickness, hardware position, and shipment route. Too many pieces in a carton can crush lower layers and create permanent flap lines. Too few can raise freight cost without adding useful protection. Ask for packed-carton photos, carton dimensions, gross weight, piece count, and board strength before shipment. Mixed SKUs should have clear carton labels showing PO number, SKU, color, logo version, quantity, carton number, and gross weight.
Receiving inspection should sample cartons from different stack positions, not only the top layer. Check for crushed corners, water marks, weak tape, poor labels, odor, mildew risk, hardware pressure marks, and inconsistent folding. If bags were washed, dyed, coated, or printed, confirm they were fully dry before packing. The checklist should end with sellable, usable bags arriving at the roaster or fulfillment center.
- Approve polybag, bulk pack, tissue, separator, fold direction, and carton count before production ends.
- Prevent buckles, zipper pulls, patches, and metal hardware from pressing into visible panels.
- Check carton dimensions, board strength, gross weight, stack plan, and pallet condition where relevant.
- Verify carton labels for PO number, SKU, color, logo version, quantity, carton number, and gross weight.
- Inspect cartons from top, middle, and bottom positions to catch compression, moisture, and packing inconsistency.
Specification comparison for buyers
| Spec decision | Recommended option | Best fit | Buyer risk to check |
|---|---|---|---|
| Fabric weight | 16 oz canvas, about 540 gsm, as a commercial baseline; 18 oz, about 610 gsm, for heavier kits or resale programs | Wholesale sample kits, staff bags, trade shows, cafe retail, distributor use | A lighter fabric can look similar in photos but wear faster at flap edges, base corners, gusset folds, and strap anchors |
| Canvas finish | Approve raw, dyed, washed, pigment-dyed, waxed, coated, or calendered canvas by physical swatch | Programs where color, hand feel, water resistance, or structure affects brand presentation | Finish changes shrinkage, shade, sewing behavior, print adhesion, crocking risk, and final dimensions |
| Finished tolerances | Set feature-level tolerances: commonly +/- 10 mm for width and height, +/- 5 mm for logo and key pockets, +/- 15 mm for strap length | Retail-ready bags, laptop-adjacent bags, document bags, and repeat orders | Broad tolerances let flap alignment, zipper access, pocket placement, or document fit drift |
| Interior construction | Full lining, reinforced base, bound or overlocked inner seams, and reinforcement behind load points | Coffee packs, cupping forms, catalogs, tablets, staff tools, and cleaner retail presentation | Unfinished interiors can fray, shed lint, lose shape, or rub against packed coffee samples |
| Strap system | 38-50 mm cotton or polyester webbing with box-and-cross stitching or dense bar-tacks at reinforced anchors | Crossbody carry, wholesale sales visits, staff use, and heavier daily loads | Narrow webbing, weak adjusters, short stitch runs, or unsupported anchors concentrate failure at two points |
| Closure system | Zipper under flap for containment; buckle or hook for workwear styling; magnets only after loaded closure testing | Bags carrying sample packs, invoices, cupping sheets, notebooks, bottles, or retail items | Weak closures can open when the bag is full, tilted, or worn crossbody |
| Branding method | Screen print for bold artwork; woven label, sewn patch, or leather-look patch for long-wear branding; embroidery after puckering review | Coffee merchandise, staff programs, wholesale account kits, and cafe retail | Fine artwork can crack, rub off, bleed, misregister, pucker, or become hard to read on textured canvas |
| Sampling route | Pre-production sample using approved canvas, lining, webbing, hardware, thread, decoration, reinforcement, and packing fold | Any bulk order where durability, appearance, or reorder matching matters | Showroom samples may use substitute materials that hide bulk-production risk |
| Packing method | Individual polybag with controlled fold for retail; separators or tissue where hardware can mark fabric | Cross-border shipments, fulfillment centers, mixed SKUs, palletized cartons, retail cartons | Poor packing can cause flap creases, hardware pressure marks, moisture odor, distorted gussets, or carton crush |
Buyer checklist before sampling
- Define the use case: retail resale, roastery staff bag, wholesale sample kit, distributor sales tool, trade show bag, event giveaway, or mixed-use program.
- List expected contents and convert them into a test load in kilograms, including coffee samples, bottles, catalogs, cupping forms, notebooks, tablets, or small tools.
- Specify finished width, height, gusset depth, flap coverage, zipper opening, pocket layout, strap adjustment range, and required document or laptop fit.
- State canvas weight in oz and gsm, plus acceptable finish: raw, dyed, washed, pigment-dyed, waxed, coated, or calendered.
- Require lining, base reinforcement, clean inner seams, reinforcement patches, and defined bar-tack locations at strap, flap, pocket, gusset, and closure stress points.
- Define strap width, webbing material, adjuster quality, pull direction, shoulder pad requirement, and anchor reinforcement.
- Choose the branding method and set print size, placement tolerance, color reference, rub-resistance expectation, and fold-area cracking limit.
- Request a pre-production sample built with approved production materials, decoration, dimensions, hardware, thread, reinforcement, and packing fold.
- Ask for a durability test plan covering static load, dynamic strap pull, seam creep, closure cycling, print rub, abrasion zones, dimensions, and carton handling.
- Confirm MOQ by canvas color, lining color, hardware finish, strap color, size, print version, patch type, and packing method.
Factory quote questions to send
- What exact canvas weight in oz and gsm, weave type if known, shrinkage expectation, and finishing process are included in the price?
- Is the canvas raw, yarn-dyed, piece-dyed, garment-washed, pigment-dyed, waxed, coated, or calendered, and will the sample use the same source?
- Will the pre-production sample use the approved fabric, lining, webbing, hardware, thread, label, patch, print method, reinforcement, and packing fold?
- What seam allowance, stitch density, thread type, needle size range, reinforcement method, and bar-tack placement do you use at strap anchors, flap joins, zipper ends, and pocket openings?
- What tolerances do you propose for width, height, gusset, flap length, strap length, pocket position, logo placement, fabric shade, and hardware finish?
- What is the MOQ by canvas color, print version, lining color, hardware finish, strap color, size variation, patch type, and packing style?
- Are sample charges, screen or mold fees, custom label costs, wastage allowance, inspection support, and shipping overage included or billed separately?
- Can you perform and document static load, dynamic strap pull, seam inspection, closure cycling, print rub, abrasion-zone review, and carton handling checks before shipment?
- What acceptance criteria do you use for skipped stitches, loose threads, seam creep, print cracking, crocking, hardware scratches, dimension variance, odor, and carton damage?
- How will each bag be folded and packed, how many pieces go in a carton, what carton board strength is used, and how do you prevent zipper, buckle, patch, or hardware marks?
Quality-control points to confirm
- Measure finished width, height, gusset, flap length, zipper opening, pocket placement, strap length, strap width, and logo placement against the approved tolerance sheet.
- Weigh the finished bag against the sealed approval sample to catch unapproved changes in canvas weight, lining, reinforcement, hardware, or trim.
- Inspect canvas shade, weave consistency, finish, odor, stains, slubs outside the agreed range, coating defects, and color transfer risk under daylight and warehouse lighting.
- Check strap anchors, bar-tacks, side seam intersections, flap corners, pocket edges, zipper ends, bottom gusset seams, and reinforcement patches for loose thread, skipped stitches, uneven density, or seam slippage.
- Load the bag to the agreed test weight for the agreed hold time, then inspect for seam creep, strap distortion, hardware movement, base sagging, zipper stress, flap misalignment, and shape loss.
- Apply controlled lift, pull, and swing checks to the loaded strap so inspection reflects shoulder carry, hand lifting, and crossbody movement.
- Cycle zippers, buckles, magnetic snaps, hooks, rivets, adjusters, and sliders repeatedly and watch for snagging, weak attachment, sharp edges, looseness, paint loss, or difficult operation.
- Rub test screen print, patch edges, woven labels, embroidery, and dyed webbing on the same canvas finish used for bulk production.
- Check print placement, logo angle, print opacity, registration, ink cure, cracking at folds, abrasion in high-touch areas, and ink transfer to light fabric.
- Verify canvas color, lining color, webbing color, thread color, zipper tape, label color, and hardware finish against the approved physical standard.