Start With The Route, Not The Bag
Canvas messenger bags for coffee roasters are easy to mis-scope because the product sounds simple. In practice, the buyer is not ordering just a sewn bag. The buyer is choosing a merch item that has to survive print, packing, warehouse handling, and a specific shipping route. The same bag may move through cafe retail, wholesale replenishment, subscription bundles, trade show stock, or e-commerce fulfillment. Each route changes what matters most.
If the bags are going into stores, presentation matters. If they are going into distribution centers, carton counts and label accuracy matter more. If they are going by ocean freight, moisture protection and carton compression become more important. If the launch is tied to a roast release or cafe opening, lead time risk matters more than a small unit-price gain. The brief should name the route first so the factory does not guess at fold direction, inner packing, or carton size.
A useful RFQ asks the supplier to price the bag and the carton together. That gives procurement a better view of landed cost and also reveals whether the sample only works as a loose piece or still looks good after packing. For roaster merch, the carton is part of the product experience, not an afterthought.
- Choose the main carton goal first: lower cube, cleaner retail presentation, easier warehouse handling, or stronger print protection.
- Tell the supplier where the bags are going: store shelves, wholesale warehouses, e-commerce kits, or event inventory.
- Ask the factory to show the folding or flat-packing method instead of assuming a default fold will work.
- Set a gross carton weight target if your receiving team has a handling limit.
- If the route is moisture-sensitive, require the supplier to explain the inner wrap and carton protection in the quote.
Lock The Product Shape Before Quoting
The fastest way to create quote noise is to ask for a messenger bag without defining the internal use case. Start with what the customer needs to carry. For coffee roaster programs, that is usually a notebook, merch inserts, a tablet sleeve, event materials, or daily-use items rather than a fully padded laptop load. Once the use case is clear, the dimensions can be made practical instead of decorative.
A common merch-friendly shape is about 30-32 cm wide, 31-34 cm high, and 8-10 cm deep at the gusset. That size gives a credible messenger profile without pushing the bag into a heavier, more expensive category. Strap length usually needs to adjust enough for cross-body wear, and strap width should be broad enough to sit comfortably when the bag is loaded. If the bag is supposed to hold a tablet or notebook, say so in the brief and do not rely on a generic pouch shape.
Construction details affect both usability and packing. A soft body with a front flap, one inner slip pocket, and an adjustable shoulder strap works for most roaster merch lines. Additional pockets, stiff back panels, or structured bottoms can be useful, but they should be intentional. Every added panel takes sewing time and can reduce pieces per carton.
- Specify the exact finished size in centimeters, not only a visual reference.
- State the objects the bag must fit so the gusset is sized to real use.
- Call out strap width and strap drop in the RFQ.
- Use a soft body if the bag is meant to pack flat and ship efficiently.
- Do not market the bag as a laptop bag unless the internal dimensions and construction were designed for that claim.
Choose Canvas Weight And Finish For The Real Use Case
Canvas weight is one of the few material decisions that affects feel, sewing, packing, and freight at the same time. For many coffee roaster messenger bag programs, 10 oz to 12 oz cotton canvas is the practical range. It gives enough body to feel like a real retail item, but it still folds reasonably flat and stays within a manageable shipping profile. Heavier fabric can work, but it should be a deliberate brand choice rather than the default.
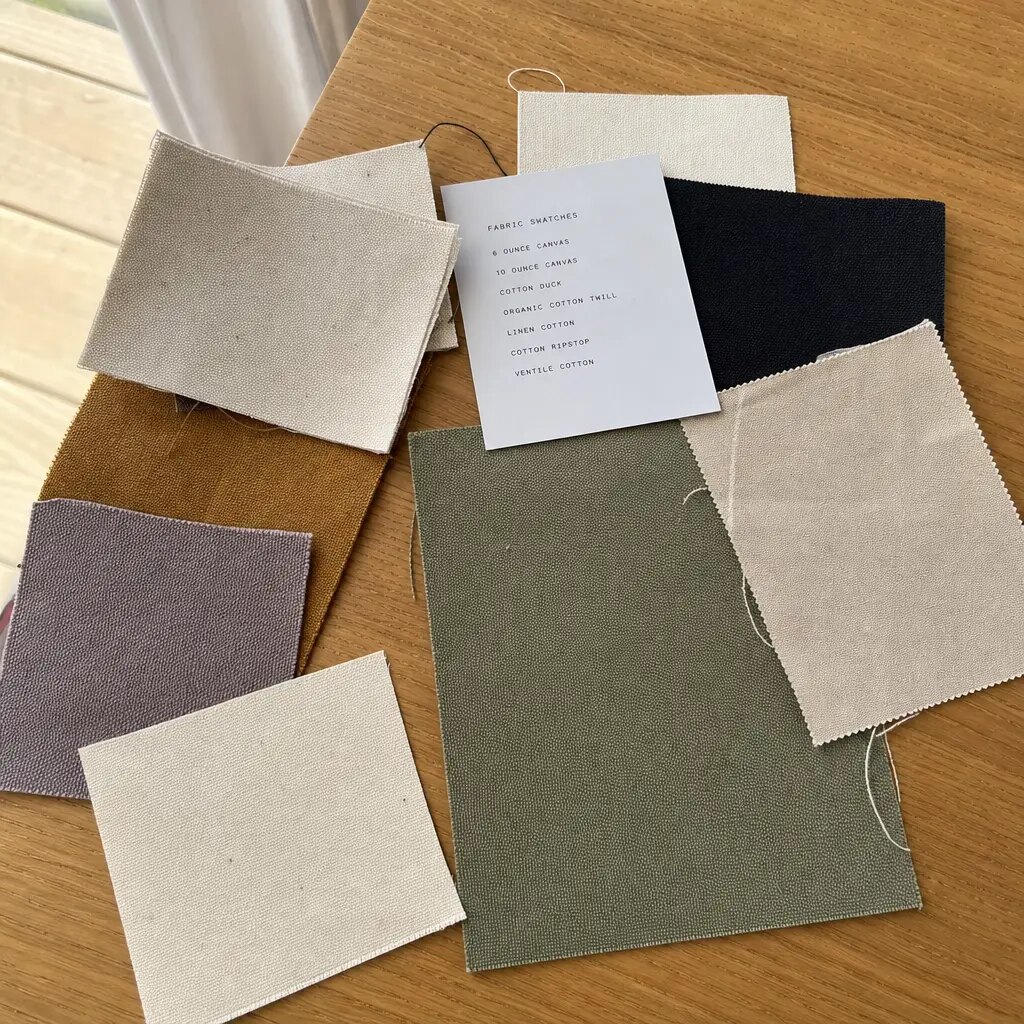
The number on the spec sheet is not the whole story. Two 12 oz canvases can behave very differently depending on weave density, finish, and whether the fabric is greige, natural finished, dyed, washed, or enzyme-finished. Ask the supplier to quote both oz and GSM after finishing and to identify the exact finish. If two vendors both say 12 oz, you still need to know whether one is crisp and dense while the other is looser and more drapey.
For roaster brands, natural canvas usually works well because it supports a warm, tactile look. That does not mean all variation is acceptable. A buyer can tolerate small cotton flecks or slight shade movement in a natural material, but not oil marks, mildew odor, broken yarns in the logo zone, or obvious shade mismatch across the order. Those points need to be defined before the sample is approved.
- Use 8 oz canvas only when the bag is promotional and cost is the main constraint.
- Use 10 oz canvas for budget retail programs that still need a substantial hand feel.
- Use 12 oz canvas as the safest default for roaster merch and repeat customer use.
- Use 14 oz or heavier canvas only when the brand wants a rugged look and accepts the added sewing and freight cost.
- If the fabric is washed or enzyme-finished, ask about shrinkage behavior and carton recovery after compression.
Specify Closure, Strap, And Reinforcement Like A Load-Bearing Product
A messenger bag feels simple, but the stress points are not. The flap opening, strap anchors, pocket edges, and hardware attachment areas are where failures usually show up first. Procurement should specify the closure and reinforcement plan instead of assuming the factory will choose a suitable default. If the bag will be worn daily, the attachment points matter more than decorative features.
For most canvas merch programs, 38 mm webbing gives a good balance of comfort and cost. The strap should be adjustable enough for cross-body use and attached with reinforcement that the factory can repeat cleanly, such as box-x stitching plus bartacks at the stress points. If the bag uses a magnetic snap, ask for the backer construction and the closing feel. If it uses a metal slider or buckle, ask for the plating finish and whether the edges are safe against the canvas and adjacent bags in carton packing.
Do not let hardware become a hidden packing issue. Weak magnets, sharp metal corners, or plating flakes can damage neighboring bags when the cartons are compressed. Hardware also increases thickness, which can reduce pieces per carton more than the bag sample suggests. If the buyer wants the cleanest retail look, the strap and closure should be designed together, not selected one at a time.
- Specify webbing width, strap drop, and adjustable length in the quote request.
- Require reinforcement at strap anchors, flap corners, and pocket openings.
- Ask for a photo or sample of the backer used under any magnetic snap.
- Check whether hardware can mark the print or adjacent bags when packed flat.
- Use one closure system per order if the objective is repeatable production and consistent carton packing.
Treat Branding As A Packing Problem
Coffee roaster artwork often includes logotypes, bean illustrations, origin names, roast notes, and simple shop marks. On cotton canvas, clean and bold usually outperforms intricate and delicate. One-color screen print is often the right choice because it keeps the decoration controlled, readable, and cost-efficient. Embroidery can look premium, but larger stitched areas may add thickness, pucker the flap, and create pressure points inside the carton.
Placement matters as much as method. Keep the print away from fold lines, flap edges, and hardware contact areas. A graphic that looks fine on a flat art board can wrinkle or rub once the bag is folded and packed. If the brand wants a more elevated detail, a small woven side label can work well, but it still needs the same discipline: size, position, thread colors, backing, and seam placement must all be approved before production.
If one order covers several cafe locations or roast names, the decoration system should stay controlled. Multiple artwork versions increase screen setup, sorting, and carton-control risk. For a first order, one shared bag body with a single front print and one secondary label is usually a better test than many small variations. The quote should show exactly which decoration elements are included and which are optional.
- Use screen print for simple logos, clear typography, and color-controlled bulk orders.
- Use embroidery only when the artwork can tolerate extra thickness and possible fabric puckering.
- Use a woven label when the brand wants a premium cue without overworking the front panel.
- Keep artwork away from folds, snaps, and carton contact points.
- Approve print close-ups, stitched label close-ups, and a packed sample before bulk production.
Build MOQ Around Components, Not Only Finished Bags
The finished-bag MOQ is only part of the purchasing picture. Canvas color, webbing color, label type, hardware finish, hangtag, and print method can each carry their own minimums. A supplier may be able to quote a lower minimum when the order uses stock natural canvas, standard webbing, and a common snap. The same bag becomes more difficult when the brief asks for custom dyed fabric, matched strap color, special plating, or several decoration versions.
For a first merch test, it is usually smarter to keep the configuration narrow. One body color, one print color, one webbing color, one label, and one carton spec make the order easier to buy, inspect, and repeat. If the business plan calls for more SKUs later, that is a scaling decision. It should not be introduced into the first run unless the volume justifies the extra setup cost and sorting burden.
Ask the supplier to break MOQ down by component so the buyer can see where the cost is really coming from. That approach helps procurement decide whether to simplify the order or accept the surcharge. It also shows whether the supplier is quoting a genuinely stock program or building a custom product around a low unit price.
- Request MOQ separately for the bag body, fabric color, strap color, label, hardware, and hangtag.
- Use stock materials for the first run if sell-through is still unproven.
- Limit artwork variations on the first order unless the sales plan justifies separate screens and sorting.
- Confirm whether custom dyed canvas needs lab dips, shade approvals, or a higher fabric minimum.
- Avoid mixed-carton schemes unless the warehouse has a clear receiving process for sorting SKUs.
Use Carton Data To Compare Suppliers
A low FOB price can hide a poor packing plan. Messenger bags are soft goods, but they are not weightless, and the strap, flap, gusset, and hardware all influence carton density. Two factories can quote similar unit prices and create very different landed costs once freight cube, pallet space, and damage risk are included. That is why carton data belongs in the first quote.
The quote should show finished bag size, pieces per carton, carton dimensions, gross weight, net weight, and CBM per 1,000 pcs. It should also say how the bag is folded, whether the print faces are separated, and where the hardware sits in the stack. If the bag is destined for LCL or mixed container shipping, the carton board grade and moisture protection matter more than they would for a domestic bulk transfer.
A practical packing target for a standard roaster messenger bag is often around 20-30 pcs per export carton, depending on bag size, canvas weight, and hardware. The exact count should be validated with a packed sample. A tighter carton can reduce freight cube, but if it pushes gross weight too high or compresses the flap and print, it creates rework later. The point is not to optimize paper. The point is to optimize the full landed result.
- Request carton dimensions, gross weight, net weight, and CBM per 1,000 pcs with the unit price.
- Ask for both flat-pack and retail-ready packing quotes if the channel strategy is still open.
- Compare carton count against warehouse receiving needs, not only factory convenience.
- Confirm whether tissue, separators, belly bands, polybags, hangtags, and carton marks are included.
- For moisture-sensitive routes, ask the supplier to recommend carton board grade and pallet protection.
Approve The Pre-Production Sample In Packed Form
A loose sample proves only part of the product. For canvas messenger bags, the pre-production sample should be made with final canvas, final ink, final label, final hardware, and the same packing method that will be used in bulk. That is the only way to know whether the flap creases badly, whether the logo transfers, whether the hardware marks adjacent bags, and whether the bag recovers after carton compression.
The sample should be checked as a user would check it, not only as a buyer would inspect it on a desk. Fill it with the intended use items and test strap comfort, flap coverage, pocket access, and opening tension. Open and close the closure several times. Rub the print with a clean white cloth. Then look again after the bag has been folded and returned to the carton format. That sequence catches problems that a photo approval will miss.
Timing matters as much as quality. If the sample is approved late, the order can miss a seasonal roast launch, a cafe opening, or an event schedule. The sample plan should include component sourcing, sewing, packing simulation, and shipping time. If the bulk production team is different from the sample room, the packing instruction should be explicit enough to repeat without interpretation.
- Approve a physical pre-production sample, not only a photo or technical drawing.
- Check finished width, height, gusset, flap length, strap width, strap drop, and pocket size.
- Test print rub with a clean white cloth and inspect for transfer, powdering, or cracking.
- Open and close snaps, sliders, zippers, or buckles repeatedly to catch weak hardware early.
- Review the packed sample after compression so carton effects are visible before bulk sewing starts.
Write QC Rules For The Bag And The Carton
Canvas has natural variation, especially when the fabric is undyed or minimally finished. The buyer needs to define what variation is acceptable and what is a defect. Small slubs or cotton flecks may be normal. Stains, mildew odor, oil marks, rust, broken yarns in the logo area, and distorted hardware should not pass. Written standards reduce argument because the factory and inspector can check the same reference.
QC should cover the bag and the carton together. For the bag, check dimensions, logo placement, stitch density, bartacks, seam finish, closure function, hardware edges, odor, and color consistency. For the carton, check pieces per carton, inner packing, orientation, printed-surface protection, carton marks, and gross weight. If the buyer has a corporate inspection standard or AQL system, state it in the PO so the factory knows how many units and cartons to sample.
Numeric tolerances help, but they should be practical. A common starting point is plus or minus 0.5 cm for small panels and plus or minus 1 cm for overall width or height. Logo placement should be tied to the approved artwork sheet, especially if the print sits near a seam or fold. If the carton is carrying compressed packed bags, open random cartons after packing to check for creases, print transfer, and hardware pressure points.
- State dimensional tolerance for the bag body and the logo placement.
- Classify skipped stitches, loose bartacks, and open seams as major defects at stress points.
- Require hardware to be smooth, correctly plated, and free from burrs, rust marks, or plating flakes.
- Check carton count, carton marks, and inner packing during inspection, not only at warehouse receiving.
- Open random packed cartons to confirm compression has not damaged the print, flap, or hardware area.
Protect The Schedule Before Sewing Starts
Lead time problems usually begin before the sewing line sees fabric. Incomplete artwork, late fabric changes, undecided label colors, and revised carton plans can all stall the order. For a coffee roaster launch tied to a seasonal blend, event calendar, subscription campaign, or cafe opening, a delay can make the merch arrive after the selling window. The schedule has to be managed as part of procurement, not as an afterthought.
A realistic timeline includes artwork review, material sourcing, sample production, buyer signoff, bulk cutting, printing, curing, sewing, trimming, QC, packing, carton marking, and export handoff. Custom dyed canvas, woven labels, and special hardware all add component lead time. If the launch date is fixed, reduce complexity instead of assuming the factory can absorb late changes without cost or risk.
The RFQ should also make the response format consistent so suppliers are actually comparable. Ask each factory to return the same items: finished dimensions, material specification, decoration method, packing method, carton data, sample timing, bulk lead time, component MOQ, and excluded charges. Then attach one simple dimension drawing and one reference image. That combination is enough to keep the quote clear without overengineering the brief.
- Prepare vector artwork, Pantone references, dimensions, and packing instructions before requesting a final quote.
- Do not approve bulk material purchase until canvas weight, color, and finish are locked.
- Allow time for a physical sample when the bag will be sold as retail merchandise, not only used as a giveaway.
- Reserve inspection time before vessel cutoff so the final review is not rushed.
- Use stock materials and one artwork version when the launch date is tight.
Specification comparison for buyers
| Spec decision | Recommended option | When it fits | Buyer risk to check |
|---|---|---|---|
| Main canvas weight | 12 oz cotton canvas, about 380-420 GSM after finishing, with reinforcement at strap and flap stress points | A strong default for roaster merch that should feel substantial, pack flat, and survive repeated customer use without becoming overly bulky | Lighter fabric can look weak and crease hard; heavier fabric can raise sewing difficulty, carton weight, and freight cost |
| Finished bag size | About 30-32 cm wide, 31-34 cm high, and 8-10 cm gusset for a standard merch messenger bag | Useful when the bag should carry cafe or daily-use items without moving into laptop-bag pricing | If the gusset is too deep, carton cube rises quickly; if it is too shallow, the bag loses utility |
| Closure | Magnetic snap for a cleaner retail finish, or webbing strap closure for a utility look | Choose based on target price, presentation, and how much hardware risk the route can tolerate | Weak magnets, poor plating, or sharp edges can fail in use and mark adjacent bags during carton packing |
| Logo decoration | One-color screen print on the flap, plus an optional woven side label for a premium line | Best for simple roaster marks, origin graphics, and clean branding on natural or dyed canvas | Fine-line art can fill in on textured canvas; woven labels need approval for size, placement, thread colors, and backing |
| Strap build | 38 mm webbing with adjustable length and reinforced attachment points | A good balance of comfort, durability, and cost for everyday carry | Too-narrow webbing feels cheap; weak stitching or poor reinforcement can fail under load |
| Carton packing method | Flat pack with tissue or a separator sheet between printed surfaces, usually 20-30 pcs per export carton depending on size and weight | Suitable when the buyer wants lower freight cube, stable pallet loading, and less print rub | Over-compression causes flap creases, print transfer, and hardware pressure marks that may appear only after unpacking |
| Inner packing | Individual recycled polybag or paper belly band, selected by channel and moisture risk | Polybag is safer for humid routes and ocean freight; a belly band fits direct retail or plastic-reduction programs | Paper-only packing is more exposed to moisture; retailer rules may also restrict polybags or require warnings |
| MOQ logic | One body, one canvas color, one print color, one strap color, one label, one carton spec for the first run | Best for coffee roasters testing a merch line before repeating it at larger volume | Small mixed-SKU orders can look cheap by unit price but become expensive after screen setup, label MOQ, and handling |
| Sample approval | Pre-production sample made with final fabric, ink, label, hardware, and carton packing simulation | Essential when carton presentation, retail finish, and damage prevention all matter to the buyer | Photo approval alone misses hand feel, flap alignment, strap comfort, and how the bag recovers after packing |
Buyer checklist before sampling
- Define the finished bag size in centimeters, including body width, height, bottom gusset, flap length, strap width, strap drop, and pocket position before requesting quotes.
- State target canvas weight in oz and GSM, and specify whether the fabric should be natural, bleached, black, dyed, washed, or enzyme-finished.
- Provide logo artwork in vector format and identify the exact print size, print position, ink color, label type, and any patch or hangtag requirements.
- Decide the carton objective up front: lowest freight cube, best retail presentation, easiest warehouse handling, or maximum protection for printed surfaces.
- Request estimated carton dimensions, gross weight, net weight, pieces per carton, and CBM per 1,000 pcs in the first quote.
- Approve one physical pre-production sample packed exactly as it will ship, not only a loose bag or digital mockup.
- List mandatory carton marks, barcodes, retailer labels, recycled-content claims, and pallet height or weight limits if they apply.
- Write acceptance criteria for seam strength, print rub, flap alignment, hardware function, odor, stains, and loose threads.
- Confirm whether the quote includes export carton, inner packing, hangtag, woven label, spare hardware, and inspection support.
- Ask the supplier to show how the bag folds or stacks inside the carton, including protection between printed surfaces and hardware contact points.
Factory quote questions to send
- What canvas weight are you quoting in oz and GSM, and is the fabric stock greige, natural finished, dyed, washed, or custom woven?
- What are the finished bag dimensions, carton dimensions, pieces per carton, gross weight, net weight, and CBM per 1,000 pcs?
- Is the price based on flat packing, folded packing, or retail-ready individual packing, and what protection sits between printed surfaces?
- Which print method is included, what is the maximum print size, and are screen setup charges, color matching fees, or repeat-screen fees separate?
- What MOQ applies to the bag body, fabric color, webbing color, woven label, hardware finish, and printed hangtag?
- Can the pre-production sample be made with final canvas, final ink, final label, final hardware, and the proposed carton packing?
- What seam allowance, stitch density, reinforcement method, and stress-point bartacks are used on the strap, flap, and pocket?
- How many days are required for sampling, material purchase, bulk production, inspection, and carton marking after approvals?
- What QC reports, in-line photos, packed-carton photos, or carton drop-test records can you provide before shipment?
- If the order ships by LCL or mixed container, what carton strength, moisture protection, and pallet pattern do you recommend?
Quality-control points to confirm
- Finished dimensions should stay within the approved tolerance, commonly plus or minus 0.5 cm for small panels and plus or minus 1 cm for overall width or height.
- Main canvas weight should match the approved swatch within a practical tolerance and should not be substituted without buyer approval.
- Print should pass dry rub and light scratch checks without visible powdering, cracking, or transfer to adjacent bag surfaces.
- Logo placement should match the approved artwork sheet, with special attention to flap edges, folds, and alignment to seams or hardware.
- Strap joints, flap corners, pocket openings, and D-ring or slider loops should have secure reinforcement with no skipped stitches or loose thread clusters.
- Magnetic snaps, sliders, zippers, or buckles should operate smoothly and should not create rust marks, sharp edges, or plating flakes.
- Bag color should be checked under consistent light against the approved sample, especially for natural canvas, black canvas, and custom dyed lots.
- Cartons should match the approved packing plan for pieces per carton, inner packing, orientation, printed-surface protection, carton marks, and gross weight.
- Random cartons should be opened after packing to check compression marks, print transfer, flap deformation, and hardware pressure points.
- If your program uses AQL or another inspection standard, state it in writing so the factory knows how many bags and cartons to sample.