Start With the Real Packing Problem
A canvas messenger bag for an artisan bakery is rarely just a generic giveaway. It may sit beside the pastry case as paid merchandise, ship to ten bakery branches as loyalty stock, support a farmers market team, or arrive in a staff onboarding kit. In all of those uses, the front flap does most of the visual work. If the flap is creased, dusty, rubbed, or dented by a buckle, the bag looks like second-grade stock even if the stitching passes inspection.
The common sourcing mistake is simple: buyers approve a loose sample and assume the factory’s standard export packing will be fine. A desk sample does not show what happens after 25, 30, or 40 canvas bags are stacked, compressed, taped into a carton, moved by truck, consolidated in LCL freight, and handled again at a distributor warehouse. Canvas can hold memory lines. Hardware can press into the surface. Ink can transfer when curing or interleaving is weak.
A useful canvas messenger bags carton packing plan for artisan bakeries does more than state the carton count. It defines the bag construction, protects the printed flap, controls practical carton weight, keeps CBM visible, and makes receiving labels reliable. Procurement teams should be cautious when a quote says only “standard export packing.” That phrase does not tell you carton grade, pieces per carton, fold method, inner packing, tissue protection, strap placement, gross weight, net weight, or carton marks.
Packing should be agreed before mass production, not after the goods are sewn. It affects cutting, printing sequence, ink curing, inspection, carton purchase, carton dimensions, carton marks, freight estimates, and warehouse receiving. Once production is finished, the supplier may choose the fastest way to close cartons. For bakery retail programs, that is an avoidable risk.
- Treat packing as a written product specification, not a warehouse afterthought.
- Define the sales channel before approving packing: retail shelf, staff kit, event stock, gift program, or distributor replenishment.
- Require carton data early enough to calculate landed cost and warehouse handling cost.
- Approve a packed sample, packed-layer photo set, or pilot carton before shipment release.
- Make flap condition, logo protection, carton count, and label accuracy part of the PO.
Build the Bag Spec Before the Carton Spec
Carton planning starts with the bag itself. A flat messenger bag with no gusset packs very differently from a bakery retail bag with a reinforced flap, front pocket, magnetic snap, cotton webbing strap, metal slider, and side gusset. Every added feature creates thickness. Some features also create pressure points. If those pressure points are not mapped before packing, hardware can stack in one area and mark the bags below it.
For bakery programs, common canvas weights include 10 oz, 12 oz, and 14 oz. In approximate GSM terms, buyers often see 10 oz around 300-340 GSM, 12 oz around 360-410 GSM, and 14 oz around 420-480 GSM. These are practical reference ranges, not universal conversions. Fabric weight is influenced by yarn count, weave density, finishing, shrinkage, and coating. A dense 12 oz canvas may recover better from compression than a loose 14 oz canvas.
Finished size drives carton count almost as much as fabric weight. A wide front flap may need a larger carton if it must stay flat. A deeper gusset consumes volume and may tempt the supplier to nest bags together, but nesting can cause snaps, sliders, or buckles to align vertically. A long shoulder strap can tangle or press through the flap unless the packing method tells workers exactly where to put it.
The buyer’s tech pack should include finished dimensions, tolerances, strap range, hardware type, print size, label location, seam reinforcement, and inner packing. A nice-looking sample is not enough for B2B procurement. The factory needs measurable targets, and the inspector needs a standard that can be checked without guesswork.
- Light option: 10 oz canvas for lower-cost promotional bags and lighter cartons.
- Balanced option: 12 oz canvas around 360-410 GSM for most bakery retail and staff programs.
- Premium option: 14 oz canvas around 420-480 GSM when structure and perceived value matter more than lowest freight cube.
- Heavy-duty option: 16 oz or reinforced panels only when compression and carton weight have been tested.
- Tolerance control: set measurable limits for body, flap, logo, strap, hardware, and carton packing before sample approval.
Set Practical Tolerances for B2B Inspection
Procurement buyers need tolerances that respect sewn cotton products while still protecting retail appearance. Canvas messenger bags are not molded plastic parts. Fabric relaxes, stretches, shrinks, and changes shape slightly after cutting, printing, sewing, and packing. Small variation is normal. Undefined variation, however, leads to arguments during final inspection and receiving.
For many commercial canvas messenger bags, ±1 cm is a workable starting tolerance for body width, height, and gusset. Flap drop often needs tighter control, such as ±0.7 cm, because an uneven flap is immediately visible from the front. Logo placement on the flap is commonly controlled within ±0.5 cm from approved reference points when panels are printed before sewing. Adjustable strap length may allow ±2 cm, but the buyer should still define a usable minimum and maximum range.
Hardware position should not be treated as a minor detail. Snap placement, buckle location, rivet position, and strap anchor alignment can change both function and packing performance. A snap placed too high may pull the flap tight and create puckering. A buckle that lands on the printed area during packing can leave an impression. Even a pocket seam ridge can affect the logo-safe zone.
These tolerances belong in the RFQ, quote, sample approval, and PO. If the buyer requires tighter limits, the factory may need more careful cutting, panel marking, print jigs, or extra inspection time. That can affect price and lead time, so it should be discussed early rather than discovered at the final inspection table.
- Body size: use ±1 cm as a common starting point for width, height, and gusset.
- Flap drop: control around ±0.7 cm when the flap is the main branding surface.
- Logo position: request ±0.5 cm from fixed references when artwork alignment is important.
- Strap length: define both the adjustable range and tolerance, commonly ±2 cm.
- Hardware: verify snap, slider, rivet, and strap anchor positions because they affect packing marks.
Choose an Orientation That Protects the Flap
For many bakery messenger bags, the safest carton orientation is flat packing with the printed front flap kept smooth and the shoulder strap tucked inside the bag. This avoids a fold through the logo and keeps hardware away from the visible branding area. If the bag is too wide for a practical carton, one soft body fold may be acceptable, but the fold line must avoid the print, flap edge, snap, heat-transfer edge, and pocket ridge.
Nested packing can save cube, but it is not automatically safer. When bags are nested, gussets, sliders, buckles, and snaps may line up in one vertical pressure zone. The carton can look neat when closed and still produce hardware dents on the lower layers after storage. The risk increases with 14 oz canvas, wide straps, magnetic snaps, raised embroidery, or thick woven patches.
Rolling should usually be avoided for retail messenger bags. Tight rolling can curve the flap, distort side seams, and give the bag a casual, giveaway-style appearance. Rolling may work for low-cost event stock, but it should be approved only after recovery testing. A bag that looks acceptable after five minutes may still hold a curve after two weeks in a carton.
Ask for photos that show the actual packing direction. The photo set should include the bag before packing, strap position, tissue placement, first layer, middle layer, bottom layer, and closed carton. These images reveal whether logos touch logos, whether hardware touches print, and whether the carton is being closed with reasonable pressure.
- Preferred: flap flat, print protected, strap tucked inside body, hardware away from logo.
- Conditional: one soft fold only when the fold avoids print, snap, flap edge, and transfer edge.
- Higher risk: nested packing when hardware stacks in the same carton zone.
- Avoid for retail: tight rolling that curves the flap or creates memory lines.
- Approval evidence: require layer photos before accepting the packing method.
Match Print Method to Packing Risk
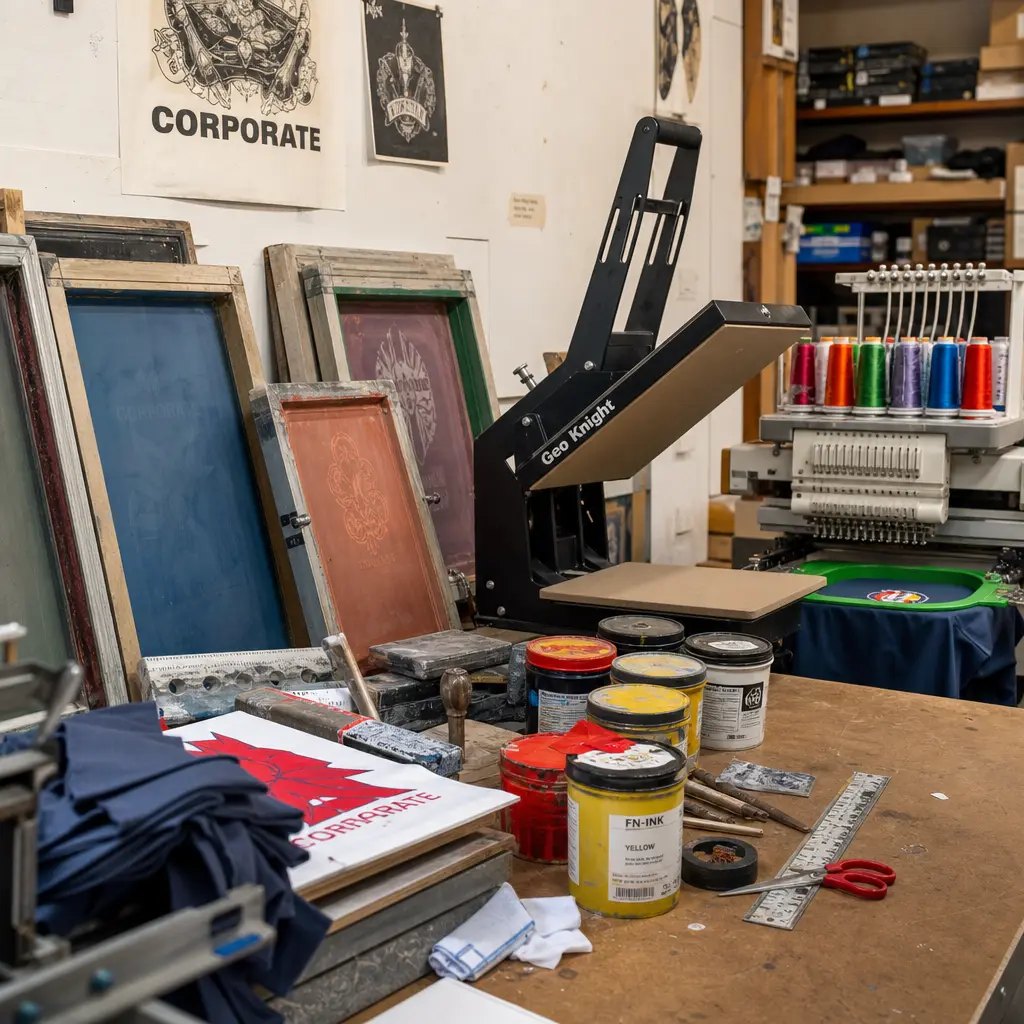
Most artisan bakery messenger bags use screen printing because bakery logos often rely on one to three solid colors. Screen printing can be cost-effective and durable, but it still depends on the right ink system, full curing, and sensible packing protection. If printed bags are packed too soon, carton pressure can cause blocking, tackiness, shine marks, or transfer onto the next bag. Those issues may not appear during a quick sample review.
Water-based printing can give a softer hand on cotton canvas, but performance depends on fabric absorbency, ink chemistry, and curing. Pigment print can work well for simple logos but may sit more on the surface and show rub if overloaded. Heat transfer can reproduce small text and fine detail, yet the transfer edge needs protection from scuffing and heavy compression. Embroidery can look premium, but it adds raised thickness and backing that may mark the opposite panel.
Print placement is also a packing decision. A logo should sit in a safe zone away from fold lines, snaps, pocket seams, strap anchors, buckles, and flap corners. If artwork crosses a seam ridge or sits directly above a magnetic snap, the carton can create a visible stress line or circular impression.
The RFQ should state print method, color count, Pantone or approved color reference, artwork dimensions, position tolerance, registration tolerance, curing process, and packing protection. Ask the supplier to confirm whether tissue, paper interleaving, or individual bags are included in the unit price. Otherwise, the lowest quote may simply be missing the protection your retail program needs.
- Screen print: specify Pantone target, print size, registration tolerance, curing, and rub check.
- Water-based print: confirm drying buffer, curing method, and compatibility with the approved canvas.
- Heat transfer: require smooth interleaving and avoid pressure on transfer edges.
- Embroidery: check backing, thread trimming, raised thickness, and pressure marks after packing.
- Woven label: define fold type, seam location, colorfastness, and whether placement interferes with stacking.
Set Carton Count by Weight, Cube, and Recovery
Carton quantity should not be chosen only to make a neat packing list. The right count depends on bag size, canvas weight, gusset depth, strap hardware, inner packing, carton grade, shipping route, and how well the bottom layer recovers after compression. For many standard canvas messenger bags, 20-40 pieces per carton is a practical starting range, not an automatic rule.
Gross weight needs discipline. Cartons that are too heavy are more likely to be dropped, dragged, crushed, or rejected by receiving teams. Cartons that are too loose waste CBM and allow bags to shift during vibration. Many buyers prefer export cartons that remain practical for manual warehouse handling, but the exact weight limit should match the buyer’s receiving policy and carrier requirements.
Compare carton options by CBM per 1,000 pieces as well as FOB unit price. A supplier may reduce CBM by packing more tightly. That can look attractive in a quote, but if the result is flap creasing or print abrasion, the buyer pays later through rework, markdowns, complaints, or store labor. Another supplier may use slightly more cube and deliver cleaner retail-ready units.
A simple packed-carton test is worth the time. Pack the proposed count, close the carton, leave it compressed for at least 24 hours, then inspect top, middle, and bottom layers. Look at flap flatness, print rub, strap indentation, gusset shape, carton bulging, odor, and ease of repacking. The bottom layer tells you more than the top layer.
- 10 oz simple bags: test up to 40 pcs/carton only if gross weight and print protection are acceptable.
- 12 oz retail bags: 25-35 pcs/carton often balances cube, handling, and presentation.
- 14 oz or hardware-heavy bags: 20-30 pcs/carton may reduce compression marks.
- Paper-wrapped premium bags: use lower count because tissue and sleeves consume volume.
- Distributor stock: keep carton quantity consistent to speed receiving and branch allocation.
Choose Inner Packing With Retail Readiness in Mind
Inner packing is one of the easiest quote details to miss. One factory may include individual polybags. Another may quote bulk pack. A third may include hangtags but not barcode labels. The unit prices may look comparable, but the delivered goods are not the same. Inner packing should be specified as clearly as fabric weight, print method, and carton count.
Individual recycled PE bags provide strong practical protection against dust, humidity, and carton rub. They also help warehouse and store teams handle each unit without refolding straps or brushing canvas dust from the surface. For bakery retail programs, that can reduce store preparation time. The tradeoff is plastic use, which may not fit every bakery brand position.
Paper bands, tissue wrap, or paper sleeves can create a lower-plastic presentation that feels more aligned with artisan branding. Paper-only systems, however, give less protection during ocean freight, LCL movement, and long warehouse storage. If plastic-free packing is required, compensate with stronger cartons, clean interleaving, shorter storage assumptions, and packed-condition approval before bulk production.
Barcode placement should be decided before production. Retail bags may need a hangtag, sticker, paper band label, polybag label, or carton barcode. Gift-with-purchase bags may not need unit barcodes, but carton labels still need accurate SKU and quantity data for branch allocation. A beautiful bag with unclear labels becomes a receiving problem.
- Individual polybag: strongest protection against dust, moisture, and carton rub.
- Recycled PE bag: useful when protection is needed but virgin plastic should be reduced.
- Paper band or sleeve: better low-plastic presentation but weaker transit protection.
- Tissue over logo: low-cost protection against abrasion and ink-to-canvas contact.
- Barcode or hangtag: define material, placement, attachment method, and inclusion in price.
Specify Carton Strength, Marks, and Pallet Rules
The master carton is part of the delivered product. Canvas messenger bags are bulky and may include hardware, so the carton must resist bulging, corner crush, moisture softening, and tape failure. For export orders, a 5-ply corrugated carton with suitable ECT or burst-strength equivalent where available is generally safer than a light domestic carton. The exact requirement still depends on carton size, gross weight, route, palletization, and whether the shipment moves by FCL, LCL, air, or courier.
LCL and cross-dock shipments create more handling risk than a direct full-container shipment to one warehouse. Cartons may be stacked, unstacked, sorted, relabeled, and moved several times. Once a carton belly-outs, pressure transfers unevenly to the bags inside and may mark the flap or distort the gusset. The carton can fail before anyone has inspected the merchandise.
Carton marks should be approved before printing or labeling. At minimum, include buyer code, SKU, color, design version, quantity per carton, carton number, gross weight, net weight, carton dimensions, and destination or warehouse code where required. If country-of-origin marking is required by the buyer or destination market, confirm placement and wording with the importer’s compliance team.
Pallet rules should also be clear. Ask whether palletization, corner protectors, stretch wrap, pallet labels, moisture precautions, and maximum pallet height are included. If palletization is excluded from the quote, freight comparison may be incomplete. The lowest FOB price may become less attractive when destination handling costs are added.
- Use export-grade cartons for ocean freight, LCL handling, and multi-warehouse distribution.
- Check carton gross weight against buyer receiving limits and carrier handling expectations.
- Require carton marks that match PO, packing list, SKU, quantity, and destination.
- Avoid unapproved mixed cartons because they slow receiving and increase allocation errors.
- Confirm palletization, edge protection, stretch wrap, and special labels as included or excluded.
Build MOQ Around Real Production Constraints
MOQ for canvas messenger bags is not only a sewing-room number. It is shaped by fabric sourcing, dye lot control, cutting yield, printing setup, label production, hardware purchasing, inner packing, carton marks, and shipment allocation. Natural canvas usually offers more flexibility than custom-dyed canvas because stock fabric may be available. Custom dyed fabric, branded hardware, special webbing, and certified material documentation can raise the true minimum.
A bakery distributor may want 300 pieces for one bakery, 500 for another, and 200 for a seasonal market program. A factory may be able to combine sewing production, but each logo version still needs separate artwork control, print setup, strike-off approval, and inspection separation. Ask whether MOQ applies per fabric color, per print design, per label, per packing method, per carton mark, or per destination.
Carton multiples are often overlooked. If the approved carton quantity is 30 pieces and a branch allocation is 100 pieces, the buyer must choose among three full cartons plus one short carton, an adjusted allocation of 90 or 120, or a mixed carton. Short cartons need void fill to prevent crushing. Mixed cartons need unmistakable labels and a packing list that receiving teams can follow.
A practical MOQ strategy may use one natural canvas base, one strap color, and multiple print versions. This keeps fabric and sewing efficient while still allowing bakery-specific branding. The goal is to separate true production constraints from preferences that can be handled through carton marks, labels, or local distribution.
- Natural canvas with one-color print is usually the simplest path to lower MOQ.
- Custom-dyed canvas requires shade approval, dye lot control, and larger fabric booking.
- Multiple bakery logos may share construction but still require separate print setups.
- Carton marks are easier to vary than fabric, webbing, hardware, or print method.
- Align quantities with carton multiples to avoid weak short cartons and confusing mixed cartons.
Approve Samples and Quotes in Shipment Condition
A loose sample is useful, but it is not enough for a first order, retail launch, or new packing method. The buyer needs to know how the bag behaves after it is folded, stacked, wrapped, compressed, and unpacked. The sample should represent production fabric, print method, strap, hardware, label, inner packing, carton orientation, and carton count.
Start the review with the bag itself: fabric shade, handfeel, odor, stitching, flap shape, strap adjustment, hardware security, and print quality. Then review packed condition: tissue position, polybag fit, strap placement, carton fill, fold line, and whether the printed flap touches rough canvas, hardware, or another print. After 24 hours under pressure, open the package and photograph the logo area before smoothing it by hand.
Quote comparison should include more than unit price. Ask for MOQ, sample cost, setup charges, fabric details, print method, inner packing, carton quantity, carton dimensions, gross weight, net weight, CBM per carton, estimated CBM per 1,000 pieces, lead time, and shipment terms. Required extras such as recycled polybags, paper bands, hangtags, barcode labels, silica gel, palletization, and destination sorting should be separated as included or optional.
Final shipment approval should be documented with approved sample photos, measurement sheet, print strike-off, packing layout, carton marks, carton weight, and packing list format. These records help the inspector and warehouse compare real goods against a clear standard instead of relying on memory, chat messages, or assumptions.
- Request a production-style packed sample or pilot carton for first orders and major changes.
- Photograph flap condition immediately after unpacking, before hand smoothing.
- Compare FOB price together with CBM per 1,000 pieces and packing protection level.
- Separate included packing from optional retail labels, paper bands, palletization, and inserts.
- Keep approved packing records available for final inspection and receiving teams.
Specification comparison for buyers
| Procurement decision | Recommended specification | Best fit for bakery programs | Risk to verify before PO |
|---|---|---|---|
| Canvas body weight | Quote fabric by both oz/yd² and GSM. Common commercial options are 10 oz around 300-340 GSM, 12 oz around 360-410 GSM, and 14 oz around 420-480 GSM, depending on weave, yarn, shrinkage, and finishing. | Retail bakery merchandise, staff kits, farmers market programs, loyalty gifts, wholesale buyer packs, and distributor replenishment. | Ounce-to-GSM conversion is not exact. A loose-weave canvas can sound heavy on paper but still collapse, crease, or print poorly after carton compression. |
| Finished bag tolerance | Set tolerances before sampling: body width/height/gusset typically ±1 cm, flap drop ±0.7 cm, logo position ±0.5 cm, and adjustable strap length range ±2 cm unless tighter display fit is required. | Programs where bags must fit shelf displays, gift boxes, branch allocation cartons, e-commerce bins, or warehouse locations. | Without tolerances, inconsistent bags may pass a visual check one by one but stack unevenly, distort carton fill, or look irregular on a retail shelf. |
| Logo-safe packing orientation | Pack flat when practical. Keep the printed flap smooth, tuck the strap inside the bag or secure it away from the logo, and avoid folds through print, snaps, heat-transfer edges, or flap corners. | Messenger bags with front flap branding, adjustable shoulder strap, cotton webbing, magnetic snap, front pocket, metal slider, or retail hangtag. | A fold, snap, or buckle pressed into the logo can leave a shiny line, circular mark, hardware dent, or permanent flap crease visible at unpacking. |
| Print protection | Pack only after prints are fully cured. Use tissue, smooth paper interleaving, or individual inner bags to prevent ink-to-ink contact and hardware-to-print pressure. | One- to three-color bakery logos, seasonal artwork, local market slogans, loyalty program graphics, and co-branded distributor designs. | Screen print, pigment print, and heat transfer can scuff, block, crack, or transfer if packed too early or stacked under uneven pressure. |
| Inner packing method | Choose individual recycled PE bags for maximum protection, or tissue plus paper band/sleeve when plastic reduction is a priority. Define barcode and hangtag placement. | Bakery retail shelves, multi-location distribution, corporate gifting, wholesale inventory, and e-commerce bundle fulfillment. | Paper-only packing can support a lower-plastic presentation but gives less moisture, dust, and abrasion protection during ocean freight, LCL handling, or long storage. |
| Master carton grade | Use export-grade 5-ply corrugated cartons for most import orders. Specify carton burst/ECT equivalent where available, strong tape, approved carton marks, and no bulging cartons. | LCL shipments, cross-docking, distributor warehouses, stacked storage, and orders with multiple handling points. | Weak cartons belly out, crush at corners, lose tape, or transfer pressure to lower-layer bags before receiving inspection even begins. |
| Carton quantity | Start with 20-40 pcs/carton, then finalize by packed-carton test, gross weight, carton size, carton grade, and bottom-layer recovery. Avoid impractical manual handling weights. | Most B2B bakery merchandise orders where freight cube, warehouse handling, and shelf appearance all matter. | A high carton count may reduce CBM but increase flap creasing, hardware dents, dirty rub, carton failure, and receiving complaints. |
| MOQ structure | Confirm MOQ by fabric color, print design, label, hardware, inner packing, carton mark, and destination instead of relying on one headline MOQ. | Importers combining several bakery branches, seasonal logos, colorways, and distributor allocations under one purchase order. | Below true material or print minimums, factories may add surcharges, substitute fabric, mix shade lots, or change packing counts. |
| Packed sample approval | Approve a production-style packed sample or pilot carton after at least 24 hours of compression. Inspect top, middle, and bottom layers before bulk release. | First orders, new canvas weight, new print method, large flap logo, hardware change, retail launch, or new distribution route. | Loose sample approval does not reveal carton rub, strap marks, lower-layer crushing, odor transfer, or post-packing print issues. |
Buyer checklist before sampling
- Define the commercial use first: paid retail merchandise, staff kit, wholesale buyer gift, event giveaway, loyalty reward, delivery support, or distributor stock. Presentation risk changes by channel.
- Issue a written finished specification with width, height, gusset, flap drop, pocket size, strap width, strap length range, hardware position, seam reinforcement, label position, and logo placement from fixed reference points.
- State measurement tolerances in the PO or tech pack: normally ±1 cm for body width/height/gusset, ±0.7 cm for flap drop, ±0.5 cm for logo placement, and ±2 cm for adjustable strap length unless tighter controls are needed.
- Specify canvas by both oz/yd² and GSM. Request a physical swatch and record whether the fabric is natural, bleached, dyed, washed, enzyme treated, coated, stiffened, or otherwise finished.
- Keep artwork inside a logo-safe zone. Avoid fold lines, seam ridges, snap pressure points, buckle contact zones, pocket edges, strap anchor pressure areas, and flap corners.
- Define print method, color count, Pantone or approved color standard, artwork size, ink curing requirement, registration tolerance, rub check, and whether tissue or interleaving is required over printed flaps.
- Confirm inner packing in exact terms: individual recycled PE bag, paper sleeve, tissue wrap, paper band, bulk pack, hangtag, barcode label, silica gel policy, and any plastic-free requirement.
- Approve carton packing by pieces per carton, carton size, carton grade, gross weight, net weight, CBM, stacking direction, strap position, fold line, void fill, carton marks, and mixed-carton rules.
- Request packed-carton evidence before shipment: open carton, first layer, middle layer, bottom layer, closed carton, carton marks, scale weight, measured carton dimensions, and representative inner packing.
- Include packed-condition acceptance criteria: no severe flap crease, no print transfer, no buckle indentation on logo, no dirty canvas, no mold or carton odor, no wet cartons, and no unapproved mixed SKU packing.
Factory quote questions to send
- Which canvas weight is included in the quote in oz/yd² and GSM, what yarn/weave reference is used, and can you provide the exact swatch used for costing?
- Is the canvas natural, bleached, dyed, washed, enzyme treated, coated, or stiffened, and what shade tolerance will apply across panels, flaps, straps, and repeat orders?
- What finished bag dimensions, gusset depth, flap drop, strap width, strap length range, buckle type, snap type, pocket construction, bartacks, and reinforcement details are included in the unit price?
- What finished-goods tolerances are you quoting for body size, flap symmetry, strap length, logo location, seam allowance, and hardware placement?
- What packing method is proposed: flat, one soft fold, nested, or bulk stacked, and exactly where will the flap, logo, strap, snap, buckle, and slider sit inside the carton?
- What carton quantity, carton dimensions, gross weight, net weight, CBM per carton, and estimated CBM per 1,000 bags are included in the quote?
- What carton grade is included, such as 5-ply export carton, ECT or burst-strength equivalent where available, and what tape pattern will be used?
- What print method is quoted, how many colors are included, what Pantone or approved color standard will be used, and what curing or drying time is required before packing?
- How will the printed flap be protected from abrasion, blocking, and hardware marks: tissue, paper interleaving, polybag, flap-facing direction, or another method?
- Is the shoulder strap tucked inside the bag, coiled, secured with paper tape, packed separately, or left loose, and how will buckle indentation be prevented?
Quality-control points to confirm
- Finished body dimensions should be checked against the approved spec. A common commercial tolerance is ±1 cm for width, height, and gusset, ±0.7 cm for flap drop, and ±2 cm for adjustable strap length unless the buyer requires tighter display or fit control.
- Logo placement should be measured from fixed reference points, not by eye. A practical tolerance is often ±0.5 cm for screen-printed flap artwork; stricter tolerances should be confirmed before costing.
- Canvas panels should be free from obvious slubs, oil spots, dirty folds, broken yarns, severe shade mismatch, dye streaks, mold odor, and stains visible at normal inspection distance under neutral lighting.
- Flap symmetry needs separate review because it is the main branding surface. Check flap drop, corner shape, edge waviness, snap alignment, and whether the flap lies flat after unpacking.
- Seam allowance, bartacks, strap anchors, gusset seams, pocket corners, flap corners, and stress points should be inspected because users may carry bread, jars, coffee packs, catalogs, or point-of-sale materials.
- Printed logos must match approved artwork for color, size, location, edge quality, opacity, registration, and orientation, with no cracking after light folding and no transfer after reasonable dry rub testing.
- Water-based, pigment, or discharge prints should be checked after full curing and again after packing pressure, not only immediately after printing while the surface looks fresh.
- Heat transfers should be checked for lifting edges, gloss inconsistency, bubbles, adhesive bleed, edge cracking, and surface scuffing after tissue removal and carton compression.
- Metal sliders, buckles, snaps, rivets, and magnetic closures should be checked for burrs, rust risk, sharp edges, secure attachment, noise, color consistency, and indentation marks after packed storage.
- Inner packing should be clean, correctly sized, odor-free, and consistent. Polybags should not be so tight that they bend the flap, and paper bands should not create deep pressure lines across the logo.