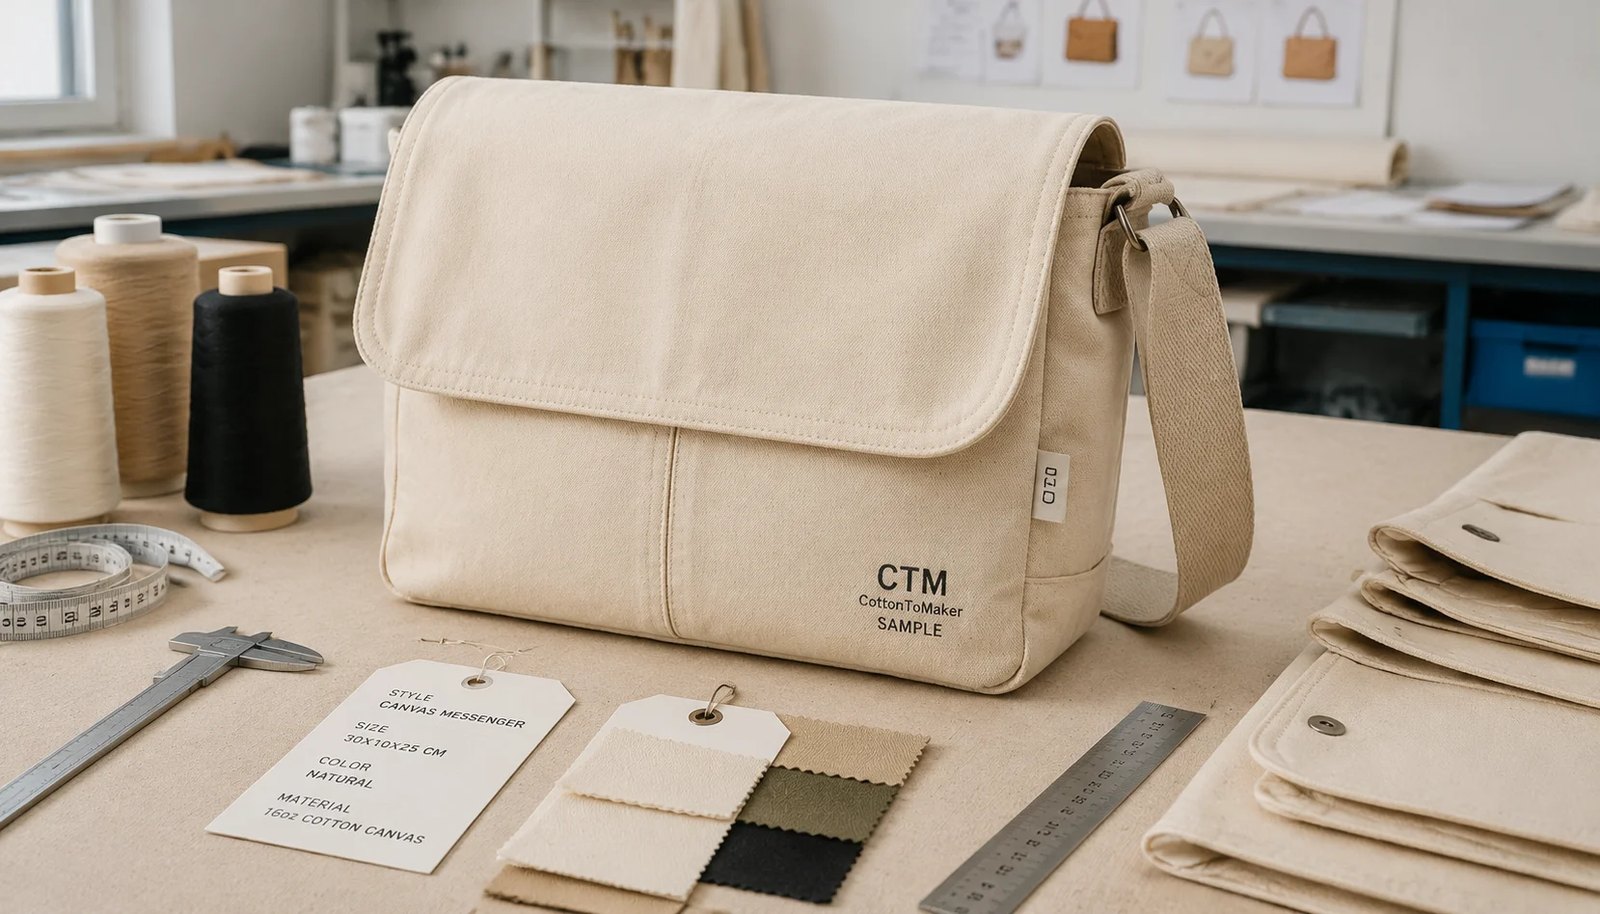
Why museum shop samples fail even when the bag looks right
Museum shop buyers often approve a canvas messenger bag too quickly because the first sample looks clean on the table. That is where many procurement problems start. A sample can look close in shape and still fail in fabric weight, print registration, strap strength, or packing format once the order moves into bulk production. The visual match is only one part of approval; the other parts are repeatability, durability, and cost control.
Museum retail also carries a different commercial expectation than promotional bag work. The product must hold up as a real carry item, present well beside books and gifts, and stay within a cost structure that preserves margin for the shop. That means sample approval should test whether the bag can be made again at scale, not whether one hand-finished piece looks good in isolation. Buyers who skip this step usually end up with production drift, added rework, or a second round of samples.
A useful sample approval process starts by separating appearance, construction, and commercial feasibility. The bag may be attractive, but if the factory cannot source the same canvas again, cannot reproduce the print without blur, or cannot hold the quoted cost once trims are counted, the sample is not ready for bulk release. Procurement teams need to treat the sample as a decision gate, not as a presentation piece.
- A sample that uses the wrong canvas weight can make the bag too limp or too rigid.
- A print that looks sharp on one sample may break down if the factory changes ink mesh or curing temperature.
- A good-looking sample can still hide weak strap reinforcement, poor gusset shaping, or loose internal finishing.
- A clean table sample does not prove carton durability, barcode legibility, or retail unpacking quality.
Start with the retail use case, not the bag shape
For museum shops, the right canvas messenger bag depends on what the customer will carry and how the product will be sold. A slim crossbody style for exhibition notes is not the same as a bag meant for books, postcards, and small retail purchases. Before sample approval, define the use case in writing: daily visitor carry, premium souvenir item, exhibition launch item, member gift, or general retail stock. Each use case changes the ideal size, weight, closure, and interior layout.
That use case also drives the commercial target. If the bag needs to feel premium, a 14 oz or 16 oz canvas usually gives better structure than a very light fabric, especially when the bag is displayed folded on a shelf. If the program is price-sensitive, a 12 oz canvas with clean stitching and a simple one-color print may be enough. The key is to align the bag spec with the retail role before the factory starts sampling, because later changes are expensive and often create new lead time.
For museum procurement, it helps to define the audience as precisely as possible. Is this for visitors carrying catalogs and phones, for shoppers buying multiple items, or for gift buyers wanting a compact souvenir? If the shop expects repeated carry and heavier loading, the strap and seam requirements rise. If the main goal is visual merchandising, the profile, flap shape, and logo placement become more important. Buyers should not approve a sample until the use case has been translated into measurable specs.
- For premium retail, prioritize structure, clean edge finishing, and print clarity.
- For high-volume museum programs, prioritize repeatability, quick packing, and controlled labor content.
- For exhibition-specific runs, keep artwork and label placement flexible enough to adapt to each show.
- Write the intended loading use on the spec sheet, such as light carry, daily carry, or book-and-catalog carry.
Fabric weight, weave, and finish: the first approval gate
Canvas messenger bags are usually quoted in ounces or GSM, and that number should not be treated as marketing copy. For most museum shop programs, 12 oz to 16 oz cotton canvas is the practical range. Around 14 oz is a common starting point because it balances shape, print performance, and hand feel without turning the bag into a work bag. If the sample is too light, the panel can collapse and the print may telegraph through oddly. If it is too heavy, the bag can become stiff, bulky, and expensive to ship.
The buyer should also ask how the canvas is finished. Raw, pre-washed, dyed, bleached, and enzyme-washed fabrics all behave differently. A raw canvas sample can feel slightly larger and stiffer before the first wash; a washed canvas may appear softer but lose body or show more surface irregularity. That matters for a museum shop, because customers notice both presentation and feel when the item is displayed near books, stationery, and higher-margin gifts. The finish can also change shrinkage and print edge quality, which is why the spec should never say only 'canvas' without the actual construction.
Ask the factory for a real fabric swatch and, if possible, the measured weight or construction data from the same lot used on the sample. If the sample uses a different roll from the bulk order, write that down. Procurement teams should not assume all 14 oz canvas behaves the same across mills. Weave density, yarn thickness, and finish method affect how the bag hangs, how it sews, and how cleanly it takes artwork. When the sample is approved, that fabric description needs to be specific enough that another inspector can verify it later.
- Use a 10 cm by 10 cm fabric swatch in the sample pack if possible.
- Record actual weight, not just supplier description, when the order is custom.
- Ask whether the same fabric lot will be held for bulk or whether the sample is from a different roll.
- Check whether the canvas is reactive dyed, vat dyed, bleached, or left natural, because color consistency will change.
Print method and artwork controls for museum retail graphics
Museum shops often use artwork, exhibit names, or collection marks that need clean presentation. For simple logos and text, screen print is usually the most cost-effective and durable route. It gives strong opacity on natural canvas and keeps unit cost under control at moderate volume. If the design includes small gradients, detailed line art, thin lettering, or multiple tones, the buyer should compare screen print with digital print or heat transfer before approving the sample. The best-looking sample is not always the best production method.
The mistake to avoid is approving a sample only for appearance without recording the actual print method, ink type, and placement dimensions. A 120 mm logo on the sample should stay 120 mm in production unless the spec says otherwise. If the print sits across a seam, near a fold, or close to the bag edge, the buyer needs to know how the factory will handle registration and where distortion is acceptable. That is especially important for museum graphics, where a logo shifted a few millimeters can look careless on retail display.
Buyers should also ask how the factory tests the ink on the chosen canvas. A print that appears strong immediately after curing may still crack, fade, or rub off during handling if the ink system is mismatched to the fabric surface. If the design will be exposed to repeated folding, the approval sample should be checked with the bag folded and opened a few times. If the artwork is part of a limited exhibition program, the buyer should demand a color reference and a production method note in the approval record so the same image can be reproduced later.
- Screen print fits 1 to 4 solid colors and large open shapes.
- Digital or transfer print fits complex art but may add cost and durability risk.
- Embroidery works for small marks but is rarely the best choice for large museum graphics.
- Ask for print position tolerance in millimeters, not just 'as per sample.'
Comparison of sourcing routes for the sample approval stage
The sample you approve is only as reliable as the sourcing route behind it. A trading company can move fast and simplify communication, but it may show a sample that is not fully representative of the production line. A direct factory can usually give better control over fabric, stitching, and packing, but the buyer needs tighter RFQ detail to avoid vague answers. For museum shops, the best route depends on how much variation the order allows and how much risk the buyer can carry.
The table below compares common sourcing routes and the approval risks they create. The point is not to choose the cheapest path. It is to choose the route that gives the most trustworthy sample for the least amount of rework. Procurement teams should ask who actually made the sample, where the fabric came from, and whether the bulk order will use the same operators, machines, and trim suppliers. If those answers are unclear, the sample is not yet a dependable production reference.
For larger museum programs, a pre-production sample from the actual factory is usually the safer choice because it proves the production route instead of only the design. For smaller or experimental programs, a trading sample may help with speed, but only if the buyer confirms that the bulk factory will mirror the same material spec. The right question is not whether the supplier has sent a nice sample before. It is whether the sample represents the real production chain.
- Ask who physically built the sample and on what line.
- Request fabric origin and trim source if the bag includes custom components.
- Do not approve a trading sample as production proof unless the same factory and same spec are confirmed.
- Use a production-ready sample route when the bag includes custom print, custom labels, or retail packaging.
Construction details that decide whether the bag feels retail-ready
A canvas messenger bag can pass the visual test and still fail on construction details that matter in use. The strap is the first stress point to examine. For museum shop carry use, a 25 mm to 38 mm webbing strap is usually practical, but width alone is not enough. The attachment needs reinforced box-X stitching or an equivalent bartack pattern, and the webbing should lie flat without twisting. If the strap pulls the body of the bag out of alignment, the bag will age badly in use.
The flap, gusset, and pocket structure deserve the same attention. A bag with a structured flap should close cleanly without curling at the corners. The gusset should hold shape when the bag is empty and should not collapse into the main opening. If there is an internal pocket for tickets, phones, or receipts, the opening needs to be sized for real use rather than for a cleaner sample appearance. Buyers often overlook the pocket because it looks simple, but a pocket stitched too close to the top line can reduce usable volume or cause seam tension.
Interior finish also matters. Loose thread ends, rough seam allowances, and exposed binding may not show in a quick photo, but they affect the retail impression and long-term wear. For museum shop buyers, especially those sourcing giftable products, the sample should be turned inside out and inspected carefully. The goal is not luxury handbag perfection. The goal is clean, repeatable construction that feels deliberate and does not signal rushed production.
- Confirm strap width, strap length, and attachment reinforcement on the sample sheet.
- Check flap corners for curl, asymmetry, or visible stiffness mismatch.
- Inspect internal pocket size against the actual items the customer will carry.
- Ask whether the factory uses box-X stitching, bartacks, or another reinforcement method and record it exactly.
What the sample must prove before you move to bulk
A good sample should prove three things: the bag meets the visual brief, the construction can survive normal use, and the factory can repeat it at the quoted cost. If any one of those fails, the sample is not really approved. Museum shop buyers should treat the sample as a production test, not a design object. A useful approval process is practical and specific: size, weight, print, stitching, closure, packing, and cost should all be checked against the spec sheet.
The approval standard should be written in objective terms. For example, the bag can be accepted if strap stitch length is consistent, print edges stay within the agreed tolerance, and the pocket opening does not warp after closure testing. If the sample is still being debated in soft terms like 'looks fine' or 'feels nice,' the buyer does not yet have enough control for bulk. A buyer can still allow minor variation, but the variation has to be described in advance so both sides know what is acceptable.
There should also be a clear distinction between cosmetic variation and functional failure. A small loose thread on the reverse side may be acceptable if it trims cleanly and does not affect structure. A crooked print, weak strap reinforcement, or zipper that catches during short use testing should not be accepted because those defects will multiply in bulk. Sample approval is most effective when the buyer writes down what passes, what needs correction, and what automatically fails. That gives the supplier a usable standard instead of a vague impression.
- Measure width, height, gusset, strap length, and pocket size on the stuffed sample.
- Inspect stitch density and reinforcement at stress points.
- Confirm the bag stands or folds as expected when empty and when lightly loaded.
- Define which cosmetic flaws are acceptable and which are automatic rejections.
Sample approval thresholds that prevent later disputes
Set numeric or visible thresholds before the sample arrives. If the bag will be displayed in a museum retail setting, the buyer should define acceptable variation in print position, seam alignment, and label placement. For example, a side label that shifts by a few millimeters may be acceptable, but a crooked front print or uneven flap edge usually is not. If the buyer wants the bag to match a brand guide, the spec should reference the exact artwork file and the approved position from a measurement point, not a verbal description.
This is also where buyers should define what is cosmetic and what is rejection-worthy. Small thread trimming on the reverse may be acceptable if it does not affect presentation. Puckering near the logo, color mismatch against the agreed reference, or a zipper that jams during a short function test should be treated as non-approval items. The more the buyer converts taste judgments into measurable limits, the less time will be spent arguing after the sample is on the table.
It is useful to record tolerances for the dimensions that matter most. For a canvas messenger bag, that often means body width, body height, gusset depth, strap length, pocket position, and print placement. If the bag uses a flap or magnetic snap, the buyer should also note where the closure sits relative to the top edge. That level of detail helps the supplier make a sample that can be repeated, and it gives the buyer a defendable basis for rejecting an out-of-spec bulk lot.
- Reject visible puckering on the main display face.
- Reject obvious color drift on the canvas body or print ink.
- Reject weak reinforcement at straps, handles, or flap closures.
- Write the acceptable tolerance for key dimensions before sample approval starts.
Packing, labeling, and barcode details that matter to museum shops
Museum shop orders often fail at the packing stage because the bag is approved as a product but not as a sellable unit. A clean sample should show how the final retail or warehouse packing will work. That includes polybag type, barcode sticker placement, hangtag location, carton count, and whether the bag needs a retail insert or silica gel. Buyers who ship through distributors should also decide whether the product will arrive flat-packed or already shaped. Those decisions affect labor, carton size, and damage rate.
Packing detail also changes the merchandising experience. A structured flap can crease if packed too tightly. A printed canvas body can rub if the factory stacks units without separators. If the museum shop plan includes hanging display, the buyer should ask for a hanger hole or hook-ready hangtag before approving the sample. Retail-facing packaging should not be left as an afterthought because it becomes part of the customer’s first impression and part of the warehouse handling process.
Procurement teams should also verify barcode and carton marks on the sample stage. A product can be mechanically perfect and still create operational trouble if the barcode is in the wrong place, the carton count is inconsistent, or the polybag warning print is missing where required. Ask the factory to include the exact packing format in the approval pack. Then keep that pack as the reference for the bulk purchase order and carton inspection.
- Confirm if each bag needs an individual polybag or a bulk inner pack.
- Approve barcode location before carton labeling is fixed.
- Match carton pack count to warehouse handling, not only to factory convenience.
- Check whether packing creates creases on the front panel or flap surface.
Lead time, MOQ logic, and the real cost drivers in the quote
For custom canvas messenger bags, MOQ should be read as a function of fabric, print setup, and packing labor, not only as a bag count. A factory may quote a low MOQ for a simple one-color bag, but once the buyer adds custom dyeing, woven label, special zipper tape, or retail packing, the real minimum may be higher. That is normal. The useful question is not 'what is your MOQ' in isolation, but 'what is the MOQ for this exact spec and why.' Buyers who ask that way get more honest answers and fewer surprise charges later.
Lead time also needs to be split into sample, pre-production sample, and bulk production. If the sample is approved, bulk should still be booked against confirmed fabric and trim availability. A buyer who ignores this often loses time to fabric replacement or print queue changes. For museum programs tied to exhibitions, this can make the difference between on-shelf launch and a missed season. The procurement plan should therefore include decision dates, artwork lock dates, sample approval deadlines, and shipping windows.
Quote review should be line-item based. Ask for fabric, trim, print, sewing, packing, carton, and any testing cost separately. That makes it easier to compare suppliers that hide setup cost inside unit price versus those that disclose it openly. If the museum shop is buying several bag styles, use the same quote template across suppliers so differences in cost structure are visible. That is more useful than chasing the lowest unit number without knowing what is included.
- Separate one-time setup costs from recurring unit cost.
- Ask for fabric, trim, printing, sewing, packing, and carton cost lines.
- Count approval time as part of the schedule, not as a side note.
- Ask whether price changes if the order is split across multiple artwork versions.
Specification comparison for buyers
| Spec decision | Recommended option | When it fits | Buyer risk to check |
|---|---|---|---|
| Fabric weight | 12 oz to 16 oz cotton canvas, with 14 oz as the common starting point | Museum shops that need a balanced hand feel, print clarity, and durable retail presentation | Too-light fabric can distort after print and feel cheap; too-heavy fabric can push cost up and make the bag stiff |
| Print method | Screen print for simple logos; heat transfer or digital print for complex art; embroidery only for small marks | Artwork with 1 to 4 colors, especially logos tied to exhibitions, collections, or retail programs | Fine detail can fill in on screen print; embroidery can warp fabric and is rarely right for large graphics |
| Closure style | Magnetic snap or top zipper with inner pocket | Retail buyers who need quicker sell-through and better item protection in stores or visitor use | Weak magnets, rough zipper tape, or poor alignment can create rejection in sample approval |
| Strap construction | 25 to 38 mm webbing strap with reinforced box-X stitching | Daily carry use, guide books, tablets, and shop purchases | Thin straps, poor edge binding, or weak bartacks lead to strap twist and load failure |
| Sample route | Pre-production sample from the actual factory, not a sales sample from a trading desk | Any order above basic trial quantity or any program with custom print and packaging | A trading sample may hide real production fabric, trim, or stitch limits |
| MOQ logic | Start from fabric width, print setup, trim color, and packing method rather than bag count alone | Programs with custom color, complex print, or retail-ready labeling | A low bag MOQ can still create high total cost if the factory must buy excess fabric or new trims |
| Packing format | Flat pack with single polybag, barcode sticker, and carton count mark unless retail hanging is required | Museum shop replenishment, distributor stock, and export consolidation | Loose packing creates contamination risk; overpacked retail units can drive labor and carton cost |
| Lead time control | Sample approval before bulk booking; bulk lead time counted from approved PPS and packaging spec | Seasonal museum programs and exhibition-linked launches | If the sample is approved late, fabric and print slots may shift the delivery window |
Buyer checklist before sampling
- Confirm finished bag size, tolerance, and whether the size includes flap, gusset, or external pockets.
- Lock fabric weight in oz or GSM, plus whether the canvas is washed, bleached, dyed, or raw.
- Approve artwork file, print size, print placement, and acceptable color delta against the reference sample.
- Define strap width, strap length, reinforcement points, and the load target the bag must hold in use.
- Specify lining, pocket count, closure type, label type, and hangtag or barcode needs.
- Set sample acceptance rules for stitching, thread color, seam alignment, odor, wrinkling, and hand feel.
- Confirm packing format, carton pack count, carton size limit, and whether polybags are required.
- Request the factory to quote separate costs for sample, bulk, print setup, packing, and any testing.
- Ask for a pre-production sample from the same factory line that will run the bulk order.
- Require written approval for any post-sample change to fabric lot, trim source, print method, or carton format.
Factory quote questions to send
- What exact fabric construction and finished GSM or oz are you quoting for the sample and for bulk production?
- Is the sample made in the same line, with the same fabric lot, trims, and print method as the bulk order?
- What is the setup cost for print, embroidery, label, or mold work, and which of those costs repeat or amortize in bulk?
- What is the production MOQ by fabric color, print color count, and carton packing format?
- What dimensional tolerance will you hold on width, height, gusset, strap length, and pocket placement?
- What inspection standard do you use for stitch count, seam strength, print registration, and zipper or snap function?
- What carton pack count, master carton size, and barcode labeling options are available for museum shop distribution?
- What is the sample lead time, pre-production sample lead time, and bulk lead time after approval?
- What is the actual lead time risk if fabric, zipper tape, or printed trim must be reordered after sample sign-off?
- Which material or process changes require a new sample approval before you release bulk production?
Quality-control points to confirm
- Measure finished dimensions on the actual stuffed sample and compare against the approved spec sheet, not a visual estimate.
- Inspect fabric weight or hand feel against the agreed canvas weight and reject any obvious downgrade in density or weave consistency.
- Review print alignment, edge sharpness, opacity, and wash or rub resistance if the artwork sits near folds or seams.
- Pull the strap and handle attachment points by hand and look for loose thread, skipped stitches, or weak bartacks.
- Open and close the zipper, snap, or magnetic closure at least 20 times to catch rough movement or misalignment.
- Check that the side label, woven label, or heat transfer mark is in the exact approved position and readable at retail distance.
- Verify odor, lint, stain marks, needle damage, and packing cleanliness before approving the sample for bulk reference.
- Confirm the sample includes final carton marks, hangtag placement, and polybag format if these are part of the selling unit.
- Check interior finish for exposed thread ends, sharp seam allowances, or rough binding that could annoy end users.
- Compare the approved sample against the production sample under the same lighting before accepting a color or print shift.