Why Coffee Roasters Need a Dedicated Sample Approval Process
Coffee roasters order canvas messenger bags for retail sales, wholesale accounts, and event giveaways. Unlike generic promotional bags, a coffee roaster's bag must carry a 12 oz or 1 lb bag of beans upright, survive repeated handling at farmers markets, and display a brand logo that looks professional under market lighting. A sample that passes these checks reduces the risk of a bulk order that fails in the field.
A sample approval process tailored for coffee roasters focuses on three things: structural integrity under load, print quality that survives bag-to-bag contact, and dimensions that fit standard coffee packaging. Without a structured checklist, buyers often approve a sample based on looks alone and later discover the strap tears after 50 uses or the print fades after a few weeks on a retail shelf.
The financial impact of a failed bulk order is significant. A 500-piece order at $3.50 per unit represents a $1,750 investment in bags alone. If the bags fail, you lose not only the bag cost but also the coffee packaging inside, the labor to repack, and the customer goodwill from a damaged brand experience. A structured sample approval process is the cheapest insurance against this risk.
Coffee roasters also face unique logistics challenges. Bags are often stored in warehouses with fluctuating humidity (50-80% RH), displayed in retail bins where they are stacked, and carried by customers who expect durability. A sample that passes a controlled factory test may still fail in these real-world conditions. The sample approval process must simulate these conditions as closely as possible.
- Coffee bags are heavy relative to their size: a 1 lb bag of whole beans is denser than a t-shirt or notebook. The bag must support 2-3 lb total load including packaging.
- Messenger bags for coffee are often stacked in display bins; the bottom bag must support the weight of 5-10 bags above without collapsing or distorting the gusset.
- Brand logos on coffee bags are seen close-up by customers; print quality directly affects perceived product value. A misaligned or faded print reduces perceived value by 20-30%.
- A structured sample approval process saves reorder time and prevents costly production mistakes. The average cost of a sample revision is $50-100; the cost of a failed bulk order is $1,750+.
- The cost of a failed bulk order includes replacement bags, lost sales, and brand reputation damage. A single negative review can cost 10-20 future sales.
Fabric Weight: The First Decision That Affects Everything
Canvas messenger bags for coffee roasters typically use 10 oz (340 GSM) to 12 oz (407 GSM) cotton canvas. A 10 oz fabric is stiff enough to hold shape when carrying a coffee bag, but flexible enough to fold flat for packing. Lighter fabrics (6-8 oz) may look flimsy and can tear at the strap anchor points after repeated use. Heavier fabrics (14 oz+) add unnecessary weight and increase shipping costs by 25-30% without providing extra benefit for a coffee bag load.
When reviewing a sample, weigh the bag on a digital scale and compare it to the quoted GSM. A 10 oz canvas bag for a standard messenger (about 12 x 10 x 3 inches) should weigh approximately 0.6-0.7 lb empty. If the sample feels noticeably lighter, the factory may have substituted a lower GSM fabric. Always ask for a fabric swatch card with the sample so you can feel the hand and check the weave density. The swatch should be from the same dye lot as the sample.
Fabric weight also affects print adhesion. Heavier canvas has a tighter weave, which provides a smoother surface for screen printing. Lighter canvas may have a looser weave that causes ink to bleed or print unevenly. If your logo includes fine details or small text (under 8 pt), a 10 oz or heavier fabric is recommended to ensure print sharpness. Test print adhesion by rubbing the print with a white cloth for 10 seconds; no ink transfer should occur.
Consider the fabric's environmental impact. Organic cotton canvas is available but typically costs 15-20% more and may have a different hand feel. Recycled canvas is another option, but it can have inconsistent color and texture (Delta E variation of 2-3 between batches). Request a swatch of any alternative fabric before committing to a sample run. Also check the fabric's shrinkage percentage: pre-shrunk canvas should shrink less than 3% per ASTM D3776.
- Request a fabric swatch card with the sample; compare the swatch to the bag fabric under natural light (D65 illuminant).
- Weigh the empty sample bag and calculate the approximate fabric weight: bag weight (oz) / fabric area (sq ft) x 16 = approximate oz per sq yard. Compare to quoted GSM.
- Check for fabric shrinkage: measure the bag dimensions before and after a gentle wash cycle (cold water, air dry). Pre-shrunk canvas should shrink less than 3%.
- If the bag will be screen printed, ensure the fabric is not too textured; a rough weave can cause ink to bleed or print unevenly. Use a 10x loupe to check weave density.
- For custom colors, request a dye lot sample before the sample run; color can vary between dye lots by up to 2 Delta E. Use a spectrophotometer to verify color match.
Stitching and Seam Construction: Where Bags Fail First
The most common failure point on a canvas messenger bag is the strap attachment. The strap must be sewn into the side seam or attached with a reinforced panel. On a sample, check that the strap is bar-tacked at both ends with at least three rows of stitching. A single line of stitching across the strap width will pull out under the weight of a coffee bag. Also check the gusset seams: the bottom gusset should be stitched with a flat-felled seam or a reinforced double stitch to prevent the bag from splitting at the fold.
Stitch density matters. A standard industrial sewing machine for canvas should produce 8-10 stitches per inch (SPI). Fewer stitches per inch weaken the seam by up to 40%; more stitches per inch can perforate the fabric and cause tearing. Run your fingernail along the seam to feel for uneven tension or skipped stitches. If the sample has any loose threads or visible gaps in the stitching, reject it and ask for a rework before approving bulk production. Use a seam gauge to measure SPI accurately.
Thread type is equally important. Polyester bonded thread (Tex 40-60) is standard for canvas because it resists rot, UV degradation, and abrasion. Cotton thread, while traditional, will rot in humid storage (>60% RH) and break under load. Ask the factory to confirm the thread type and Tex number. If the sample uses cotton thread, request a revised sample with polyester thread before approving. Also check the thread color: it should match the bag fabric or be a neutral contrast.
Seam finishing also affects durability. Raw edges on the interior of the bag can fray over time, especially if the bag is washed. A bound seam or a serged edge prevents fraying and gives the bag a professional finish. Check the interior of the sample for raw edges; if you see fraying, ask the factory to finish the seams on the bulk order. A clean interior also reduces lint that could contaminate coffee packaging.
- Count stitches per inch on the strap attachment and gusset seam using a seam gauge; 8-10 SPI is the target range. Document the count for each seam type.
- Check for backstitching at the beginning and end of every seam; backstitching prevents the thread from unraveling. Backstitch length should be at least 1/2 inch.
- Look for thread type: polyester bonded thread (Tex 40-60) is standard for canvas; cotton thread will rot in humid storage. Ask for a thread specification sheet.
- Inspect the interior of the bag for loose thread ends; a clean interior indicates good workmanship and reduces lint in coffee packaging. Maximum 2 loose threads per bag.
- Ask for a seam cross-section photo to verify the stitch type (lockstitch or chainstitch) and thread tension. Lockstitch is preferred for stress seams.
Print Method Selection: Matching Ink to Canvas and Use Case
Coffee roasters typically use screen printing for canvas messenger bags because it provides good color opacity on natural fabric and holds up to repeated handling. Plastisol ink is the most durable option for canvas; it bonds to the fibers and resists cracking and fading. Water-based ink is softer to the touch but may fade after 10-15 washes, which is acceptable for promotional bags but not for retail products that will be used daily. Heat transfer is not recommended for canvas messenger bags because the transfer film can peel at the edges, especially on a bag that is folded and stacked.
When reviewing a printed sample, check the ink thickness and edge sharpness. The print should feel slightly raised but not stiff. Run your fingernail across the print surface; if the ink flakes or peels, the cure temperature was too low or the ink is incompatible with the fabric. Also check the print placement: the logo should be centered within 1/8 inch tolerance on the front panel. Misaligned prints look unprofessional and can reduce the perceived value of your coffee brand by 20-30%.
For multi-color logos, ask for a registration proof before the sample run. Misregistration is expensive to fix after the sample is made because it requires a new screen and a new print run. A registration proof shows each color layer separately and aligned, so you can verify that the colors will not bleed into each other. If your logo includes fine text (under 6 pt), consider a woven label instead of screen print; fine text can blur on canvas. Woven labels cost $0.30-0.50 more per bag but provide sharper detail.
Wash testing is critical for printed samples. Request a wash test sample: wash the printed bag 10 times per AATCC 135 standard and compare the print to an unwashed sample. Look for fading, cracking, or peeling. If the print shows significant wear after 10 washes, the ink or cure process is not suitable for your use case. A good plastisol print on canvas should show minimal fading after 20 washes. Also test for crocking (color transfer): rub the print with a white cloth for 10 seconds; no ink transfer should occur.
- Request a wash test sample: wash the printed bag 10 times per AATCC 135 and compare the print to an unwashed sample. Document fading with photos.
- For multi-color logos, ask for a registration proof before the sample run; misregistration is expensive to fix after the sample is made. Cost of a new screen is $50-100.
- If your logo includes fine text (under 6 pt), consider a woven label instead of screen print; fine text can blur on canvas. Woven labels cost $0.30-0.50 per bag.
- Check the print placement relative to the bag's seam allowance; a print too close to the seam may be distorted when the bag is sewn. Minimum 1/2 inch from seam.
- Ask for the ink's cure temperature and compare it to the factory's standard cure process; under-cured ink will peel. Plastisol cure temperature is typically 320-350°F.
Closure and Hardware: Magnetic Snaps vs. Zippers vs. Straps
Coffee roasters need a closure that keeps the bag contents secure during transit but allows quick access at a market or retail display. A magnetic snap closure is the most common choice for canvas messenger bags because it is easy to open and close with one hand. However, a magnetic snap alone may not be secure enough if the bag is packed full and carried by the strap; the flap can pop open. A top zipper adds security but slows access. The best compromise for coffee roasters is a magnetic snap closure with a top zipper, or a magnetic snap with a buckle strap.
When evaluating a sample, test the magnetic snap strength. Fill the bag with a 1 lb coffee bag and shake it gently for 30 seconds; the flap should stay closed. Open and close the snap 50 times to check for magnet loosening or fabric tear around the snap. The magnet should be at least 12 mm in diameter for a standard messenger bag; smaller snaps may not hold the flap securely. If the bag has a zipper, slide it fully open and closed 20 times; it should not catch or separate at the end stop. Also check the zipper tape: it should be sewn into the seam allowance, not glued, because glue will fail after a few months of use.
Hardware quality varies widely between factories. A metal zipper pull is more durable than plastic for a bag that will be used daily. A thin plastic buckle will crack in cold weather (below 40°F), so if your bags will be used outdoors in winter, specify a metal or heavy-duty plastic buckle. The magnetic snap should be from a reputable supplier (e.g., YKK, Prym, or equivalent). Ask the factory for the hardware supplier's brand and model number.
Consider the flap overlap. The flap should cover at least 2 inches of the front panel to prevent rain or dust from entering. A flap that is too short will expose the bag's contents to the elements. Measure the flap overlap on the sample and compare it to your specification. If the overlap is less than 2 inches, ask the factory to increase the flap depth on the bulk order. Also check the flap shape: a curved flap is more resistant to wind lift than a straight flap.
- Test the magnetic snap with a full bag: the flap should not open when the bag is swung gently by the strap for 30 seconds. Use a 1 lb weight for testing.
- Check the zipper pull: a metal zipper pull is more durable than plastic for a bag that will be used daily. YKK #5 metal zipper is the industry standard.
- If the bag has a buckle strap, ensure the buckle is made of metal or heavy-duty plastic; a thin plastic buckle will crack in cold weather (below 40°F).
- Measure the flap overlap: the flap should cover at least 2 inches of the front panel to prevent rain or dust from entering. Use a ruler to measure.
- Ask for the hardware supplier's brand and model number; reputable brands (YKK for zippers, Prym for snaps) indicate higher quality and easier replacement.
Pocket Configuration: What Coffee Roasters Actually Need
A canvas messenger bag for coffee roasters does not need multiple pockets. One internal slip pocket (approximately 7 x 9 inches) is sufficient for a phone, pen, or small notebook. Additional pockets add labor cost ($0.50-0.80 per pocket) and can make the bag bulky. The pocket should be sewn into the back panel of the bag, not the front, so it does not interfere with the main compartment space. The pocket top edge should be hemmed and reinforced at both corners with a triangle stitch (bar tack) to prevent tearing.
Some coffee roasters request a small external pocket for business cards or a price list. If you add an external pocket, ensure it is placed on the back of the bag (the side that rests against the body) so it does not disrupt the front print area. The external pocket should be at least 5 x 4 inches to hold a standard business card or small flyer. Avoid pockets with zippers on the exterior; they add cost ($0.30-0.50 per zipper) and can scratch coffee packaging.
Pocket depth is critical. A pocket that is too shallow (under 6 inches) will not hold a phone securely; a phone can fall out when the bag is tipped. Measure the interior pocket on the sample and compare it to your specification. If the pocket is too shallow, ask the factory to deepen it. Also check that the pocket is sewn on the back panel, not the front; a front pocket can distort the print area and make the bag look unbalanced.
If you plan to use the bag for retail display, consider adding a small key clip or a pen loop inside the main compartment. These small features add minimal cost ($0.10-0.20 each) but improve the user experience. Request a sample with these features if you plan to include them in the bulk order. Also check that the pocket material is the same as the bag fabric; a different fabric can cause differential shrinkage.
- Measure the interior pocket: a standard smartphone (6.5 x 3 inches) should fit without stretching the seam. Pocket depth should be at least 7 inches.
- Check the pocket depth: a pocket that is too shallow (under 6 inches) will not hold a phone securely. Use a phone or a 6.5-inch block to test.
- Verify the pocket is sewn on the back panel, not the front; a front pocket can distort the print area and make the bag look unbalanced.
- If you add an external pocket, request a sample with the pocket to check that it does not bulge when empty. Bulging pockets look unprofessional.
- Consider adding a key clip or pen loop for improved functionality; these features add minimal cost ($0.10-0.20 each) and improve user experience.
Sample Approval Workflow: From Digital Proof to Production Sample
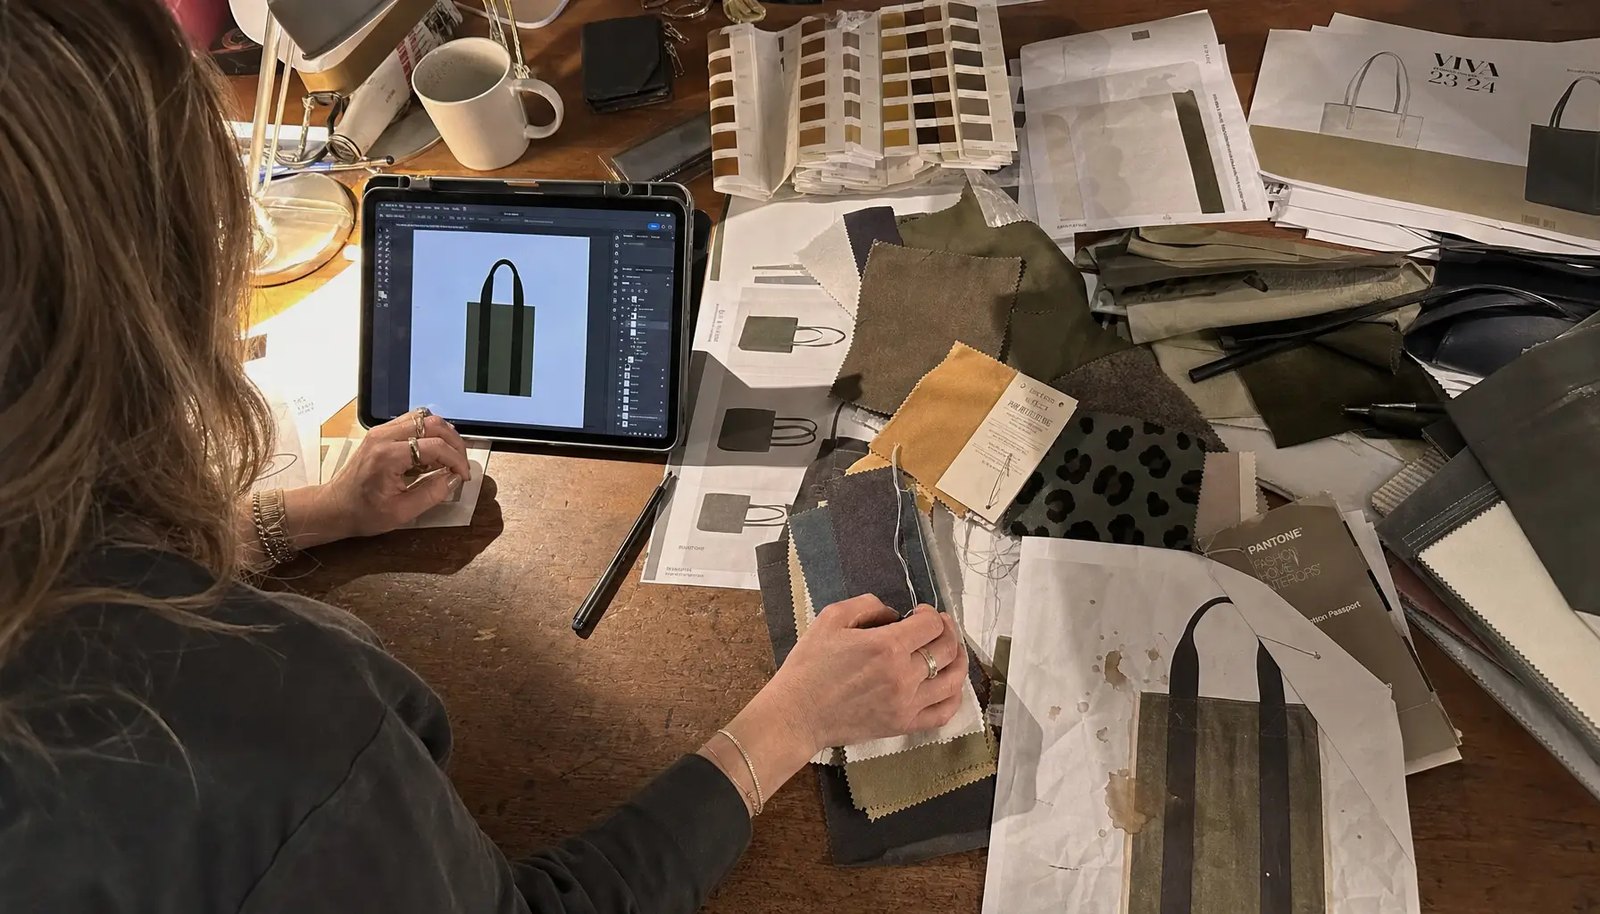
The sample approval process for canvas messenger bags typically follows four stages: digital proof, sample request, sample review, and production sample. The digital proof is a 2D rendering of the print placement and color. Approve the digital proof only for layout and color; do not use it to judge fabric feel or bag dimensions. After the digital proof is approved, the factory will produce a physical sample. This sample should be made from the same fabric and thread that will be used in production. Never approve a sample made from a different fabric weight or color, because the final product will differ.
Once you receive the physical sample, run through the buyer checklist in this guide. Measure everything, test the closures, and check the print quality. If the sample passes all checks, sign off on it in writing and request a production sample from the actual bulk fabric dye lot. The production sample is the final confirmation that the fabric color and texture match the bulk order. Some factories charge extra for a production sample ($50-100); ask about this cost upfront. A production sample can save you from a costly color mismatch that is only visible when the bulk fabric arrives.
Document every step of the approval process. Keep a digital file with photos of the sample, the signed approval form, and any correspondence with the factory. This documentation is useful if a dispute arises about the sample specifications. It also helps your team maintain consistency across reorders. Use a sample approval form that includes all critical specs: fabric weight, stitch density, print placement, hardware type, and pocket dimensions.
If the sample fails any check, provide specific feedback to the factory. For example, instead of saying 'the stitching is bad,' say 'the strap attachment has only 6 stitches per inch; we need 8-10 SPI.' Specific feedback helps the factory understand the issue and correct it on the next sample. Request a revised sample and repeat the review process until all checks pass. The average number of sample rounds for a first order is 2-3.
- Always request a physical sample before approving bulk production; a digital proof cannot show fabric hand or print texture. Cost of a sample is $30-80.
- Ask the factory to send the sample with the same hardware (zipper, snap, buckle) that will be used in production. Verify hardware brand and model.
- Keep the approved sample as a reference for the factory; mark it with a tag that includes the date and approval signature. Store it in a sealed bag to prevent fading.
- If the sample fails any check, provide specific feedback (e.g., 'strap stitching has only 6 SPI, needs 8-10') and request a revised sample. Document the failure with photos.
- Document the entire approval process with photos and signed forms to avoid disputes. Use a sample approval form that includes all critical specs.
Packing and Shipping: How Bags Arrive Affects Your Cost
Canvas messenger bags are typically packed in polybags and then packed into export cartons. The polybag protects the bag from dust and moisture during transit. For coffee roasters, individual polybagging is important because the bags may be stored in a warehouse or retail space for weeks before use. Without a polybag, the canvas can absorb humidity and develop mildew. Ask the factory to provide a packed carton photo with the sample so you can see how 50 bags fit in a carton. A carton that is too tight can crush the bags; a carton that is too loose wastes shipping volume.
Carton dimensions and weight affect freight cost. A standard carton for 50 canvas messenger bags (12 x 10 x 3 inches each) should be approximately 24 x 18 x 12 inches and weigh about 35-40 lb. If the carton is larger or heavier, ask the factory to optimize the packing configuration. Also confirm that the cartons are sealed with tape on both top and bottom seams, and that the carton strength is at least 32 ECT (edge crush test) for sea freight. Weak cartons can collapse during shipping and damage the bags inside.
Consider the shipping method. Air freight is faster but more expensive; sea freight is cheaper but takes 20-30 days. For a first order, sea freight is usually the best option because it gives you time to inspect the bags before they reach your warehouse. If you need bags urgently, air freight can deliver in 5-7 days, but the cost may be 3-4 times higher than sea freight. Calculate the landed cost per bag including freight, duty (typically 5-10% for cotton bags), and insurance.
Ask the factory about their palletization process. For sea freight, cartons should be palletized and stretch-wrapped to prevent shifting during transit. A pallet that is not properly wrapped can collapse, damaging the cartons and the bags inside. Request a photo of the palletized shipment before it leaves the factory. Also confirm that the pallet height does not exceed 48 inches for standard container loading.
- Request a packed carton photo with the sample; check that bags are folded neatly and not crushed. A crushed bag indicates poor packing.
- Ask for the carton dimensions and weight; compare to your freight quote to avoid surprise shipping costs. Standard carton: 24x18x12 inches, 35-40 lb.
- Specify that each bag should be individually polybagged; confirm the polybag is at least 1.5 mil thick to prevent tearing. Thicker polybags (2 mil) are recommended for humid climates.
- If shipping by sea, request that cartons be palletized and stretch-wrapped to prevent shifting during transit. Pallet height should not exceed 48 inches.
- Consider the shipping method: sea freight is cheaper but slower (20-30 days); air freight is faster (5-7 days) but 3-4 times more expensive. Calculate landed cost per bag.
Lead Time and Schedule Risk: What to Expect and How to Plan
A typical lead time for a custom canvas messenger bag order is 45-60 days from sample approval to shipment. This includes fabric procurement (10-15 days), cutting and sewing (20-25 days), printing (5-7 days), and packing (3-5 days). The sample approval process adds 10-14 days for the first sample and another 7-10 days for a revised sample if needed. Coffee roasters planning for a seasonal launch (e.g., holiday market) should start the process at least 90 days before the desired delivery date.
Schedule risk often comes from fabric availability. If your canvas color is a custom dye, the factory may need to order the yarn or fabric from a mill, which can add 2-3 weeks. Standard natural or black canvas is usually in stock. Ask the factory if they have the fabric in stock before you place the order. Also ask about their current production load; a factory that is running at full capacity may have longer lead times. A simple phone call or email to confirm lead time before placing the order can prevent a missed deadline.
Build in a buffer for sample revisions. Most first samples require at least one revision, especially for print color or strap stitching. If you need the bags by a specific date, plan for two sample rounds and add a 2-week buffer. Communicate your deadline to the factory early so they can prioritize your order. A factory that knows your deadline can adjust their production schedule to meet it.
Request a production schedule with milestone dates: fabric arrival, cutting start, printing start, packing start. This schedule helps you track progress and identify delays early. If a milestone is missed, you can adjust your plans or escalate to the factory management. Use a Gantt chart or simple spreadsheet to track milestones. Also ask for weekly progress updates with photos.
- Start the sample process at least 90 days before your desired delivery date for a custom color order. Standard colors may need 60 days.
- Ask the factory if they have the fabric in stock; if not, request a lead time for fabric procurement. Custom dye adds 2-3 weeks.
- Build in a 2-week buffer for sample revisions; most first samples require at least one revision. Plan for two sample rounds.
- Request a production schedule with milestone dates (fabric arrival, cutting start, printing start, packing start) to track progress. Use a spreadsheet.
- Communicate your deadline to the factory early so they can prioritize your order. A factory that knows your deadline can adjust their schedule.
Landed Cost Comparison: Sample Quality vs. Total Cost of Ownership
The unit price of a canvas messenger bag is only part of the total cost. Landed cost includes the unit price, shipping, customs duties, insurance, and any quality-related costs such as returns or replacements. A bag that costs $2.50 per unit but fails after 50 uses will cost more in the long run than a bag that costs $3.50 per unit and lasts for years. Coffee roasters should evaluate sample quality as an indicator of production quality. A sample with poor stitching or thin fabric is a red flag that the bulk order will have similar issues.
When comparing quotes from different factories, ask for a breakdown of the unit price by component: fabric, hardware, printing, labor, and packing. This breakdown helps you identify where a factory is cutting corners. A factory that quotes a very low unit price may be using lower GSM fabric, thinner thread, or cheaper hardware. Request a sample from each shortlisted factory and compare them side by side using the buyer checklist in this guide. The factory that produces the best sample at a reasonable price is usually the best long-term partner.
Calculate the total cost of ownership over the bag's expected lifespan. If a bag costs $3.50 and lasts 2 years, the annual cost is $1.75. If a cheaper bag costs $2.50 but lasts only 6 months, the annual cost is $5.00. The more expensive bag is actually cheaper in the long run. Factor in the cost of customer dissatisfaction if a bag fails; a single negative review can cost you 10-20 future sales.
Consider the cost of a failed bulk order. If you order 500 bags and 10% are defective, you lose $175 in bag cost plus the cost of the coffee packaging inside. If the defect is structural (e.g., strap failure), you may also lose the coffee bags that were inside. A sample approval process that catches defects before bulk production is the best way to avoid these costs. The cost of a sample revision ($50-100) is negligible compared to the cost of a failed bulk order ($1,750+).
- Calculate landed cost: unit price + freight per unit + duty (typically 5-10% for cotton bags) + insurance (0.5-1% of value). Use a landed cost calculator.
- Ask for a component cost breakdown to compare factory quotes on an apples-to-apples basis. Request fabric, hardware, printing, labor, and packing costs separately.
- Request samples from at least two factories and compare them using the same checklist. The factory with the best sample at a reasonable price is the best partner.
- Factor in the cost of a failed bulk order: replacement bags, lost sales, and brand reputation damage. A single negative review can cost 10-20 future sales.
- Calculate total cost of ownership over the bag's expected lifespan to compare long-term value. A $3.50 bag that lasts 2 years is cheaper than a $2.50 bag that lasts 6 months.
Specification comparison for buyers
| Spec Decision | Recommended Option | When It Fits | Buyer Risk to Check |
|---|---|---|---|
| Fabric weight | 10 oz / 340 GSM ±5% tolerance | Daily carry for 1-2 lb coffee bags; retail display | Too light (6-8 oz) tears at strap anchor under 5 lb load; too heavy (14 oz) adds 30% freight cost per carton |
| Strap width | 1.5 inch cotton webbing, bar-tacked both ends | Shoulder carry with moderate load (up to 5 lb) | Narrow straps (1 inch) dig into shoulder; wide straps (2 inch) may not fit standard buckle hardware |
| Closure type | Magnetic snap (12 mm min) + top zipper (YKK #5) | Retail display and secure transit; coffee bags need dual closure | Snap-only bags spill during shipping; zipper-only slows access at market; weak snap (<12 mm) opens under 1 lb load |
| Print method | Screen print with plastisol ink, 4-color max | Up to 4-color logo on flat front panel; fine details >6 pt | Water-based ink fades after 10 washes (test required); heat transfer peels on seam edges; fine text <6 pt blurs on canvas |
| Pocket configuration | One internal slip pocket (7x9 inch) with bar-tack corners | Holding a smartphone (6.5x3 inch), pen, or small notebook | No pocket means loose items scratch coffee packaging; too many pockets add $0.50-0.80 labor cost per bag |
| Bottom gusset | 2.5 inch flat gusset, centered within 1/4 inch tolerance | Carrying 1-2 lb coffee bags upright; retail shelf display | No gusset flattens bag shape; too wide gusset (3+ inch) wastes fabric and looks sloppy; off-center gusset causes lean |
| Stitching thread | Polyester bonded thread, Tex 40-60, 8-10 SPI | High-stress seams on straps, gusset, and pocket attachment | Cotton thread rots in humid storage (>60% RH); thin thread (Tex 20) breaks under 5 lb load; <8 SPI weakens seam strength by 40% |
| Sample lead time | 10-14 business days from artwork approval for first sample | First-time buyer verifying print color, fit, and fabric hand | Rushed samples (<7 days) skip seam sealing or use wrong fabric; always request production-equivalent sample with same components |
| MOQ for custom print | 500 pieces per design per color; setup fee included | Brand launching a regional coffee line; retail or wholesale distribution | Lower MOQ (100-300) often means higher unit price ($4.50-6.00 vs $3.00-3.50) or limited color options; confirm MOQ includes screen setup |
Buyer checklist before sampling
- Verify fabric weight: weigh the empty sample bag on a calibrated digital scale. For a 12x10x3 inch bag, 10 oz canvas should weigh 0.6-0.7 lb. Compare to quoted GSM; tolerance is ±5%.
- Check stitch density: count stitches per inch on strap attachment and gusset seam. Minimum 8 SPI; target 10 SPI. Use a magnifying glass or seam gauge.
- Test closure durability: open and close the magnetic snap 50 times. Check for magnet loosening, fabric tear around snap, or snap detachment from webbing.
- Measure interior pocket dimensions: a standard smartphone (6.5 x 3 inches) must fit without stretching the seam. Pocket depth should be at least 7 inches.
- Inspect print alignment: logo should be centered within 1/8 inch tolerance on front panel. Measure from seam to print edge on both sides. Check for ink bleed at edges using a 10x loupe.
- Assess strap stitching: look for backstitching at both ends of the strap. Minimum 3 rows of bar-tack stitching. A single line of stitching will fail under 10 lb load.
- Check bottom gusset fold: the gusset should be creased and stitched flat. Measure from center seam to gusset edge on both sides; tolerance is ±1/4 inch. A wrinkled gusset indicates poor die cutting.
- Confirm zipper operation: slide the zipper fully open and closed 20 times. It should not catch, separate at the end stop, or require excessive force. Check zipper brand (YKK preferred).
- Review packing sample: ask for a packed carton photo showing how 50 bags fit. Verify no crushing or distortion. Check polybag thickness (minimum 1.5 mil).
- Request a production sample after bulk fabric dye lot is approved. Compare color to first sample using a Delta E meter; tolerance is <2 Delta E.
Factory quote questions to send
- What is the exact GSM of the canvas you will use for production? Is it the same as the sample fabric? Provide a fabric specification sheet with weight, weave count, and shrinkage percentage.
- Do you use pre-shrunk canvas? If not, what shrinkage percentage should I expect after the first wash (measured per ASTM D3776)?
- What is your stitch-per-inch specification for strap attachment and gusset seams? Can you provide a photo of a seam cross-section showing thread type and stitch count?
- What ink type do you recommend for my logo? Can you provide a wash test result (AATCC 135, 10 cycles) for that ink on your specific canvas?
- What is your sample approval process? Do you require a signed-off sample before bulk production, or do you start bulk after digital proof? Provide a written SOP.
- What is the lead time for a production-equivalent sample? Is there an additional charge for a second sample revision? What is the cost per revision?
- What is your MOQ for a custom PMS color webbing strap? Does that MOQ apply per color or per style? Is there a setup fee for custom webbing?
- How do you pack finished bags? Are they polybagged individually? What is the carton quantity, carton dimensions, and carton weight? Provide a packing specification sheet.
- What is your defect rate tolerance? Do you perform AQL sampling? What is your acceptable quality limit (AQL 2.5 for major defects, 4.0 for minor)?
- Do you offer a pre-production sample from the actual bulk fabric dye lot? If so, what is the lead time and cost? Is this sample refundable against the bulk order?
Quality-control points to confirm
- Fabric weight tolerance: ±5% of specified GSM. Any deviation beyond that changes bag stiffness, print adhesion, and shipping weight. Use a calibrated scale and compare to ASTM D3776 standard.
- Stitch tension: no loose threads, skipped stitches, or puckering on flat panels. Run a fingernail along the seam to feel for uneven tension. Maximum 1 skipped stitch per 10 inches of seam.
- Print registration: multi-color prints must align within 1 mm. Use a 10x loupe to check for misregistration. Misregistration causes color bleed and unprofessional appearance.
- Strap attachment: the strap must be bar-tacked at both ends with at least 3 rows of stitching. A single row will fail under 10 lb load. Test with a pull gauge at 15 lb for 10 seconds.
- Zipper quality: the zipper tape must be sewn into the seam allowance, not glued. The slider must move smoothly without forcing. Check zipper brand; YKK #5 or equivalent is standard.
- Magnetic snap strength: the snap should hold the flap closed when the bag is half-full (about 1 lb). A weak snap will open during carry. Test with a 1 lb weight in the bag, shake gently for 30 seconds.
- Interior pocket stitching: the pocket top edge must be hemmed and reinforced at both corners with a triangle stitch (bar tack). The pocket should not tear when a 1 lb weight is placed inside.
- Bottom gusset alignment: the gusset fold must be centered within 1/4 inch. An off-center gusset causes the bag to lean when placed on a shelf. Measure from center seam to gusset edge on both sides.
- Thread color match: thread color should match the bag fabric or be a neutral contrast. Mismatched thread on a dark bag looks like a defect. Use a Pantone color standard for thread matching.
- Packing condition: bags should be folded neatly, not crushed. Cartons should be sealed with tape on both top and bottom seams. Carton strength should be at least 32 ECT for sea freight.