Why Printing Cost Moves So Much on Canvas Messenger Bags
Canvas messenger bag printing cost is not controlled by the logo alone. The bag construction, fabric texture, flap design, sewing sequence, ink coverage, and packing method all affect the final quote. A flat tote bag is usually easier to print than a messenger bag because the printable area is simple. A messenger bag has a flap, gusset, strap, pockets, closures, and sometimes bulky seams that can limit where a factory can print cleanly.
The most common quote problem is asking for a general custom messenger bag price without locking the print position and production sequence. If the logo is printed on the flap before sewing, the factory needs accurate cutting and stitching control to keep the logo centered after assembly. If the logo is printed after sewing, the print table may not sit flat because of seams, buckles, or lining. Both choices can be correct, but they should be priced and sampled deliberately.
- Printing before sewing usually gives cleaner ink coverage but requires better cutting and assembly control.
- Printing after sewing can work for simple positions but may have higher placement tolerance and more rejects.
- A larger flap logo uses more ink and may need a stronger curing process to avoid rubbing.
- Coarse canvas texture can make small letters, thin lines, and reversed logos look less sharp.
- Hardware close to the logo can slow production because operators must avoid buckles, snaps, or strap parts.
Start the RFQ with the Bag Structure, Not the Logo
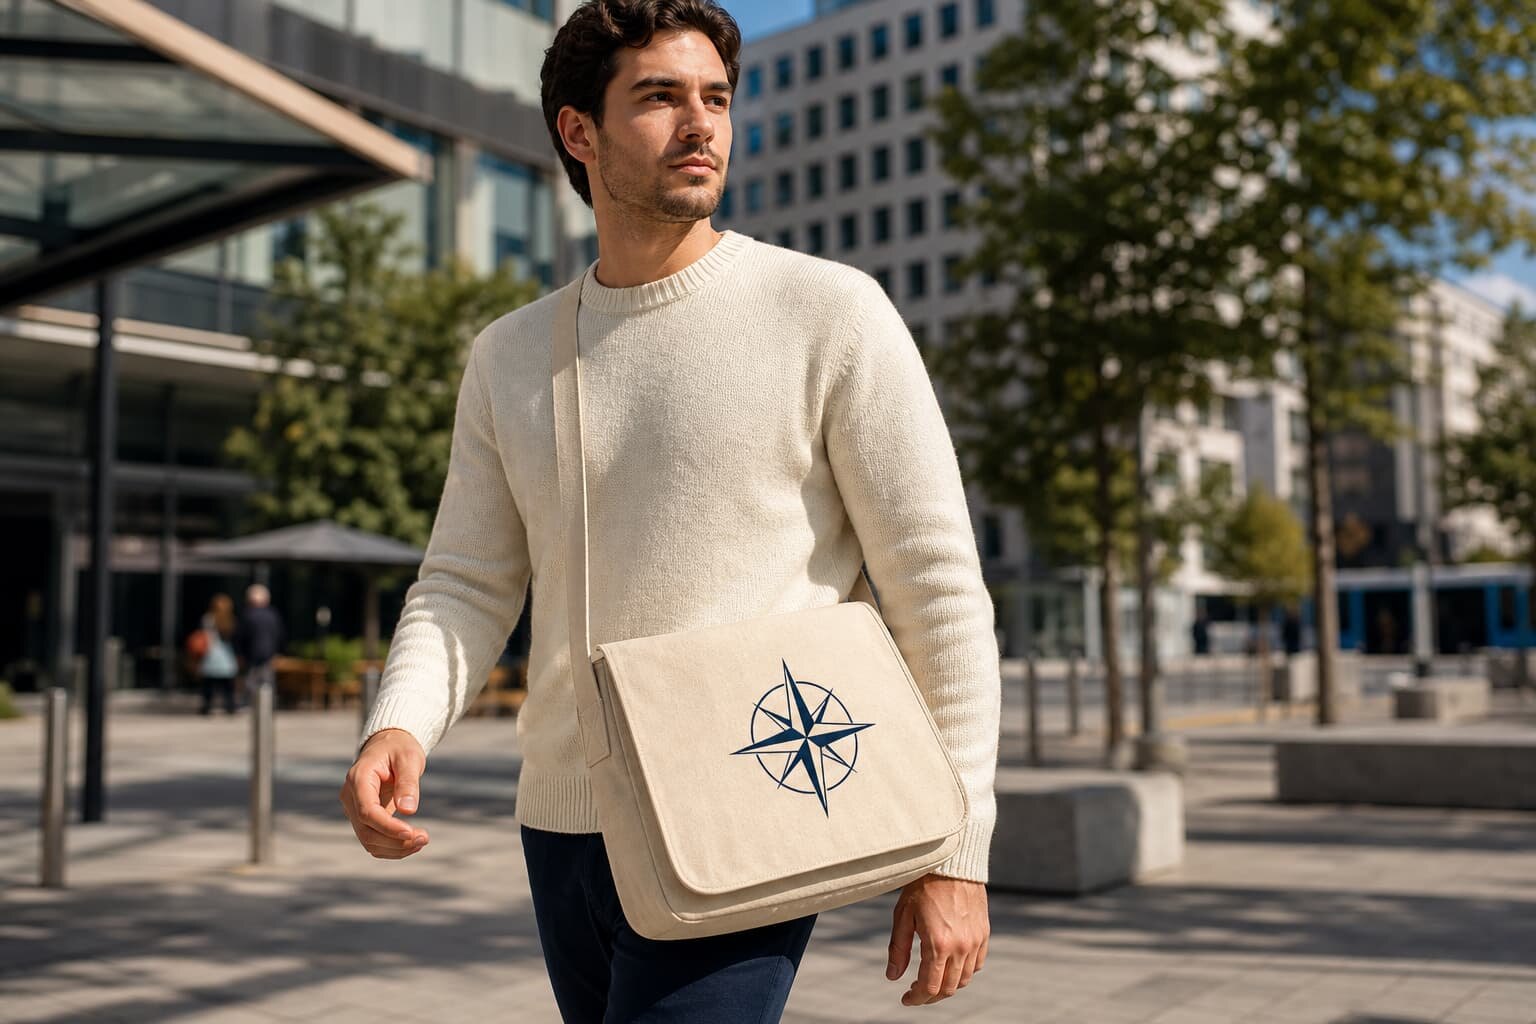
A factory cannot quote printing cost accurately if the bag itself is still vague. For canvas messenger bags, the print area depends on the flap size, flap curve, gusset depth, closure type, and pocket placement. A front flap measuring 35 x 28 cm gives a different working area from a small commuter style with a narrow flap and two buckles. Even if the printed logo size is the same, the labor risk and placement control can be different.
Procurement teams should treat the blank bag specification as the base of the print quote. Include finished bag dimensions, fabric weight, lining requirement, strap width, strap adjuster type, inside pocket layout, and closure method. Then define the print as a second layer. This makes it easier to compare one supplier against another because you can see whether a cheaper quote is based on lighter canvas, fewer pockets, cheaper hardware, or a simplified logo process.
- Quote the finished size, not only a rough capacity such as laptop bag or school bag.
- State whether the flap is rectangular, rounded, angled, or cut with a shaped edge.
- Confirm if the print sits on the flap, lower front panel, inside pocket, strap, or sewn label.
- Tell the factory if the bag must hold a laptop, catalog, document folder, or retail merchandise.
- Ask for a technical sketch when pocket and flap details are more complex than a standard style.
Fabric Weight and Surface: The First Cost Driver
Canvas is often described in ounces, such as 10 oz, 12 oz, 14 oz, 16 oz, or 18 oz, while some buyers use GSM. The conversion is not always quoted consistently, so ask whether the weight refers to finished fabric. For messenger bags, 12 oz to 16 oz cotton canvas is common for bulk orders because it gives enough body for the flap and strap stress points without becoming too bulky at seams. Heavy canvas can look premium, but it increases fabric cost, sewing difficulty, carton weight, and sometimes print unevenness.
Fabric surface matters as much as weight. A tightly woven canvas accepts screen print more cleanly than a loose, coarse canvas with heavy slubs. Natural canvas may show seed flecks, which some brands like, but those flecks can interrupt thin logo lines. Dyed canvas adds color control and colorfastness questions. If you print a light ink on dark navy, black, or forest green canvas, the factory may need an underbase layer or extra ink pass, which changes cost and handfeel.
- 10 oz to 12 oz canvas fits lighter promotional or event messenger bags where cost and freight weight matter.
- 12 oz to 16 oz canvas fits most retail and corporate messenger bags with a structured flap.
- 16 oz to 18 oz canvas can support a premium look but increases seam bulk and may need stronger needles.
- Natural canvas is easier for dark one-color printing but can vary in shade and visible cotton flecks.
- Dark dyed canvas can require special ink planning when the artwork uses white, cream, yellow, or fine detail.
Choose the Print Method by Artwork, Not by Habit
Screen printing is usually the practical default for canvas messenger bag printing when the artwork is solid, the quantity is reasonable, and the color count is limited. It gives good coverage on cotton canvas and allows Pantone matching within a realistic tolerance. The setup cost is mainly driven by screens, color count, logo size, and the need for underbase printing on darker fabric. For a one-color logo on a natural canvas flap, screen printing is often the cleanest cost-to-result option.
Digital printing, heat transfer, embroidery, woven labels, cotton labels, and leather patches can all be valid, but each solves a different problem. Digital print can handle more colors but may look less crisp on rough canvas and should be tested for rubbing. Heat transfer can reproduce detail but may feel like a film on fabric and may not match a rugged canvas look. Embroidery adds texture but can pucker lighter canvas and is not ideal for tiny text. Woven labels and patches are often better when the buyer wants repeatable branding across multiple bag colors.
- Use screen print for solid logos, simple slogans, and stable reorder programs.
- Use digital print only after checking color density, edge quality, and rub resistance on actual canvas.
- Use woven labels when the logo has small details and the same label can be applied to several bag styles.
- Use leather or PU patches when the brand wants a premium trim effect instead of a large printed logo.
- Avoid embroidery on thin flap panels unless backing, puckering, and inside appearance are approved.
Understand the Cost Breakdown Before Comparing Quotes
A useful supplier quote separates the blank bag cost from decoration and setup. If one supplier gives only a single unit price, you cannot tell whether their advantage comes from cheaper fabric, lower print setup, simplified sewing, thinner webbing, or weaker packing. Ask for the cost structure in a way that still respects the supplier's quoting format: bag body, printing, setup charge, sample charge, packing, and any optional branding items such as labels or patches.
The biggest hidden cost is usually revision. Artwork redraw, Pantone changes, print position changes, and logo size changes after sampling can force the factory to remake screens or repeat sampling. That is why buyers should send final vector files and measurement-based placement instructions at RFQ stage. A good quote should mention whether setup charges are one-time, whether they apply again for reorders, and whether new colorways require new screen preparation or only ink changes.
- Blank bag cost: fabric, cutting, sewing, lining, webbing, hardware, pockets, and basic labels.
- Decoration cost: ink, print labor, screen preparation, curing, print testing, and defect allowance.
- Setup cost: screens, plates, embroidery tape, patch mold, artwork adjustment, or sample tooling.
- Packing cost: individual bag, tissue or paper wrap, hangtag, barcode label, export carton, and carton mark.
- Logistics impact: heavier canvas and larger cartons can change freight economics even when unit price looks low.
MOQ Logic: Why the Same Logo Costs More at Low Quantity
Printing MOQ is not only a supplier rule; it is connected to setup time, machine changeover, ink mixing, screen preparation, sample approval, and defect risk. A one-color print on 500 pieces may carry a reasonable setup share per bag. The same print on 100 pieces may look expensive because the fixed setup cost is spread over fewer units. If the bag uses custom dyed canvas, custom webbing, or a special label, the real MOQ may come from material suppliers rather than the sewing line.
Buyers can control MOQ pressure by separating what must be custom from what can stay standard. For example, using stock natural 14 oz canvas with a one-color screen print and standard metal adjuster is easier than ordering a custom dyed canvas, custom zipper puller, embossed patch, and retail barcode packing at the same time. If the order is a market test, choose a standard bag base and invest in a clean print proof instead of changing every component.
- Low MOQ works best with stock canvas color, standard hardware, and one print location.
- Custom dyed fabric often has a higher MOQ than the sewing factory's bag MOQ.
- Woven labels and patches may have separate minimums even when bag quantity is lower.
- Multiple artwork versions split quantity and can increase per-unit print cost.
- Reorders are easier to negotiate when the first order keeps approved screens, labels, and fabric records.
Sampling: What to Check Before Bulk Cutting
A printed sample should prove more than logo appearance. It should show whether the chosen canvas weight can hold the bag shape, whether the flap closes cleanly, whether the strap feels strong enough, and whether the print position remains correct after sewing. A flat print strike-off is useful for ink color approval, but it does not replace a pre-production sample when the logo sits on a flap that will be folded, stitched, and packed.
For a new canvas messenger bag order, use a two-step sample process when time allows. First approve material and print on a fabric cutting or print strike-off. Then approve a full bag sample using the actual fabric, print method, hardware, strap, label, and packing. Keep the signed sample or sealed reference sample as the comparison standard for bulk inspection. Do not approve only from photos if color, size, and handfeel are important.
- Check the logo position with a ruler from the flap top edge, side edge, and closure point.
- Open and close the flap several times to see whether the print cracks, rubs, or distorts at the fold.
- Compare Pantone target against print result under consistent lighting, not only on a phone photo.
- Load the sample with realistic weight to inspect strap bartacks and flap shape.
- Pack the sample as bulk will be packed and inspect whether the printed area creases or transfers ink.
Print Placement and Acceptance Criteria
Clear placement instructions reduce arguments during inspection. Do not write only center logo on front. Provide logo size, position from fixed edges, and tolerance. For example, center on front flap, logo width 120 mm, top of logo 80 mm below flap top seam, horizontal tolerance plus or minus 5 mm, vertical tolerance plus or minus 5 mm. The correct tolerance depends on whether the bag is printed before or after sewing and how much the fabric can move during stitching.
Acceptance criteria should also cover color, registration, ink coverage, and visible defects. Cotton canvas is a natural woven surface, so it will not behave like coated paper. Small texture marks may be normal, but missing ink, heavy bleeding, crooked placement, wrong color, or transfer marks should not be accepted. Define what is critical, major, and minor before production starts, especially when the order is for retail distribution or a national brand program.
- Logo size tolerance should be stated in millimeters, not only visually same as sample.
- Placement tolerance should be wider for assembled-bag printing than flat-panel printing.
- Multi-color logos need registration tolerance, especially around outlines and small text.
- Ink defects to define include pinholes, smearing, bleeding, ghosting, scuffing, and poor curing.
- The approved pre-production sample should control judgment when written tolerance is incomplete.
Packing and Lead Time Affect the Real Printing Cost
Packing is often treated as an afterthought, but it can protect or damage the print. A canvas messenger bag with a large front flap logo may need a paper insert, careful folding direction, or individual bag protection so the printed area does not rub against metal hardware. If the bag is tightly compressed to reduce carton volume, the print may crease. If the bag is loosely packed, cartons become larger and freight cost increases. The right choice depends on whether the buyer values low freight cube, retail appearance, or warehouse efficiency.
Lead time should be calculated from approved artwork and approved sample, not from the first RFQ date. Printing can add time for screen making, ink matching, strike-off approval, curing, and quality checks. If the bag also uses custom fabric color or special hardware, material preparation may control the schedule. Buyers should ask the factory for a timeline by stage: material booking, sample, approval, cutting, printing, sewing, final inspection, packing, and shipment handover.
- Individual polybags protect the bag but may not fit every buyer's sustainability policy.
- Paper wrap or tissue can reduce plastic use but must not stick to uncured or heavy ink areas.
- Carton dimensions and pieces per carton should be quoted before shipment booking.
- Printed flap bags should be packed so metal buckles do not press into the logo.
- Rush orders increase mistake risk when artwork, ink, and sample approval are not locked early.
How to Compare Supplier Quotes Without Buying the Wrong Bag
The lowest canvas messenger bag printing quote is not always the lowest landed cost. A cheap quote may use lighter canvas, narrower webbing, less durable hardware, lower stitch density, no print testing, or weak export cartons. It may also exclude setup charges that appear later. Compare quotes line by line against your RFQ specification, then ask each supplier to confirm assumptions in writing. If a supplier cannot explain fabric weight, print method, and packing, the quote is not ready for procurement approval.
A good sourcing workflow is to shortlist suppliers by technical response quality, not only price. The factory should identify print risks, ask about artwork files, suggest suitable logo methods, and explain MOQ drivers. This behavior is important because canvas messenger bags combine textile, sewing, decoration, and packing decisions. You want a supplier who can prevent production mistakes before the purchase order, not one who simply accepts unclear instructions and corrects problems after bulk goods are finished.
- Normalize all quotes to the same fabric weight, bag size, hardware, print position, and packing method.
- Ask suppliers to mark excluded charges clearly instead of hiding them in later proforma revisions.
- Compare sample quality before final supplier selection when the order is retail-facing.
- Review carton data because freight cost can erase a small unit-price saving.
- Keep a quote comparison sheet with assumptions, open risks, sample status, and approval dates.
Specification comparison for buyers
| Spec decision | Recommended option | When it fits | Buyer risk to check |
|---|---|---|---|
| Fabric weight for printed flap | 12 oz to 16 oz cotton canvas, pre-shrunk or tested for shrinkage | Most retail, event, campus, and brand merchandise messenger bags | Very heavy canvas may increase seam bulk and make print edges less smooth over thick folds |
| Print method for flat logo | Screen printing with matched Pantone ink | Solid logos, one to three colors, MOQ where screen charge is acceptable | Confirm whether ink sits cleanly on coarse canvas and whether artwork has small reversed text |
| Print method for photo or gradients | Digital pigment print on light canvas or transfer where approved | Shorter runs, multicolor campaign artwork, or changing designs | Request wash/rub test because canvas texture can dull fine gradients |
| Premium branding position | Woven label, leather patch, or cotton label sewn on flap seam | Retail bags, corporate gifting, or long-term reorder programs | Label MOQ, patch tooling, and sewing position tolerance can affect unit cost and lead time |
| Low-cost branding position | One-color screen print centered on front flap before assembly | Simple logo orders where cost control matters more than decoration depth | Printing after assembly can distort placement near pockets, buckles, or flap curve |
| Packing method | Individual polybag or recycled paper wrap, then export carton with carton marks | Distributor and retail warehouse handling | Oversized packing increases carton volume; compressed packing can crease printed flap |
| Sample approval | Pre-production sample with actual fabric, print ink, hardware, and packing method | Any order with new logo, new fabric GSM, or changed flap size | A digital proof alone does not verify ink absorption, print scale, or bag structure |
Buyer checklist before sampling
- Confirm the canvas messenger bag size, flap shape, gusset depth, strap width, pocket layout, and closure type before asking for print pricing.
- State fabric weight in oz or GSM, fabric color, dyeing requirement, and whether shrinkage or colorfastness testing is needed.
- Send vector artwork with Pantone references, logo size in centimeters, print position measured from bag edges, and number of colors.
- Specify whether the logo is printed before sewing, after sewing, on a label, on a patch, or on a removable hangtag.
- Ask the supplier to separate bag cost, printing cost, screen or plate charge, sample charge, packing cost, and inland handling if applicable.
- Request a pre-production sample using actual bulk fabric, actual logo method, actual strap hardware, and actual packing.
- Define print acceptance criteria for color tolerance, placement tolerance, registration, ink coverage, rubbing, and visible defects.
- Clarify MOQ by bag style, fabric color, print method, label or patch material, and carton packing, not only by total order quantity.
- Check carton size, gross weight, pieces per carton, and whether the packed flap will crease the printed area during export handling.
- Freeze artwork, fabric, hardware, and packing before bulk cutting to avoid cost revisions and lead time movement.
Factory quote questions to send
- Is the quoted canvas weight based on finished fabric weight or greige fabric weight before dyeing and finishing?
- Will the logo be printed before bag assembly or after sewing, and how does that affect placement tolerance?
- What is the screen charge, plate charge, or setup charge for each logo color and each artwork size?
- What is the MOQ for the bag body, custom fabric color, screen printing, woven label, leather patch, and custom carton mark?
- Can you quote one-color screen print, two-color screen print, woven label, and leather patch as separate branding options for comparison?
- What print test can be provided on canvas: dry rub, wet rub, tape test, wash test, or simple internal adhesion check?
- What is the sample lead time for blank sample, printed sample, and pre-production sample using final material?
- Will bulk production use the same canvas batch, ink type, hardware finish, and webbing width as the approved sample?
- How many bags per export carton, what carton dimensions, and what gross weight are expected for the quoted style?
- Which costs are not included in the unit price: sampling, artwork redraw, bank fee, inland trucking, fumigation, palletizing, inspection support, or document charges?
Quality-control points to confirm
- Measure finished bag width, height, gusset, flap length, strap length range, and pocket opening against the approved sample.
- Check canvas GSM or oz weight, fabric handfeel, shade consistency, shrinkage risk, and visible slubs or weaving defects.
- Verify logo size, position, color, registration, edge sharpness, ink coverage, and whether the print is distorted by seams or flap folding.
- Perform rub checks on the printed area and inspect whether dark ink transfers onto light fabric or packing material.
- Inspect stitching density, bartacks at strap joints, seam allowance, loose threads, skipped stitches, and stress points near hardware.
- Check buckle, snap, zipper, magnetic button, or hook-and-loop closure for function, finish consistency, and safe attachment.
- Confirm label content, barcode placement, hangtag, polybag warning text, carton mark, carton strength, and pieces per carton.
- Compare random bulk pieces against the signed pre-production sample before shipment release.