The real proofing problem for bakery messenger bags
Wholesale canvas messenger bags for artisan bakeries are usually not complicated products, but they become expensive to fix when the proofing process is loose. The common failure is not that the bag cannot be made. The failure is that the print, flap, strap, and packing are approved separately, then the buyer discovers during final inspection that the bakery logo is slightly crooked, too low on the flap, too stiff, or rubbing against another bag in the carton.
A bakery buyer often wants a natural, practical bag that can be sold in-store, bundled with gift hampers, used by staff, or offered as a loyalty item. That means the bag must carry weight, show the brand cleanly, and arrive without print transfer or dirty canvas marks. A good RFQ should turn the artwork and bag idea into measurable production rules, not just a nice sample photo.
- Treat the sewn messenger bag as the proofing unit, not a flat fabric panel.
- Approve logo size and position after the flap is stitched and the strap is attached.
- Decide whether the bag is a retail product, staff utility bag, gift set package, or promotional giveaway.
- Set print tolerance, fabric tolerance, and packing rules before the supplier quotes bulk production.
Start with the bag use, not the artwork file
For artisan bakeries, the same messenger bag shape can have very different production requirements. A small bag for a croissant gift card program may only need to hold a catalog, receipt folder, or coffee pouch. A market bag for weekend bread sales needs a stronger body, wider strap, and better bottom shape. If the supplier only sees a logo and target price, they may quote a thinner canvas body that looks acceptable in a photo but collapses when loaded.
Write the use case into the RFQ. Include expected contents, maximum load, whether the bag will be sold at retail, and whether it needs an inner pocket for receipts or loyalty cards. This helps the factory choose fabric, seam construction, and strap attachment before the print proof is made. It also lets you compare quotes fairly, because a 10 oz flat promotional messenger is not the same product as a 16 oz retail-grade canvas messenger bag with reinforced strap points.
- For light retail merchandise, 10 oz to 12 oz canvas may be acceptable if the bag is small and not overloaded.
- For bakery market use, 12 oz to 16 oz canvas gives better body and a more durable perceived value.
- For premium gift programs, consider cotton lining, inner pocket, metal snap, or a woven side label, but expect a higher MOQ and longer sampling time.
- For staff utility use, prioritize strap strength, stain visibility, and easy handling over decorative trim.
Fabric GSM and canvas construction choices
Canvas weight is often quoted in ounces, but buyers should request GSM as well. A supplier may call two fabrics 12 oz, while one feels loose and soft and the other feels firm because of yarn count, weave density, finishing, or shrinkage. For messenger bags, the fabric must support the flap shape and print surface. Too light, and the flap curls. Too heavy, and the seams become bulky, the bag costs more to sew, and print edges may become less sharp on a rough surface.
Natural canvas suits bakery brands because it looks warm and low-key, but it can show cotton seed specks and shade variation. Dyed canvas gives stronger brand control but adds color approval and potential crocking concerns. Washed canvas has a softer hand feel but can distort size and reduce print sharpness. The right choice depends on whether the bakery wants a clean retail SKU, a rustic market piece, or a premium merchandise item.
- Request fabric weight as both oz and GSM, with acceptable tolerance stated in the quote.
- For natural canvas, define whether cotton seed specks and slubs are acceptable or considered defects.
- For dyed canvas, use a Pantone or lab dip reference and require colorfastness comments from the factory.
- For washed canvas, approve the final print after washing because shrinkage and surface texture can change the artwork appearance.
- For heavy canvas above roughly 540 GSM, review seam bulk, needle marks, carton weight, and sewing cost before committing.
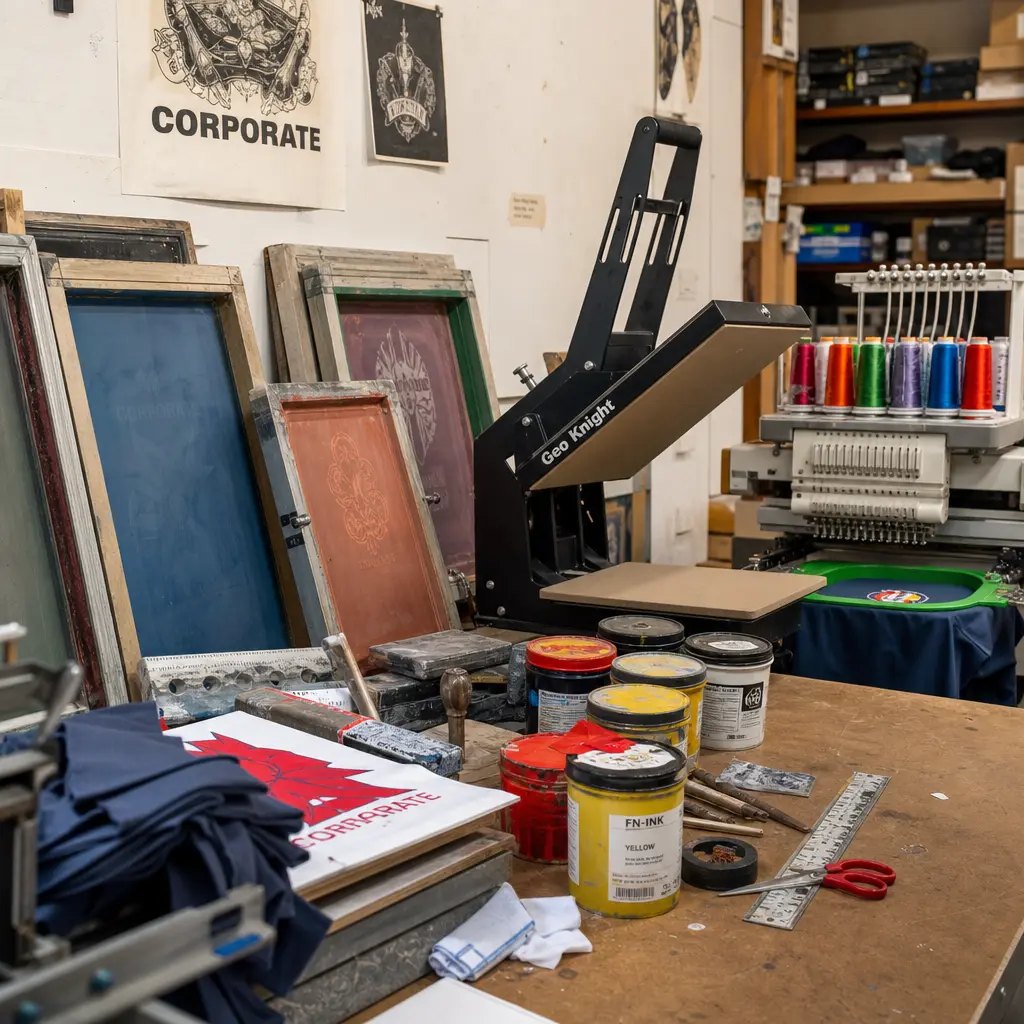
Choose the print method by artwork behavior
Most bakery logos are suitable for screen printing when they use solid marks, limited colors, and clear typography. Screen printing is usually efficient for wholesale canvas messenger bags because it gives stable unit cost and good opacity when the MOQ justifies screen setup. For a natural canvas bag with one or two print colors, it is often the safest commercial option.
Problems start with fine flour textures, very small slogans, watercolor bread illustrations, or distressed logos. Coarse canvas absorbs ink unevenly, and tiny negative spaces can close during printing. Heat transfer can solve some multicolor detail issues for smaller runs, but it can look less integrated with natural canvas and may create a different hand feel. Embroidery gives a premium result for simple logos, but small lettering and detailed bakery illustrations are not ideal.
- Use screen print for solid bakery logos, simple line art, and one to three color designs.
- Use heat transfer cautiously for short runs, gradients, or many colors where screen setup becomes inefficient.
- Use embroidery for premium simple marks, not for small ingredient lists, thin scripts, or detailed illustrations.
- Define minimum line width and minimum text height before sampling, especially on 12 oz to 16 oz canvas.
- Require a cured print sample, not only a digital placement proof, before approving bulk production.
Proof placement on the sewn flap
Messenger bags are more sensitive to print placement than totes because the flap is a moving, sewn panel. If the logo is printed before sewing, cutting variation and seam allowance can shift the final visual position. If the logo is printed after sewing, the factory needs suitable jigs and a flat enough print area. Neither method is automatically wrong, but the buyer must know which method the factory will use and what tolerance they can hold.
For bakery buyers, the safest proof includes a placement drawing with measurements from fixed sewn points. Measure from the finished flap edge, side seam, snap center, or other stable reference points. Avoid placing artwork too close to curved flap edges, thick seams, magnetic closures, or buckle straps. A logo that looks balanced on an open flat flap may appear too low when the bag is worn and the flap bends over the body.
- Keep key artwork at least 20 mm away from flap edges, seams, snaps, and fold lines unless the factory confirms otherwise.
- Specify placement tolerance, for example plus or minus 5 mm for small logos or plus or minus 8 mm for larger flap artwork.
- Approve the print with the flap closed, open, and naturally hanging from the shoulder strap.
- Mark the artwork centerline and the finished flap centerline on the proof sheet.
- Reject samples where the logo is level on the flat panel but visually tilted after the flap is closed.
MOQ logic for bakery chains and distributors
MOQ is not only a unit count. It may be controlled by fabric roll minimum, dye lot, print screen setup, cutting efficiency, hardware purchase, label order, or packing SKU. For a distributor serving several artisan bakeries, this matters because one total order of 2,000 bags may still contain five small artworks, three carton labels, and different hangtags. The factory may price this differently from one clean 2,000-piece design.
A practical approach is to standardize the bag body and vary the artwork only where it creates sales value. For example, one natural canvas body, one strap type, one inner label, and several one-color front flap prints may be easier than different fabrics and trims for every bakery. If branch artwork must vary, request the quote in a table that separates body MOQ, artwork MOQ, screen cost, packing SKU charge, and sample cost.
- Clarify whether MOQ applies per bag body color, per artwork, per print color, per label, or per shipment.
- Group bakery branches under one fabric and trim specification when possible.
- Expect extra screens or setup charges for each artwork, even when the bag body is identical.
- Use artwork codes and carton marks to prevent mixed-design packing errors.
- For trial orders, compare a smaller MOQ with higher unit cost against a larger MOQ with lower setup cost per bag.
Quote data that prevents false savings
A low unit price can hide missing items. One supplier may include export carton, woven label, screen charge amortization, and individual packing. Another may quote only the blank bag with one print position, then add charges later. Procurement teams should force quotes into the same structure before comparing. Otherwise, the cheapest line item may become the most expensive landed order.
For canvas messenger bags, the quote should also show construction details that affect labor cost. Strap width, strap adjuster, pocket count, lining, closure type, bartacks, edge binding, and print position all change production time. A quote without these details is not a reliable basis for purchase approval. If the factory cannot state them clearly, the sample may not match bulk production.
- Request unit price by quantity break, such as 500, 1,000, 2,500, and 5,000 pieces, if your program may scale.
- Separate screen charge, sample charge, lab dip charge, label charge, hangtag charge, and packing charge.
- List Incoterm, port, carton dimensions, carton gross weight, and pieces per carton for freight estimation.
- Specify whether the quoted price includes pre-production sample, final inspection support, and spare cartons.
- Require the supplier to confirm validity period because cotton fabric, freight, and currency movements can affect repeat orders.
Sample approval should be physical and measurable
A digital proof is useful for alignment discussion, but it cannot approve canvas texture, ink absorption, strap strength, hardware feel, or carton abrasion risk. For bakery merchandise, a physical pre-production sample should be made with the planned bulk canvas, thread, strap, closure, label, and print method. If the factory substitutes available material for speed, the sample must be marked as a development sample, not a production approval sample.
The approval record should include measurements and photos, but the signed sample is still important. Keep one approved sample with the buyer or distributor and one with the factory production team. Bulk QC should compare against that sample for fabric hand feel, print color, stitch appearance, and packing method. If there are approved deviations, write them down; do not rely on chat messages scattered across the ordering process.
- Measure finished body width, height, gusset, flap length, strap width, strap length range, and pocket size.
- Photograph the front flap print straight-on under neutral light and include a ruler or placement guide.
- Check whether the bag stands, folds, and closes as expected after realistic loading.
- Rub the cured print with dry white cloth to screen for obvious adhesion problems.
- Approve the packing sample if the bag will be sold as a retail SKU or shipped to multiple stores.
Packing and carton rules for printed canvas
Packing is often treated as a final detail, but it can damage the print after a perfect production run. Canvas is abrasive compared with smooth nonwoven or polyester fabrics. If printed flaps are stacked face-to-face before the ink is fully cured, or cartons are overpacked, print transfer and scuffing may appear during ocean freight. Bakery buyers also need clean presentation because these bags may go straight to retail shelves or gift assembly tables.
Decide whether sustainability goals allow polybags. Some bakery brands prefer no individual polybag, but removing it requires a better carton plan. Paper banding, tissue interleaving, or controlled stack direction can work if the print is protected and the cartons are not too heavy. Carton marks should identify artwork code, bakery branch, quantity, PO number, and destination to avoid sorting errors at the warehouse.
- Set a maximum carton gross weight that warehouse teams can handle, often around 15 kg to 18 kg depending on buyer policy.
- Avoid packing fresh prints tightly; require sufficient curing and cooling time before folding and carton loading.
- Use interleaving or face-in stacking when printed flaps may rub against rough canvas backs.
- Define inner packing: bulk pack, paper band, individual polybag, hangtag, barcode sticker, or retail header card.
- Require carton drop suitability if cartons will move through parcel networks or store replenishment channels.
Lead time risks in print proofing
The longest delay is often not sewing. It is artwork correction, lab dip approval, print testing, sample shipment, and buyer feedback. Bakery programs are frequently tied to seasonal launches, store openings, holidays, or gift box campaigns. If the approval calendar leaves only a few days for proof correction, the factory may rush printing and packing, which increases the risk of crooked placement, color drift, and mixed cartons.
Build the schedule from the required arrival date backward. Include time for RFQ clarification, sample making, international courier, internal brand approval, deposit processing, fabric booking, screen setup, cutting, printing, curing, sewing, final inspection, packing, customs documents, and freight. If artwork has multiple versions, add buffer. Every additional design needs proofing discipline, even when the bag construction is the same.
- Allow separate approval time for fabric color, print strike-off, sewn sample, and packing sample when the order is retail-facing.
- Do not release bulk fabric cutting until the final bag size and flap print placement are approved.
- Do not release bulk printing until the cured print color and adhesion are approved.
- Use a written change log after sample approval; late artwork changes should trigger a revised lead time.
- For holiday bakery campaigns, book inspection and freight space earlier than normal because small delays can miss the selling window.
Specification comparison for buyers
| Spec decision | Recommended option | When it fits | Buyer risk to check |
|---|---|---|---|
| Fabric body weight | 12 oz to 16 oz canvas, roughly 400 to 540 GSM depending on mill construction | Best for bakery retail bags that must hold boxed pastries, coffee bags, catalogs, or market-day purchases without looking flimsy | Do not compare only ounce labels; request actual GSM, weave density, shrinkage tolerance, and whether the weight is measured before or after dyeing |
| Flap print area | One-position print centered on the flap, kept at least 20 mm away from flap edges and seam bulk | Works for bakery logos, neighborhood artwork, seasonal gift programs, and corporate bakery merchandise | Artwork placed too close to seams can distort during sewing; proof print position on the sewn sample, not only on a flat fabric panel |
| Print method | Screen print for solid bakery logos; heat transfer only for small multicolor runs; embroidery for premium low-detail branding | Screen print usually gives the most stable cost and color result on wholesale canvas messenger bags for artisan bakeries | Fine lines, flour-dust textures, and small typography may fill in on coarse canvas; confirm minimum printable line width before sampling |
| Ink and curing | Water-based or pigment ink with curing test matched to the fabric color and wash expectation | Suitable when the buyer wants a softer hand feel and a natural artisan look | Under-cured ink can rub off on light bakery packaging; require rub testing after curing and before packing approval |
| Strap construction | 38 mm cotton webbing or canvas strap with reinforced bartacks at stress points | Appropriate for messenger bags used by staff, delivery partners, or retail customers carrying heavier bakery purchases | A low quote may hide narrow webbing, single-stitch attachment, or weak hardware; specify strap width, length range, and bartack requirement |
| MOQ logic | Consolidate fabric color and bag body, then vary print artwork by bakery branch or seasonal campaign if the factory can batch screens efficiently | Useful for distributors managing several bakery accounts or brand owners testing multiple stores | Multiple artworks can create extra screen charges, longer proofing time, and mixed-carton errors unless SKU labeling is controlled |
| Sample approval | Approve a pre-production sample made with bulk fabric, bulk thread, final strap, final hardware, and final print process | Necessary before import orders, distributor rollouts, or retail programs with strict brand color control | A nice photo sample is not enough; keep one signed physical sample at the buyer side and one at the factory for production matching |
| Packing plan | Individual polybag only when required; otherwise paper banding or master carton packing with interleaving to protect the print | Fits bakery brands with sustainability goals and distributors needing clean retail-ready cartons | Fresh ink, rough canvas, and tight cartons can cause print transfer; define drying time, stacking direction, and carton weight limit |
Buyer checklist before sampling
- Define the finished bag size, flap size, gusset depth, strap width, strap length range, closure style, pocket layout, and expected load use before artwork is placed.
- State the fabric in both ounces and GSM, including acceptable tolerance, shrinkage expectation, color standard, and whether the canvas is natural, dyed, washed, or laminated.
- Send vector artwork with Pantone references, minimum line width, negative space requirements, and a note on whether exact bakery brand color or close commercial match is acceptable.
- Require a print proof on the same canvas construction used for bulk, then approve the sewn sample because flap tension and seam position can shift the visual center.
- Set acceptance criteria for print position, color variance, ink adhesion, edge sharpness, stitch density, bartack strength, odor, stains, loose threads, and carton labeling.
- Separate one-time charges from unit cost: screen charge, sample charge, artwork adjustment, special packing, inner label, hangtag, inspection, and inland freight to port.
- Confirm whether MOQ is based on bag body color, artwork, print color, fabric roll, or carton quantity; this prevents surprises when ordering multiple bakery branch designs.
- Define packing by SKU, carton quantity, carton dimensions, gross weight limit, barcode or carton mark format, and whether mixed designs are allowed in one master carton.
- Build the approval calendar backward from the bakery launch date, allowing time for artwork correction, sample shipping, bulk material booking, printing, sewing, inspection, and export handling.
- Keep a signed approval record with sample photos, measurement sheet, print placement drawing, Pantone target, packing method, and final quote version.
Factory quote questions to send
- What is the exact canvas weight in GSM and ounces, and is that weight measured before dyeing, after finishing, or on finished fabric?
- What is the normal GSM tolerance and shrinkage range for this canvas, and can you provide a fabric swatch from the planned bulk lot?
- Which print method do you recommend for this artwork on canvas messenger bags, and what line width or text height should be avoided?
- Can the print be placed on the sewn flap, or must it be printed before sewing? How will you control placement tolerance after assembly?
- What are the MOQ rules by bag color, print artwork, print color, and packing SKU if we order several bakery branch designs?
- Which costs are one-time charges, and which are included in the unit price: screens, sample, inner label, hangtag, paper band, polybag, carton marks, and export carton?
- What is your pre-production sample lead time after artwork approval, and what is the bulk lead time after sample approval and deposit?
- How many bags per export carton do you recommend for this size, and what carton dimensions and gross weight should we use for freight estimates?
- What in-line and final QC checks do you perform for print adhesion, color, measurement, strap strength, stitching, metal hardware, and packing accuracy?
- Can you provide photos of the actual sample under neutral light, close-ups of print edges, seam areas, strap bartacks, inside pocket, label, and carton packing before shipment?
Quality-control points to confirm
- Finished size tolerance should normally be controlled within plus or minus 10 mm for body width and height, with tighter tolerance agreed for flap print position.
- Print placement should be measured from fixed sewn reference points, not from raw fabric edges, because canvas can move during cutting and sewing.
- Color approval should compare the cured print on actual canvas under neutral lighting, with acceptable Delta E or visual tolerance agreed before bulk printing.
- Ink adhesion should pass dry rub testing and reasonable hand-scratch resistance after curing; any wet rub or wash expectation must be specified separately.
- Stitching should be even, with no skipped stitches, open seams, broken threads, or loose bartacks at strap joints and stress areas.
- Metal hardware, buckles, snap buttons, or magnetic closures should be checked for function, plating defects, sharp edges, and consistent placement.
- Canvas surface should be free from major slubs, oil marks, mildew odor, heavy creases across the print zone, and visible color panels that do not match.
- Cartons should protect printed flaps from abrasion, avoid over-compression, and use SKU marks that match the purchase order, artwork code, and packing list.