Why logo placement matters on a wine club messenger bag
For wine clubs, the messenger bag is usually more than simple packaging. It can function as a membership welcome item, event carry bag, tasting-room merchandise piece, or seasonal club premium. In all of those roles, the logo is expected to work immediately: it should read well when the bag is handed over, photographed for social content, stacked in a fulfillment area, or carried by members after the first delivery. Placement that looks acceptable on a flat screen can fail in real use if it ends up hidden by a flap fold, broken by a pocket seam, or pulled off-center once the bag is filled.
That is why procurement teams should treat logo placement as a production-control issue rather than a last-step artwork decision. The usable branding area depends on pattern shape, seam allowance, flap angle, topstitch rows, hardware position, and how the bag hangs when loaded. A factory that quotes decoration without showing how the art relates to the actual sewing pattern is still working at estimate level, not approval level.
Wine club programs also have a higher image-risk profile than many generic promotional orders. A bag may appear in launch emails, influencer gifting, vineyard event photography, or member unboxing content. If the logo feels too low, too high, too small, or visually crowded by closures and pockets, the brand result looks cheaper even when the fabric itself is acceptable. Strong placement protects both appearance and spend efficiency.
- Use a placement drawing with measurements from fixed reference points, not just a centered artwork file.
- Judge visibility on the finished bag shape, not on an unsewn flat panel alone.
- Keep branding away from flap folds, magnetic snap zones, zipper tape, side gussets, and pocket openings.
- Choose the visible face based on how the bag will be carried, photographed, and stored in the wine club workflow.
Start with the bag structure, not the artwork
The bag structure determines whether a logo can be placed cleanly and repeated consistently in production. Buyers often begin with the art file and ask where it can fit, but the better order is to confirm the body construction first. A single-gusset messenger with one broad front face gives the factory a stable decoration zone. A flap-top style offers a strong branding surface, but the flap fold reduces usable height and can change how the logo reads once the bag is closed.
Every added feature competes with branding space. Front slip pockets, contrast binding, D-rings, webbing loops, stitched dividers, buckle straps, and decorative panel seams can all interrupt the logo zone. They also introduce more sewing variation, which makes it harder to keep placement consistent across a run. That does not mean detailed bags are wrong for wine clubs. It means the quote, sample, and QC standard must account for those details early, because the decoration will not behave the same way as it does on a simple front panel.
For many wine club buyers, the safest starting point is a straightforward messenger body with one main decorated panel, minimal external hardware, and a flap or zipper design that leaves a clear visual field. If the brand wants a premium feel without a large printed mark, a smaller embroidery area, woven label, or sewn patch can often achieve better repeatability than forcing a large centered logo onto a crowded construction.
This section matters during supplier comparison because two factories may quote the same nominal bag size but use different panel breaks or flap depths. Those small pattern differences can shift the branding result enough to change which placement is safest. Ask for a front-view line drawing or pattern reference before finalizing art placement.
- Simple body construction usually means lower sewing variation and better placement repeatability.
- More panels and trims reduce usable branding area and raise alignment risk.
- If the logo is a key brand element, build the bag around the logo zone instead of treating decoration as an afterthought.
- Request a front-view technical drawing so the placement decision is tied to actual construction.
Map the main placement zones before you request pricing
Most canvas messenger bags give you three realistic branding zones: the flap face, the front body panel below the flap, and a smaller trim position such as a side label or patch. Each zone behaves differently in production and in use. The flap face is usually the strongest visibility area because it is the first surface people see when the bag is closed. It works well for member gifts and event bags where the logo should read immediately. The risk is that flap folds, snap hardware, edge topstitching, and curved corners can make centered art look visually off if the available flat area is not measured carefully.
The lower front body panel can be a safer option when the flap already carries hardware, a pocket, or decorative stitching. This zone often supports a lower-right or lower-center placement that feels quieter and more retail-oriented. Buyers choosing this route should test the look with the bag filled, because the front body panel may bulge once the bag carries inserts or accessories. A design that looks balanced when empty can appear too low or too small in real use.
A side label, woven tab, or patch is useful when the brand wants a more understated look or needs durability over a large print statement. This approach fits wine clubs that want the bag to feel more like a reusable lifestyle item than a giveaway. It also reduces print risk on textured or washed canvas. The tradeoff is lower visibility in photography and less brand impact from a distance.
Before sending an RFQ, mark the preferred zone and one backup zone. Suppliers can then price alternatives without improvising. This also helps if the initial sample reveals that the first-choice placement conflicts with seam allowances or the flap geometry. A practical RFQ shows logo width, height, and x/y position measured from fixed points such as top edge, side seam, and centerline.
- Primary zone: front flap for strong first-view branding if the flap has enough uninterrupted space.
- Secondary zone: lower front body for a quieter retail look and less hardware conflict.
- Tertiary zone: side label or patch for durability and subtle branding.
- Always define one backup placement so sampling does not stall if the first location proves unstable.
Fabric weight and finish: what to specify in the RFQ
Canvas specification affects cost, appearance, and decoration stability at the same time. For most wine club messenger bags, 10-12 oz canvas is the practical middle range because it balances structure, printability, and manageable cost. It is heavy enough to feel substantial when carrying tasting notes, corkscrews, catalogs, or light accessory kits, but usually still flexible enough for efficient packing and shipping. If the bag is expected to feel more premium, carry heavier inserts, or hold shape better in retail display, 14 oz canvas is often worth quoting as an upgrade path.
Lower weights can still work, especially for cost-sensitive promotional runs, but buyers should understand the tradeoff. Lighter canvas wrinkles more easily during packing, tends to telegraph seam pressure, and can make even a correctly placed logo look less stable when the bag is folded or stacked. This is not always a defect; it is a material behavior. The issue is that buyers sometimes expect a soft lightweight canvas to present like a structured retail bag, and the logo takes the blame when the real issue is substrate choice.
Finish type matters too. Raw canvas often provides a crisp print surface and straightforward costing, but it may shift more in wash or soften differently over time. Enzyme-washed or prewashed canvas can look more relaxed and premium, which suits many wine club aesthetics, yet washed finishes may introduce subtle shade variation and a less crisp print edge because the surface is more irregular. If you need a very sharp mark or tight color consistency, the finish should be evaluated along with the decoration method, not separately.
Your RFQ should specify fiber content, weight in oz or GSM, finish type, color reference, acceptable shade tolerance, and any shrinkage expectation. If the bag color is natural, off-white, black, olive, or wine-adjacent brand tones, approve a fabric reference before bulk cutting. Small shade movement can change how the logo reads, especially with dark or fine-line prints.
- State canvas weight in oz or GSM and avoid vague terms such as heavy-duty or premium canvas.
- Specify finish type: raw, prewashed, enzyme-washed, or other approved finish.
- Ask for shade reference approval before cutting, especially on washed or dyed canvas.
- Match fabric choice to the decoration method so print sharpness and hand feel are predictable.
Best logo methods for this product, ranked by buyer use case
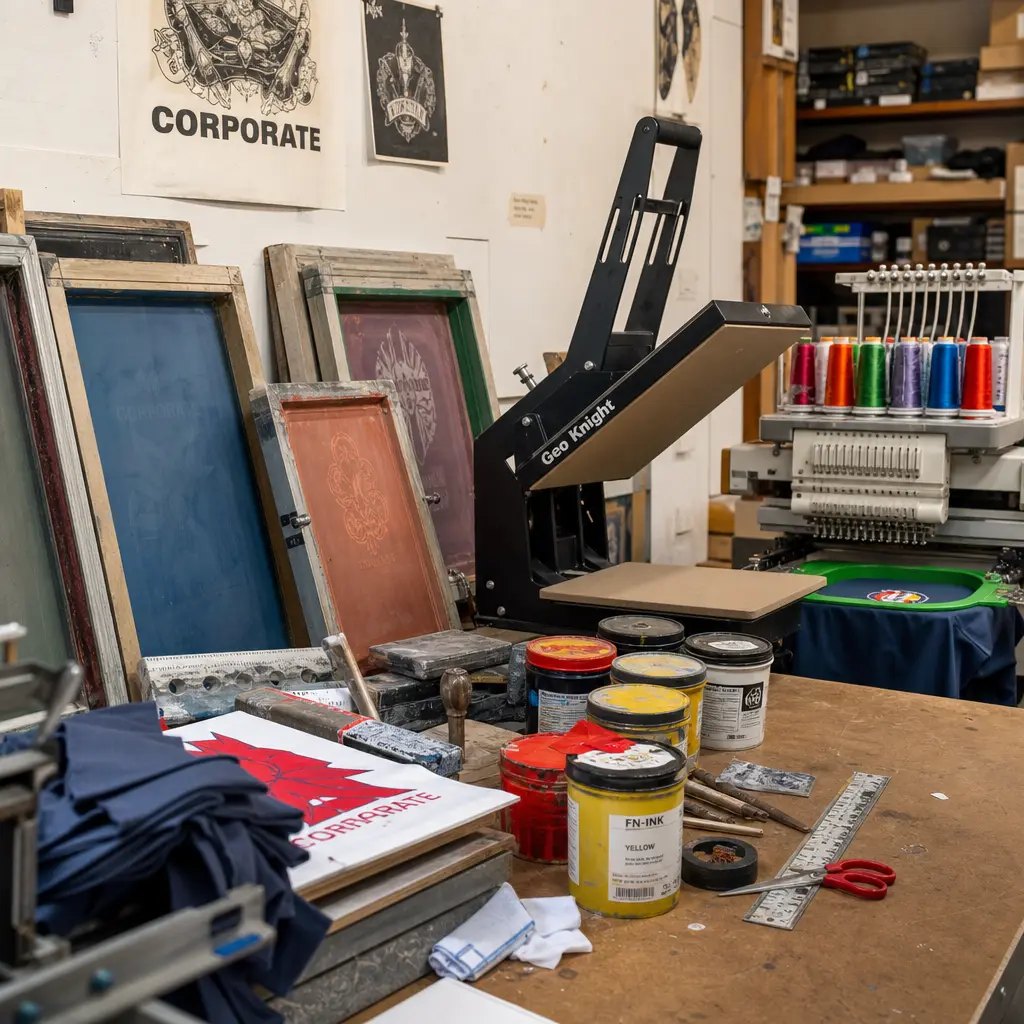
Screen printing is usually the most practical decoration method for wine club messenger bags when the artwork is simple and the order volume is meaningful. It gives a clean flat result on broad panels, supports consistent placement, and is usually the easiest method to compare across suppliers. It works best for one- or two-color logos, line-based marks, and solid shapes that do not rely on fine gradients. Buyers should still inspect opacity, edge sharpness, and cure quality, because canvas texture can expose weak ink laydown quickly.
Embroidery is appropriate when the brand wants a more tactile, premium appearance and the logo is compact enough to stitch cleanly. It tends to work better for smaller marks than for large filled areas. Dense embroidery on soft canvas can create puckering or draw-in if the backing is weak or if the stitch count is too high. Procurement teams should ask what stabilizer and thread type will be used, because embroidery quality depends as much on those support choices as on the logo file itself.
Woven labels and sewn patches are often the most durable option when the buyer wants sharp edges, small text, or a refined branded detail that survives repeated use. A woven label can sit at the side seam, flap edge, or front panel. A patch can be cotton, twill, leather-look, or other approved trim, depending on the program. For wine clubs, these methods are especially useful when the bag should feel like a reusable lifestyle product rather than a campaign handout. They also reduce the risk of large-area print distortion on washed or textured canvas.
Heat transfer is sometimes proposed for flexibility, but buyers should treat it carefully on canvas messenger bags. Unless the factory can show strong adhesion, rub resistance, and stable appearance after handling, it can become a false economy. Transfers may look good at sample stage and then reveal edge lift, excessive sheen, or cracking in use. If a supplier recommends transfer, ask why it is better than screen print or patch construction for this specific bag and logo.
The best method depends on the program goal. Member welcome gifts often favor cost-controlled screen print. Retail resale may justify a woven label or small embroidery. Event distribution may prioritize speed and visual impact. The decision should come from use case, not from whichever method the supplier happens to offer first.
- Screen print: best for simple art, broad panels, and cost-efficient volume.
- Embroidery: premium feel for smaller marks, but inspect backing, puckering, and stitch density.
- Woven label or patch: durable and sharp, especially for understated retail-style branding.
- Heat transfer: only use if durability and rub performance are proven on your actual canvas.
How to compare supplier quotes without missing hidden cost
A useful quote for custom canvas messenger bags should separate the major cost drivers instead of hiding everything inside one unit price. Buyers should ask for line items covering fabric, cutting and sewing, decoration setup, decoration run cost, packaging, labels, and any special handling. This matters because the cheapest total price can conceal weak assumptions. One supplier may be pricing lighter canvas, looser packing, or a simpler decoration method than the RFQ intended. Another may include better sample control but appear more expensive only because their scope is more complete.
Quantity bands are essential. Wine club programs often begin with a cautious first order and expand later, so pricing at 500, 1,000, and 3,000 pieces gives a better view of how setup costs are absorbed. Without those breakpoints, buyers cannot see whether a quote is truly efficient or just front-loaded. If the supplier charges decoration setup per color, per placement, or per colorway, those rules need to be explicit. Otherwise, later artwork or assortment changes can produce avoidable cost surprises.
Buyers should also compare quotes against risk, not just against price. A lower figure from a supplier that cannot explain placement coordinates, sample standard, or QC method is weaker than a slightly higher price from a supplier that can show pattern-based placement control and packing discipline. For wine clubs, timing and presentation often matter as much as pennies on unit cost. A shipment that arrives with mixed carton labeling or visibly inconsistent logos can consume more cost in warehouse sorting and brand damage than was ever saved on the PO.
Direct factory sourcing generally gives better visibility when the logo, bag pattern, and packing standard must all align tightly. Trading companies can still be useful when combining categories into one shipment or reducing communication burden, but the same quote transparency should apply. The buyer should know who is actually making the bag, who controls decoration, and who is responsible if the approved placement is missed in bulk.
- Request a cost breakdown so you can compare scope, not just unit price.
- Ask for quantity bands to expose real setup economics and scale effects.
- Check whether decoration charges repeat by colorway, placement, or reorder.
- Compare supplier control level, sampling detail, and QC discipline alongside price.
Sample approval: what to inspect before bulk production
A flat artwork proof is only the first checkpoint. Before bulk production, buyers should approve a production-like sample made with the final or near-final fabric, final bag pattern, final decoration method, and intended construction details. Anything less leaves too much interpretation open. For messenger bags, small differences in flap depth, seam allowance, pocket height, or binding width can make the same logo appear noticeably different from the digital concept.
Measure the decorated sample from at least two fixed reference points. For example, record the distance from top edge to logo top, from side seam to logo edge, or from flap centerline to artwork center. If the bag shape is asymmetrical, note which edge controls the visual center. This prevents the factory from relying on subjective language like centered or balanced. Procurement teams should add those numbers to the approved spec sheet and tie them to the PO.
Inspection should include both static and filled viewing. Put realistic contents inside the sample, close the flap, hang the strap, and view the bag from normal user distance. A logo that appears centered on an empty shell may shift visually once the panel rounds out under load. This is especially important for wine clubs including catalogs, accessories, or structured inserts. If the bag is expected to appear in photography, check it under lighting conditions similar to marketing use, because washed canvas texture can affect contrast and legibility.
Also confirm decoration details beyond placement. For screen print, inspect opacity, edge sharpness, and hand feel. For embroidery, check stitch fill, thread coverage, and whether the backing distorts the panel. For patches or labels, inspect attachment symmetry and edge cleanliness. Approve thread color, ink tone, and overall visual balance as one package rather than signing off on placement alone.
- Approve a physical pre-production sample, not only a digital mockup or decorated blank.
- Measure placement from fixed reference points and add those numbers to the final spec sheet.
- Inspect the sample filled and hanging, not just lying flat on a table.
- Review color, texture, edge quality, and visual balance together with placement.
QC thresholds that prevent expensive rework
Bulk quality control works best when the acceptance standard is written in production language, not in subjective brand language. For logo placement on a flat messenger panel, a common working tolerance is within plus or minus 5 mm from the approved sample. If the bag has a curved flap, patch attachment, or flexible washed fabric, the buyer and supplier may agree on a slightly different tolerance, but it should still be numerical. Once a shipment is on the floor, words like close enough or looks centered are not useful for inspection decisions.
Decoration quality should be defined method by method. For screen print, ask for clean edges, solid coverage where opacity is intended, no pinholes in major solids, no visible ghosting, and no off-register colors. On natural or textured canvas, some texture show-through may be acceptable, but the acceptable level should be discussed at sample stage. For embroidery, define no loose threads, no thread breaks, no excessive puckering, and no exposed backing visible from the front. For labels or patches, inspect edge cut cleanliness, alignment, stitch consistency, and attachment security.
The logo zone must also be reviewed together with surrounding sewing quality. A technically centered print can still look defective if nearby seams pucker or if the flap edge is not symmetrical. Inspect stitch count consistency, skipped stitches, thread tension, and fabric drag around the decorated area. In practice, apparent logo defects are often construction defects that distort the panel after decoration or during final assembly.
Procurement teams should build QC around three moments: incoming material check, in-line production check, and final random inspection. Incoming checks verify fabric shade, weight, and hand feel against the approved sample. In-line checks catch placement drift before too many units are made. Final inspection confirms AQL or agreed sampling results, packing accuracy, and visual consistency before shipment release. This staged approach is usually cheaper than relying only on end-of-line inspection.
- Write placement tolerance into the PO and spec sheet as a measurable number.
- Define print, embroidery, and patch standards separately because the defect risks differ.
- Inspect the logo area together with surrounding seam quality and panel symmetry.
- Use incoming, in-line, and final inspection checkpoints instead of one late inspection only.
Packing, labeling, and lead time: where wine club orders usually slip
Decoration quality can be lost in packing if the protected face and fold method are not specified. Canvas messenger bags are often folded for carton efficiency, but careless folding can crease the logo, abrade printed surfaces, or transfer dust and friction marks across light-colored fabric. Buyers should confirm whether bags are packed flat, stuffed lightly, folded once, or nested, and whether a polybag or tissue separator is required. The right answer depends on the destination: warehouse replenishment, kitting line, direct event delivery, or retail distribution.
Labeling discipline is equally important for wine club programs because many orders feed into timed launches and multi-SKU fulfillment. If cartons are mixed loosely or if outer labels do not match the PO, the downstream team spends labor sorting product that should have been production-ready. A strong packing spec defines carton quantity, inner pack rules, fold direction, barcode placement, carton marks, destination data, and carton sequence if needed. This is especially important when colorways or club tiers are being packed together for fulfillment.
Lead time should be broken into stages. Buyers should ask for sample lead time, material booking lead time, production window, inspection window, and ex-factory date separately. When a wine club launch has a fixed ship-to-member date, the procurement calendar also needs freight and warehouse buffer, not just factory finish date. A quote that says 35 days without showing the stage breakdown is less useful than it appears.
The most common schedule failures are delayed artwork approval, late fabric confirmation, unclear packing instructions, and rework after sample-stage misunderstandings. These are mostly preventable if the RFQ is complete and the sample approval is documented tightly. In other words, lead time risk often begins with missing specification detail, not only with factory capacity.
- Protect the decorated face during folding, stacking, and carton loading.
- Write carton quantity, label format, and SKU separation into the packing spec.
- Ask for a stage-by-stage lead time instead of one undifferentiated delivery promise.
- Build warehouse and freight buffer around the club launch date, not only around ex-factory timing.
A practical RFQ framework for wine club buyers
The cleanest way to reduce confusion is to send an RFQ that makes the supplier answer against the same structure every time. Start with the intended use: member welcome gift, event bag, resale item, or shipment insert. Then define the bag construction, target size, strap style, closure type, and intended load. After that, specify the canvas in measurable terms, followed by the exact decoration method and placement drawing. This sequence forces the quote to reflect how the bag will actually be made.
For logo placement specifically, include a front-view diagram with reference dimensions. State preferred location, backup location, logo size, artwork file type, and Pantone references where relevant. If there are restrictions, write them directly: do not place across flap fold, keep clear of pocket seam, maintain minimum distance from topstitch line, or use label instead of print if panel width shifts below approved range. These kinds of notes help the supplier quote responsibly and reduce back-and-forth during sampling.
Your RFQ should also ask the supplier to confirm their own control points. Require them to state placement tolerance, sampling standard, packing method, MOQ by colorway, and quotation validity. If multiple suppliers answer the same form, you can compare them faster and spot where one quote is incomplete. That is particularly useful for wine club procurement, where timelines are often tied to campaign calendars and the buyer needs to make decisions quickly without losing traceability.
The goal is not to create paperwork for its own sake. The goal is to remove ambiguity before it becomes sample delay, quality dispute, or fulfillment friction. A stronger RFQ usually leads to more realistic pricing, better sample accuracy, and fewer surprises once the order scales.
- State the end use first so suppliers understand the performance and presentation target.
- Attach a measured front-view placement drawing with one preferred and one backup logo zone.
- Require the supplier to confirm MOQ, tolerance, lead time stages, and packing method in writing.
- Use the same RFQ structure across suppliers so quote comparison is meaningful.
Specification comparison for buyers
| Spec decision | Recommended option | When it fits | Buyer risk to check |
|---|---|---|---|
| Logo placement | Front flap centered, or lower-right front panel if the flap is crowded | Wine club gifts, member welcome kits, tasting-event bags, and resale programs where the logo should appear clearly in unboxing photos and first use | Check that the logo does not cross flap fold lines, topstitch rows, magnet zones, pocket openings, or seam allowances |
| Logo size | 70-110 mm wide for understated marks; 120-160 mm wide for stronger retail presence | When the bag is used as a club premium, event tote alternative, or branded add-on item | Large marks can look distorted after sewing or folding, especially on soft canvas or near curved flaps |
| Print method | Screen print for 1-2 color art; woven label or patch for durable identity; embroidery for premium smaller marks | When artwork simplicity, wear life, and target cost differ by program type | Wrong method can cause cracking, bleed, puckering, high setup cost, or poor legibility on textured canvas |
| Fabric weight | 10-12 oz canvas for most wine club messenger bags; 14 oz when more structure or heavier inserts are expected | When the bag carries tasting notes, openers, catalogs, bottle sleeves, or fulfillment inserts | Light canvas wrinkles more in transit and can make logo placement look uneven even when measured correctly |
| Bag structure | Single gusset messenger with flap closure or zipper-top body and one clean front panel | When the buyer wants predictable branding space, lower sewing variation, and easier quote comparison | Extra pockets, paneling, and contrast trims reduce usable logo area and increase placement conflict |
| Source route | Direct factory for custom logo, pattern, and packing control; trading company only when combined sourcing matters more than direct production visibility | When artwork control, carton accuracy, and landed-cost discipline matter | Confirm whether the supplier quoting you actually makes the bag or is passing the order through another layer |
| MOQ strategy | 500-1,000 pcs per artwork/color for full custom runs; lower MOQ only with stock fabric and simple decoration | When testing a new wine club launch, seasonal campaign, or limited-member drop | Low MOQ usually raises unit price, narrows fabric options, and weakens shade and placement consistency |
| Packing route | Bulk pack with size/color separation and PO-matched carton labels; individual polybag only if retail presentation or clean warehouse handling requires it | When orders go to kitting lines, fulfillment centers, or multi-SKU wine club programs | Loose mixed packing creates count errors, label confusion, logo rub damage, and extra warehouse labor |
| Sampling path | Pre-production sample using actual fabric, actual decoration method, final pattern, and measured placement | When the logo must match a brand guide or the bag will be used in photography, gifting, or retail | A digital artwork approval alone does not prove placement, stitch behavior, print hand feel, or panel distortion after sewing |
Buyer checklist before sampling
- Confirm final bag dimensions, gusset depth, flap shape, strap construction, closure type, and realistic loading weight for wine club use.
- Specify canvas composition, fabric weight in oz or GSM, finish type, shade reference, shrinkage expectation, and any wash or rub-performance requirement.
- Send vector artwork and define exact logo width, height, placement coordinates, orientation, and Pantone references on a measured placement drawing.
- State the approved decoration method by logo location, including screen print color count, embroidery thread references, or woven label construction.
- Ask for sample photos plus one physical pre-production sample made with final fabric, final print method, and final sewing construction before bulk approval.
- Define quality checkpoints for logo position, print coverage, stitch quality, shade consistency, stains, needle damage, carton count, and shipping marks.
- Agree packing details in advance, including fold direction, polybag requirement, inner quantity, outer carton count, barcode labels, and destination labeling.
- Request quote breaks at multiple quantities so you can compare setup cost, unit cost, and packaging cost across realistic order volumes.
Factory quote questions to send
- What is the exact canvas specification in oz or GSM, fiber content, weave, and finish, and is the fabric prewashed, enzyme-washed, or raw?
- Where exactly will each logo sit, measured from top edge, side seam, flap fold, or panel centerline, and can you show it on the sewing pattern?
- Which decoration method are you pricing for each location, and what setup charges apply by screen, thread color, patch mold, or label loom?
- What is your MOQ by artwork, by fabric color, and by logo method, and how does price change at 500, 1,000, and 3,000 pcs?
- Will the sample use the same fabric lot type, print method, thread, backing, and sewing sequence as bulk production?
- What placement tolerance and print-quality standard can you hold in bulk, and how do you inspect that during production?
- How are bags packed per carton, how is the decorated face protected, and can carton labels include SKU, PO, destination, and carton sequence data?
- What is the lead time split for sampling, material sourcing, bulk production, inspection, and ex-factory date, and which steps usually create delay?
- What in-line QC checks do you run on print registration, seam alignment, flap symmetry, and needle damage near the decorated area?
- If there is a placement or print defect in bulk, what is your rework or replacement process before shipment?
Quality-control points to confirm
- Logo position tolerance: keep placement within +/-5 mm on flat panels unless the bag structure clearly requires a looser agreed standard.
- Print quality: no pinholes, blurred edges, double-hit ghosting, off-register color, excessive hand feel, or visible bleed into the weave where opacity is required.
- Embroidery and label quality: no puckering, thread breaks, loose tails, distorted edge shape, exposed backing, or misaligned patch attachment.
- Stitch integrity around decoration: no skipped stitches, seam grin, broken thread, fabric drag lines, or distortion that makes the logo appear crooked.
- Fabric consistency: verify canvas shade, weave appearance, GSM or oz weight, and hand feel against the approved sample before cutting bulk production.
- Component and structure check: flap symmetry, strap attachment strength, gusset depth, pocket alignment, and closure position must match the approved construction.
- Cleanliness standard: no oil marks, ink transfer, glue residue, mildew smell, metal stains, or handling dirt on visible outer panels.
- Packing accuracy: carton count, polybag use, fold direction, barcode labels, SKU separation, and outer shipping marks must match the approved packing list and PO.