What the sample has to prove before you quote bulk
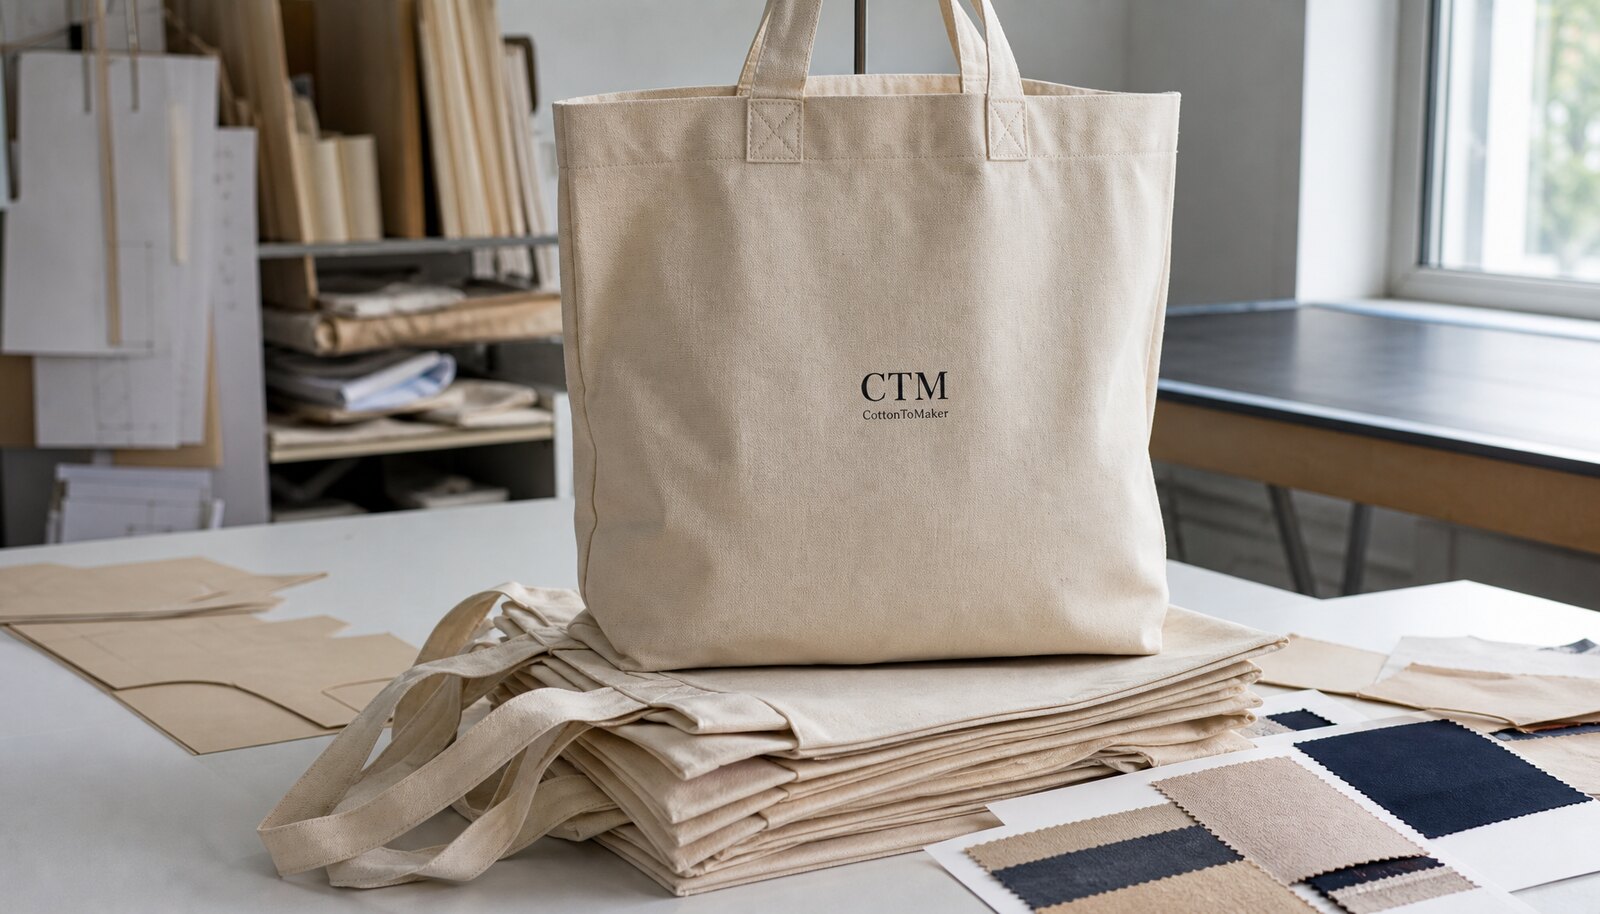
A canvas library tote for a trade show looks simple on paper, but it carries more sourcing risk than many buyers expect. The bag has to hold brochures, catalogs, notebooks, and sometimes a sponsor insert without sagging, twisting, or making the print look rough once it is filled. That is why the sample is not a courtesy step. It is the only practical way to confirm whether the fabric weight, handle reinforcement, print method, seam quality, and packing format all work together in a real event context.
Procurement teams should treat the first approved sample as the production reference, not as a loose example. If the supplier is allowed to say the sample is only indicative, the bulk lot can drift as soon as the factory changes fabric lot, sewing detail, or carton setup. A cleaner approach is to tie the quote, the purchase order, the approval note, and the sample tag to the same revision number. That creates a shared standard for the buyer, the supplier, and any third-party inspector.
For trade-show sourcing, the real question is not whether the bag looks acceptable in an empty photo. The question is whether it performs when it is loaded, stacked, packed, and handed out ten hours into a show day. That means the approval process should reflect actual use, not generic tote-bag language.
- Define the event use case first: handout bag, library-style carry bag, or premium sponsor kit.
- Tie the sample to a revision number so the factory cannot substitute a different version later.
- Reject any approval language that does not identify one physical sample as the source of truth.
Pick the finished bag format that fits the event kit
The best comparison for buyers is the finished bag format, because format drives cost, durability, and inspection risk more directly than a generic tote category. A flat open-top tote is the simplest option and works well for brochure packs or registration desk giveaways. It has fewer sewing steps and is usually easiest to repeat, but it can collapse when loaded and may feel thin if the kit includes books or boxed items.
A gusseted tote gives the buyer more usable volume and is often the most practical format for library-style trade show use. The side depth lets the bag hold a wider mix of collateral without bowing at the front panel. That said, gussets also introduce more cut and seam variables, which means buyers should pay close attention to symmetry and corner shape. If the gusset is slightly off, the bag can twist or lean when it sits on a table.
Box-bottom construction is the strongest choice for presentation and upright display, especially when the tote is part of a premium sponsor pack. It also makes internal packing cleaner. The tradeoff is cost and production complexity: additional pieces, tighter alignment, and more room for corner defects. Zip-top and lined versions add further value for higher-value inserts, but they should be approved only when the event use case justifies the extra material, labor, and inspection effort.
The point of the format decision is not to buy the most robust bag available. It is to buy the lightest, simplest format that still performs properly for the event kit, the brand image, and the way the bags will be handled at registration and on the show floor.
- Flat open-top: best for speed and low unit cost, but weakest on structure.
- Gusseted: best for brochures, catalogs, and wider event kits.
- Box-bottom or lined: better for premium use, heavier loads, and upright presentation.
Set fabric, weave, and handle specs in measurable terms
Fabric weight is one of the first commercial decisions that changes how a tote feels in use, but buyers should avoid treating the weight number as a universal quality score. For many trade-show handout programs, a lighter canvas can be the right answer if the bag only needs to carry a few brochures and light inserts. For reusable library-style tote bags, a heavier canvas usually gives better body and better shape retention. The buyer’s job is to match the cloth to the actual load, not to assume heavier always means better.
The problem with vague canvas descriptions is that they hide important differences. Two suppliers can both say “canvas” while one is quoting a looser weave, a different finish, or a fabric that behaves very differently under print. To compare quotes properly, ask for the fabric in gsm or oz, the weave type, the finish, and whether the fabric is bleached, natural, dyed, washed, recycled, or blended. Those details affect hand feel, print behavior, and the likelihood of shade variation between batches.
Handle design matters just as much as fabric. Record handle width, handle length, and handle drop on the spec sheet instead of relying on a general description like “long handles.” Wider handles usually carry weight more comfortably, while handle drop affects whether the tote is easy to hold by hand or over the shoulder. Reinforcement also needs a specific callout. A bar-tack, X-box stitch, or similar anchor detail can significantly change how the bag survives repeated use, especially if the event kit is dense.
If the tote needs to function like a true reusable carry bag, ask the factory how the handle is attached to the body, what reinforcement pattern it uses, and whether the seam package creates bulk where the hand grips the bag. Those details are often more important than a small difference in fabric weight.
- Use one unit system across the quote, sample, and PO: gsm or oz, not both without conversion notes.
- Measure handle width and handle drop on the physical sample before approving bulk.
- Ask whether the canvas is natural, dyed, washed, recycled, or blended, because finish changes the hand feel and print behavior.
Approve the artwork on the actual canvas, not on a flat proof
Canvas is forgiving for bold graphics and much less forgiving for fine type, thin rules, or weak registration. For canvas library tote bags used at trade shows, a simple one-color or two-color print often gives the most reliable result because it is easier to hold cleanly on woven fabric and easier to inspect at receiving. If the design depends on gradients, small legal text, or tight line work, the buyer should test it on the actual canvas before releasing bulk. A design that looks crisp on a screen can look softer once the weave starts breaking the edge of the print.
The approval record should be specific enough that a different buyer or inspector could use it without guessing. Write the logo width, placement from seams or edges, color reference, and revision number directly on the sample tag or sign-off sheet. For example: front logo 82 mm wide, 24 mm below top edge, centered between side seams, Pantone 186 C, revision B. That level of detail is useful because it gives the factory a repeatable target and gives the buyer a defensible reason to reject a bulk lot if the print drifts.
Avoid approving artwork by saying it “looks good” without defining what good means. The print should be judged on opacity, edge sharpness, alignment to seams, and whether the woven texture creates any visual break in the logo. If the tote will be used in an attendee kit or as a sponsor gift, the print quality is part of the product, not a decorative add-on.
- Do not approve from a PDF proof alone when the final substrate is woven canvas.
- Mark the sample with exact placement dimensions measured from seams or edges.
- Set a rejection rule in advance for print shift, blurred edges, or weak coverage on the weave.
Build the quote around real cost drivers, not one unit price
A useful supplier quote should separate recurring production cost from one-time setup cost. Fabric, sewing, printing, and packing recur on every order. Sample fee, screen or plate setup, carton artwork, and some tooling items may only happen once. If the supplier gives only a single all-in number, the buyer cannot tell whether the quote is competitive or just hiding cost in the setup line. A procurement-ready quote should let you compare apples to apples across suppliers, formats, and quantities.
The other place buyers lose commercial clarity is MOQ. MOQ should not be treated as a random number to accept or reject without context. It usually reflects fabric purchase size, print setup efficiency, sewing line planning, and the factory’s willingness to hold a production slot. That means the same tote can be priced very differently depending on whether you are at a small-run threshold or a quantity where the supplier can buy fabric more efficiently and keep the same print setup through the order.
A practical way to compare vendors is to ask for pricing at your actual commit level and at the next meaningful tier above it. That gives you a view of the cost curve, not just the lowest possible price. It also helps you decide whether it is worth increasing quantity for a lower unit cost or whether the extra stock would become dead inventory after the event. For trade show programs, that is often the real negotiation point: not “what is your cheapest price,” but “what quantity gets us a better landed cost without creating surplus bags.”
Do not stop at unit price. Compare landed cost, sample policy, setup charges, packing charges, and the freight implications of the chosen packing format. A tote that looks inexpensive per unit can become expensive once carton size, gross weight, and destination handling are added.
- Ask the supplier to separate one-time setup charges from recurring production costs.
- Compare the quote at the quantity you can actually commit to, not at a hypothetical volume.
- Include packing, carton work, inland freight, and destination handling in your landed-cost view.
Use the sample to run a fit and durability check
A sample that looks clean in a product photo still needs to survive the actual event load. Put the tote through a simple use test with the real contents it will carry: brochures, catalogs, notebooks, product cards, and any boxed inserts. If the bag is meant to sit at a registration counter or inside a premium pack, load it the way the event team will use it and see whether the base stays flat, the gusset twists, the handles pull the body out of shape, or the print creases in a bad way. Those are functional failures, not just finish issues.
The buyer should also look for defects that do not show up in a quick visual review. Open corners, skipped stitches, thread nests, loose fibers, oil spots, and rub marks are common reasons to reject a sample or require revision. If the tote is going directly to attendees, odor matters too. A bag can be structurally fine and still be a poor fit for a trade show if it arrives with staining, chemical smell, or visible handling marks.
The sample should also prove that the bag can be filled and emptied easily. A tote that looks good when empty but is awkward when packed will slow booth staff and frustrate attendees. Test the opening width, the handle comfort, and the way the bag sits once a brochure set is inside. If the tote is intended for repeated reuse, that test is even more important, because the buyer is then buying experience as well as material.
- Load the tote with the real event kit, not with an empty-hand visual check.
- Check whether the bag stands, folds, and carries the way your team expects at the show.
- Write down reject conditions before testing so the decision is not made by memory.
QC checkpoints that matter in production and receiving
The sample is only useful if the production lot is compared to it with discipline. Inspect first-off pieces, mid-run pieces, and carton randoms against the same approved sample under the same lighting. Record dimensions, print location, carton count, and visible defects on one inspection sheet so the receiving team can use the same standard without cross-referencing multiple emails. If the supplier says a difference is acceptable, ask them to state the tolerance before the order moves forward.
For simple canvas totes, buyers often start with a body tolerance around plus or minus 0.5 cm and a handle-length tolerance around plus or minus 1 cm, but those numbers should not be copied blindly into every program. Tighten the tolerance if the tote must fit a fixed-size insert, stack into a set carton, or match a sponsor presentation spec. In other words, the tolerance should follow the use case, not the supplier’s default.
Print QC should be practical, not theoretical. Confirm that the logo remains readable at normal viewing distance, that the color is close to the approved physical reference under neutral light, and that the print does not bleed into the weave in a way that changes the brand mark. For construction, pay special attention to seam starts and ends, handle anchors, gusset corners, and the base. Those are the places where a bag that passed sample review can still fail in bulk if the factory changes workflow or staff.
If the bags are shipping directly into an event kit assembly process, packaging QC matters as much as the bag itself. Carton count, inner pack count, label accuracy, and carton condition should all be checked before the goods leave the factory. A perfectly made tote can still create disruption if the packing detail is wrong.
- Measure the approved sample and keep those dimensions on the inspection sheet.
- Reject open seams, missing reinforcement, severe puckering, and print defects that change the logo appearance.
- Confirm that carton counts and label information match the purchase order before the goods leave the factory.
Treat packing as part of the product specification
Packing affects freight, warehouse handling, and how quickly the bags can be distributed on site. Flat-folded packing is usually the most efficient for canvas library tote bags because it keeps cartons neat, reduces void space, and makes counts easier to control. If the bag is a premium giveaway or the print is especially delicate, tissue or polybag protection can be worth the added labor, but the buyer should decide that before sample sign-off. Once the packing method changes, carton size and gross weight change too, and that can affect both shipping cost and receiving plans.
Trade show teams often underestimate the downstream impact of carton labels and inner counts. If the totes will be pulled into kit assembly, the carton format should make picking fast and predictable. Specify the inner count per carton, the carton marks, and whether the cartons need palletization. If the bags are going directly to a venue or to a fulfillment partner, clear carton marking can save far more time than a small unit-price concession ever would.
This is also where buyers can negotiate more intelligently. If a supplier is quoting a lower unit price but insists on a packing format that drives up destination handling or makes the warehouse process slower, that is not a better deal. Compare the full landed and operational cost, not just the ex-factory price.
- Choose one packing format and keep it fixed from sample approval through bulk shipment.
- Make carton count, carton marks, and inner pack count part of the PO.
- Use protection where needed, but do not add wrapping that slows distribution without a clear reason.
Use a sample approval workflow that prevents rework
A strong approval workflow does not need to be complicated, but it does need to be disciplined. Start with one written spec that covers use case, size, fabric, decoration, handle design, and packing. When the sample arrives, photograph it, measure it, test it, and mark any changes directly on the sample record. If the bag needs revision, issue one clean revision note rather than multiple informal comments spread across email threads. Once the sample is final, sign it off with a revision number and keep that record attached to the order file.
The biggest mistake in trade-show sourcing is approving a sample with vague language and then expecting the factory to remember details later. Production follows the written record, not memory. If the sample changed during review, the final spec should reflect those changes before the bulk order is released. That is especially important when the event date is fixed and there is no time for a second sample cycle.
A good approval workflow also makes supplier comparison easier. If two vendors both claim they can meet the brief, the one that responds cleanly to a detailed sample review is often the lower-risk partner. The point is not paperwork for its own sake. The point is to make the tote repeatable in bulk, not just acceptable as a one-off sample.
- Use one spec sheet, one revision log, and one final approved sample.
- Do not approve by memory or by a vague email like “looks good.”
- Store the approved sample with photos, measurements, and the sign-off date attached.
Negotiate with vendors on proof, not promises
Once the sample looks close, the next step is not to ask for a generic discount. It is to ask for proof points that reduce commercial risk. Ask whether the quoted fabric is from stock, whether the print setup already exists, whether the supplier can hold the same material through the reorder window, and what internal inspection they perform before shipment. Those answers matter more than a small per-unit reduction if your event date is fixed.
This is also where it helps to compare vendor behavior, not just prices. A supplier that explains tolerance ranges, clarifies setup charges, and separates sample cost from production cost is usually easier to manage than one that replies with a single low number and no detail. For procurement teams, clarity has value because it reduces the time spent reworking specs, chasing revisions, or resolving misunderstandings after the PO is issued.
Negotiation should also cover reorder logic. If the trade show program is likely to repeat, ask whether the supplier will keep the same pattern, print screen, or fabric reference on file. Ask what happens if the next batch comes from a different fabric lot and whether shade variance needs reapproval. That kind of question is useful because it tells you whether the vendor is set up for repeat business or only for one-off jobs.
- Ask for proof of fabric availability, print setup readiness, and in-house inspection steps.
- Compare vendors on clarity, not only on unit price.
- Confirm reorder rules for fabric lot, shade variation, and retained production references.
Specification comparison for buyers
| Bag format | Best trade-show use | What to approve on the sample | Cost impact | Lead-time impact |
|---|---|---|---|---|
| Flat open-top tote | High-volume brochure handouts, registration desk distribution, simple sponsor packs | Finished size, handle attachment, print alignment, and whether the bag collapses when loaded | Lowest sewing cost and lowest setup complexity; usually best when the event budget is tight | Fastest to sample and easiest to repeat because there are fewer construction variables |
| Gusset tote | Library-style carry, book bundles, wider collateral sets, reusable attendee bags | Gusset depth, corner symmetry, seam straightness, and how the base behaves under load | Moderate cost increase from extra fabric and sewing time; usually a better value when volume matters | Slightly longer than a flat tote because cut accuracy and seam alignment matter more |
| Box-bottom tote | Premium sponsor kits, boxed inserts, display use at counters, higher perceived value | Base panel alignment, bottom reinforcement, upright stance, and seam bulk at the corners | Higher cost from extra pieces and tighter sewing; can be justified by presentation value | Longer approval cycle if the factory is not experienced with box construction |
| Zip-top tote | Higher-value inserts, media kits, travel-friendly event packs, items that need to stay enclosed | Zipper length, slider quality, zipper tape alignment, top opening clearance, and snag points | Adds material and labor cost; usually the highest-cost option in this group | Lead time increases if the supplier needs zipper sourcing or extra assembly steps |
| Lined or reinforced tote | Heavier loads, premium programs, reusable gift bags, repeated-use trade-show kits | Lining finish, hidden seams, pocket placement if included, and handle reinforcement through the lining | Raises both sewing time and inspection burden; use when durability or presentation justifies it | Can add approval time because more components mean more chance of revision |
| Material choice | Before sampling and before apples-to-apples quote comparison | Fabric weight in gsm or oz, weave, finish, color, shrink behavior, and whether the lot is natural, dyed, washed, recycled, or blended | Different cloth weights and finishes change landed cost, not just unit price | No direct lead-time impact if specified early; late changes can force a new sample |
| Decoration method | Before artwork sign-off and before print-line approval | Print method suitability, artwork line thickness, color reference, and repeatability at production scale | Can materially change setup cost and scrap risk; simple one-color prints are often easiest to control | Some methods need extra setup or curing time; late changes can delay release |
| Packing format | Before bulk approval and before freight planning | Flat-fold, tissue, polybag, carton count, carton size, and whether palletization is required | Packing changes influence labor, carton size, and freight cost; hidden packing costs can erase a low unit price | Can affect shipment timing if special pack-outs must be added at the end |
Buyer checklist before sampling
- Define the exact event contents the tote must carry, then size the bag around that kit instead of using a generic tote dimension.
- Choose one finished format for approval: flat, gusseted, box-bottom, zip-top, or lined. Do not let different formats enter sample review at the same time.
- Write the fabric spec in one unit system and keep it consistent across the quote, sample tag, inspection sheet, and PO.
- Record the weave, finish, and color reference, and note whether the canvas is natural, dyed, washed, recycled, or blended.
- Measure handle width, handle length, and handle drop on the physical sample, then confirm the reinforcement pattern at the anchor point.
- Approve artwork on the actual canvas and not on a smooth digital proof alone, especially if the design includes fine type, thin rules, or small legal text.
- State the logo placement in millimeters from seams or edges, and attach the revision number to the sample record.
- Decide whether the tote will be flat-folded, tissue-wrapped, polybagged, or carton-packed before sample sign-off, because packing affects freight and carton counts.
- Ask the supplier to split sample cost, one-time setup cost, recurring unit price, packing cost, and any label or carton charge into separate lines.
- Set the acceptance standard in writing before production starts, including allowable size tolerance, print shift tolerance, and carton count tolerance.
Factory quote questions to send
- What is the exact fabric specification in gsm or oz, weave, finish, and color, and what tolerance do you allow on bulk production?
- Which finished bag format is included in the quote, and what changes if we add a gusset, box bottom, zipper, lining, or internal pocket?
- Is the sample fee credited back if we place the bulk order, and which charges are one-time setup items versus repeatable production costs?
- What MOQ applies by color, construction, and print method, and what is the production reason for that MOQ?
- Which print method are you pricing on this fabric, and what line thickness, color count, or logo detail can you reliably hold at production scale?
- How do you attach the handles, and do you use bar-tacks, X-box stitching, or another reinforcement pattern at the stress point?
- What size tolerances do you quote for body width, body height, gusset depth, handle length, and logo placement?
- What packing format, inner count, carton size, and gross weight are included in the quoted price?
- Can you show a price break at the next meaningful quantity tier, not only at the MOQ?
- What is the earliest realistic production slot after final approval, and what items would delay it: fabric sourcing, print setup, zipper sourcing, or packing changes?
Quality-control points to confirm
- Fabric should match the approved sample in weight, weave appearance, hand feel, and finish. If a variance is allowed, it must be written on the approval sheet, not left to interpretation.
- Check body width, body height, gusset depth, and handle drop against the signed sample. A common starting point for simple totes is plus or minus 0.5 cm on body dimensions and plus or minus 1 cm on handle length, but tighter tolerances may be needed for kit inserts or box packing.
- Inspect handle reinforcement at the anchor point for clean stitching, no skipped stitches, no loose ends, and no opening when the bag is loaded to the agreed test weight.
- Look at the print on real canvas under neutral light. Confirm color, edge sharpness, print opacity, and whether the logo shifts when the bag is folded or carried.
- Check seams, corners, and gussets for broken thread nests, open stitching, needle damage, or heavy puckering that changes the bag shape.
- If the tote includes a zipper, confirm zipper length, slider quality, and tape alignment; the zipper should open smoothly without catching the canvas.
- For lined or reinforced bags, inspect internal seam finish and hidden bulk at the corners, because those issues often do not show up in a quick front-view photo.
- Check for odor, oil spots, stains, loose fibers, and rub marks before packing, especially if the bags go directly into attendee kits.
- Verify carton count, inner pack count, carton marks, and product description on the carton label against the PO before release.
- Inspect first-off pieces, mid-run pieces, and carton randoms against the same approved sample so the factory cannot pass a good sample but ship a different bulk lot.